Has this ever happened to you? Staying in your backyard on a nice summer morning, thinking about what to do with this beautiful day and then BRRRRRR!!! You start hearing this unbearable sound and all you want to do is just go somewhere quiet.
Most of the time, it’s your neighbors mowing their lawn, making a BBQ, or listening to loud music. Things like these happen and the only thing you can do is take some steps to make your yard more soundproof.
At least this is what I did. And today I want to show you one of my projects that transformed my backyard into a quieter and more private place. Also, I’ll present two extra projects so you can choose whatever fits better for your property.
Keep reading and please let me know if you’d like to try any of these yourself somewhere in the future.
Why a Regular Fence Is Not Enough 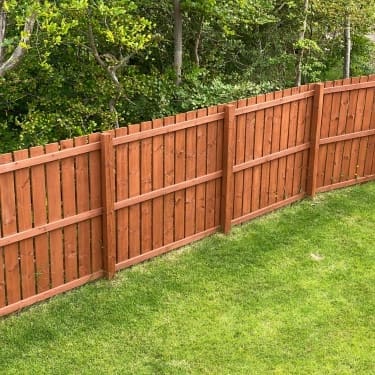
I want you to know this upfront so you do not waste money on the wrong build.
A standard wooden privacy fence has gaps, hollow spaces, and not much weight to it. Sound just slips through or jumps right over the top. I see neighbors put up six-foot cedar fences hoping it will quiet things down, and then they wonder why they can still hear the highway.
A quick note on decibel numbers, because I throw them around a bit in this article. Every 10 decibels roughly cuts the loudness in half to your ear. So a wall that blocks 50 decibels is not just a little better than one that blocks 30. It is dramatically quieter on the other side.
My Straw Bales Soundproofing Project
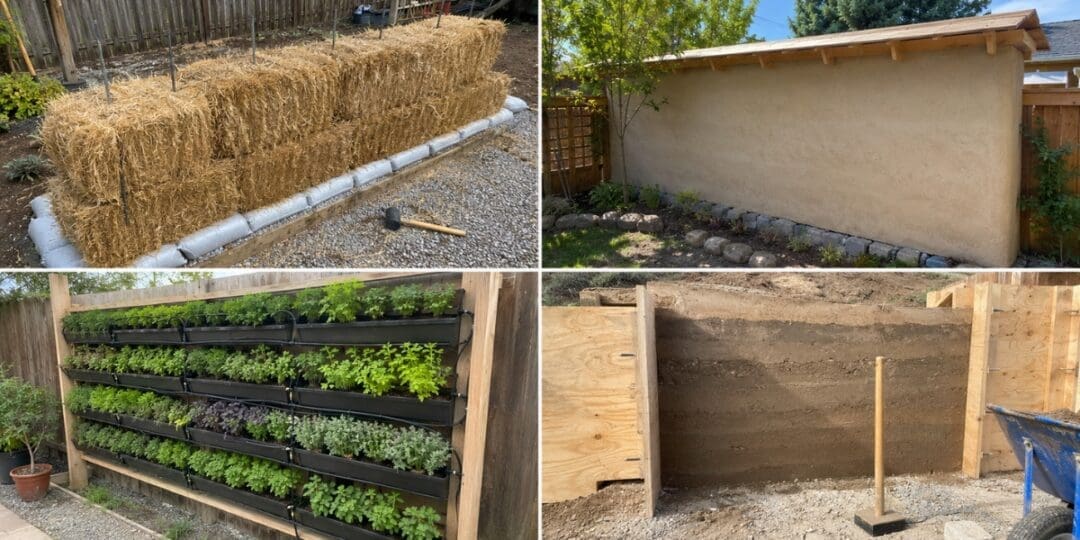
I built this wall on my own property, and it has held up beautifully for going on four years now. A 20-inch straw-bale wall blocks around 60 decibels, which is more than a 6-inch concrete wall manages. According to the Acoustical Society of America, straw is a good sound insulator.
Bales can be laid flat or stood on edge. Laying the baes flat is better as it gives you a wider 20-inch wall, and that is what gets you the sound blocking. Standing them on edge gives you a narrower wall and a faster build. For the best noise reduction, you want them laid flat.
The bales themselves come in two sizes. The 2-string bales run roughly 14 by 18 by 36 inches and weigh around 40 to 50 pounds. The 3-string bales are bigger, about 16 by 24 by 48 inches, and weigh closer to 70 or 80 pounds. I used 3-string because they are denser. The thing with them is that they are also heavier to lift onto upper courses, so if you do not have help on build day, the 2-string bales are easier to handle.
To estimate how many you need, figure that each bale, laid flat, covers about 4 to 5 square feet of wall face. A 7-foot-tall wall that runs 20 feet long needs roughly 30 to 35 bales.
Materials and Cost
Here is what you need to gather:
• Straw bales, $5 to $10 each in most of the country
• Gravel for the foundation trench
• Polypropylene or burlap bags to fill with gravel for the toe-up
• Rebar in two lengths, longer for anchoring the bottom course and shorter for pinning bales between courses
• Earthen or lime plaster for the final coat
• A wooden top plate or beam to cap the wall
• Basic tools: a shovel, a level, a mallet, and a sharp knife
For a 20-foot wall built with 3-string bales, plan on somewhere between $600 and $800 total if you have to buy everything new. The biggest variable is the plaster, since earthen plaster mixed from your own clay costs almost nothing, while bagged lime plaster can run $200 to $300 for a wall this size.
The bales are the heart of the wall, so I advise you to get the best quality available. Get them tight and dry. A loose bale will sag and let sound through, and a damp bale will rot from the inside out very fast.
Preparing the Foundation
Start by marking out the line where you want your wall to run. Use stakes and string to keep it straight. A crooked foundation will sabotage your entire build.
Dig a trench along that line about 12 to 18 inches deep. You want to get past the topsoil and down to firm, undisturbed ground. If you hit roots or soft spots, keep digging until the bottom feels solid under a shovel. Make the trench at least as wide as your bales, plus a few inches of breathing room on each side.
Fill the trench with clean gravel and tamp it down in layers as you go. This gives you a base that drains water away instead of holding it against your bales.
Once the gravel is level with the surrounding ground, lay your gravel-filled bags on top. This raised gravel layer is called the toe-up, and it is one of the most important parts of the build. The toe-up lifts the bales off the ground so groundwater cannot wick up into the straw and rot it out from below. Aim for 8 to 10 inches of toe-up height in most parts of the country, and more if you get heavy snow or runoff where you live.
Take your time on the foundation. It is what makes the rest of the project go smoothly, and I rushed mine the first time and paid for it later.
Stacking and Pinning the Bales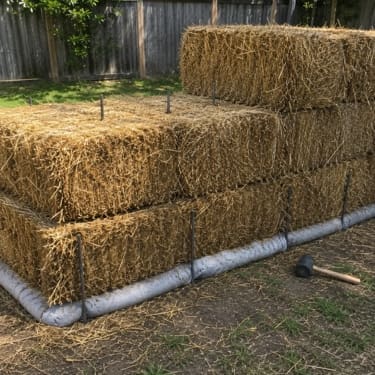
Lay your first course of bales directly on the gravel bags. Press them down so they sit firmly and snug against each other. There should be no gaps between bales, and if you have any, stuff them tight with loose straw before you continue building.
The bottom course gets anchored down into the gravel with long rebar. You want pieces that match the bale height plus another 12 inches to drive down into the gravel below. For 3-string bales laid flat, that means rebar around 28 inches long. Drive two pieces straight down through each bottom-course bale, all the way through, until the tops are flush with the top of the bale.
For the second course, stagger the joints like you would with bricks. A bale should never sit directly on the seam between two bales below it. Pin each upper-course bale straight down through to the course below using shorter rebar, around 20 to 24 inches long. Tap them in with a mallet.
Keep stacking until you reach the height you want. I built mine to 7 feet, which is tall enough to block both the sight and the sound from the nearby sawmill. If you are framing in gate or window openings, do it as you stack, using rough timber to support the bales above.
Capping the Top
When you reach the top, set your wooden top plate across the bales and anchor it down with long pins driven all the way through to the second-to-last course. This holds the wall together at the top and gives you something to attach a small roof to.
The roof cap is the part most builders get wrong.
A straw-bale wall resists better if you are able to keep it as dry as possible. Plaster is durable, but it is not waterproof, and rain hitting the top of the wall will eventually work its way down through the bale. You need a real roof cap, not just a board laid across the top.
I built mine with a simple shed-roof design using 2-by-4s and metal roofing. The overhang sticks out 18 inches on each side of the wall. That is the minimum I would recommend. If you can go to two feet, even better. The wider the overhang, the better protected your plaster will be from rain.
Plastering Both Sides
The plaster is what turns a stack of straw into a real sound-blocking wall. Without it, you only have insulation.
You have two options here, and they are worth understanding before you make a choice. 
Earthen plaster is the cheaper one. It is basically mud, mixed from clay-rich soil, sand, and chopped straw, stirred together in a wheelbarrow until it has the consistency of thick cake batter. If you have decent clay subsoil on your land, you can dig it up and mix it yourself for almost no money. It looks beautiful and breathes well, but it does not hold up to driving rain as well as the other option.
Lime plaster costs more because you have to buy bagged hydrated lime from a building supply store and mix it with sand and water. It is harder, more weather-resistant, and lasts longer on the outside of a wall. I went with lime plaster on the outside facing the weather and earthen plaster on the inside facing my yard. That combination gave me the best of both worlds.
Plan on roughly 1.5 cubic feet of plaster per 100 square feet of wall face per coat. Apply the plaster in two or three coats. The first coat gets pressed hard into the straw with your hands or a trowel so it grips the fibers. Let it dry partially before the second coat, which evens out the surface. A third thin finish coat smooths everything out and seals up any cracks.
What I Learned From Building It
The big one was underestimating how much I needed. That covered both the plaster and the patience for keeping the bales dry. You have to keep those bales bone dry while you are working, which means tarping every night until the plaster goes on.
And you should mix or order more plaster than you think you need, because running short halfway through a coat means an unplanned drive to the supply store. I made both mistakes the first time.
The other one was the toe-up height. I made it too low and I was patching the bottom of the wall every spring until I rebuilt that section properly.
The labor is not bad if you have a friend or two to help. I had the wall up in a weekend, plaster done over the following weekend, and the noise from the sawmill is now a faint hum I barely notice.
Rammed Earth Is A Good Alternative
If straw bales do not suit your land, rammed earth is the other building method worth mentioning. A 12-inch rammed-earth wall blocks over 50 decibels and can last for generations once it is up.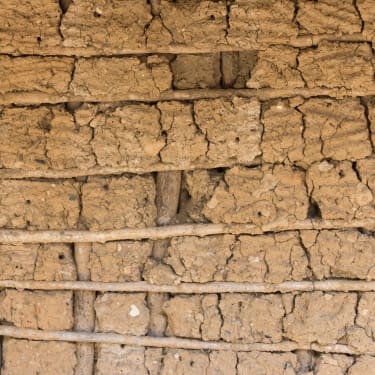
Rammed earth is a real undertaking and a step up from the straw-bale build.
The work involves building strong plywood forms that can take the pressure of repeated tamping without bowing or coming apart, then shoveling moist soil into them in 4-inch layers and compacting each layer until it stops compressing.
Hand tamping a whole wall is brutal, so most folks rent or buy a pneumatic tamper before they start. The soil itself has to be the right mix, roughly 50 to 75 percent sand with some clay, and the moisture has to be just right at around 10 percent.
If this is the route you want to take, take a weekend workshop first, or at least buy a detailed book on the technique before you start. Your county extension office can also test your soil to see if it is even suitable. Or you can test the structure of your soil yourself with this mason jar soil test.
You can find it in this book and I also tried it to see if my garden soil is suitable for planting tomatoes. I preferred to do it this way because it’s cheaper and less time-consuming than asking for a test from the Cooperative Extension Service.
See how to make the test yourself here.
Adding a Living Wall
A densely planted green wall knocks 9 to 15 decibels off ambient noise. It is not as much as the heavier builds, but layered in front of a straw-bale or rammed-earth wall, it adds another round of sound reduction while looking beautiful.
The first thing to know is that these walls get heavy fast. A fully planted, well-watered green wall can run 200 to 400 pounds for a 4-by-6-foot section. Whatever you are mounting it to has to be solid. You want a substantial wall, a sturdy outbuilding, or a freestanding frame built for the purpose.
You can build a modular green wall planter system. Try a DIY wall-hanging garden. This is a project that takes a couple of hours, and besides insulation, it offers you extra space to plant whatever you want. This is a perfect project if you struggle with “space problems.” Why leave all that unused space above the ground empty when you can grow a thriving vertical garden?
After you have the green wall, you can easily set up a drip line by running a thin tube along the top with small emitters that drip into each pocket. The line connects to a regular garden hose spigot, and a battery-operated timer runs the watering schedule for you.
If you want to try something more self-sufficient, you can do it the Amish way. See how they collect water on their homesteads and how they build simple, but efficient piping systems to move this water everywhere they need it.
Try this project and you will be able to water your brand new green wall for free by taking advantage of the nature around you.
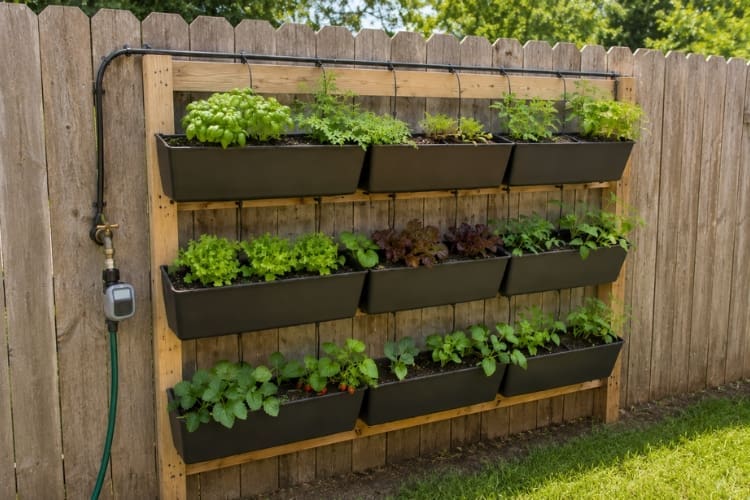
Choose plants that suit your light and climate, and lean toward native species that will not struggle on your land. Fill each pocket with potting mix, plant everything, and water thoroughly. After a few months of growth, the wall fills in densely and starts doing real acoustic work.
If you want something that grows faster but is very useful on any homestead, you can use the wall-hanging garden to plant medicinal herbs.
I would not rely on a living wall by itself for blocking loud machinery. But as a second layer in front of a heavier wall, or as a way to soften noise around a patio or sitting area, it is a lovely addition.
Final Thoughts
Building a sound-reducing wall is indeed a lot of work, but if you ask me, it’s a homestead project that pays you back every single day. Mine has given me back my mornings, my evenings, and a quiet kitchen where I can think straight again.
All of these projects take real work, real planning, and a willingness to learn as you go. But the materials are simple, the techniques have been used for centuries, and the end result is something solid you built with your own hands.
Summer is just around the corner and one of the biggest problems you might not be ready for is the lack of water.
The last few summers have been brutal across most of the country. Droughts stretching longer than they used to. Heat waves knocking out power for days at a time. Towns putting watering restrictions on lawns and gardens. This is the actual reality, and unfortunately, you are the one who needs to deal with all of this.
You might tell yourself you are self-sufficient because you have a rain barrel. But the rain barrels run dry in a long dry stretch and the towns put restrictions on outdoor watering right when your garden needs it most.
The following project, the Smart Water Box, is a small device you can install in your backyard that pulls drinkable water out of the humidity in the air.
Once it is up, it produces clean water without needing rain, a well, or the town water supply. It uses the moisture that is already sitting in the air around you, even on dry summer days. You know that sometimes it gets so hot you feel like you have no air to breathe. That’s humidity and with this device, you are able to turn all of it into water you can use on your homestead.
See how the Smart Water Box works here.
Make this summer easier on yourself. Set things up now so you have water on hand, no matter what the weather, the grid, or the government throws at you.
You may also like: 
NEVER Throw Away These Items! (Do This Instead)
How to Stockpile a Ton of Water Without It Going Bad (Video)
7 High-Yield Crops for Small Spaces
Why My Grandfather Buried a Coffee Can Under Every Fence Post
9 Plants That Grow With No Water