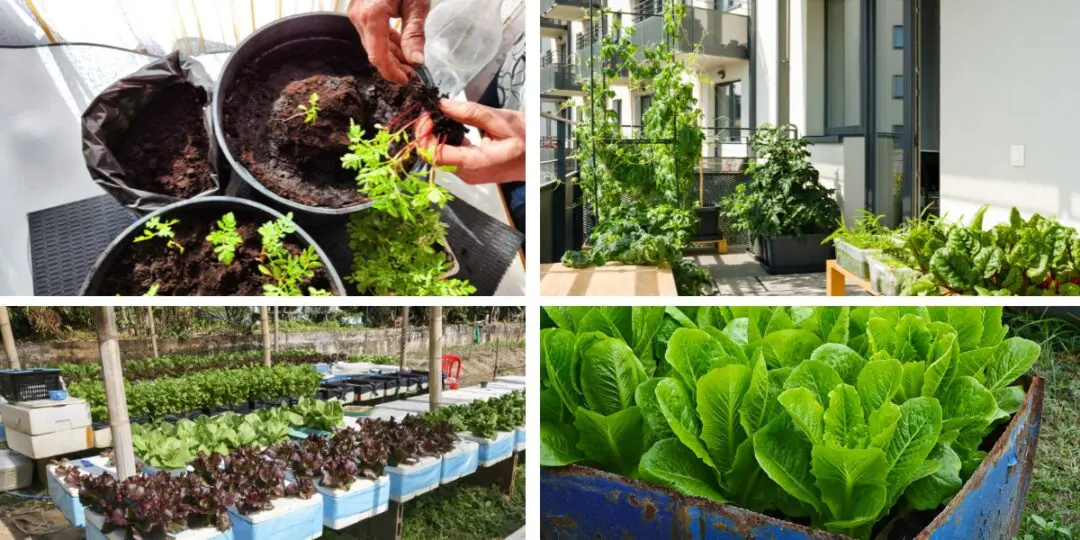
You don’t need a big piece of land to grow real food for you and your family. What’s more, you don’t even need special crops. Basic crops, the ones everyone is planting in their gardens, do just fine in containers, raised beds, and other places you might believe are too small for them to be productive.
The secret is to give your plants what they need. Usually, when you are planting these crops in a big garden, most of their needs are met by default, but when you plan to grow food in a small space, you’ll need some “special” knowledge.
This guide covers some popular crops that will surprise you with the harvest you get from how little space they take up.
For each one of them, I prepared a small DIY project you can start right after you read the article. Transform your patio, balcony, or small backyard into the most productive garden you have ever had!
Leaf Lettuce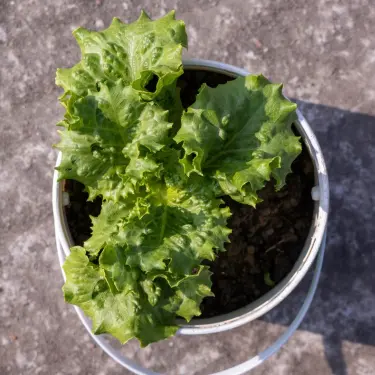
Leaf lettuce is probably the easiest crop to grow in small spaces. Unlike head lettuce, the leaf types don’t form a big ball. They just keep pushing out new leaves, so you can cut what you need and come back for more a few days later. Four plants in a single 10-inch pot can give two people a full salad every week. That’s an amazing amount for one little pot on your porch!
Here’s how to set it up:
- Grab a 10-inch pot or upcycle a food-grade bucket. Drill a few holes in the bottom for drainage.
- Fill it with a soilless potting mix that has perlite in it.
- Plant four small transplants about 6 inches apart. Red leaf, buttercrunch, arugula, spinach. Mix them up and give yourself some variety.
- Give them at least 6 hours of sun and keep the soil moist.
When you want to harvest, cut the outer leaves first and let the center keep growing. When a spot goes bare, drop in a new seed. I keep two of these on my porch and I honestly can’t remember the last time I bought bagged lettuce.
The only problem is that as soon as the weather gets chilly, your little pot of leaf lettuce will stop being productive. This bothered me so much, but I managed to solve the whole problem with a tiny project I finished in 2 hours flat.
I simply decided to build an indoor greenhouse. You might be wondering why not grab the pot and bring it inside your home, but there is an explanation for this. The inside of our houses is not a space we can fully control and the salad you planted in the spring might be missing some essential elements, such as light and the right humidity.
When you have an indoor greenhouse, you can fine-tune these variables and boost the production of your plants.
If you want to begin this DIY project, click here and get the full step-by-step instructions with pictures.
Radishes
If you want to see results fast, radishes are your best bet. Most varieties go from seed to ready-to-pick in 3 to 5 weeks. That’s fast enough to squeeze in multiple rounds between spring and fall, and they barely need any soil depth.
Here’s how to start this project:
- Take a 3-gallon bucket, drill some drainage holes, and fill it with a mix of potting soil and compost.
- Sow about 12 to 16 seeds spread out across the surface, cover with half an inch of soil, and water well.
- Once they sprout, thin them to about an inch apart so the roots have room.
- Keep the soil moist the whole time. Dry soil makes radishes woody and tough, and nobody wants to bite into that.
In about 25 to 30 days, you’ll be getting crisp, spicy radishes out of a bucket on your patio. Drop in another round of seeds that same day and you’ve got a steady supply rolling. Try Cherry Belle for a classic red or Easter Egg mix if you want some color. Label your buckets with the sowing date so you always know what’s coming up next.
Bush and Pole Beans
Beans are one of the best crops you can grow if you want a good harvest and also a plant that offers you utility. Beans are known to pull nitrogen out of the air and put it back into the soil, which means they’re actually improving your soil while they’re feeding you and your family. Bush beans stay short, about 2 feet tall, and don’t need any support.
Then we have pole beans that climb, and this is one amazing feature because they take up almost no ground space and keep producing as long as you keep picking.
👉 If You Can Follow LEGO Instructions, You Can Build This Shed
Here’s what to do:
- Bush beans do great in a shallow window box. Space the seeds 2 to 4 inches apart and stagger your plantings every couple of weeks so you always have something coming in.
- Pole beans need to climb, so you will build a quick tripod from three bamboo stakes over a 5-gallon container. Plant one seed at the base of each stake and train the vines up as they grow.
- Use potting mix, water with about an inch or two a week, and try to keep the leaves dry when you water. That helps keep disease away.
Don’t forget to pick the pods while they’re still tender.
Cucumbers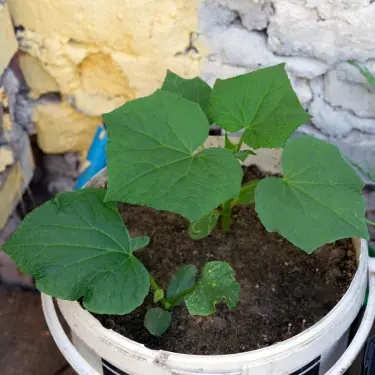
Cucumbers take up a lot of ground space if you let them sprawl, but just try to put them on a trellis and you’ll notice immediately how they start to behave.
One trellised plant can give you dozens of cucumbers over the season, and I find this plenty for fresh eating and a few jars of pickles.
👉 This Invention Wipes Out Power Bills and Generates Energy on Demand
Here’s my setup:
- Drill drainage holes in a 5-gallon bucket and fill with potting mix.
- Stir in about a quarter cup of gypsum. That gives the plant calcium and helps prevent blossom-end rot, which is when the bottom of the fruit turns dark and mushy.
- Push a wire tomato cage into the middle for support.
- Sow three seeds around the rim, and once they’re up, thin down to the strongest one.
- Train the vine up the cage and pick the cucumbers when they’re glossy and evenly green.
Cucumbers demand a lot of water. So, mulch the top of the bucket with a little straw to hold moisture in. I pulled over 20 cucumbers off a single bucket plant last summer!
Tomatoes
This is the one crop that I consider every homesteader must grow. A single plant in a 5-gallon bucket can produce a surprising amount of fruit if you set it up right. The University of New Hampshire Extension recommends a soilless potting mix with perlite, drainage holes near the bottom, and compact varieties like BushSteak, Celebrity, Tumbling Tom, or Tiny Tim.
Give the plant 6 to 8 hours of direct sun. Water well once or twice a day, depending on how hot is outside. Make sure you have a strict watering schedule. Skipping this step is the fastest way to get cracked fruit or blossom-end rot.
I turned one of my buckets into a self-watering planter last year and it changed the way I plant tomatoes.
Related: Edible Plant Maps For Every U.S. State
If you want to try this, take a stickplant saucer and place it upside-down inside the bucket at the bottom of it. This creates a small water reservoir. Also, drill an overflow hole an inch above it, and run a piece of PVC pipe down the side for easy filling. This PVC pipe will take any excess water and circulate it into the reservoir.
Peppers
Peppers are naturally compact and they love heat, which makes them great container crops if you’ve got a sunny spot. Both sweet and hot varieties do well in pots, and a single plant can give you dozens of peppers over a long growing season.
Here’s how to get it right:
- Use at least a 5-gallon container with good drainage.
- Mix equal parts compost, coconut coir, and perlite.
- Plant your transplant deep, burying part of the stem to encourage extra roots.
- Put the pot somewhere sunny and sheltered from the wind.
Here’s a tip that will makes a real difference. Pinch off the first few flowers that show up because it forces the plant to build a stronger root system and more branches first. This will help your peppers to give you a bigger harvest.
Once the fruits start coming, support the branches with soft ties so they don’t snap under the weight.
Microgreens
This is the fastest food you can grow at home. Microgreens are just baby seedlings of regular vegetables and herbs, harvested when they’re an inch or two tall. They’re packed with flavor and vitamins, and they’re ready in 7 to 14 days. A windowsill is all you need.
Here’s how to start your first batch:
- Save a clear plastic clamshell from the store, the kind berries come in. Poke a few drainage holes in the bottom.
- Fill with about an inch and a half of damp potting mix and scatter seeds densely across the surface. Radish, mustard, broccoli, and sunflower all work great.
- Press them in lightly, mist with water, and cover with another container or some plastic wrap to hold in moisture.
- Check every 12 hours and mist if things are drying out.
- After 3 or 4 days you’ll see sprouts. Take the cover off and set the tray in a bright window or under a lamp about 3 inches above the greens.
- Leave the light on for about 15 hours a day so they grow straight and strong.
- When they hit an inch or two tall, cut them with scissors right above the soil line. Rinse, eat, and start another batch.
You can keep this going year-round. Fresh greens on your table every single week, no garden required, no grocery store needed.
If all of this sounds like more work than you want to deal with, there’s a shortcut that does everything better, faster, and without any of the mess.
HerbNest is a complete indoor hydroponic system that will grow your food indoors and it does all the work by itself. No soil, no misting every 12 hours, no rigging up plastic containers and desk lamps. You drop in a seed, and the system takes care of everything. Light, water, and nutrients are all handled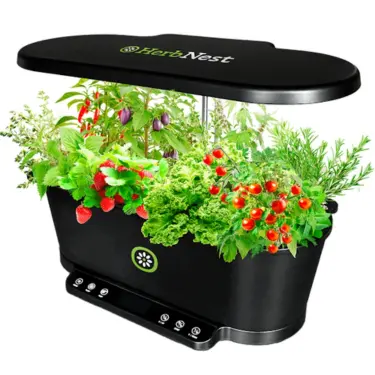 automatically. You just show up when it’s time to harvest.
HerbNest is perfect for microgreens, but it also grows full-size vegetables! Tomatoes, bell peppers, eggplants, cucumbers, lettuce, herbs, you name it. Plants that normally take months in a garden are ready to pick in as little as three weeks.
This is why it’s worth it:
- Grows 15 plants at once in less than 2 square feet of counter space,
- Up to 12 full harvests a year, that’s 180 plants from one system,
- Full-spectrum LED lighting that cuts energy use by up to 90% compared to regular grow lights,
- 24/7 smart monitoring through an app so your plants thrive even when you’re not home,
- Two grow modes, one for vegetables and one for medicinal herbs and flowers,
- Set it up in 5 minutes and the automated system does the rest.
If you’ve been wanting to grow your own food but don’t have the outdoor space, the time, or the patience, this is the easiest way to make it happen.
👉 Click here to get your HerbNest and start growing fresh food at home without the work!
Final Thoughts
You don’t need a backyard if you want good food on your table. Just grab a few buckets and find the right crops and you are good to go.
This is one of the first steps you can take towards self-sufficiency and you might be surprised at just how much a small space can give back when you work with the right plants.
You may also like: 
Join Our WhatsApp Homesteading Community!
The Most Powerful Plants You Should Have When SHTF (Video)
How To Store Your Food If You Don’t Have A Lot of Space
Strange Ways to Grow Potatoes In a Tiny Space
7 Low-Maintenance Animals That Thrive on Small Homesteads


