A couple of years back, a farmer in Donegal, Ireland, was cutting into a patch of bog and hit something solid. Guess what it was?
He found butter.
Close to 50 pounds of it!
The whole thing looked like it sat there for centuries.
Funny enough, the archaeologist who came out to look at it tasted a sliver and said it still tasted like butter.
But this wasn’t a one-off find either. This practice goes back more than 3,500 years.
Now, you don’t have a bog out back and neither do I. But American farm kitchens had their own version of this long before anybody had a refrigerator, and all it takes is salt and water. So, if you churn your own butter, or you buy it in bulk when the price drops, let me walk you through it.
What Makes Butter Go Bad And How To Avoid It 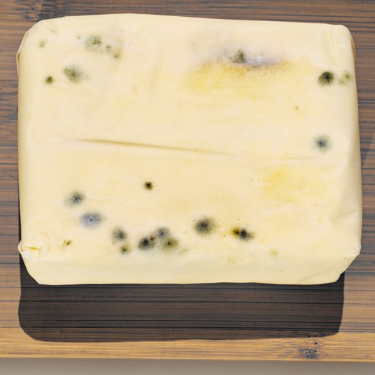
Butter isn’t delicate. Pure butterfat is tough stuff and it doesn’t spoil easily. But if you want to keep it for months, it will eventually spoil.
But why is this happening?
Butter holds water and milk solids, and those milk solids are protein and sugar, which is exactly what bacteria love. Also, the air itself makes it turn rancid, and light speeds that right along.
This is why a crock of brine handles both of those. The salt keeps the bacteria from getting comfortable, and the layer of liquid on top shuts out the air and the light completely.
This sounds amazing, but there’s just one thing you need to know. This is not canning! The brine doesn’t sterilize your butter. This means your butter won’t be fresh forever, but this technique can give it even 6 months of extra life.
The Old-Fashioned Way of Keeping Food Fresh
Earlier, I mentioned how American farm kitchens had their own ways of preserving food long before refrigerators came along.
But here’s the thing. This isn’t just a thing of the past.
Many Amish families still preserve and store their food without electricity today. And if you’ve ever bought something from an Amish farmer at the farmers market, you probably know how good their homemade food can taste.
Now, there are three traditional ways of storing food I want to talk about. And notice I said storing, not preserving. When it comes to preserving food, the Amish have all sorts of methods.
But for keeping food cool, let’s look at three.
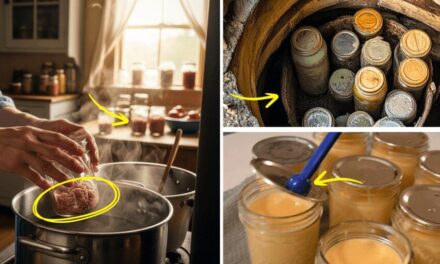
The first is the classic root cellar. The second is the ice house, which is sort of their old-fashioned version of a refrigerator.
Both are useful, but here’s the problem. Not everybody has the space or money to build a root cellar. And a full-sized ice house? That’s even less practical for most of us.
That’s why the third method caught my attention.
It takes the idea behind the first two and puts it into something much smaller. Something you could actually build on an ordinary homestead. The Amish use it as an emergency backup, but it can be a full-time thingy on your homestead.
It doesn’t need electricity, doesn’t take up much room, and can help keep suitable foods cool without having another appliance running all day.
And here’s something else. If you already have a root cellar or a cool basement, you could make the setup even more effective by putting it there.
I think this is one of those old-fashioned ideas worth bringing back. If you’d like to try it yourself, the Amish refrigerator project is explained here.
If you think this is not enough, and if you want full video instructions for this project and many more, you can find them here.

Should You Wash The Butter?
This is what makes the difference between butter that lasts long and butter that goes bad after 2 weeks!
And here’s the explanation.
If buttermilk is left behind, it carries protein and sugar. This means it will sour from the inside no matter how strong your brine is.
So, the only correct answer is that yes, you should wash homemade butter.
Store-bought butter comes already washed, so it can go straight in. But homesteaders rarely wash homemade butter as thoroughly as it needs, and that’s why homemade butter has a reputation for not keeping.
This is how to wash homemade butter the right way.
Pour off the buttermilk, then put the butter in a bowl of ice cold water and press it against the side of the bowl with the back of a spoon or your hands. The water will turn cloudy. Dump it, add fresh cold water, and do it again. Keep going until the water stays clear, and I mean actually clear, not just a little less milky than last time.
The Trick That Kept Butter Good Across an Ocean
In 1835, Lydia Child told the readers of The American Frugal Housewife to pack their butter in a clean, scalded firkin, cover it with strong brine, and spread a cloth over the top, and it would keep good.
What I find fascinating is that the whole dairy trade ran on the same idea for hundreds of years!
Farms packed their summer butter into oak casks of a hundred pounds or more, then bored a hole in the top and poured in clear skimmed brine until it filled every gap between the butter and the cask, driving the air out. Then they plugged the hole with a peg. Some creameries went over the whole lot once a week to keep every cask topped up.
That butter held up in the springhouse on the farm, in commission house cellars in New York and Chicago, and in the hold of a ship rounding Cape Horn on its way to the other side of the world.
This is the method I also tried for my butter, and it really works like described. This is why I want to share it with you below.
*One single thing: the method I present is adapted for our times in order to make it safe.
The Brine Crock Method, Step by Step
You won’t need much, and you may already have all of it:
- A crock or a wide glass jar – Stoneware or glass only, since strong brine will eat at metal over time. I know they used wood in the past, but nowadays these are the best options.
- Pickling or canning salt – Not the iodized table salt in the shaker, because iodine and the anti-caking agents cloud your brine and leave an off taste.
- A small saucer or plate – Something that fits down inside the crock.
- A clean jar of water – You’ll set this on the saucer to hold the butter down.
- A lid or a clean cloth – Just to keep dust and light out.
Once you have that together, this is the order I work in:
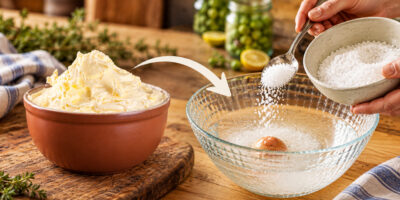
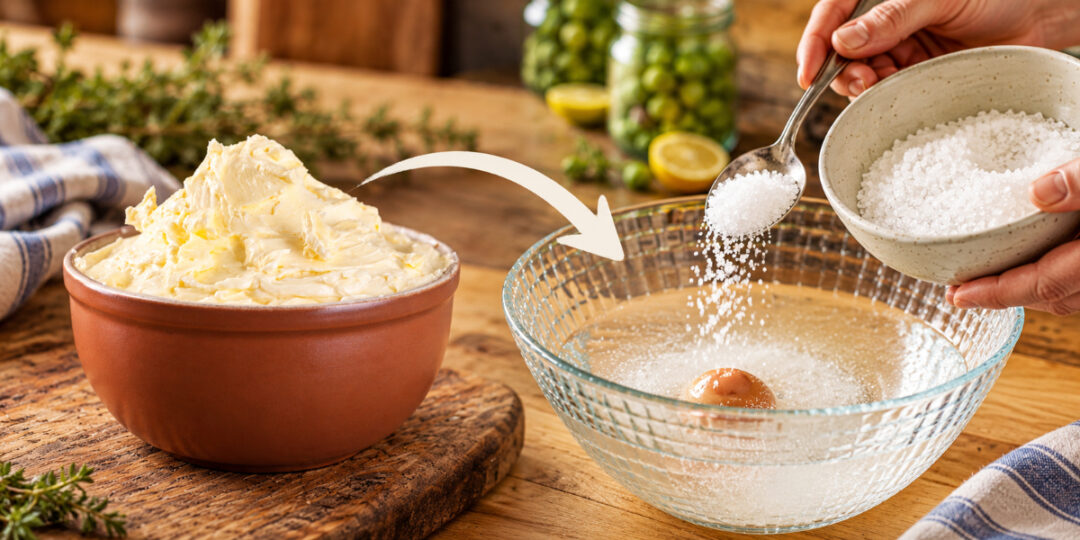
- Mix your brine – Use about two and a half to three pounds of salt per gallon of water. That sounds like a lot because it is. You want it strong enough that the water won’t take any more salt, and the old test for that is dropping in a fresh egg. If it floats, you’re there.
- Cool it all the way down – Heat the water just enough to dissolve the salt, skim off whatever foam comes up, then let it sit until it’s cold. Warm brine will melt the surface of your butter.
- Scald the crock – Pour boiling water through the crock and let it dry before you pack any butter in. This kills all the bacteria and other organisms.
- Pack the butter in layers – Press each layer down firmly before you add the next one. Air pockets down in the middle will spoil a batch from the inside, and you won’t find out until you dig that far.
- Cover it with brine – Leave about two inches of room at the top and pour in enough cool brine to cover the butter by a good two inches.
- Weigh the butter down – Set the saucer on top of the butter and put the jar of water on the saucer. Then cover the crock and set it in the coolest, darkest spot you have.
Other Old Kitchen Skills We Should Bring Back
This old way of preserving butter is just one of the many useful kitchen skills our grandparents knew. And I think it’s a shame how many of those skills we’ve forgotten today.
Nowadays, most people want everything ready-made. They want to walk into a store and find everything they need sitting on a shelf.
And sure, that’s convenient. But what happens when just one part of that system breaks down? Suddenly, all that convenience is gone.
It’s convenience hanging by a pretty thin thread, if you ask me.
And that’s one of the reasons I decided to become more self-sufficient in the first place. The thought of depending so much on other people for something as basic as food honestly makes me anxious.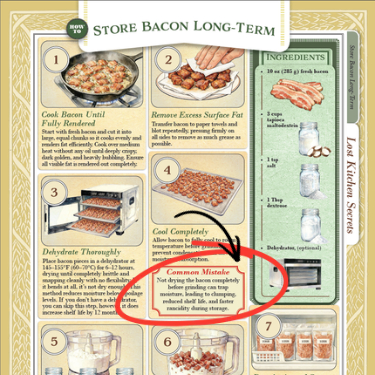
I want to have food in my own home and know I can provide for my own needs. I don’t want something that fundamental to be completely out of my hands.
That’s why I started working on my old-fashioned kitchen skills.
Now, everybody knows about making pickles and canning vegetables. But there’s so much more out there that we’ve almost forgotten about.
I found some of those old kitchen skills in here.
This is one of the resources I’ve used to sharpen my skills, and so far, I’ve been more than pleased with it.
Here are just a few things I’ve learned about that I think are worth knowing:
- How to store bacon for the long term;
- How to make MRE-style meals for years;
- How to store rice and beans properly for years;
- How to make and store yeast for later use;
- How to make Amish burger in a jar;
- How to make cleansing nettle soup.
And there’s so much more.
I know we can’t make everything ourselves. But I think knowing how to make even a few of these things puts us in a much better position than depending on the grocery store for absolutely everything.
Don’t Leave Before Reading THIS!
Ok, this is one of the most important parts if you want to start preserving your butter like this.
Butter floats.
It’s lighter than saltwater, so it works its way up.
The first time I tried this, I packed a crock, poured the brine over it, and noticed that the butter kept pushing up. I needed to do something about it, because if I left that part exposed, it would have gone rancid.
How did I solve this?
For me, it was a small saucer that saved me. I put it on top and placed a jug of water on it to hold the whole setup in place
You can use anything that fits in your crock or jar. But please stick to stone or metal.
After you place the weight, check the first couple of days to make sure everything is still in the right place.
How Long It Really Keeps
Some call butter preserved like this “The Forever Butter.” But how long does it really keep?
At cool room temperature, you’re looking at a few weeks. In a root cellar or basement that stays somewhere around 50 to 55 degrees, you can count on three to six months without trouble.
A little butterfat leaches into the brine over time and gives bacteria something to feed on. But you can take care of this by changing the brine when it starts looking cloudy. Always dig butter out with a clean, dry knife too. This prevents contamination.
Want Butter That Keeps a Year?
Putting butter in saltwater was one old way of making it last longer. But what if I told you there’s another way to keep that same butter for up to a year in the fridge?
And I think more homesteaders should know about it.
I’m talking about making ghee, the clarified butter.
It’s a simple method, but getting it right depends on the recipe you’re using.
So why is ghee so popular? Besides its longer shelf life, it handles higher cooking temperatures and contains very little lactose.
And I especially like making it from homemade butter. I don’t like having to blindly trust food labels when it comes to what I’m feeding my family. When I make my own ghee, I know exactly what’s going into that jar.
Want to try making your own ghee?
Here’s the step-by-step recipe I’ve used and tested myself. Since discovering it, I’ve never gone back to my old method.
Get the full ghee recipe here.
Final Thoughts
What I like about this method is how little it asks of you. Salt, water, a crock you probably already own, and this is pretty much it.
I use butter in most of the food I cook, and making and preserving my own butter saved me some nice money. It also saved me trips to the store.
Have you ever tried this method? Tell me more in the comments section below!
You may also like: 
The Secret Trick That Cuts Fruit Canning Time in Half
15 Vegetables You Can Actually Pickle Overnight
Why You Should Add Cinnamon to Your Lard
10 Fermentation Mistakes That Will Ruin the Whole Batch