I’ve thrown away more produce than I’ve preserved. If that sounds familiar, you know that when you have a garden, some animals, and also a house that you should take care of, a full canning day doesn’t always happen. And vegetables don’t wait for you to finish everything around the homestead before they go bad.
You tell yourself you’ll get to it this week, but then your schedule fills up with something else, and later, when you open up the cellar, you realize that all your vegetables have spoiled, and the only thing you can do now is add them to the compost pile.
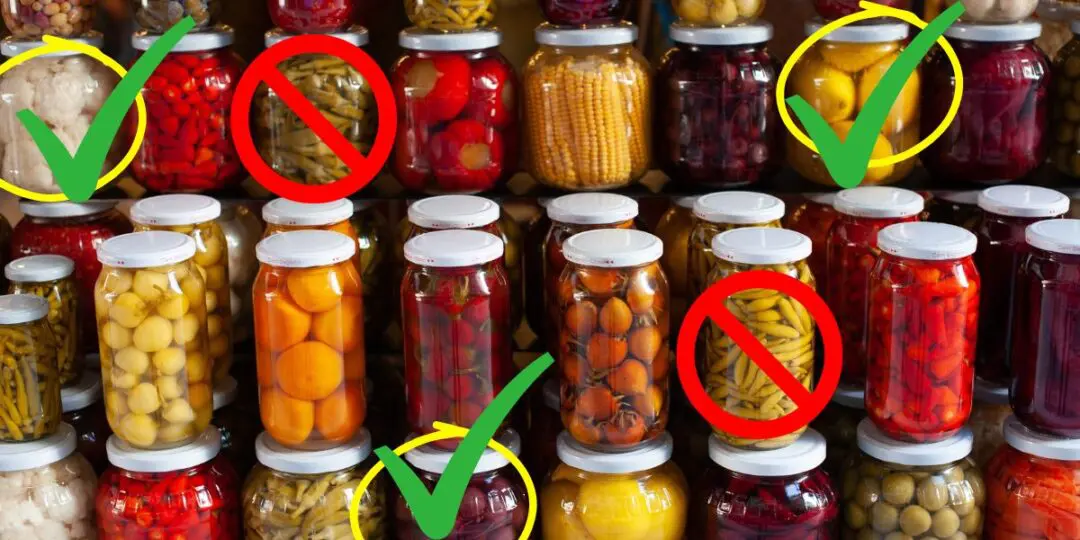
Refrigerator pickles are what changed this for me and got me out of this loop. This zero-effort method will help you save time and money while also giving you some delicious pickles.
All you need is hot brine, a clean jar, and twenty minutes. Here’s how to do it with fifteen different vegetables you might already be growing yourself.
The Brine
Before we get into the vegetables, you need to get the brine right. Everything else depends on it.
The ratio: equal parts vinegar and water, plus pickling salt. Never cut back on the vinegar. That acidity is what keeps your pickles safe from bacteria and you from foodborne illness.
Standard brine: 3 cups 5% vinegar + 3 cups water + 3 Tbsp pickling salt. Boil for two minutes.
Sweet brine: Same ratio, but add 1½ cups sugar.
60+ Weekend Projects to Keep You Active After 60
A few rules that apply every time:
- Use white, apple cider, or white wine vinegar, all at 5% acidity.
- If your tap water is hard, you need filtered water. Minerals cloud brine and toughen vegetables.
- No more than 2 Tbsp of herbs and spices per pint jar. Mix dried spices with fresh herbs for layered flavor.
- Pour hot brine over packed jars, seal, and refrigerate overnight. Use within two weeks.
Now, getting chewy pickles is the last problem when it comes to hard water. On the other hand, the stuff you can’t see is the one that should worry you.
What hard water does to your body when you’re drinking it every single day, that’s the part you might never think about.
If you want to make your tap water better for you and your family, one wise approach would be to filter your water. The only problem is that many store-bought water filters are too expensive for what they offer.
Why pay $400 when you can make your own filter for just $30?
If you don’t know where to start, this step-by-step guide is probably the best and easiest way to build a homemade, effective water filter. This is a large-scale filter that can be used to filter 5 gallons of water at a time!
Click here and get the whole guide for a big discount, just today.
Cucumbers
If you want the best results, go with pickling the small bumpy cucumbers around 3–5 inches long. Stay away from wax-coated ones you find at Walmart because the brine won’t be able to pickle them.
Start by washing your cucumbers and trimming about 1/16 inch off the blossom end. The blossom end should go because it contains enzymes that soften pickles. Then slice the cucumbers into spears or rounds. If you have small gherkins, those can go in whole. Pack them tight into your jars, pour hot brine over the top, and put them in the fridge.
For classic dill pickles, season with dill seed, mustard seed, garlic, and peppercorns. If you want sweet pickles, add more sugar along with some allspice or celery seed.
One thing that really makes a difference is picking cucumbers within 24 hours of harvest. A teaspoon of food-grade calcium chloride per quart of brine adds extra snap. Cucumbers pickled with enough vinegar can be kept refrigerated for up to a month, longer than most quick pickles.
Because cucumbers are about 95% water, the brine gets in fast. That’s why they’re one of the few vegetables that taste good after just one night of pickling.
Onions
These are the ones I pickle most often, and I think every homesteader should have a jar in the fridge at all times because, to be honest, onions go well with anything. No cooking, no blanching, all you have to do is just peel, slice thin, pack, and pour.
A 1:1 vinegar-to-water brine with a tablespoon of salt and a pinch of sugar does the trick. If you want a Mexican-style version, throw in cumin seeds, oregano, and sliced jalapeño. Let them sit overnight.
Your Generator Is the Most Dangerous Thing You Own!
Use firm onions and make sure every slice stays under the brine.
If you cure your onions right, they last 5–8 months in a cool, dry spot. So if you pickle a jar every time you pull some from storage, you’ll have a condiment on hand all winter. They go on tacos, sandwiches, grain bowls, or straight out of the jar.
Carrots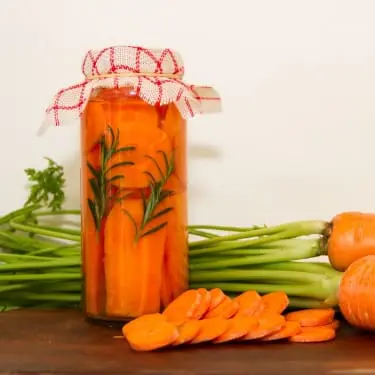
Carrots take a little more work, but they pay you back. They’re dense, so you’ll need to blanch them for 1–2 minutes and then drop them in an ice bath. This process softens them just enough for the brine to get in without making them mushy.
Ginger and garlic go well with carrots’ natural sweetness, and if you add bay leaves, cumin seeds, and chili flakes, you end up with an Indian-inspired pickle that’s too good to be true.
It is best to use young carrots when you can. They’re crispier and more tender. Older ones still work, but can get stringy.
Personal note: Pickled carrot sticks with garlic and ginger are the thing I bring to every potluck now. People always ask for the recipe, and I almost feel guilty telling them how simple it is.
I generally don’t buy carrots because I have a lot of them from my garden.
Also, you might already have noticed that food is rapidly becoming the new oil, and land is the new gold. The weekly grocery bill skyrockets every time you go to the store and things don’t seem to get better.
This is why my garden is so precious to me. It’s my safety net that keeps my family one step ahead of whatever comes next.
But you can take this further. How would it be to have a garden that offers not just food but also fish? Even more, how would it be to have this garden that is not dependent on rain, irrigation, and good soil? But wait, there’s more. How would it be to have this garden that fits in any small space, even an apartment?
Well, all of this is possible with this simple invention. Over the past year, over 13,200 families have also already successfully used the very same technique to get over tragic milestones such as hurricanes, snowstorms, or floods, and you can do the same.
See how this method works and why it’s worth it to have on your homestead.
Celery
Most people don’t see celery as a pickling vegetable, but it is an amazing choice. Its texture soaks up brine fast and stays crunchy even after a few days in the jar.
To do this, trim the ends, slice stalks into half-inch pieces, pack into the jar, and pour the brine. This time, no blanching needed. Celery seed, mustard seed, and peppercorns are a good combo, and a bit of sugar takes it closer to a sweet relish.
If your celery has gone limp in the fridge, I want you to know that you can still save it. Soak the stalks in cold water for an hour before slicing, and they’ll firm right back up.
Bell Peppers
First of all, slice them into rings or strips, pull out the stems and seeds, pack them tightly, and pour hot brine. They’ll indeed soften a little in vinegar, but they’ll still keep enough crunch to be satisfying.
Garlic, oregano, dill seed, and black peppercorns are a solid spice combination for this one. More sugar gives you sweet pickled peppers, and a few jalapeño slices give you spicy ones.
If you want the best texture, go with thick-walled peppers, and reach for the red ones when you can. When they’re red, you know for sure they’re ripe and packed with more vitamin A and C. One raw bell pepper has more vitamin C than a cup of orange juice.
Jalapeños and Hot Peppers
If you grow hot peppers, you already know what happens. They all ripen at once and suddenly you’ve got more peppers than you could ever use fresh. Hopefully, this pickling method takes care of that in about five minutes.
Make sure you wear gloves to prevent irritation. Slice your peppers into rings. If you want less heat, you can pull out the seeds. Then pack into jars with garlic, cumin seed, and coriander, and pour hot brine over them. A little sugar balances the hotness.
Capsaicin, the compound that makes peppers hot, helps fight inflammation and cell damage. Regular chili eating lowers the risk of dying early, so your pickled jalapeños do more than just make your meals tastier.
And something I learned for the garden: capsaicin keeps bugs away. Save your leftover seeds and skins and work them into a homemade pest spray.
Also, capsaicin is perfect if you want to make “Flat Tummy Capsules.” There are many different combinations of herbs that can be used to make homemade flat tummy capsules, but this blend is particularly effective for supporting digestive health and weight management, and capsaicin is a main ingredient. 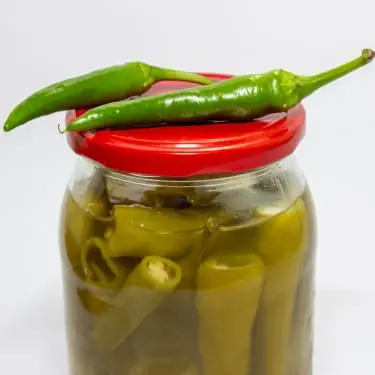
So, if you are growing hot peppers or you just buy them because you like to cook with them, you should know about this recipe. I made these capsules for the first time last year and since then, they have had a special spot in my bathroom cabinet. Why? Because I struggle with bloating pretty often and I noticed that they truly help. When my gut bothers me the most, I start a cure with one capsule before lunch and one before dinner, and keep this routine for a week. The results speak for themselves!
Also, don’t worry about the other ingredients you need because you will find all of them in your backyard and your pantry.
You can get the recipe from this book called The Forgotten Home Apothecary. This is a collection of over 200 herbal remedies, all put together by Dr. Nicole Apelian. Most of these remedies were present in all American homes during the Great Depression, but today, people have simply forgotten about them.
And I get it, with all of the advances in medicine, this is only natural to happen, but this doesn’t mean these remedies are no longer useful. There are regular problems you can treat at home and don’t need a trip to the hospital, such as my feeling of bloating. This is not a big deal, but it is something that bothers me. This type of natural remedy is the best in this case.
If you are one of those who don’t want traditional remedies to be forgotten, this book might be a good addition to your homestead.
Click here and get The Forgotten Home Apothecary for a 78% discount
* The offer is exclusive to our readers and is limited.
Radishes
If you’re impatient, then radishes are your best choice. All you have to do is slice your radishes carefully or quarter them, pack them in the jar, pour the brine, and wait a night.
If you want to add some kick, use jalapeño slices and garlic. If you want something mellower, go with dill and a pinch of sugar. If you want them to hold their crunch, pick them while they’re still small and firm. Bigger ones go spongy once they hit the brine, so consider this.
Parsnips
Parsnips don’t get talked about much, but their mild sweetness picks up vinegar brine well. Peel your parsnips and cut them into sticks or thin rounds. If they feel tough, you can blanch them for a minute or two, but younger parsnips don’t need all of this. They are more forgiving.
Season with mustard seed, garlic, bay leaves, and thyme.
If you want tender pickles, stick with young parsnips. Older ones get woody and no amount of brine will fix that. And if you can harvest after the first frost, even better. Cold weather makes them sweeter, so it’s easy to say that late-fall roots make the best pickles.
Asparagus
Asparagus needs a one-minute blanch and ice bath before it goes in the jar. You start by trimming the woody ends off your spears, then stand them upright in your jars and pour hot brine over them. Season with dill, garlic, mustard seed, and red pepper flakes. A few lemon slices in the jar brighten the whole thing, and that’s why I add lemon every time.
If you want tender-crisp spears and not floppy ones, be careful and don’t over-blanch them. Blanch your asparagus for no more than 60 seconds. You’ll know it’s ready when the color brightens, but the spear still feels firm when you press it with a fork. Leave a little room at the top of the jar so the brine covers the tips all the way.
If you don’t already grow asparagus, you might consider it. A well-kept bed stays productive for over 15 years. That’s 15 springs of fresh spears and pickled jars from one planting!
Green Beans
Pickled green beans, sometimes called “dilly beans,” are some of my favorites. Before pickling, trim the ends off your beans and cut them to fit your jars. Then blanch them for 1–2 minutes, drop them in an ice bath, drain, and pack them standing up. If you want classic dilly beans, season with dill seed, garlic, and chili flakes.
Use young, fresh beans and pull off any strings before they go in. A good bean should snap clean when you bend it. If it bends without breaking, it’s too old for pickling.
Broccoli
Start by cutting your broccoli into small florets and blanching them for 1–2 minutes. Once they brighten up, move them straight to an ice bath to stop the cooking. After they cool down, drain them, pack them into your jars, and pour the brine over them. Broccoli can handle bold seasonings, so don’t hold back. Garlic, ginger, and chili flakes give you an Asian-inspired jar, while turmeric and cumin take it in a curry direction.
If you want the florets to hold their texture, use firm, fresh heads and keep your blanching time to 1–2 minutes. Pull them out as soon as the color turns a brighter green and get them into the ice bath right away. If they feel soft between your fingers after the ice bath, they went too long.
I was skeptical about pickled broccoli until I tried it with ginger and sesame. Now it’s a regular in our fridge.
If you grow your own broccoli, leave the plant in the ground after you cut the main head. It’ll keep putting out side shoots for weeks, and those smaller florets work perfectly for pickling.
Cauliflower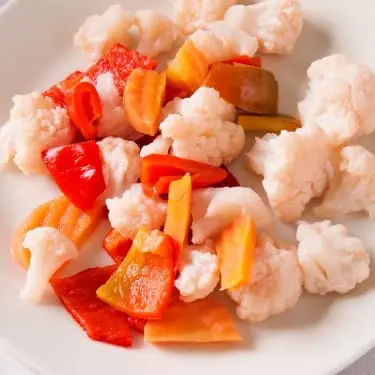
Cauliflower lasts for a while in brine and keeps its crunch as long as you don’t let the blanching go past two minutes. Even if it’s ready to eat after one night, you can give cauliflower a few extra days in the fridge. It tends to taste better with more time.
9 Most Underrated Prepping Items (That You Probably Don’t Have Either!)
If you want golden florets, add turmeric to the brine along with mustard seed and red pepper flakes. If you want something more Italian, try garlic, oregano, and bay leaves.
Pick cauliflower that looks fresh with no brown spots. One cup has about 25 calories but gives you folate, vitamin C, potassium, and fiber.
Snow Peas and Sugar Snaps
These are some of the fastest vegetables you can pickle. Wash your pods, pull off any strings, and pack them whole or cut on a diagonal. Then pour hot brine over them and put them in the fridge. One night and they’re ready to go.
If you want an Asian-style version, try ginger, garlic, and sesame seeds. If you want something more traditional, go with dill and mustard seed.
Be careful and don’t cram too many pods into the jar. You should be able to see brine between the pods when you look through the glass. If they’re pressed tight against each other, the brine can’t reach all the surfaces and you’ll end up with some that taste great and some that taste like nothing.
Ramps (Wild Leeks)
If you forage, you know ramp season is short. Pickling buys you a couple of extra months in the fridge.
Give your ramps a good wash to get the soil off, trim the roots, and separate the bulbs from the greens if you want. Then pack them into your jars and pour hot brine over them. No cooking at all. Season with dill, mustard seed, and a pinch of sugar.
If you want the best texture, use your ramps within a week of picking them, and go for the ones with slender bulbs and tender tops.
Horseradish
The process for this one is a little bit different. This time you will not slice anything. Instead, you’re grating the root and preserving it straight in vinegar. Mix 1 cup of vinegar with ½ teaspoon of salt for every 2 cups of grated horseradish. Then pack it into small jars, put them in the fridge, and use them within a month or two.
Most people keep it plain, but you can add a pinch of sugar or some mustard seed for a little extra. If you want to keep the heat strong, make small batches. Horseradish loses its kick the longer it sits.
If you haven’t grown horseradish yet, you should try it because it’s incredibly easy and rewarding. Tuck a few plants at the edge of your garden and they’ll come back year after year with no intervention.
Final Thoughts
I used to think of pickling as a task that eats up one or two days. Sterilizing jars, watching pressure gauges, and clearing the entire kitchen. Not fun. Sometimes it still is, especially when the tomatoes come in heavy, but this method is one that helps me save little things. Now I feel like I am not wasting anything, and I take advantage of all the vegetables I have.
Fifteen minutes of work, twenty-four hours of waiting, and you’ve turned something headed for the compost into something you’ll reach for at every meal.
The brine is always the same, and as you can see, the method barely changes. The only thing that matters is what you have in your cellar and what is in season.
You may also like:
Grandma’s Long-Lasting Bread and Butter Pickles
The Book That’s Getting Kids Excited About Gardening Before They Can Even Read (Video)
You Never Thought You Could Pickle These
Best Ways To Preserve Your Fall Harvest
These 6 Items Skyrocketed in Price. Here’s What I Did


