
Canning is a great way to preserve food and make it shelf-stable. If you are like most people, you think canned foods are primarily jams, jellies, soups, and vegetables. But there are many more foods that can be canned. Let’s look at some of these foods that are sure to surprise you!
Bacon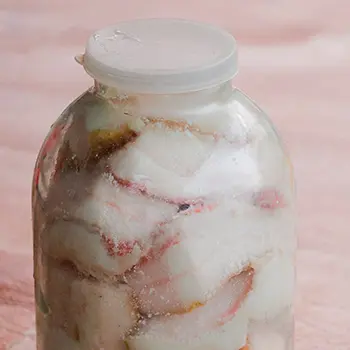
Start by selecting good-quality bacon. You can use raw or precooked bacon. Cut the bacon strips into lengths that will fit inside your canning jars. Some people prefer to partially cook the bacon before canning to reduce shrinkage and fat in the jars, but this is optional.
Wash your canning jars, lids, and bands in hot, soapy water, and rinse them thoroughly. Sterilize the jars and keep them hot until you’re ready to use them. Ensure the lids are clean, but you don’t need to sterilize them in boiling water.
Pack the bacon strips tightly into the hot, sterilized jars. You can add a pinch of canning salt if you like, but it’s optional.
Use a clean, non-metallic tool to remove any air bubbles by gently pressing the bacon down in the jars.
Use a clean, damp paper towel or cloth to wipe the rims of the jars to ensure they are clean and free from any grease or debris.
Related: Canning Bone Broth That Lasts For More Than 2 Years
Place the lids on the jars and screw on the bands until they are fingertip tight (not overly tight). This allows air to escape during the canning process.
Follow your pressure canner’s instructions for canning meat. Typically, you’ll need to add water to the canner, place the filled jars inside, and process them at the recommended pressure and time for your altitude. Canning bacon usually requires a higher pressure setting than vegetables or fruits.
After the canning process is complete, turn off the heat and allow the pressure canner to cool down naturally. Once it’s safe to do so, remove the jars with a jar lifter and place them on a clean, dry towel. As they cool, you should hear the lids “ping” as they seal. Let the jars cool completely.
After the jars are cool, check the seals by pressing down on the center of each lid. If it doesn’t flex or make a popping sound, the jar is sealed. If a jar is not properly sealed, refrigerate and consume its contents promptly.
Store the sealed, canned bacon in a cool, dark place. Canned bacon can be stored for an extended period, often up to a year or more.
Butter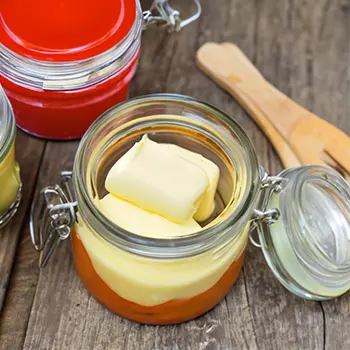
Canning butter is often done using a method called “canning in a water bath,” but there are some important considerations to ensure the butter is safely preserved.
Use high-quality, unsalted butter. You can use store-bought butter or homemade butter. Cut the butter into smaller pieces or cubes to make it easier to handle.
Wash your canning jars, lids, and bands in hot, soapy water, and rinse them thoroughly. Sterilize the jars and keep them hot until you’re ready to use them. Ensure the lids are clean, but you don’t need to sterilize them in boiling water.
Fill the hot, sterilized jars with the prepared butter, leaving about 1/2-inch of headspace at the top. It’s essential to pack the jars firmly to minimize air gaps.
Use a clean, damp paper towel or cloth to wipe the rims of the jars to ensure they are clean and free from any butter residue.
Related: How To Make Condensed Milk That Can Last More Than 2 Years
Place the lids on the jars and screw on the bands until they are fingertip tight (not overly tight). This allows air to escape during the canning process.
Place the filled jars in a large pot or canning kettle, making sure they are not in direct contact with the pot’s bottom. Fill the pot with enough water to cover the jars with at least 1-2 inches of water. Bring the water to a gentle boil.
Process the jars in the boiling water bath for about 45 minutes to 1 hour. The exact time may vary depending on your altitude and the size of the jars. Consult a reliable source for precise processing times.
After the canning process is complete, turn off the heat and allow the jars to cool naturally. As they cool, you should hear the lids “ping” as they seal. Let the jars cool completely.
After the jars are cool, check the seals by pressing down on the center of each lid. If it doesn’t flex or make a popping sound, the jar is sealed. If a jar is not properly sealed, refrigerate and consume its contents promptly.
Store the sealed, canned butter in a cool, dark place. Canned butter can typically be stored for an extended period, often up to a year or more.
Mushrooms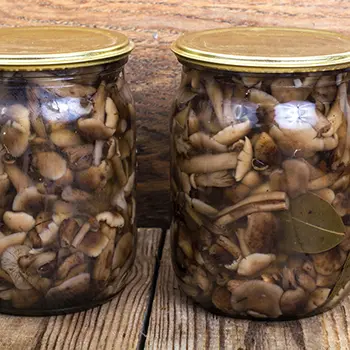
Canning mushrooms help maintain their flavor and texture while extending their shelf life.
Start with fresh mushrooms. Clean them thoroughly by brushing off any dirt or debris. You can use a damp cloth or paper towel for this. Trim the stems and cut the mushrooms into slices or leave them whole, depending on your preference.
Wash the canning jars, lids, and bands in hot, soapy water, and rinse them well. Sterilize the jars by submerging them in boiling water for 10 minutes to ensure they are clean and free from any potential contaminants. Keep the jars hot until you’re ready to use them.
Blanch the cleaned mushrooms in boiling water for about 5 minutes. This helps to preserve their texture and reduce the risk of darkening. After blanching, drain the mushrooms.
Fill the hot, sterilized jars with the blanched mushrooms, leaving about 1 inch of headspace at the top. You can add salt (about 1/2 teaspoon per pint jar) if desired, but it’s optional.
Pour hot water or a mushroom broth (if you prefer) into the jars, covering the mushrooms while maintaining the 1-inch headspace. Make sure to remove any air bubbles by gently tapping the jars or using a non-metallic tool.
Related: How To Grow Food From Sawdust Blocks
Use a clean, damp paper towel or cloth to wipe the rims of the jars to ensure they are clean and free from any food residue.
Place the lids on the jars and screw on the bands until they are fingertip tight (not overly tight). This allows air to escape during the canning process.
Follow your pressure canner’s instructions for canning mushrooms. Typically, you’ll need to add water to the canner, place the filled jars inside, and process them at the recommended pressure and time for your altitude. Canning mushrooms require pressure canning for safety.
After the canning process is complete, turn off the heat and allow the pressure canner to cool down naturally. Once it’s safe to do so, remove the jars with a jar lifter and place them on a clean, dry towel. As they cool, you should hear the lids “ping” as they seal. Let the jars cool completely.
After the jars are cool, check the seals by pressing down on the center of each lid. If it doesn’t flex or make a popping sound, the jar is sealed. If a jar is not properly sealed, refrigerate and consume its contents promptly.
Store the sealed, canned mushrooms in a cool, dark place. Canned mushrooms can typically be stored for an extended period, often up to a year or more.
Sausage Patties
You can use either cooked or uncooked sausage patties, depending on your preference. If you’re using uncooked patties, you can either partially cook them in a skillet or oven before canning, or you can can them raw. If using cooked patties, make sure they are thoroughly cooked before canning.
Wash the canning jars, lids, and bands in hot, soapy water, and rinse them well. Sterilize the jars by submerging them in boiling water for 10 minutes to ensure they are clean and free from any potential contaminants. Keep the jars hot until you’re ready to use them.
Fill the hot, sterilized jars with the sausage patties. Leave about 1 inch of headspace at the top of the jar. If you’re canning raw sausage patties, you can pack them more tightly since they will shrink during the canning process.
You can add a small amount of liquid to the jars to help improve the quality of the product. A little broth or hot water (or even a mixture of both) can be added, but it’s optional. This step can help keep the sausages moist during storage.
Use a clean, damp paper towel or cloth to wipe the rims of the jars to ensure they are clean and free from any food residue.
Related: Pioneer Recipes Every Homesteader Should Learn
Place the lids on the jars and screw on the bands until they are fingertip tight (not overly tight). This allows air to escape during the canning process.
Follow your pressure canner’s instructions for canning sausage patties. Typically, you’ll need to add water to the canner, place the filled jars inside, and process them at the recommended pressure and time for your altitude. Canning sausage patties require pressure canning for safety.
After the canning process is complete, turn off the heat and allow the pressure canner to cool down naturally. Once it’s safe to do so, remove the jars with a jar lifter and place them on a clean, dry towel. As they cool, you should hear the lids “ping” as they seal. Let the jars cool completely.
After the jars are cool, check the seals by pressing down on the center of each lid. If it doesn’t flex or make a popping sound, the jar is sealed. If a jar is not properly sealed, refrigerate and consume its contents promptly.
Store the sealed, canned sausage patties in a cool, dark place. Canned sausage patties can typically be stored for an extended period, often up to a year or more.
This article explores several possibilities for canning foods outside of the more traditional foods. You might want to try some of these foods, or who knows, you may have some surprises yourself!
You may also like:

An Insanely Effective Way to Build a 5 Year Food Stockpile (Video)
How To Pickle Watermelon Rind The Amish Way
Cut Down On Your Bills In 2024 With These Amish Projects
Easy DIY Water Purification System For Under $20


