The first time I made sauerkraut, I was so proud of myself, right up until I lifted the lid a week later. The whole crock was slimy and gray and smelled like something had died in there. I realized that maybe I don’t know how fermenting works at all.
Turned out I’d made two mistakes that day, not some big ones, but it was enough to destroy the whole thing. Once I discovered what those mistakes were, fermenting became one of the main ways to preserve my food.
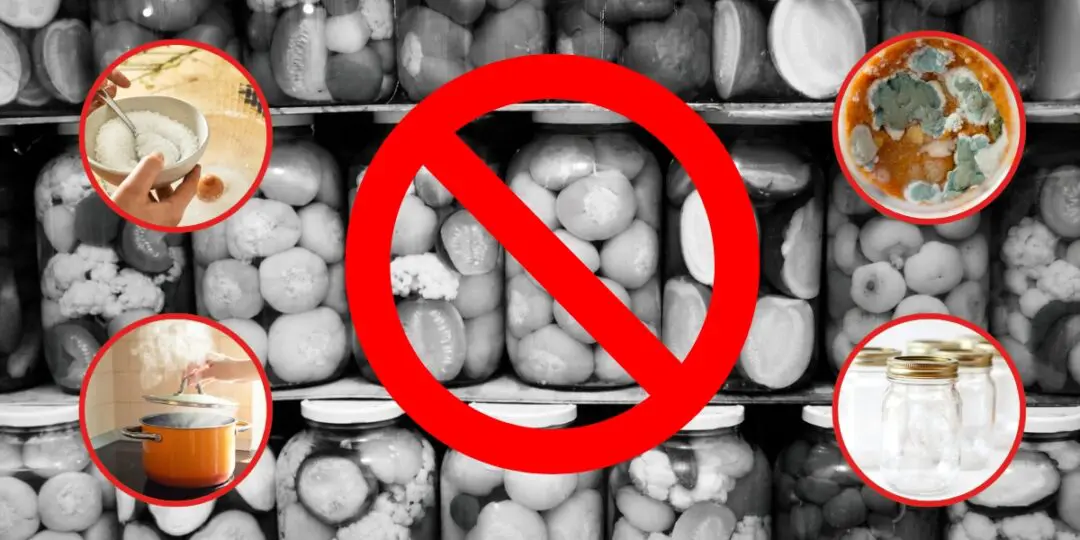
That’s what I want for you. Learn to never make these ten mistakes I’m about to present and you’ll never mess up an entire batch.
You’ll never wonder if everything is alright each time you notice something weird, and you’ll have crisp pickles waiting in the pantry whenever you want them.
Getting the Salt Wrong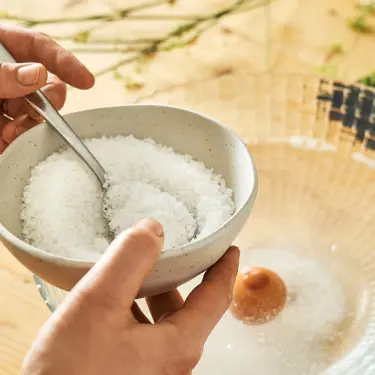
Start here, because this was the first mistake I made that cost me an entire batch. The salt you use is incredibly important. You can’t just go into Walmart, grab the first pack of salt and use that for your fermented pickles. Also, how much salt you use is another step you need to be careful about.
Salt pulls the water out of your vegetables to make the brine, and it sets up an environment where the good bacteria can get going before anything nasty does. Too little and the batch goes soft and slimy on you. Too much and it barely ferments at all, just sitting there waterlogged.
You want 2 to 3% salt by the weight of your vegetables, which comes out to about 20 to 30 grams per 1,000 grams of produce. For sauerkraut, the old USDA number is 3 tablespoons of salt to 5 pounds of cabbage, and the National Center for Home Food Preservation will tell you flat out not to mess with that ratio. It’s what keeps the batch safe, not just tasty.
Get a cheap kitchen scale. Weigh the cabbage, weigh the salt. I know weighing things feels fussy, but this is what makes the difference.
Using the Wrong Kind of Salt
Plain table salt is usually iodized, and iodine slows the bacteria down. It often has anti-caking junk in it too, which can leave your brine cloudy. Always go with salt that has no additive in it. It should be pure salt with no iodine, dextrose, or anti-caking agents. Canning salt, unrefined sea salt, or some Kosher salt are all good options.
I keep a bag of pickling salt right next to the crocks so I never grab the wrong thing in a hurry.
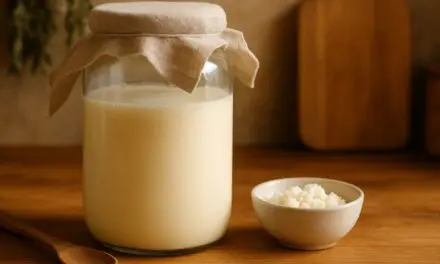
Salt is the main ingredient during fermentation and it’s so good because it helps bacteria grow. Now, I know this might make you wonder about some health concerns. The thing is, this bacteria is all good bacteria. So, there’s nothing to worry about. Good bacteria is amazing when you want to have a healthy gut. If you ever struggled with digestive problems, fermented pickles might be the answer.
And since I mentioned this, I want to tell you more about sauerkraut. This is probably the best natural probiotic you can make at home. It helps reduce bloating, diarrhea, constipation, and symptoms linked to leaky gut, ulcerative colitis, or Crohn’s disease.
But did you know you can upgrade your regular sauerkraut and make it even more effective?
It’s called the Amish Kraut and it’s a special technique of fermenting cabbage. The secret lies in one uncommon ingredient most people have no idea they can use when fermenting cabbage. This is how the Amish have made their sauerkraut for hundreds of years.
Here you can find a video of the recipe and also discover the secret ingredient →

Letting Your Vegetables Float Above the Brine
This was my other rookie mistake: the floating cabbage. Anything sticking up above the liquid is sitting in air, and air is where mold and rot move in. The fermenting only happens down under the brine where there’s no oxygen.
You have to weigh everything down. They sell little glass and ceramic weights, and they’re nice, but for years I just used a clean zip-top bag filled with a bit of brine. It sinks the cabbage and seals off the surface at the same time. A clean rock or a small jar dropped inside works too. Just don’t leave a single leaf poking up.
Fermenting Somewhere Too Warm or Too Cold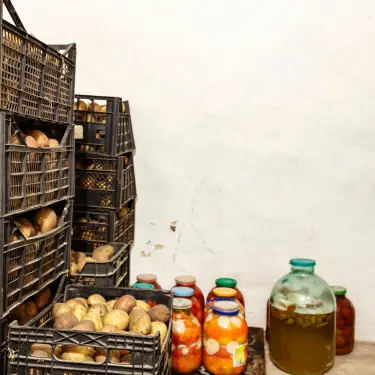
Most people set the jar wherever there’s counter space and never think about it again. The temperature is doing more than they realize.
Around 70 to 75 degrees is the happy zone, and kraut will be done in three or four weeks. Cooler, say down in the low 60s, and it just takes longer, more like five or six weeks. That part’s fine. The part that gets you is heat. Up past 75, the batch goes mushy, and once you’re over 80 it can flat out spoil. So summer is when you have to pay attention. A pantry shelf or a basement corner away from the woodstove usually holds steady enough, and keep it out of the sun.
But, the best place to store your fermented goods is by far the root cellar. There’s no wonder why the Amish always use this method. The root cellar has the perfect temperature whether it’s winter or summer. But this is only true if you know how to build your root cellar properly. The interesting thing about Amish root cellars is that they are more compact than you’d expect them to be. This makes them perfect for small backyards and small spaces in general.
See how to build your root cellar like the Amish.
Brining With Straight Tap Water
This one’s easy to overlook because the water looks perfectly clean. If you’re on city water, there’s chlorine or chloramine in it, and that’s in there specifically to kill bacteria. Great for what comes out of the tap, lousy for the bacteria you’re trying to grow on purpose.
Well water you can usually use as is. City water just needs a head start. Run it through a carbon filter, or boil it and let it cool all the way down before you mix your brine. Letting it sit out overnight handles plain chlorine, though it won’t touch chloramine, so if your town uses that, the filter is the surer bet.
The thing is that most of the country uses chloramine to make water safe to drink. Now the fact that the water is clean is good; the problem is that this substance will not let the fermentation take place. Also, most commercial filters are not that effective in case of chloramine. So, what can you do if you want safe water to use for your pickles?
Well, the easiest way is to make your own filter. The following method is one I lerned form Ron, the writer of the Self-Sufficient Backyard. All you need are three buckets, the materials you’ll use to make the actual filter, and a PVC pipe to make a faucet. It takes about three hours to make this filter from scratch, and it’s been five years already since I’ve been using it.
Also, the cost is incredibly low. Depending on what materials you already have at home, it costs around $25 to build. Why spend $100 on a store-bought filter that might be ineffective when you can build this?
Bonus: you can use it to filter rainwater too
See how to make your own activated charcoal filter step-by-step →
Being Scared of the White Film
A few days in, you might find a thin, wrinkly white skin on top, and I’ve watched people dump a perfectly good crock over it.
That’s almost always kahm yeast. It’s harmless. Let it run for weeks and it’ll throw a slightly off, yeasty taste, but you just lift it off with a clean spoon and move on. The ferment underneath is doing its job.
Real mold is the thing to actually worry about, and that’s next.
Not Recognizing Harmful Mold 
Kahm yeast lies flat and white on the surface. Mold stands up off it and comes in color, usually green or black, sometimes a pink fuzz. If you see that, the batch is done, into the compost it goes. Some molds make toxins and others eat through the acid that was keeping the jar safe, so it isn’t worth the gamble.
Mostly I go by smell. Good ferment smells sharp and clean, like a barrel of pickles. If it smells rotten, the nose knows before the eyes do, and that’s all the answer I need.
Starting With Dirty Gear
Fermenting is forgiving, but it isn’t magic. The whole game is giving the good bacteria a head start, and a grimy crock hands the bad ones the lead instead.
You don’t need to sterilize like you’re canning. Just wash your jars, weights, and utensils in hot soapy water and rinse them well, and scrub your hands before you start packing cabbage. After it’s done, keep the jar away from raw meat and anything those surfaces touched.
Sealing the Jar Up Tight
Fermenting throws off carbon dioxide, all those bubbles you see. Lock the lid down and that gas has nowhere to go, and pressure builds until something gives.
An airlock lid solves it without you thinking about it. Or you do what I do and leave the lid resting loosely, then crack it open once a day to let the gas out and set it back. Either way, don’t seal it tight and walk off.
Going Straight From the Counter to the Pantry
When a batch finally tastes right and you leave it sitting out anyway, it doesn’t stop. It keeps souring and softening past the point you wanted, and a jar that was perfect on Tuesday is too far gone by the weekend.
Cold is the off switch. Move it to the fridge or the root cellar and the bacteria all but quit, and the ferment more or less freezes in place at the flavor you stopped it on. Mine keep for months that way. I’ve got a row of jars in the fridge door right now and I grab one whenever a plate needs waking up.
Your First Jar from Start to Finish
If all of these made fermenting look complicated, please let me show you how easy it is. The rules above are just some basics you need to follow. You can use this article like a checklist.
Below I want to share with you one simple recipe you can use to start your first batch.
Also, there’s one more thing I want to share with you: vegetables are not the only thing you can pickle.
Pickling meats for long-term storage is an old, effective method that was used by our forefathers and now is mostly forgotten. Back then, people didn’t own a freezer to store their meat, so they got creative.
The simplicity of the process, as well as the availability of the necessary supplies, makes this method a popular choice among homesteaders, preppers, large families, and anyone who is tired of having their meat go bad before they were able to cook it.
Brining meat is easy, but there are a couple of steps you should always follow if you want to keep the whole process safe. Click here to see how to pickle meat the safe way.
Final Thoughts
If you only take one thing from all this, make it the salt. That’s the one that ruins batches. Everything else is the difference between great kraut and okay kraut, and okay kraut still tastes fine on a sandwich.
So don’t wait until you’ve memorized the whole list. Buy a head of cabbage this week, weigh your salt, keep it under the brine, and stick it somewhere that isn’t hot. Then just watch what it does. One jar on your own counter will teach you more than I can from here.
You may also like: 
These 7 Homesteading Skills Pay for Themselves in Under a Year
Cheap and Easy to Build Root Cellar in Your Own Backyard (Video)
Don’t Throw Away SPOILED Vegetables! Do THIS Instead!
Why the Amish Are Immune to Inflation and How You Could Be Too
Fermented Fish: A Self-Sufficient Food Tradition Worth Reviving


