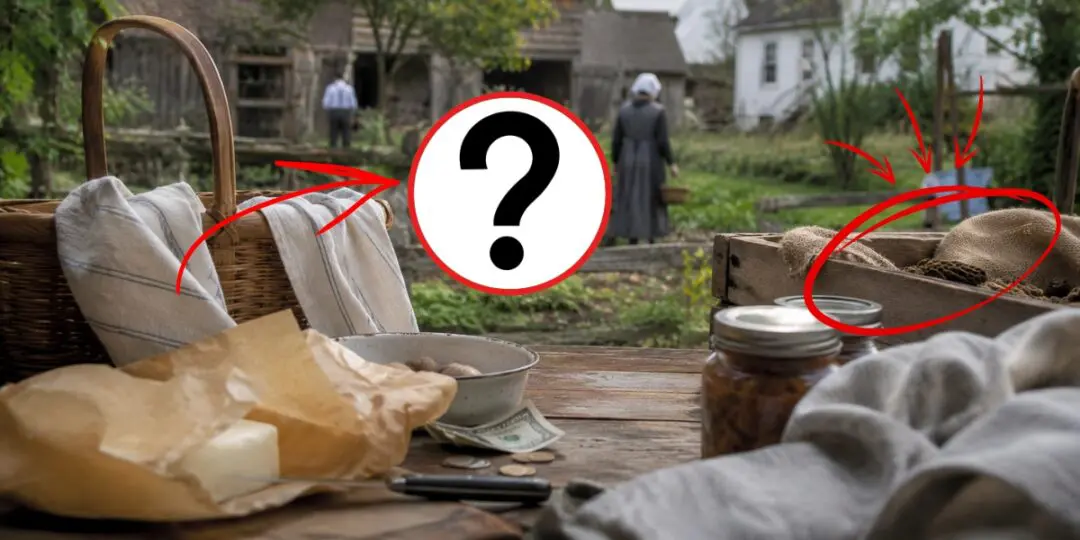
You probably already know the drill. You save seeds, you preserve the harvest, you keep a compost pile. These skills are the bread and butter of the homesteader life, and I’m guessing you’ve had them down for years.
That’s why today I’ll show you a few skills that are mostly forgotten, even though they were likely homesteading staples in our grandparents’ time.
These are the ones that don’t get written about as much because they take a little more nerve or a little more know-how. I started doing after a few years of homesteading and their greatest advantage is that they put money back into my pocket.
Here are the best homesteading skills you need to know if you’re trying to make some extra cash or just save more money.
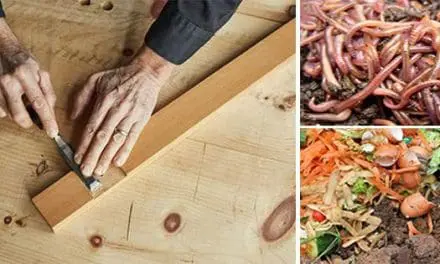
Rendering Your Own Tallow and Lard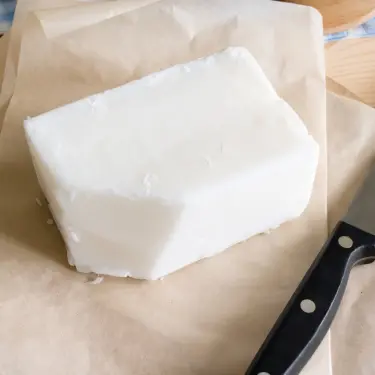
Fat is one of the most useful things on the whole homestead once you render it down. This used to be a big thing back then and it’s still popular today, but what I want to make you understand is that you can use lard for so much more than cooking.
Rendering is a simple process. You slowly melt the fat to transform it into something that’s shelf-stable. The whole secret is low and slow. You keep it around 220 to 250 degrees, no hotter, so the water cooks off without scorching.
If you want to see the whole process, step-by-step with pictures, you can find it here.
I prepare my tallow in a slow cooker so I don’t have to babysit a hot pot. Once it’s melted and the little bits called cracklings have settled out, you strain it through cheesecloth into clean jars. Good tallow comes out creamy white with almost no smell.
But here’s why I love lard so much. Just one single batch replaces cooking fat, leather conditioner for your boots and harness, and you can even make candles out of it. Tallow candles burn slow and clean and are perfect if you want to lower your energy bill.
The magic of tallow is that you turn it into three or four things you used to buy. That’s why I think you should definitely give it a try.
Propagating Plants From Cuttings
Buying nursery stock every time you want more berries or fruit is not a money-wise move. Most of your plants are capable of growing a whole new plant from a single cutting, and it costs you nothing but a little patience.
This works best with berries, but you can also use it for other plants. Currants, gooseberries, grapes, figs, elderberry, and mulberry all root beautifully this way.
If you want to try this, start the process in late winter, while the plant is still dormant. You cut a piece of last year’s growth about six to eight inches long, with a few buds on it.
Then make sure you keep track of which end is up, because a cutting stuck upside down won’t root. Next, push the bottom couple of inches into well-draining soil, leave a bud showing above the surface, and keep it watered. In anywhere from two to eight weeks, depending on the plant, you’ll see roots.
Now, if you want to try this with apples, pears, and stone fruit, it’s a whole different story. Cuttings are not working here. That’s why folks graft them onto rootstock instead.
One word of caution. A lot of newer named varieties are patented, and propagating those isn’t allowed. Stick to old open varieties and you’ll be fine.
Foraging and Selling What You Find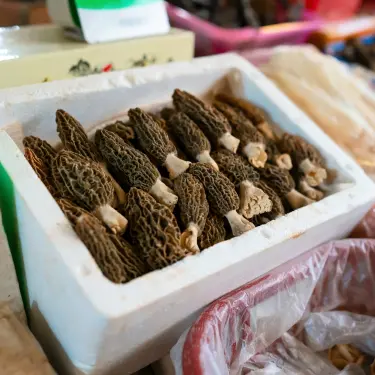
Most of the time when people go foraging, they are doing this for themselves. This is a good way to get free food, but you can use this skill to make lots of money.
Certain wild foods fetch high prices because chefs and specialty buyers want them fresh and many of these plants can’t be farmed.
Morels are the most famous example. Ramps sell fast too. So do fiddleheads and wild huckleberries. These have short seasons, and that scarcity is exactly what makes them so precious.
So, next time you go foraging, keep this in mind. This is one of the best ways to get money, especially during the spring and early summer. Local restaurants love a reliable supplier of something they can’t get from their usual distributor. Farmers markets work well if you don’t mind getting a permit. And there are even online marketplaces built just for wild foods now, where you can ship to folks across the country.
But before we go further, I have to mention how important safety is here, because this is where foraging can turn dangerous.
For example, false morels can make people very sick, so knowing the difference is a must. You can’t start eating, preserving, or selling something that might be deadly. Selling food to other people means their safety is in your hands now, so treat it that way.
The thing with all these wild foods is that some of them look almost the same. Let’s take ramps. They are delicious and sought after, but they are often confused with lily of the valley, which is very toxic for humans.
The only way to avoid accidents is knowing the subtle difference.
Here you can find a guide I always take with me when I go out foraging.
It has the full collection of plants you can find all across the U.S., and the thing I like most about it is that it has clear pictures, lots of pictures. It tells you all you need to know about the small differences between the plants and helps you identify them 100% right.
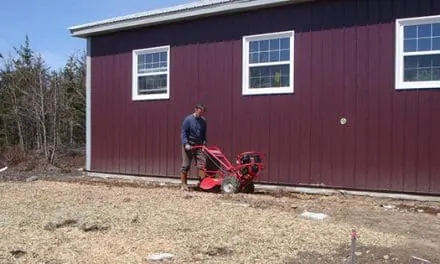
Sharpening Your Own Blades and Chains
This one isn’t exciting, but it might save you more than anything else on this list. Think about how much you pay a shop to sharpen a chainsaw chain or a mower blade, or how often you’ve just bought a new one because the old one got dull.
A dull tool isn’t just costing you money, but it’s dangerous. A dull knife makes you push harder, and that’s exactly when your hand slips. A dull chainsaw chain grabs and kicks. So learning to put a proper edge back on things keeps you safer and keeps cash in your pocket.
For a chainsaw chain, you need a round file in the right diameter for your chain and a simple guide to hold the angle. File every tooth the same number of strokes so they stay even, then reset the depth gauges. Set those too low and you’ll get nasty kickback, so go easy there.
For a mower blade, you’re not after a razor edge. A blade sharp like a butter knife is right, filed at the factory angle. The part most folks skip is balancing the blade afterward. An unbalanced blade shakes the whole deck and wears out the spindle. A cheap balancer tells you in two seconds if one side is heavy.
Always pull the spark plug wire before you touch a blade or chain. Learn this once and you’ll never pay for sharpening again.
Related: Maintenance for Lawn Mowers, Chainsaws, and More
Make Feed With Fodder and Fermenting
If you keep livestock, you already know feed is a bill that never stops. Sometimes this can get exhausting and that’s why I have two old tricks that stretch feed a long way. Both cost almost nothing to start.
The first is sprouting fodder. You soak barley, wheat, or oats and grow them into a thick green mat in trays over about six or seven days, using nothing but water. The amazing part is how much it multiplies.
A pound of dry barley grows into five to seven pounds of fresh green feed by the time it’s ready. Animals love it, and you’re feeding them living greens in the middle of the winter.
The second is fermenting feed. You soak grain or feed in water for a few days and let the good bacteria go to work. This actually pre-digests the feed, so your animals pull more nutrition out of every bite and waste less. Folks who ferment their chicken feed notice the birds eat less of it and do just as well.
A couple of things keep you out of trouble. Always start with clean, mold-free grain, because mold is the one thing that’ll ruin a batch. Use unmedicated feed for fermenting, keep your containers clean, and don’t seal them up airtight. And remember that fodder is a supplement, not the whole diet, so keep their ration balanced.
Related: The $0.5 Livestock Feed That You Can Make at Home
Canning Your Own Meat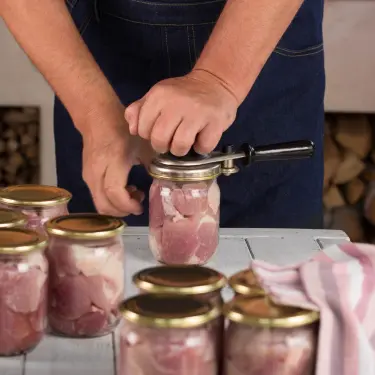
Most homesteaders can fruit and vegetables without a second thought, but a lot of folks get nervous about meat. I understand that, because meat is the one you can’t wrong since it’s dangerous. But once you learn to do it right, it saves you lots and lots of money and is one of the best foods in case of emergency.
Canning meat lets you buy beef or chicken when it goes on sale, or put up a home-raised animal, and store it on a shelf with no freezer.
Here’s the rule you never break. Meat is a low-acid food, which means it has to go in a pressure canner. Not a water bath, not a steam canner, not one of those electric multicooker gadgets that claim they can.
Only a pressure canner gets hot enough, around 240 degrees, to kill the spores that cause botulism. Most botulism cases in this country come from home-canned food done wrong.
So you follow tested times exactly. Pints of meat run about 75 minutes and quarts about 90, at the pressure for your altitude. Have your gauge tested once a year. Never make up your own times, and if a jar ever looks or smells off, throw it out without tasting it.
The folks at Penn State Extension lay out the safe times clearly, and this is a source you can fully trust.
Now, you can make your canned food last for years by just respecting a couple of simple rules, but what about its taste and texture?
Personally, I like my food to taste the same way it tasted the day I made it. Sometimes when you’re canning, the food loses its taste, but the Amish found a way to avoid this.
They add something secret that manages to preserve all the good flavors. Click here and find out their secret canning method.
Also, one recipe I love making every season is something I learned from the Amish: Beef Stew with Vegetables. You can find the recipe here.
Making Your Own Cleaners and Soap
This is the skill that works even if you live on a quarter acre in town. The cleaning aisle drains your grocery budget a little at a time, and it does it so subtly that you barely notice. You can replace most of the commercial cleaning supplies with three cheap things you probably already have.
Vinegar, baking soda, and a bit of Castile soap will handle most of your house. Vinegar cut with water makes a fine all-purpose spray for glass and counters. Baking soda is your scouring powder for the sink and tub. Castile soap mixed with water washes floors and dishes. Between those three, you’ve covered most of what you used to buy in bottles.
A few honest cautions so you don’t waste your effort. Don’t keep mixing baking soda and vinegar together expecting magic, because they mostly cancel each other out. Use them separately. Keep vinegar off natural stone like granite and marble, because it’ll destroy the surface. And never, ever mix bleach with ammonia or anything else, because that makes a gas that can instantly make you sick.
Final Thoughts
All of the skills I listed are not big investments, but they manage to pay for themselves and even help you make a profit.
Most of them just take a willingness to try something a little outside your usual routine. But after all, that’s the heart of the homesteading life, isn’t it? You keep adding skills, and each one of them makes you depend less and less on the system.
The thing I’ve learned is that the money these skills save matters and this is why I wholeheartedly encourage you to try at least one of them and see where it goes.
You may also like: 
Cleaning the Chimney: A Complete DIY Guide for Homeowners
How to Build Your Own Water Generator (Video)
6 First Aid Skills You Should Know Before A Crisis
How to Keep Deer Out of Your Property Without Building a Fence
7 Amish Blacksmithing Skills That Will Save You $500 a Year


