Before refrigerators, before canning, before any of the modern food preservation systems we take for granted, people kept vegetables safe and nourishing through winter using nothing more than salt, water, and time. That method was lactic acid fermentation, and it worked so reliably that virtually every food culture on earth developed its own version of it independently.
Sauerkraut, kimchi, dill pickles, kvass, traditional olives, Korean kkakdugi, Eastern European beet kvass, and dozens of other staple foods are all products of the same process. The bacteria doing the work are already living on the surface of your vegetables. Your job is simply to create the conditions that let them thrive and let everything else fail.
This guide covers the science of why lactic acid fermentation works, the practical method in full detail, how salt and temperature affect your results, the best vegetables to start with, and how to troubleshoot the problems that trip up beginners. If you want a food preservation method that requires no special equipment, no electricity, and no vinegar, this is it.
What Is Lactic Acid Fermentation?
Lactic acid fermentation is a biological preservation process driven by lactic acid bacteria (LAB), primarily species of Lactobacillus, Leuconostoc, and Pediococcus. These bacteria are not added to your ferment from a starter packet. They are naturally present on the surface of fresh vegetables, living alongside other microorganisms including yeasts and potentially harmful bacteria.
The process works through a competitive advantage that LAB have in a specific environment: salt brine with no oxygen. When you submerge vegetables in a salt solution and exclude air, you create conditions that LAB thrive in and most other bacteria cannot tolerate. As the NCBI Bookshelf’s documentation on lactic acid fermentations explains, salt draws liquid out of the vegetable tissue, creating a brine substrate where LAB begin metabolizing the natural sugars in the plant material and converting them into lactic acid.
That accumulating lactic acid drops the pH of the ferment progressively, typically reaching 3.5 to 4.0 over the course of days to weeks. At that acidity level, most spoilage-causing and pathogenic microorganisms cannot survive. The result is a preserved food that is safe to eat for months without refrigeration, with a distinct sour flavor and a living population of beneficial bacteria.
The Microbiology: What Happens Stage by Stage
A typical vegetable fermentation does not involve a single species of bacteria working alone. It unfolds in overlapping phases, each dominated by different organisms.
Stage 1: Leuconostoc dominates (Days 1 to 3)
The fermentation starts with Leuconostoc mesenteroides, a heterofermentative LAB species that works across a wide range of salt concentrations and temperatures. It produces carbon dioxide, lactic acid, and acetic acid. The carbon dioxide is important: it displaces oxygen from the brine, creating the anaerobic environment that subsequent bacteria need and that inhibits mold and yeast. The rapid pH drop in this stage inhibits the development of harmful organisms that would otherwise compete.
Stage 2: Lactobacillus takes over (Days 3 through 10+)
As acidity increases, Leuconostoc gives way to homofermentative Lactobacillus species, particularly Lb. plantarum and Lb. brevis. These bacteria tolerate higher acidity and continue converting sugars to lactic acid, driving the pH lower and producing the characteristic sour flavor that defines a well-fermented vegetable. Lb. plantarum is the dominant organism in mature sauerkraut and produces much of the probiotic benefit associated with lacto-fermented foods.
Stage 3: Stabilization
Once acidity reaches the target range and sugars are largely exhausted, fermentation slows. The food is now chemically preserved. Refrigeration at this point stops further acidification and keeps the texture and flavor stable. At room temperature, very long fermentation continues to acidify slowly, eventually producing an overly sour product as Lactobacillus populations decline and the food approaches its finished state.
Why Salt Is the Most Important Variable
Salt is not just flavoring in lacto-fermentation. It is the mechanism that selects for the right bacteria, controls fermentation speed, manages texture, and determines whether your batch succeeds or fails.
Salt draws water out of vegetable tissue through osmosis, creating the brine in which fermentation happens. It inhibits many harmful bacteria while allowing salt-tolerant LAB to dominate. It slows pectinolytic enzyme activity, which is what keeps fermented vegetables crisp rather than mushy.
The typical salt range for vegetable fermentation is 2 to 3 percent by weight of the total mix. For cabbage-style ferments where you dry-salt the shredded vegetable, this means roughly 1 teaspoon of non-iodized salt per pound of cabbage. For brine-submerged ferments like whole cucumbers, a 2 to 5 percent brine solution is appropriate depending on the vegetable and desired outcome.
Two critical salt rules:
- Use non-iodized salt only. Iodine is an antimicrobial additive in table salt that inhibits the very bacteria you are depending on. Sea salt, kosher salt, pickling salt, and Himalayan salt all work. Standard iodized table salt does not.
- Weigh your salt rather than measuring by volume if precision matters. Salt crystals vary significantly in density between brands and types. A tablespoon of fine sea salt is not the same weight as a tablespoon of Diamond Crystal kosher salt.
Too little salt produces a fast but unstable fermentation where unwanted bacteria can establish before LAB acidify the environment. Too much salt slows fermentation excessively, produces an overly salty product, and can prevent LAB from working effectively at all.
Temperature and Fermentation Speed
Temperature controls the pace of fermentation and affects the final flavor profile. Warmer temperatures mean faster fermentation and more assertively sour results. Cooler temperatures slow the process, producing a more complex, milder flavor with better texture retention.
The practical range for home lacto-fermentation is 65 to 75 degrees Fahrenheit (18 to 24 degrees Celsius). At 70 to 75 degrees, sauerkraut typically reaches an enjoyable tang in 5 to 7 days. At 65 degrees it takes 10 to 14 days. Traditional kimchi fermentation is deliberately slowed at around 50 degrees Fahrenheit (10 degrees Celsius) to develop its layered flavor.
Avoid fermenting in very warm conditions above 80 degrees Fahrenheit. High heat accelerates fermentation to the point where flavor complexity is lost and texture degrades faster. It also increases the risk of yeast overgrowth, which produces off flavors.
A kitchen counter away from direct sunlight is the right location for most home ferments during active fermentation. Move finished ferments to a cold root cellar or refrigerator to slow or stop further acidification.
Equipment You Need and Equipment You Do Not
One of lactic acid fermentation’s great advantages for homesteaders is the minimal equipment requirement. Here is what actually matters:
Essential:
- Wide-mouth mason jars. Quart jars work for small batches and single-vegetable ferments. Half-gallon jars suit larger volumes. Gallon jars and traditional ceramic crocks are appropriate for bulk seasonal production.
- A weight to keep vegetables submerged. Anything non-reactive that fits inside the jar works: a smaller jar filled with water, a zip-lock bag filled with brine, a folded cabbage leaf pressed under a stone. The goal is keeping plant material below the brine surface.
- A loose lid or airlock. You do not need a sealed lid during active fermentation. CO2 needs to escape. A regular mason jar lid set loosely on top works fine, as does a purpose-made fermentation airlock lid. The goal is to exclude oxygen while releasing gas.
- Non-iodized salt and a kitchen scale.
Not needed:
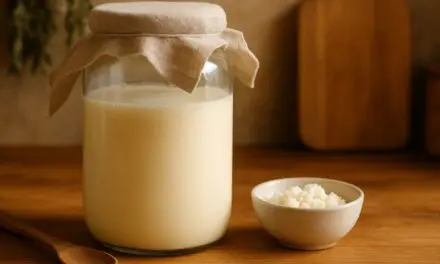
- Starter cultures or whey. Wild fermentation using only the bacteria on the vegetable surface works reliably for all standard vegetable ferments.
- Special crocks or specialized fermentation equipment. They are nice but not necessary.
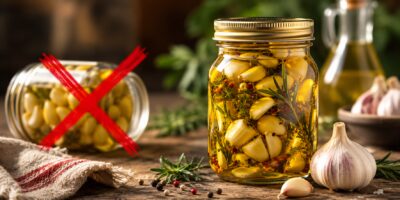
- Adding vinegar to lacto-fermented vegetables is a completely different process and does not produce the same result. Vinegar pickles are acidified mechanically; lacto-fermented vegetables are acidified biologically by living bacteria.
The Basic Method Step by Step
Step 1: Prepare your vegetables
Wash your vegetables thoroughly. Shred, slice, or leave whole depending on the ferment. For cabbage-style ferments like sauerkraut, shred finely. For cucumbers, leave whole or halve. For carrots, slice into rounds or sticks. Remove any damaged or rotting sections completely.
Step 2: Salt and massage (for dry-salted ferments)
Weigh your shredded vegetables. Add salt at 2 percent of the total vegetable weight. Massage the salt into the vegetable with clean hands for 5 to 10 minutes until it releases significant liquid. The vegetable should go limp and a visible puddle of brine should accumulate in the bowl. This liquid is your fermentation brine.
Step 3: Pack the jar
Pack the salted vegetable into your jar tightly, pressing down firmly as you go. The goal is to eliminate air pockets and force the brine to rise above the vegetable level. Pour any remaining brine from the bowl over the top.
Step 4: Weight and cover
Place your weight on top of the packed vegetables to hold everything below the brine. The liquid level should be visibly above the plant material. Set the lid loosely on top and place the jar at room temperature out of direct sunlight.
Step 5: Monitor and taste
Check your ferment daily for the first several days. You should see bubbling activity within 24 to 48 hours as CO2 is produced. Press the weight down if vegetables are floating above the brine. Taste starting around day 3 or 4 and continue fermenting to your preferred level of sourness. Most homesteaders find 7 to 14 days at room temperature produces the best balance for regular eating.
Step 6: Refrigerate or store
When the ferment reaches your preferred flavor, seal the jar and move it to cold storage. In a refrigerator it will keep for months, continuing to slowly acidify. In a cold root cellar at 35 to 40 degrees Fahrenheit, it will keep for 4 to 6 months or longer.
Best Vegetables for Lactic Acid Fermentation
Almost any vegetable can be lacto-fermented, but some work better than others as starting points.
- Cabbage (sauerkraut): The classic for good reason. High water content, natural LAB populations, and enough sugars to drive a reliable fermentation. Nearly foolproof for beginners.
- Cucumbers: The original dill pickle before vinegar took over. Whole cucumbers ferment well in a 5 percent brine with garlic and dill. Ferment quickly at room temperature (3 to 5 days) for a fresh half-sour flavor.
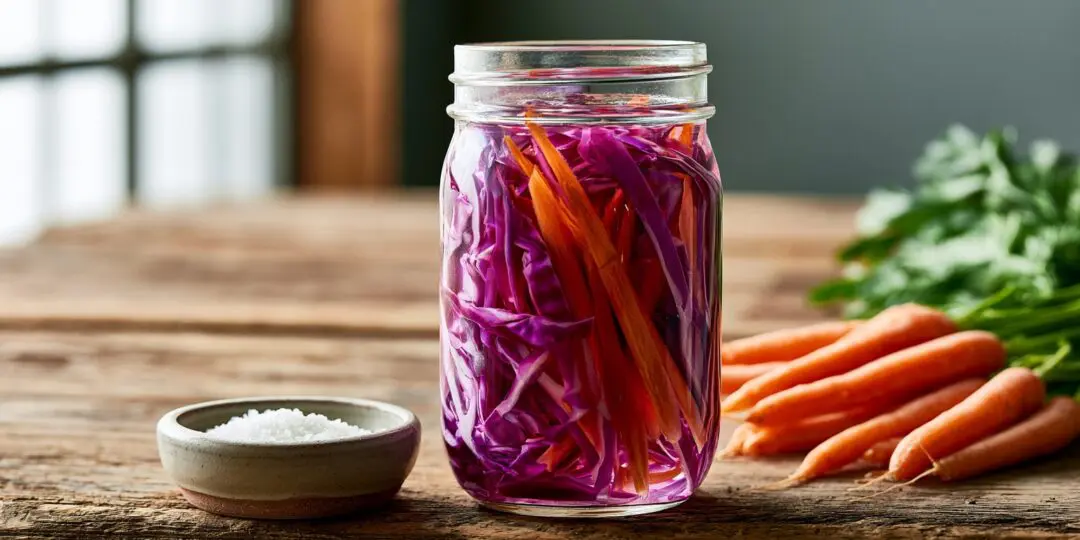
- Carrots: Dense texture survives fermentation beautifully. Slice into sticks or coins. Their natural sweetness produces a mild, slightly tangy ferment that keeps its crunch.
- Beets: Fermented beets produce a deep, earthy brine used in traditional Eastern European cooking. They take longer than softer vegetables and benefit from a few weeks of patience.
- Garlic: Whole garlic cloves ferment into something milder and more complex than raw garlic. A long ferment of 3 to 4 weeks at room temperature produces a deeply flavored result.
- Mixed vegetables: Any combination of firm vegetables works. Cabbage with carrots, cabbage with apple, beet with cabbage. Vary the proportions and see what you like.
Health Benefits: What the Research Shows
The health benefits of lacto-fermented foods have attracted serious scientific attention in recent years. The core mechanisms are reasonably well established: fermented vegetables deliver live Lactobacillus and related bacteria directly to the digestive tract alongside the prebiotic fiber of the vegetable itself. Unlike probiotic supplements, fermented foods provide a diverse microbial community rather than a single standardized strain, and they deliver those organisms within a food matrix that supports their survival.
Published research has documented that Lactobacillus strains found in fermented vegetables produce short-chain fatty acids (SCFAs) as a metabolic byproduct of fermentation in the gut. SCFAs including butyrate and propionate are primary energy sources for colon cells and play roles in reducing intestinal inflammation and supporting the gut barrier. A 2024 study in the International Journal of Food Science and Technology confirmed that lactic acid fermentation of vegetables enhances nutritional value, improves functional properties, and reduces harmful compounds like excess nitrites.
Fermentation also increases bioavailability of certain nutrients. The acidic environment and enzymatic activity during fermentation break down antinutrients like phytic acid that otherwise bind minerals and reduce absorption. This means the iron, zinc, and magnesium in fermented vegetables are more available to the body than in the same vegetables eaten raw or cooked.
One important caveat: heat destroys live cultures. If you cook fermented vegetables before eating them, you lose the probiotic benefit. The fiber, flavor, and preserved nutrients remain, but the living bacteria do not survive temperatures above roughly 115 degrees Fahrenheit. For maximum probiotic benefit, eat your ferments cold, straight from the jar.
Troubleshooting Common Problems
White film or kahm yeast on the surface
A thin white or cream-colored film on the brine surface is almost always kahm yeast, not mold. It is a harmless surface yeast that forms when vegetables are exposed to air or when fermentation slows. Skim it off, press the weight back down to submerge everything, and continue. It affects flavor slightly but is not a sign of a failed ferment.
Soft or mushy texture
Soft ferments are usually caused by too little salt, too high a temperature, or leaving the ferment too long at room temperature. Using grape leaves, oak leaves, or horseradish leaves in cucumber ferments adds natural tannins that help maintain crispness. For cabbage ferments, ensure your salt level is at least 2 percent and ferment at the cooler end of the temperature range.
No bubbling activity after 48 hours
If you see no CO2 activity after two days, check that vegetables are fully submerged, that you used non-iodized salt, and that the temperature is warm enough. Cold conditions significantly slow fermentation. Move the jar to a warmer spot and give it another day.
Fuzzy mold (green, black, or pink)
True mold with fuzzy texture is different from kahm yeast and indicates that plant material was exposed to air above the brine. Discard any molded material and the vegetable immediately below it. If mold has penetrated deeply into the jar, discard the batch. The best prevention is ensuring vegetables stay fully submerged throughout the entire ferment.
Very salty flavor
This usually means too much salt was used or the ferment was not given enough time. Time does not reduce saltiness, but if the sourness is not there yet, extended fermentation will bring the flavors into better balance. For future batches, weigh your salt carefully and target 2 percent by weight.
Learn the Food Preservation Skills the Amish Still Use Today
Modern refrigeration is convenient, but it also creates a single point of failure. The Amish have preserved food safely for generations without depending on electricity, using practical methods that continue to work during power outages, supply chain disruptions, and hard times.
The Amish Ways Book reveals dozens of traditional self-reliance skills, including food preservation techniques, root cellar storage, fermentation, canning, smoking, drying, and other time-tested methods that helped families keep food on the table long before modern conveniences existed.
Inside you’ll discover:
- Traditional Amish food storage methods
- Natural preservation techniques that require little or no electricity
- Practical homesteading skills anyone can learn
- Old-fashioned kitchen wisdom that still works today
- Proven ways to reduce dependence on grocery stores
If learning lactic acid fermentation has sparked your interest in traditional food preservation, The Amish Ways Book is an excellent next step toward building a more resilient and self-sufficient household.
Building Fermentation into Your Homestead
The real power of lactic acid fermentation at homestead scale is not the single jar of sauerkraut. It is the rhythm of putting up large batches during peak harvest and having preserved vegetables ready to eat through winter and spring without touching the freezer or canning shelf.
A half-gallon jar of fermented cabbage uses roughly two pounds of cabbage. A ceramic crock holds ten to twenty pounds. If you grow a row of cabbage, you can put up enough sauerkraut in a single afternoon to supply your household for four to six months. The same principle applies to cucumbers in summer, beets in fall, and whatever glut the garden produces.
Unlike canning, fermentation requires no heat processing and no special equipment. Unlike freezing, it requires no electricity. The ferment itself is self-regulating: as the science confirms, the acid environment it creates is inhospitable to pathogens and self-preserving once established. This makes lacto-fermentation one of the most genuinely resilient food preservation methods a homesteader can rely on.
Start with one jar of sauerkraut. Get the salt right, keep it submerged, taste it as it develops. Once you have done it once successfully, the process is demystified and you can scale it to whatever your garden produces.
You may also like: 
Don’t Forget To Join Our WhatsApp Channel For More Homesteading Guides
The Only Food That Grows Almost Faster Than You Can Eat It (Video)
Fermented Tea – A Complete Guide to Making, Using, and Storing Your Own at Home


