I’ve been buying commercial feed since I began homesteading, but the more I learn new stuff, the more I wonder if it’s the right choice.
The first time I started researching alternative feed options was a few years ago when prices jumped again. I wanted to cut costs while still giving my livestock all the food it needs. There are many solutions available, but this one surprised me the most because it is incredibly reliable, it offers lots of nutrients, and it is very easy to try on your homestead.
You need no soil, no pasture, and most importantly, no expensive setups.
Today I want to show you how to do this project yourself. I’ve tried to write it as explicitly as possible so anyone can follow it at home. I hope you’ll like it and maybe give it a try.
How $25 Turns Into 300 Pounds of Feed
The concept for this is very simple and I’ll jump straight into it. You soak barley grain, spread it on trays, water it a few times a day, and in about a week, you’ve got a thick green mat of shoots and roots. I am sure your animals will love this fresh treat and will not be shy when they devour every bit of it.
Now, the way I presented it here is a simplistic version that helps you understand the concept. The guide will show you exactly what steps to follow and also give you a heads-up regarding potential problems that might appear along the way.
Here’s why this project is worth doing:
- You get way more feed than you started with. Two pounds of dry barley turn into 6 to 8 pounds of fresh fodder.
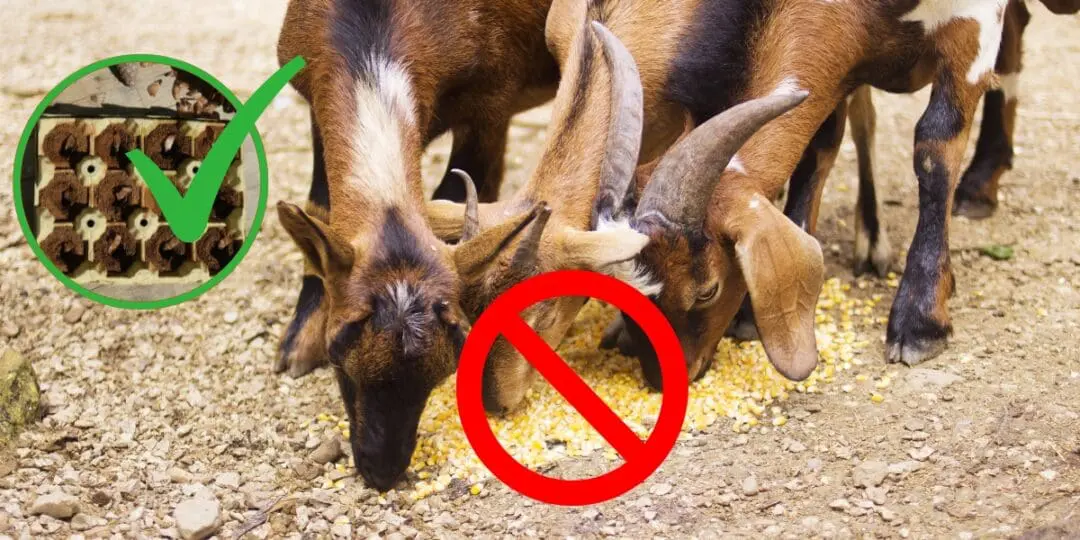
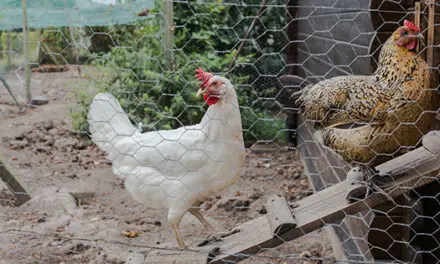
- Animals digest it better than dry grain. When barley sprouts, the starches break down into simple sugars. You’re basically pre-digesting the grain for your livestock. Every animal on your homestead will eat it. Goats, sheep, chickens, pigs, rabbits, cattle, horses. And they eat the roots too, so there’s basically no waste.
- Weather doesn’t matter. You grow it indoors. So when your pasture is scorched in August or frozen in January, you’ve still got fresh greens coming.
- It barely takes up any room. A small wire shelf with stacked trays is all you need. Now, this depends on how big you want the project to be. If you have more animals, you’ll need more sprouts, so it will take up more space.
If you want a more serious project that you can use for much more than growing feed, skip the wire shelf with trays and build a wall-hanging garden. This is a project very dear to me because that’s how I started growing my first batch of herbs. Building this takes only 3 hours and the materials are very cheap compared to what it offers. You may already have some of the materials on your homestead, which means you can also build it for free.
Imagine having a full garden that takes 0 space! I know this sounds incredible, but this is the magic of growing things vertically.
👉 Click here to see what materials you need and also get the full instructions

Now, a fair warning before we go further. A North Dakota State University review looked at the research on sprouted grain and found that while it doesn’t lose nutritional value (and may become more digestible), it didn’t lead to faster weight gain. Fodder isn’t some miracle feed. It’s a supplement. A really good one. But your animals still need hay, pasture, or grain as their main diet.
The Math Behind $0.50 Per Feeding
First of all, I want to show you the numbers.
A 50-pound bag of feed-grade barley costs about $25 to $30 at most feed stores or co-ops. Once you sprout all of it, you end up with roughly 300 to 350 pounds of fodder.
Do the math and that’s about $0.08 to $0.10 per pound of fresh feed. Even after you add in the water and a little electricity you are using for this project, you’re still under $0.12 a pound.
Here’s what a single feeding actually costs you:
| Animal | How Much Fodder | What It Costs You |
| Goat or sheep (100 lb) | 1 to 2 lb | $0.10 to $0.20 |
| Dairy cow (supplement) | 10 to 20 lb | $1.00 to $2.00 |
| Pig (200 lb) | 3 to 5 lb | $0.30 to $0.50 |
| Rabbits (4.5 lb) | A small handful | About $0.02 |
| Chickens (flock of 6) | 1 lb total | $0.10 |
If you’re running a small homestead with goats, chickens, or rabbits, you’re easily under $0.50 per feeding.
Sprouted fodder is about 88% water! So pound for pound, the nutrition costs more than dry grain. You’re not replacing hay or grain here. You’re adding fresh vitamins, enzymes, and moisture on top of what you’re already feeding. Please keep this in mind.
What You Need
Most of this you probably already have lying around. So, is the perfect project to start this spring.
Seeds
Feed-grade whole barley from your local co-op, Tractor Supply, or farm supply store. Has to be untreated and not dehulled. The whole grain needs to be intact or it won’t sprout. Don’t grab lawn seed or bird seed. Those are usually coated with chemicals. Brewery supply stores sell “malt barley” that works great too.
Trays
Standard 10 × 20-inch nursery trays with drainage holes (called 1020 trays). Get the heavy-duty ones. The thin ones crack under wet grain. Grab at least 7 to 8 so you can stagger your batches and pull a fresh tray every day.
Soaking bucket
A regular 5-gallon bucket. If you want to get fancy, drill holes in one bucket and nest it inside another for easy draining.
Shelving
A wire rack or simple PVC frame to stack trays. Just make sure water drains off the upper trays without drowning the ones below.
Light
A window or a cheap LED shop light for the last couple days of growth.
Temperature
Keep your growing area between 60 and 75°F. Up north, a heated basement works in winter. Down south, shade and a fan keep things from getting too warm. Airflow matters more than anything when you want to prevent mold.
Sanitizer
Hydrogen peroxide, white vinegar, or dilute bleach. You’ll use this to treat seeds before soaking and to scrub trays between batches.
How to Grow It (Step by Step)
Pay close attention here, especially to the sanitation and drainage parts. Mold kills more fodder systems than anything else, and it almost always comes down to too much water sitting around or not enough air moving through.
Day 1: Measure, Sanitize, and Soak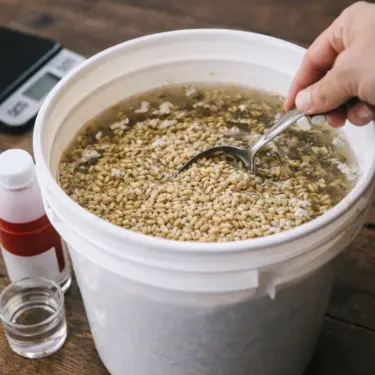
Grab your kitchen scale and weigh out 2 pounds of whole barley. That’s roughly 6 cups if you don’t have a scale, but weighing is the preferred method as it’s more accurate. If you’re only feeding a small flock of chickens or a couple of rabbits, 1 pound per tray is plenty.
👉 Before You Drink Another Cup of Coffee, Read This!
Now fill a 5-gallon bucket about three-quarters full of cool water. Not warm, not hot. Cool tap water. Add one capful of hydrogen peroxide or about two tablespoons of white vinegar. This is your sanitizing soak and it’s a step that you should not skip. The seeds you buy are not clean; they are full of mold spores. Adding vinegar or hydrogen peroxide destroys these spores before they get a chance to grow.
Dump your barley into the bucket and stir it around for a minute. You’ll see debris and empty husks float to the top. Skim those off. Then let the whole thing sit for 12 to 24 hours. The seeds will plump up and absorb water. That’s exactly what you want. They’re “waking up”.
Day 2: Drain, Rinse, and Spread
After the seeds are soaked in water, drain the bucket completely. If you’re using the double-bucket setup with holes drilled in the top bucket, just lift it out and let it drip. If not, pour the seeds into a colander or strainer.
Now rinse them well. Run clean water over the seeds and swish them around until the water coming off is clear, not cloudy or foamy. This washes off any leftover residue and gets rid of that slightly sour smell from the soak. Give them a good shake to get as much water off as possible.
Spread the drained seeds across your tray in a single layer and make it as even as possible. You’re aiming for about ¼ to ½ inch deep. This part matters more than you’d think. If the seeds are piled too thick, air can’t circulate between them and the bottom layer stays wet. That’s exactly how mold starts. If you can see the bottom of the tray peeking through in a few spots, that’s fine.
Set your trays on a level shelf or rack with something underneath to catch dripping water. A second tray without holes, a shallow baking pan, anything that keeps water off your floor. If you’re stacking multiple trays, angle them slightly or space them so runoff from the top tray doesn’t pour directly onto the seeds below.
Days 2 to 3: Dark and Damp
Your seeds don’t need any light for the first couple of days. In fact, darkness actually helps them focus energy on sprouting. Keep them in a dim corner of the room or flip an empty tray upside down on top as a cover.
👉 How the Amish Have Thrived for Centuries Without Depending on a Single Modern Convenience
Water lightly 2 to 4 times a day. Here’s how: take a spray bottle and mist the entire surface evenly, or gently pour about a cup of water across the tray and tilt it so the water runs through the seeds and out the drainage holes. The keyword is “through.” Water should move across the tray and drain out, not sit there. If you look at your tray after watering and see a little pool forming at one end, tilt the tray to let it drain or water less next time.
The seeds should feel damp to the touch, like a wet sponge. A little moist.
By the end of day 2 or early day 3, you’ll see tiny white tails poking out of the seeds. That’s the root starting to push through.
One more thing. Save that runoff water. Pour it on your garden or houseplants. It’s loaded with nutrients from the sprouting grain.
Days 4 to 6: Introduce Light
Somewhere around day 3 or 4, you’ll notice green shoots starting to push up. That’s your signal. Move the trays to a brighter spot near a window, or turn on your LED shop light. Take the covers off. The shoots need light now to keep growing and turn that deep green color.
Keep watering on the same schedule, 2 to 4 times a day. At this stage, the root mat is thickening up and the tray holds a bit more moisture, so watch for standing water more closely.
This is also when you need to watch for mold. Look for fuzzy white or gray patches on the surface or along the edges of the tray. Mold looks different from the white roots. Roots are clean, firm little threads.
Mold is fuzzy, sometimes slimy, and often has a musty smell. If you spot a small patch early, point a fan directly at the tray and cut back your watering by one round per day. That extra airflow usually handles it.
But if the mold is spreading across a large section of the tray, don’t try to save it. Dump the whole thing, scrub the tray with bleach, and start that batch over. It happens, especially when you’re dialing in your system. Don’t let it discourage you.
Keep the room between 60 and 75°F the whole time. Above 75 and you’re basically rolling out a red carpet for mold. Below 60 and growth slows way down.
Days 6 to 8: Harvest Time
By day 6, maybe day 7 or 8, depending on your temperature, the sprouts should be about 6 to 8 inches tall. What you’re looking at is a thick, carpet-like mat. Bright green shoots on top and a dense web of white roots on the bottom, all tangled together and holding the mat in one piece.
Slide your hand under one corner of the mat and peel it up. It should lift out of the tray in one solid piece, like rolling up a section of sod. Give it a gentle shake over the tray to knock off extra water.
👉 The 5-Minute Warning Most Americans Will Ignore
If you want to track how your system is performing, toss the mat on a scale. You should be getting 6 to 8 pounds of fodder from every 2 pounds of seed you started with. If you’re getting less, you might need to water a little more or check your temperature.
Feed it right away. Don’t store it. Fresh is best. Your animals eat the whole mat, shoots, and roots, so there’s nothing to throw away.
For chickens, tear the mat into fist-sized chunks they can peck apart. For goats and sheep, cut it into strips or fold it in half and toss it in the feeder. Portioning it out also helps if you’ve got animals that hog the feed and push others out.
Clean Up and Go Again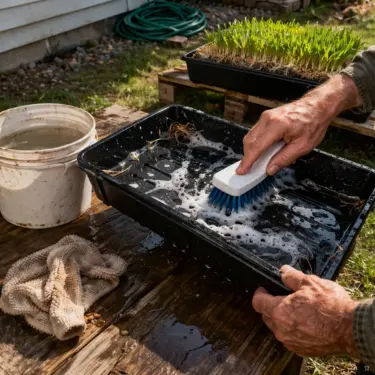
As soon as you pull the mat out, scrub that tray. Use a stiff brush with dilute bleach (about a tablespoon per gallon of water) or straight white vinegar. Get into the corners and the drainage holes where bits of root get stuck. Rinse it clean and let it dry completely before you use it again.
Do this every single time. I know it’s tempting to just reload the tray and keep going, but skipping this step is exactly how you end up battling mold and gnats for weeks.
Once the tray is dry, load your next batch of soaked seeds and start the cycle over. If you stagger one new tray every day, you’ll hit a rhythm where you harvest one tray of fresh fodder every morning, right alongside your other chores.
What to Do Next
You’ve got the fodder system down; you’re sure your animals will eat well. Now ask yourself this: what’s your plan for your family?
The average American grocery store carries about three days’ worth of food at any given time. Three days. After that, they’re waiting on a truck. And that truck is waiting on a supply chain that’s been held together poorly and crossed fingers since 2020.
Feed prices are already at record highs. Grocery costs haven’t come down. And every expert is saying the same thing: it’s going to get worse before it gets better. The fodder is a safety net for your livestock and The Backyard Miracle Farm is what will keep you and your family fed in case of an emergency.
It’s a simple, self-contained system that grows fresh vegetables, produces fish, filters water, and runs itself once you set it up. Takes about three hours to build and fits perfectly in a backyard, a patio, or even a balcony.
The worms enrich the soil. The garden feeds the fish. The fish fertilize the plants. And the built-in filtration loop keeps clean water cycling through the whole thing without you lifting a finger.
Even if you’ve already got a garden going, think about what happens in all the scenarios when a regular garden is simply not working. A single bad drought, a late frost, a heatwave that scorches everything in a week. These are things that happen, and you need to be prepared no matter what.
See it this way, your garden is plan A. This is plan B that works even when plan A fails.
👉 Click here and see how the Backyard Miracle Farm works and why it is so popular among homesteaders
How Much Feed Each Animal Needs
Goats and sheep
1 to 2 pounds a day per 100-pound animal. Keep hay out at all times. They need that fiber. And introduce fodder slowly, over 7 to 10 days, so their gut can adjust.
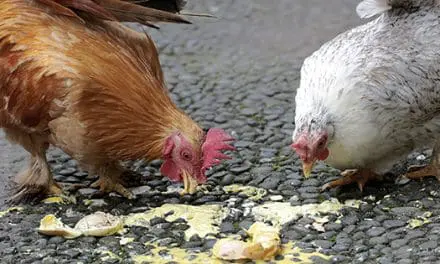
Chickens
About 1 pound a day for six hens. Tear the mat into pieces they can peck at. You’ll see those yolks get darker pretty quickly. Keep grit available.
Rabbits
A small handful a day. They love picking at the roots, which helps wear their teeth down too. Hay stays as the main course.
Pigs
3 to 5 pounds per adult pig on top of their regular grain. They’ll go nuts for the fresh greens, but fodder doesn’t have enough energy on its own to keep them growing.
Cattle
10 to 15 pounds per head as a supplement. Keep it under 15% of their total ration. If you’re milking, watch for a “green” taste in the milk when you feed a lot of sprouts.
Horses
Cap it at 2 to 5 pounds a day. Too much high-moisture feed can give them loose stools. And if your horse has laminitis issues, check with your vet first.
Get Your First Batch Going
This is not completely zero work, but it’s easy work. It fits into morning chores once you’ve done it a few times and the payoff is worth it.
You’ll get a steady supply of fresh feed that doesn’t depend on the weather, the feed store’s inventory, or what hay costs this season.
All you need is a $25 bag of barley and a stack of cheap nursery trays. Maybe you’ll give it a try!
You may also like:

Join Our Homesteading WhatsApp Community!
The Plants You Should Eat For Each Organ In Your Body (Video)
What Do Pigs Eat? A Practical Guide for Healthy, Happy Animals
You Should Never Keep These Livestock Together
Automatic Chicken Feeder That Needs No Electricity: How Do You Make It?
How $20 Can Feed Your Chickens All Spring


