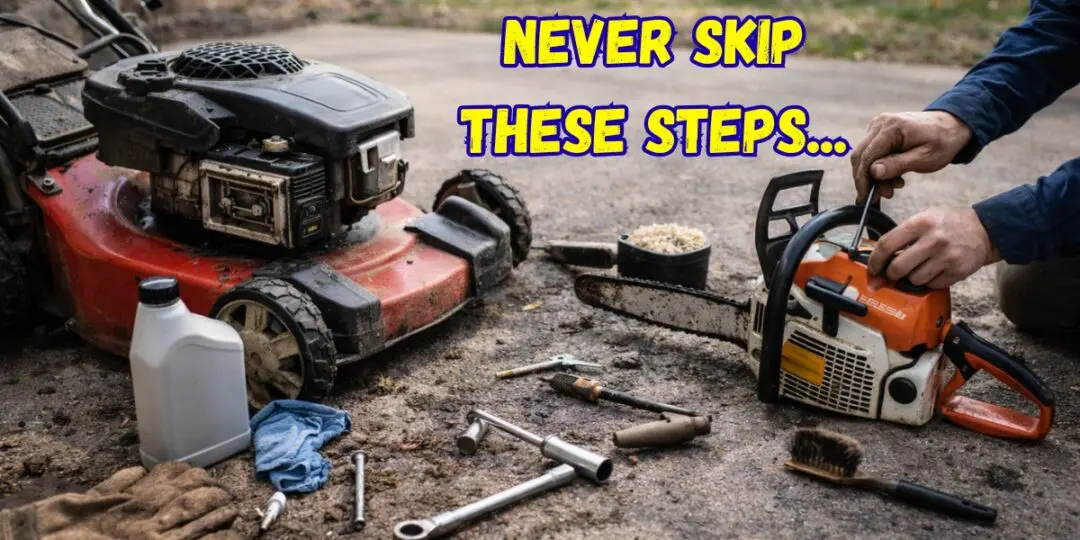
As soon as spring comes, it’s time to get out and about and do some summer maintenance. But before I start on the yard and garden, the equipment we use needs some good spring maintenance as well.
I’m going to cover basic maintenance you should do each spring for lawn mowers, tractors, chainsaws, trimmers, and roto tillers. Many are gas powered, but I’ll cover electric and battery rechargeable equipment as well.
On a fundamental level, many of these tools need to be cleaned, sharpened, lubed, have their tires checked and repaired or replaced, rust removal, and in the case of gas powered equipment, oil changes, fresh gas and spark plug checks or replacement.
I’ll also give you some tips for getting those stubborn gas powered tools started again for the first time after an idle winter. At the end, I’ll tell you more about a tool and supply checklist you should put together before starting your equipment maintenance.
Lawn Mowers
Whether your lawn mower is self-propelled, a push mower, a cordless lawn mower, or a lawn tractor, they all share some fundamental maintenance needs. Here’s how to approach them:
- Cleanup
After a winter in the shed or garage, it’s possible your mower has picked up some scattered dirt and debris. Then again, we sometimes park them for the winter with grass clippings and leaf litter still scattered on the deck and underneath around the blades. Take the time to brush, gently scrape, and wipe down the exterior of the mower and any compacted grass under the blade housing.
- Sharpening
While you’re cleaning the blade housing, that’s a good time to sharpen the blade. You can do it with the blade still attached, or you can as well remove it. If it’s chipped and very dull, it might be wise to replace it if sharpening doesn’t work.
There are mower blade sharpening attachments that you can put onto a power drill to make short work of mower sharpening. You could also use a file. A sharp blade cuts the grass better and makes for a healthier lawn.
- Tire Check
Whether you have inflated tires or solid tires, take your time to check the tires, the axle, and the alignment. Adjust for anything that’s off, and if inflatable, check the tire pressure and refill. If a tire is flat, refill it and if you’re not sure, spray some soapy water on the tire. If you see bubbles, either repair the tire or replace it.
- Air Filter
Many people forget to check the air filter on their mowers. All mowers have one. Remove the screw or wingnut that holds the filter cover and remove the filter, and inspect it. Brush it off if it’s dusty or dirty. Don’t wash it with water. That will create havoc with your carburetor and engine. If in doubt, replace it. They’re not expensive.
- Empty and Refill the Gas Tank
Old gas is bad gas. If you have gas in the tank from last Autumn, drain it. Some people add a fuel additive like Stabil to get through the winter. Stabil helps prevent a varnish from developing from the gas that could coat the carburetor and pistons. Even then, it’s wise to get rid of the old gas. Refill with regular gas.
- Check the Sparkplug
A fouled spark plug can cause a mower to not start or misfire while mowing. Detach the sparkplug wire and inspect the end of the plug. If it’s blackened and looks corroded, you can clean it up with a wire brush or replace it. Just remember to bring the old plug with you when you head to the store.
Another sparkplug maintenance step is checking the gap. That’s the difference between the curved end of the plug and the center rod. There are gap measures and adjusters sold at hardware and auto stores. Your owner’s manual should indicate the best gap.
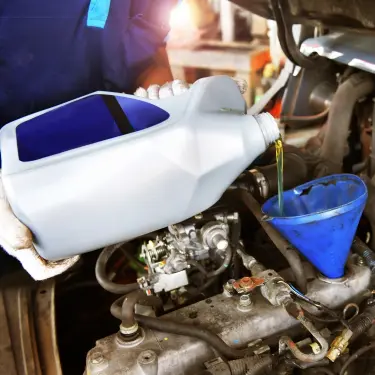
- Oil Change
This is a big one. As a general rule, you should change the oil in a lawn mower every 50 hours. But who’s counting? An easier rule of thumb is to change the oil every spring.
- Your first step is to start the motor and let it run for a couple of minutes. That will heat the oil and allow it to drain better.
- Place an oil pan under the oil drain plug and let it drain. If you can, you might want to tip the mower a bit to get it all out.
- If your mower has an oil filter, unscrew it and replace it with a new one.
- Screw in the drain cap and refill with either 5-W-30 or 10-W-30 oil. Be careful. You don’t want to overfill the oil reservoir. Check your owner’s manual or look it up online and slowly add the oil while checking with the dipstick to get to the proper level.
- After filling the oil, start it again and let it run for a minute and check the oil level again. If it’s off, add or drain some oil until you’re at the right level.
- Replace the oil cap and you’re good to go.
- It also makes sense to check your oil level periodically during the season. Carefully add oil as needed.
- Finally, check all nuts, bolts, and other attachment hardware, particularly on the handle and the mower housing.
Fixing your lawnmower and getting it back in shape is something most homesteaders are able to do. But here’s what I’ve been thinking about lately.
Your mower breaks down, and then you fix it. Your fence gives out, and you very skillfully patch it. Your garden needs work, and you get it done in no time. That’s the everyday side of homesteading, and you’ve got it covered.
But what is going to happen when the power goes out for a week? Or when the water stops running? These are some scenarios that are more and more likely to happen, and your best defense is to have systems in place that get you covered.
This is something totally different from your day-to-day maintenance tasks you have to deal with on a homestead, but it’s still part of the homesteading life and a huge step towards the self-sufficiency all of us strive to achieve.
Here’s where No Grid Survival Projects will help you. With over 75 DIY projects, each one spelled out with the same kind of detail you’d expect from an user guide. Materials list, cost breakdown, difficulty level, time to complete, photos, and full walkthroughs for every single build.
- Water filtration,
- Solar power setups,
- Food preservation systems,
- Off-grid heating, home security,
- Communication devices,
- And dozens more.
You already know how to keep your homestead running day to day, but how would it be to keep it running even when the world stops?
👉 Click here to get your copy of No Grid Survival Projects while it’s still available

Chainsaws
If you think a lawn mower is hard to start in the spring, you obviously don’t own a gas powered chainsaw. Those of us who do know the constant pulling frustration, trying to get it started. We’re going to cover some tips at the end about how to get a stubborn gas powered engine started, but some Spring maintenance can get you off to a good start with your chainsaw.
- Clean It Up
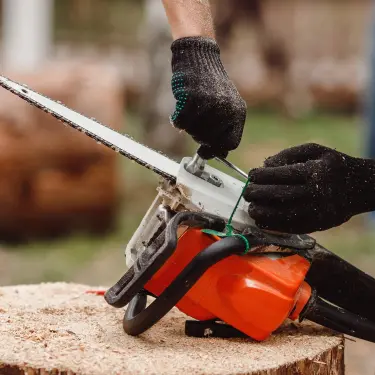
- This shouldn’t be too hard, and a damp washcloth should do the trick.
- The chainsaw chain and the chain bar sometimes rust. If that’s the case, use a rust remover to clean it up and after it’s dry, lightly oil it with chain saw lubricant.
- Some people take off the chain and soak it in a small bowl of chain lube, and don’t forget to check and fill the chain lubricant reservoir.
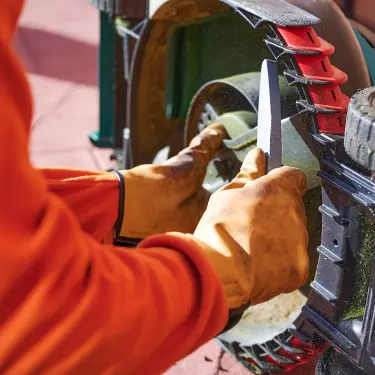
- Sharpen the Chain
Before you get that chain covered in lube, sharpen it. There are various tools you can use to do this, but most people use a round file for chainsaw sharpening.
- It’s best to leave the chain on the chainsaw while sharpening. You just travel down the chain and hold the file at an angle to the curved blades to sharpen them.
- Pull the chain around the bar to keep the teeth on top where they’re easier to sharpen.
- Check the Sparkplug
It’s always important to check the sparkplug in a gas engine, but it’s especially important with a chainsaw. Unlike many gas powered engines, chainsaw engines run on a gas and oil mixture. The addition of oil to the gas makes it burn dirtier than pure gas, and as a result, sparkplugs are more likely to get fouled.
- Make sure the spark end is clean and not corroded, check the gap and if in doubt, just replace it. They don’t cost much and you’ll not only get a fast start but a steady idle.
- Empty and Refill the Gas
It’s important to empty the gas from the chainsaw in the Spring. Adding Stabil in the Fall is always a good idea, but even then, get rid of the old gas.
- Mix up a new gas/oil mixture and refill the gas tank.
And by the way, because chainsaws are two-cycle engines and burn a gas/oil mix, you don’t have to change the oil. However, as we already mentioned, don’t forget to add chain and bar oil to the reservoir, usually located on the top right by the blade.
- One Last Thing
- Make sure all bolts are tightened, especially the bolts connecting the chain bar to the engine housing.
- Also, remember to adjust the tension on the chain. There’s a screw attached to the chain bar that lets you do that. You don’t want it too loose, or so tight that it binds. Be Goldilocks and get it just right.
Trimmers
Trimmer maintenance is straightforward, but here again, most trimmers run on two-cycle engines, so you’re once again dealing with a gas/oil fuel mixture.
- Clean up the Trimmer Housing
The trimmer end is where the action is, and both mud and caked grass clippings build up.
- Scrape off under the trimmer housing and rinse off the trimmer head.
- Replace the Trimmer wire/string
Most trimmers use a hard, polyurethane string to do the trimming.
- Remove the housing or cartridge that holds the wire and restring it based on the owner’s manual instructions. Make sure the end of the trimer wire is emerging from the holes in the cartridge.
- Sharpen the blade on the cutter for the trimmer wire. Under the trimmer hood is usually a small blade that cuts excess trimmer wire. Make sure it is not clogged and sharpen with a file if it’s dull.
- Empty and refill the gas/oil mixture.

- Empty the gas tank and refill with a new gas/oil mixture based on the owner’s manual instructions. Sometimes the recommended gas/oil mix is on a label by the gas cap.
- Check the Spark Plug!
Here again, we usually have a 2-cycle engine with a gas/oil fuel mix. Fouled spark plugs are common.
- Disconnect the spark plug wire and remove the plug.
- Inspect the spark end of the plug and scrape with a wire brush if fouled or replace.
- Check the gap with a gap gauge and adjust if necessary.
- Reinstall the plug.
- Tighten Hardware
- Check to make sure all nuts and bolts are tight, especially on the handle attached to the trimmer and the trimmer head and hood.
- Test the trimmer. Start it and if you have an automatic wire dispenser in the string cartridge, tap it on the ground to see if the string wire is running out of the cartridge correctly.
👉 This Military-Inspired Device Can Give You Over 60 Gallons of Water Per Day! Show Me the Blueprint
Tractors
Roll up your sleeves, there’s a lot to think about with tractors. Tractor sizes vary, but they have many things in common when it comes to maintenance.
- Cleaning Time
Tractors can get messy.
- Hose off or power wash your tractor to remove mud, dried grass, leaves and debris from the tires, wheel wells and mower deck or any other part of the tractor that has captured dirt and debris.
- Check the Tires
Tire size on a tractor varies depending on the size of the tractor. Almost all of them are air-filled, pneumatic times. Some have inner tubes and some are tubeless. The first step is to check for leaks in the tires.
- The easiest way to tell if there’s a leak in a tire is if it is low or flat in the Spring. That’s a pretty good clue that there’s something wrong with the tire. The trick is finding the leak.
- If the tire is small enough, you can remove it, inflate it, and immerse it in water. Bubbles will lead you to the leak.
- There are various ways to repair a tire, and you can find a variety of solutions on the Internet. If they are tubeless tires, they’re usually fixed with a rubber plug coated in adhesive and inserted into the gash or hole.
- For tires with a tube, there are also tube repair kits. You remove the tube, fill it, and immerse it to find the bubbles and repair the leak with the tube repair kit. The kit will have instructions for use.
- If there are no leaks in any tires, check the recommended tire pressure usually embossed on the side of the tire and fill them to the correct pressure.
- While you’re doing this, take the time to rinse the hubs, tires, and the cowling over the tires. Grass and mud will often collect.
- Sharpen the Blades
If your tractor is a lawn tractor.
- Sharpen the mower blades as we indicated earlier for mower blade maintenance.
- Empty and Refill the Gas
It’s not easy to empty the gas on a tractor because you can’t easily tip it to empty the gas tank.
- Siphon it off and refill it with fresh gas.
- Check the Sparkplugs
Some tractors have more than one sparkplug, so be sure to check all of them for fouling and replace or clean where needed.
- Change the Oil
Changing the oil on a tractor is the same process as for other gasoline engines. It should also be done every spring unless you use it daily during the summer. In that case, keep track of the hours and change based on the recommendation in the owner’s manual.
- To change the oil, start the tractor and run it for 5 minutes and turn it off and drain the oil into an oil pan.
- Remove the oil filter and replace it with a new one.
- Refill the oil to the proper level again using 5-W-30 or 10-W-30 weight oil.
- Run the tractor for a couple of minutes then turn it off and check the oil level again. Drain or top off as needed.
- Check the Battery and Headlights
Many tractors are started with a battery and even have headlights. Make sure all is well.
- Check the battery terminals for corrosion and clean with vinegar if necessary.
- Check to make sure the cables are tightly secured to the battery terminals.
- If you can check the water level in your battery, make sure it’s filled to the line indicated in each plate cell.
- Turn on the headlights and replace the bulb(s) if they have burned out.
- Test the automatic start to make sure all is well.
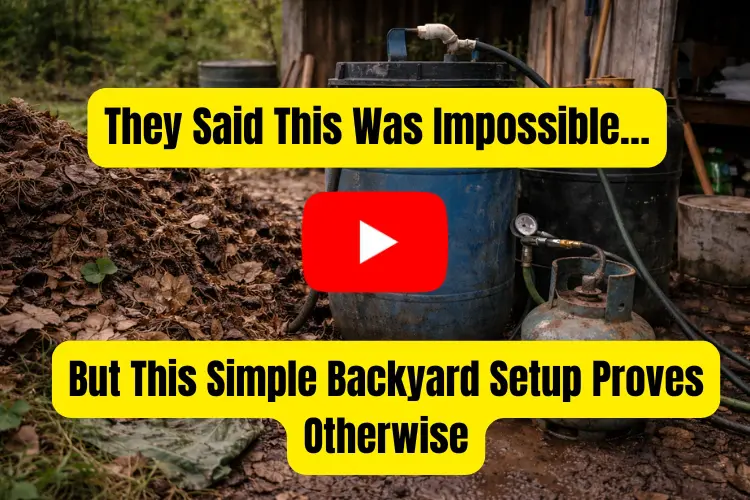
If you no longer want to spend money on gas, I want you to know that you can make it yourself at home and all you need are leaves and manure. I know this might sound crazy, but this is actually a real project you can make on your homestead.
Here are some reasons to make your own gas:
- You will no longer depend on the regular LGP cylinders or gas pipelines for cooking.
- You will handle household waste more effectively because everything will turn into gas (food scraps, fallen leaves, and other organic materials).
- You will be more self-sufficient.
If you want to see how to make this project at home, watch the video below.
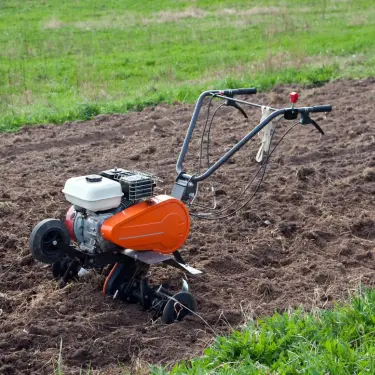
Roto Tillers
There are two styles of roto tiller. Front-Tine Tillers and Rear-Tine Tillers. Maintenance is essentially the same.
- Give it a Good Rinse
Roto tillers literally immerse themselves in dirt and mud.
- Start your maintenance with a good rinse under a hose or power washer.
- Check the Tines
Tines can easily get bent or broken, especially if they strike a rock underground.
- Look carefully at all the tines and replace any that are broken.
- If a tine is bent, you can heat it with a blow torch and hammer it back to its original alignment.
- Check that all bolts are tight and lubricate the tine axles.
- Out with the Old Gas and In with the New
- Drain the gas tank and refill with fresh gas.
- Change the Oil
Most roto tillers have 4-cycle engines and have a dedicated oil supply.
- Start and run the tiller for 5 minutes to give the oil a chance to loosen up.
- Empty the old oil into an oil pan under the tiller.
- Add 5-W-30 or 10-E-30 weight oil to the amount indicated in the owner’s manual. Do not overfill.
- Run it again for a couple of minutes and check the oil and adjust if necessary to the fill line on the dip stick.
- Check the Spark Plug
Just like before, disconnect the plug and check for fouling or corrosion and either clean or replace.
About Electric and Battery Powered Equipment
The good news is you don’t have to fuss with gas, oil, and spark plugs, but many of those other maintenance steps are still required. Here’s a quick review.
- If the equipment has blades, make sure they are sharp and not damaged.
- Make sure all equipment is cleaned, but avoid using hoses or power washers. A wet cloth is best. Water and electricity don’t mix and residual water around the motor can cause problems.
- Tighten al nuts and bolts so attachments are secure.
- IF the equipment has tires, check the tires.
- Make sure wires are not frayed and tape or replace them if needed.
- Think about a second battery for battery powered equipment, so you can have one recharging while using the tool.
👉 See How to Get Energy Without Spending 5-Figures on a Solar Panel System…
Maintenance Checklist
If you’re about to do some serious maintenance over a long weekend, here are some tools and supplies you should have on hand, depending on the equipment you’re working on:
Fluids and Lubricants
- Engine oil — SAE 30, 10W‑30, or synthetic small‑engine oil, depending on equipment.
- 2‑stroke oil — For trimmers, chainsaws, blowers, and other gas/oil fueled engines.
- Fuel stabilizer — Prevents varnish and ethanol breakdown during storage. (Stabil)
- Grease — For wheel bearings, pivot points, and auger shafts.
Cleaning and Prep Supplies
- Shop towels or rags
- Nylon and brass brushes
Replacement Parts and Wear Items
- Spark plugs — Common sizes for your equipment.
- Air filters — Foam, paper, or dual‑element.
- Fuel filters — Inline filters and in‑tank pickup filters.
- Oil filters — For riding mowers and larger engines.
Safety and Handling Supplies
- Nitrile gloves
- Safety glasses
- Hearing protection
- Oil drain pan
- Fuel containers — Approved for gasoline storage.
- Funnels — Fuel and oil‑safe.
Helpful Supplies
- Fuel‑system cleaner additive
- Shop‑vac with fine‑dust filter — For debris removal.
Sharpeners
- Mill files — Classic flat files (8–12″) for mower blades, axes, hoes, and shovels.
- Bastard-cut file — Coarse, fast-cutting file for reshaping dull edges.
- Rotary tool (Dremel) — Good for small edges, mower blade touch-ups, and tight spaces.
- Round chainsaw files — Standard manual sharpening (sizes: 5/32″, 3/16″, 7/32″).
- Chainsaw file guide — Holds the file at the correct angle for consistent sharpening.
A Word About Gas
We mentioned that you should always drain the gas that has been in the engine over winter. It could be tempting to just leave the gas tank empty in the Fall. That’s actually a bad idea. A dry engine and carburetor can cause a film or varnish to form. It can happen with a full tank over time as well. That’s why a gasoline additive like Stabil is a good idea.
You add the Stabil to the gas based on the directions on the package and then run the engine for 5 minutes. That moves the Stabil ingredients across all engine parts. Theoretically, the gas is also safe to use over time, but temperature fluctuations during storage can compromise it. Add Stabil in the Fall and drain the gas in the Spring and all should be well.
👉 4,000 Pounds of Organic Vegetables Per Month, With 1/10th The Space…
Starting a Stubborn Engine
Many of us look at that first start of a gas powered engine in the Spring and take a deep breath. Sometimes, in spite of our best efforts, it just won’t start. An easy solution is a starting fluid. It comes in a spray can. You unscrew the spark plug and spray it into the engine above the piston. Screw in the spark plug and reattach the spark plug wire and you will probably be pleasantly surprised.
If you don’t have starting fluid on hand, some farmers have been known to drop a few drops of gas into the engine the same way. That’s up to you.
Keep it Up
It would be nice if maintenance was a once or twice a year thing, but a lot depends on your frequency of use. If you use your equipment on a regular basis, occasional maintenance checks during the season make sense. Just be mindful of how your equipment is working and if something doesn’t seem right – do some maintenance.
You may also like: 
How To Sharpen Your Homesteading Tools In Minutes
Why Do Amish Never Use “Normal Butter”? (Video)
20+ Everyday Tools That Will Save Your Life In The Next Crisis
DIY Tools You Can Make from Bark, Rocks and Trees
Off-Grid Tools You Should Look For At Flea Markets


Starting fluid is for older diesel engines !!
When inspecting a chainsaw chain, the rivets must be checked, because if one is corroded or rusted, the chain can break and injure the operator.