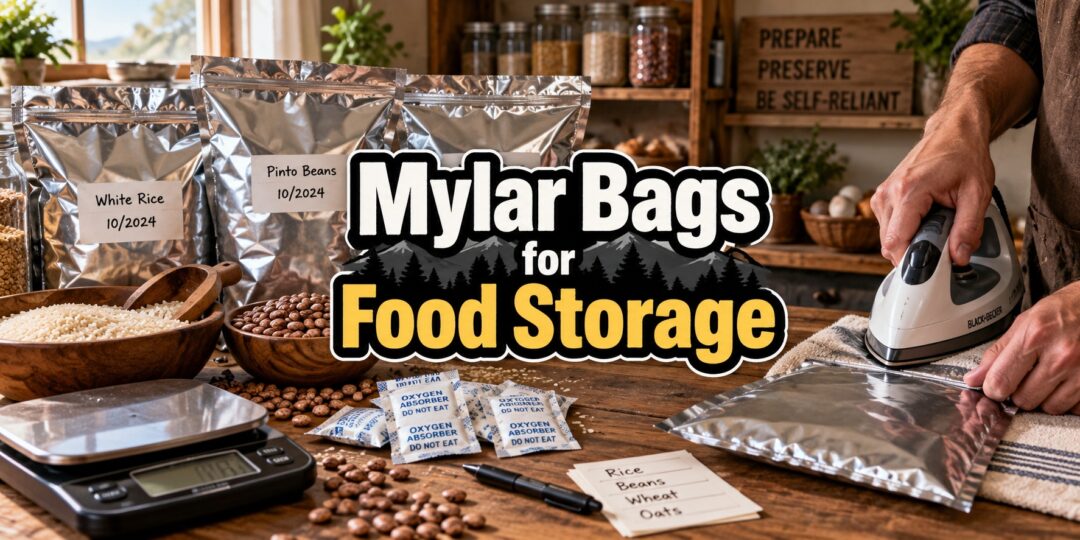
Why I Went All In on Mylar
I stored food in plain plastic bags and buckets for years before I ever touched a mylar bag, and honestly, I thought the fuss over them was overblown. Then I opened a bucket of wheat I had packed in a heavy freezer bag two years earlier and found it tasted stale and slightly off, while a batch of the same wheat sealed in mylar around the same time still tasted fresh enough to grind and bake with.
That one comparison changed how I pack my pantry for good. If you are trying to build real long-term food storage rather than just a slightly bigger version of your everyday pantry, mylar bags are one of the few upgrades that actually deliver on the promise.
What Mylar Bags Actually Are
“Mylar” gets used as a catch-all term, but what you are usually buying is a laminated pouch built from a food-grade polyethylene terephthalate layer bonded to a thin foil layer. Utah State University Extension describes these as PET or PETE laminate pouches, noting that the polyethylene layer is food-grade plastic with no known toxicities, while the foil layer dramatically reduces the transmission of oxygen and moisture through the film.
That combination is what makes these bags so different from an ordinary freezer bag. A regular plastic bag is porous enough that oxygen and moisture creep through slowly over months and years, which is exactly what happened to my wheat. The foil layer in a proper mylar bag essentially shuts that process down.
Why I Switched to Mylar for My Long-Term Pantry
I still use plenty of other bags around the kitchen and homestead, from freezer bags for garden produce to vacuum-seal bags for meat, and I actually wrote a separate guide covering all of those everyday storage bag options in detail. Mylar earns its own separate category because it solves a completely different problem: keeping dry staples genuinely stable for a decade or more instead of a season or two.
The tradeoff is that mylar takes a bit more setup than tossing food in a zip-top bag. You need the right thickness, a way to seal it properly, and in most cases an oxygen absorber sized correctly for the volume of the bag. Once you have that system down, though, repacking your bulk grains, beans, and sugar into mylar becomes a pretty quick weekend task.
Choosing the Right Mil Thickness
Mylar bags are sold in different thicknesses, usually measured in mils, and this is one of the first places I see new preppers get it wrong. A 4 or 5 mil bag is fine for shorter-term storage or lighter contents, but I use 7 mil bags for anything I am packing for the long haul, especially heavier items like rice, wheat, or dried beans that can put real pressure on a seam during handling.
Thicker bags resist punctures from sharp grain edges and rough handling far better than thin ones, and the difference in cost per bag is small compared to the cost of the food you are protecting. I have had a thin bag develop a pinhole leak from nothing more than being stacked under a heavier bucket, and once that seal is compromised, the whole point of using mylar is gone.
Oxygen Absorbers: The Part Most People Get Wrong
Oxygen absorbers are small packets of iron powder that pull residual oxygen out of a sealed container, and getting the size right matters more than most people realize. A detailed Utah State University Extension publication on the topic lays out the standard sizing: a quart container needs a 50cc absorber, a gallon container or a number 10 can needs 300cc, and a five-gallon container needs three 500cc packets to bring the oxygen level down effectively.
Undersized absorbers simply will not pull the oxygen level low enough to matter, and that is a mistake I made on my first few batches by guessing at quantities instead of doing the math based on container volume. It is also worth knowing that some staples, including wheat, beans, corn, and peas, are not especially oxygen-sensitive to begin with, so an absorber helps less with those than it does with something like rice or powdered milk.
The Botulism Question, Answered Honestly
This is the safety issue that scares off a lot of people before they ever try mylar, and it deserves a straight answer rather than vague reassurance. The same USU Extension guidance is direct about the actual risk: oxygen absorbers should only be used with foods that are sufficiently dry, and storing foods with high moisture content in reduced-oxygen packaging can create the conditions that allow Clostridium botulinum, the bacteria responsible for botulism, to grow.
In practice, this means the risk is not really about mylar itself, it is about what you put inside it. Dry staples under roughly ten percent moisture, the kind of foods people typically store this way, do not provide the environment botulism needs to develop. The mistake that actually causes problems is packaging something moist, like a home-dehydrated vegetable that was not fully dried, alongside an oxygen absorber and assuming the bag makes it shelf-stable.
How I Actually Seal My Mylar Bags
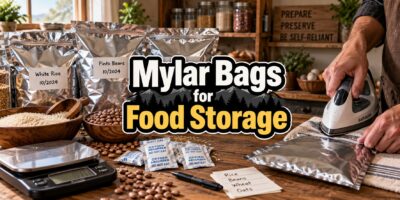
For years I sealed bags with a plain household clothes iron set to a medium-high, no-steam setting, running it slowly along a folded strip of the bag opening against a flat wooden board. It works, but a dedicated impulse heat sealer gives a more consistent seal and is worth the modest cost if you are packaging more than a handful of bags a year.
Whichever tool you use, I always run a double seal, meaning I seal the bag once, let it cool for a few seconds, then seal a second line just above the first. Before sealing that final line, I press out as much excess air as I can by hand, working from the bottom of the bag upward, then drop in the oxygen absorber last and seal quickly since absorbers start working the moment they hit air.
Which Foods I Actually Store in Mylar
Not everything belongs in a mylar bag, and figuring that out took me a couple of costly mistakes early on. White rice, wheat berries, dry corn, dried beans and lentils, rolled oats, pasta, white sugar, and powdered milk have all worked beautifully for me over multiple years of storage, which lines up with what Utah State University Extension recommends for barley, dried beans, dried milk, sugar, and wheat specifically.
What does not belong in mylar with an oxygen absorber is anything with meaningful moisture or oil content. Brown rice and other whole grains have enough natural oil in the bran layer to go rancid faster than white rice. Nuts, nut butters, jerky, butter, and cooking oils are all poor candidates for the same reason, and any home-dried food needs to be genuinely, fully dry before it goes anywhere near an oxygen absorber.
Keeping Bugs Out Before They Ever Get Sealed In
Sealing a bag does nothing to help you if the bug problem was already inside the grain before you packaged it. University of Maryland Extension recommends inspecting bulk grains and dried goods carefully both when you buy them and again once you get them home, since that step catches most infestations before they get locked into your storage container.
My own routine now is to freeze any bulk grain or bean purchase for three full days before it ever touches a mylar bag. That freezing period kills off any weevil eggs or larvae that might already be present, and it costs nothing but a little freezer space and patience. Skipping this step is how people end up finding live insects in a bag they sealed a year earlier, since a sealed environment does not kill anything already inside, it just stops new pests from getting in.
Mylar Alone Versus Mylar Inside a Bucket
A sealed mylar bag on its own is genuinely airtight and moisture-proof, but it offers almost no physical protection against punctures, crushing, or a determined rodent. I learned this the hard way when mice chewed straight through a stack of bags stored directly on a basement shelf, foil layer and all.
Since then, every mylar bag I pack for long-term storage goes inside a food-grade plastic bucket with a gasketed lid. The bucket does not improve the oxygen or moisture barrier, since the mylar is already doing that job, but it adds the physical protection that mylar alone cannot provide, and it makes stacking and moving sealed food far more practical.
How Long My Stored Food Actually Lasts
I have opened mylar-packed rice and wheat at the ten-year mark and found both still fully usable, though the flavor on some items softens gradually rather than staying identical to day one. Federal guidance on shelf-stable foods echoes this general pattern, noting that safety and peak eating quality are not quite the same measure, and dry staples stored properly can remain safe well beyond the point where flavor or texture is at its absolute best.
I treat published shelf-life numbers, whether they say ten, twenty, or thirty years, as a reasonable planning estimate rather than a guarantee, since your actual results depend heavily on how well you dried the food, how well you sealed the bag, and how consistently cool and dry your storage space actually is. Rotating through older bags every few years, even if only to confirm quality, has become part of my normal routine rather than something I only think about during an actual emergency.
Mistakes I Made When I Started
My first mistake was not labeling bags with the packing date, which meant I had several years’ worth of rice with no way to tell which batch was oldest. I now write the contents and the exact packing date directly on the bag with a permanent marker before it ever goes into the bucket.
My second mistake was buying the cheapest, thinnest bags I could find to save a few dollars, which is exactly the choice that led to that punctured bag I mentioned earlier. My third mistake was assuming every oxygen absorber packet in an open bag of extras was still good months later, when in reality an opened absorber is mostly spent within about fifteen minutes of exposure to air and needs to be stored in its own sealed container if you want to reuse the rest of the package later.
Where I Store My Sealed Bags
Temperature swings do more damage to long-term storage than almost anything else, so I keep my buckets of mylar-packed staples in the coolest, most temperature-stable part of my basement rather than a garage or attic that swings wildly with the seasons. Direct light is also worth avoiding entirely, since even a bag that blocks oxygen and moisture will not stop light from slowly degrading certain nutrients and flavors over time if it is stored somewhere bright.
A cool, dark, dry space with buckets kept up off a concrete floor, both for temperature stability and to avoid any moisture wicking up from below, has been the simplest and most reliable setup I have found on my own property.
Where I Buy My Bags and Absorbers
I buy mylar bags and oxygen absorbers from dedicated food storage suppliers rather than general online marketplaces, mainly because it is easier to confirm the actual mil thickness and cc rating of what I am getting. Generic bulk listings sometimes understate the true thickness of the film, which only becomes obvious once you are trying to seal a bag that feels flimsier than expected.
Buying oxygen absorbers in the size you actually need, rather than a single all-purpose size, saves money in the long run since you are not wasting large packets on small jars or under-protecting big buckets with packets meant for a quart container. I keep a small stock of three or four different absorber sizes on hand so I am never stuck improvising a size that does not match the container in front of me.
A Quick Word on Reusing Mylar Bags
I do not reuse mylar bags once they have been opened and emptied, and I would not recommend it either. The heat-sealed edge gets progressively harder to reseal cleanly after the first cut, and any small tear or crease introduced while opening the bag can create a weak point that defeats the entire purpose of using mylar in the first place.
Bags are cheap enough relative to the food they protect that treating them as single-use for long-term storage purposes makes far more sense than trying to stretch a few extra uses out of a bag that may no longer seal reliably. I do sometimes repurpose old bags for short-term, non-critical storage, like organizing spare parts in the workshop, just never for food I am counting on years down the road.
Food Storage Is Only One Piece of Real Independence
Knowing how to seal rice, wheat, beans, and other staples so they can last for years is an incredibly useful skill. But long-term self-reliance requires something even more valuable than a basement full of stored food:
Knowing what to do when you can no longer simply buy what you need.
What happens when your supplies begin running low? Could you grow more food, preserve the harvest without depending entirely on modern conveniences, repair essential items instead of replacing them, make useful things from basic materials, and keep your household functioning when the systems you normally rely on are unavailable?
Those are the kinds of practical abilities our grandparents and great-grandparents once considered ordinary—and they’re exactly the kind of knowledge explored in The Lost Skills of Independence.
This book is designed for people who want to become genuinely more self-reliant, bringing together forgotten skills and practical methods that can help you produce, preserve, repair, build, improvise, and make better use of the resources already around you.
Because there is an important difference between having supplies and having skills.
A bucket of stored food eventually becomes empty. A tool eventually breaks. Fuel gets used. Batteries die. But knowledge can be used again and again—and passed on to the next generation.
If you’re already taking long-term food storage seriously, don’t stop at filling your pantry. Start building the practical knowledge that can help you remain independent long after those supplies are gone.
Your stockpile can buy you time. Your skills are what make that time count.
Final Thoughts
Mylar bags are not complicated once you understand the handful of variables that actually matter: the right thickness, a correctly sized oxygen absorber for genuinely dry food, a proper double seal, and cool, dark storage afterward. Get those pieces right, and you are looking at a decade or more of usable food from staples that would otherwise start declining within a year or two in ordinary packaging.
I do not use mylar for everything on my homestead, and it is not meant to replace the everyday bags I reach for in the kitchen or garden. But for the core dry staples I am counting on to still be good years from now, it has earned a permanent place in how I build and maintain my food storage.
You may also like:
Join Our Free WhatsApp Community!
How To Build An Endless Hot Water System Without Electricity (Video)
16 Ingenious Uses for Mylar Blankets on Your Homestead
Food Storage Bags – The Complete Guide for Every Job on the Homestead
How to Make Cheese Powder at Home (Safely)
Amish vs Mormon – Two Self-Sufficient Lifestyles