The first time I heard that you could keep food cool with two clay pots, some sand, and a little water, I figured it was probably one of those internet tricks that sounds better than it works. Unfortunately, the internet is full of them! Like the videos claiming you can heat an entire room with a candle and a flower pot. I’ve seen enough of those…
But, surprisingly, this one is different. People have been using this basic method for thousands of years, and versions of it are still used today in places where electricity is unreliable or a regular refrigerator simply isn’t an option.
Building one is surprisingly easy and I want to show you how it works and how to do it, so stick with me.
How Two Pots Keep Things Cool
So how can two ordinary clay pots actually make anything cooler?
It all comes down to evaporation. It’s basically the same reason sweat cools your skin on a hot day. When water evaporates and turns into vapor, it takes some heat with it. That’s why wet skin feels cooler when there’s a breeze, and the same basic thing happens with a wet clay pot.
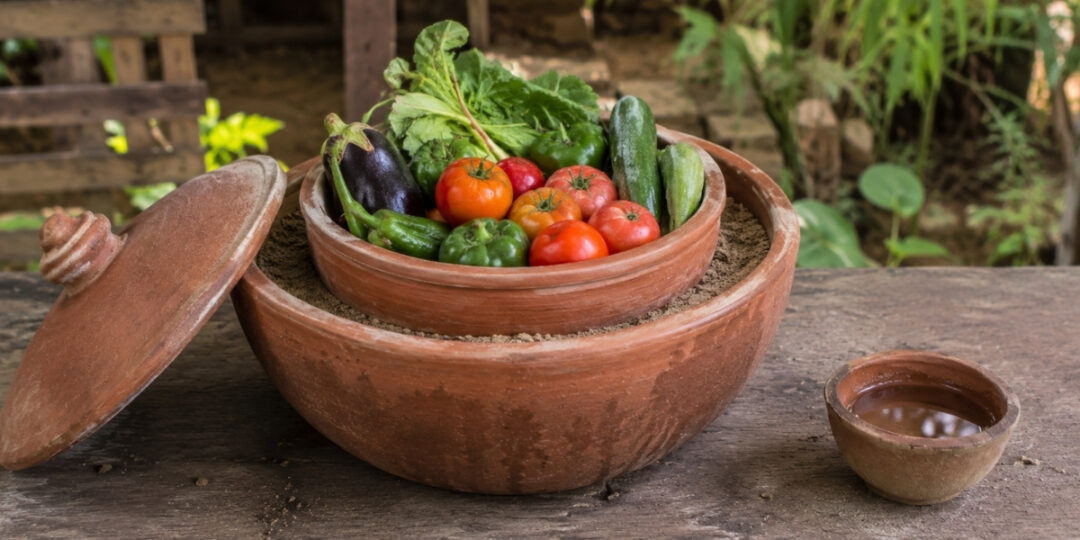
The setup is incredibly simple. A smaller pot sits inside a larger one, and the space between the two is packed with wet sand. The outside pot has to be unglazed terracotta because the clay is porous. This allows moisture to slowly work its way through the pot and evaporate from the outside surface. As that water evaporates, it pulls heat away from the wet sand and from the inner pot where the food is stored.
There are no moving parts, no motor, and nothing to plug in. As long as the sand stays damp and the air is dry enough for evaporation to happen, the water does the cooling for you and you have an electricity-free fridge.
The Man Who Made It Famous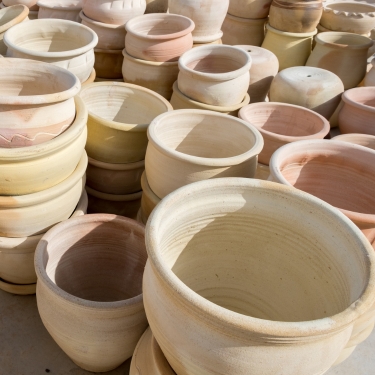
The idea itself is much older than most people realize. Similar evaporative cooling pots were used in ancient Egypt, and variations have been found in hot, dry parts of the world for a very long time.
The person who really brought the idea back into the spotlight was Mohammed Bah Abba, a teacher from northern Nigeria. Back in the 1990s, he saw farmers losing fruits and vegetables all the time because there was no electricity nearby and no real way to keep the harvest fresh. So he took that old pot-in-pot idea, improved it, and started making and distributing the coolers by the thousands.
The results got a lot of attention. Eggplants that might normally spoil in around three days could last close to a month. Tomatoes and peppers could keep for around three weeks. In 2001, Bah Abba received the Rolex Award for Enterprise, and TIME later named the pot-in-pot cooler one of the best inventions of the year.
To be honest, pretty impressive for two clay pots and some wet sand. And after reading this story, I decided to also give it a try. Maybe it was not the scam I initially thought it was.
But even if this method became famous in Nigeria during the 90s, people have been using electric fridges all around the world nevertheless. For example, the strict Amish communities that were not using electricity managed to keep their food fresh before the 90s and they had some surprising methods to do so.
Wondering how they did it?
They had this thing called “The Earth Fridge.” This is no fancy method, but also, it’s not what you’re expecting it to be.
👉 Click here and see how this Amish invention works and how to build it yourself
Where This Works
I watched a lot of videos about this subject and I realized that this is the part that gets skipped over in a lot of videos, and honestly, it’s probably the most important thing to know about this DIY fridge.
A zeer pot, because this is the official name, works best when the weather is hot and the air is dry. The drier the air is, the easier it is for water to evaporate from the outside of the pot. And the faster that evaporation happens, the more cooling you get.
In hot, dry conditions, testing by MIT D-Lab and Practical Action found that these coolers can keep the inside at least 15°F cooler than the hottest temperature outside during the day. If it’s 95 degrees out, a drop like that can make a real difference for your vegetables.
Humidity is where things complicate. When the air is already full of moisture, water doesn’t evaporate nearly as fast. And when evaporation slows down, so does the cooling.
So for people in the States, how well this works really depends on where you live.
The dry Southwest – This is where a zeer pot really shines. Arizona, New Mexico, Nevada, West Texas, inland California, and a lot of the high desert have exactly what this cooler needs: heat and dry air.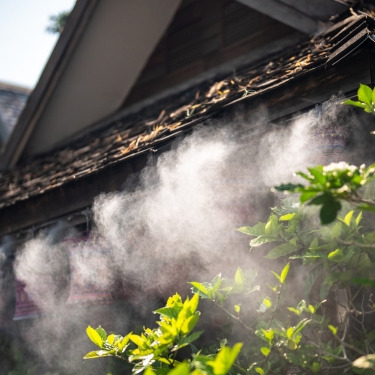
The in-between country – Places like the Great Plains, eastern Colorado, and parts of the Mountain West can still get decent results, especially during a dry stretch in summer. You probably won’t get the same temperature drop you’d see somewhere like Tucson, but it can still make a noticeable difference.
The humid regions – The Southeast, Gulf Coast, Florida, the Ozarks, and Appalachia are a different story. In the middle of a muggy summer, there can already be so much moisture in the air that the pot doesn’t cool very much.
That doesn’t mean it’s completely useless, though. It can still work better during a dry spell or during the cooler, less humid parts of spring and fall. Putting it somewhere with a steady breeze helps too. You can even run a small fan across the outside and sometimes squeeze a few more degrees out of it.
But there’s one thing that works no matter how humid the air around you is.
Imagine having a device that gives you fresh water right in the middle of a dry spell.
Something like that already exists, and it came from a regular guy who got tired of dealing with local water restrictions every summer. Whenever drought hit, the authorities would cut or restrict the water. He is a homesteader with a family and a garden, and he simply wanted to know he’d still have water when he needed it. When someone else gets to decide when you can use something as basic as water, you start looking for another option…
That’s how the Portable Water Box was created.
Think of it as a box that pulls water vapor from the air and turns it into liquid water you can use. The idea is simple, but when your usual supply disappears, it suddenly matters a lot.
And this kind of technology isn’t new. Similar systems have been used by the military for years, yet most regular people barely hear about them.
You have to wonder why.
If you depend completely on someone else for your water, they’re the ones holding the cards. If it gets restricted or shut off, you’re stuck… You have to play by their rules…
The guy behind this device didn’t want that. So he decided to share what he learned and show people how they could have a more reliable source of water when the system lets them down. Because when the water stops running, that’s not when you want to start looking for a backup.
👉 See how the Portable Water Box works and how you can build your own backup water source
What to Keep in It, and What to Leave Out
A zeer pot is great for fresh produce. Tomatoes, peppers, eggplant, cucumbers, leafy greens, carrots, apples, and similar fruits and vegetables are exactly the kind of foods it can help with. Keeping them cooler than the surrounding air slows down spoilage and can buy you extra days or, under good conditions, even weeks compared with leaving them sitting on the counter. I say this is perfect, especially because most of us will use those vegetables fairly fast on a homestead.
What you don’t want to put in there are foods that really need refrigeration. A regular kitchen fridge usually stays around 38 degrees, and a clay-pot cooler isn’t going to get anywhere near that. Meat, milk, eggs, and cooked leftovers still need proper refrigeration.
I think the easiest way to look at it is as a little portable root cellar, not a total replacement for your fridge.
How to Build One Yourself
Ok, let’s get to the part you were waiting for. Building a zeer pot is simple, and there’s a good chance you already have some of what you need around the house or garden.
You’ll need two unglazed terracotta pots, the plain orange kind you can find at almost any garden center. One needs to fit inside the other with a couple of inches of space left all the way around. For a reasonable household amount of produce, an outer pot around 14 to 16 inches across works well. You can definitely go bigger, but remember that a bigger pot means more sand, more water, and a little more time before everything cools down.
The sand matters more than you might think. Coarse river sand or builder’s sand works better than really fine, dusty play sand because water can move through it more easily. You’ll also need water and a cloth or small towel for the top.
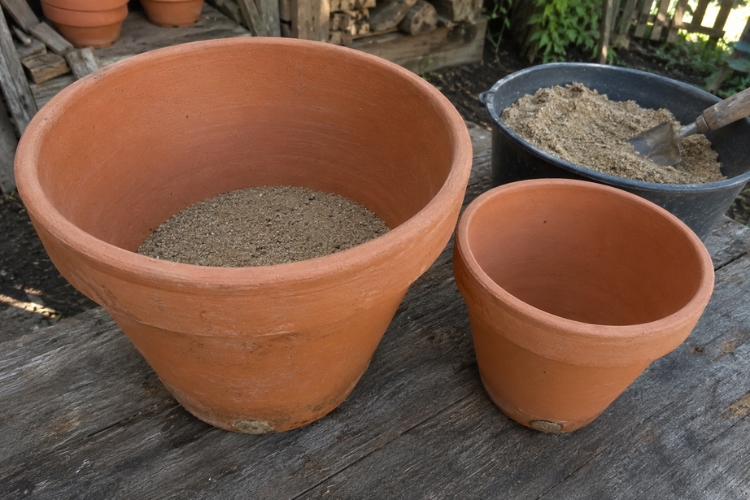
Plug the holes – Most terracotta flower pots have a drainage hole in the bottom, so you’ll need to close the holes in both pots first. A cork, a little silicone, or even a flat stone packed in with clay can work. You just don’t want the sand and water draining straight out.
Add a sand base – Pour a couple of inches of sand into the bottom of the larger pot. This gives the smaller pot something to sit on and lets you adjust the height.
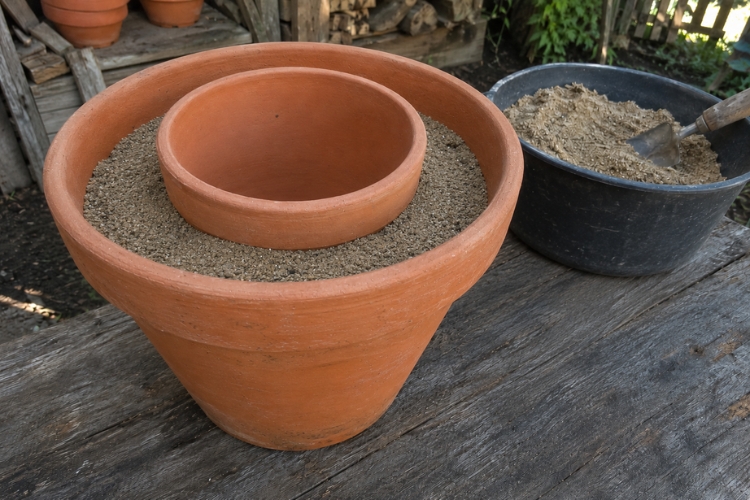
Nest the small pot – Put the smaller pot right in the center of the larger one. Ideally, the rims should sit at about the same height. Add or remove some sand underneath until it sits where you want it.
Fill the gap – Pour sand into the space between the two pots, working your way all the way around. Fill it almost to the top and press the sand down gently as you go so there aren’t big empty pockets.
Soak the sand – Slowly pour water onto the sand until it’s completely wet. Give it a few minutes to soak in, then add a little more. That first watering usually takes the most, so I like to let the whole thing sit for a few hours before putting food inside.
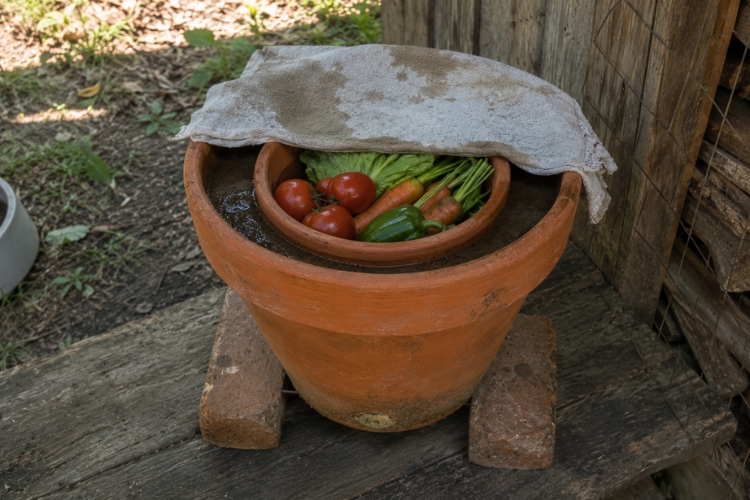
Load and cover – Put your produce into the smaller pot and cover the opening with a damp cloth or towel. If you have a lid that fits, you can use that too. The cover helps keep the cooler air inside and keeps bugs and dirt away from your food.
Find the right spot – Put the whole thing somewhere shady with good airflow. If you can, lift it slightly off the ground on a couple of bricks or a wire rack. The more air that can move around the outside of the pot, the better the evaporation works.
How to Keep It Running
Once it’s set up, the only thing you really need to stay on top of is the water. In hot weather, you’ll usually want to wet the sand in the morning and again in the evening. On really hot, dry days, it might need a little more.
The nice thing is that the terracotta gives you a pretty good clue when it’s drying out. When the pot is wet, the clay usually looks darker. As the moisture disappears, the outside starts getting lighter again. If you see it turning pale, especially near the top, you need to add more water.
And definitely keep it out of direct sunlight. Keep the pot somewhere in the shade if you want to get the best results.
If You Need a Bigger “Outdoor Fridge”
Maybe you had a really big harvest, or you just want to keep more produce fresh at once. In that case, this method might feel a little limiting. After all, there’s only so much you can fit inside a terracotta pot.
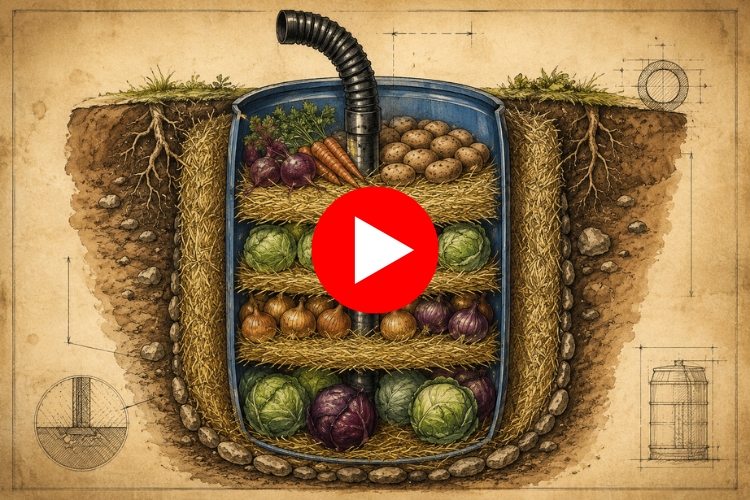
But hear me out, because there’s another method that has been used in survival communities for a long time, and it might be exactly what you’re looking for. Instead of a small terracotta pot, imagine using a 55-gallon barrel. This method lets you do just that.
It’s one of those old, almost forgotten skills that most people don’t know about anymore, but today it can still be incredibly useful.
If you want to see how you can use it yourself, watch the video below →
Final Thoughts
All I can say is that this is a smart idea for a homestead and it can help you save fridge space or even save your food in case of a blackout.
If you want to build one, you can see that the materials are very cheap, so you can run a test and see if this is for you.
I mainly use it during the summer to store veggies and I love it. Actually, I can honestly say that I prefer it more than the fridge for this task because the temperature is perfect and keeps the vegetables better. Sometimes the low tepeature form the fridge can be quite harsh and mess up the texture or taste of my veggies, but this never happened with the zeer pot.
You may also like:
5 DIY Wax Projects for Your House
DIY Pressurized Rainwater Harvesting and Purification System (Video)
9 Practical Toilet Paper Alternatives
10 Ingenious Uses for Flour Around Your Home