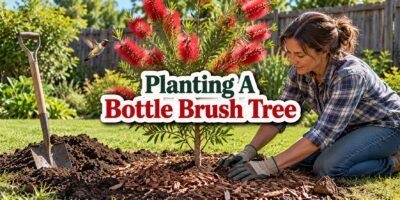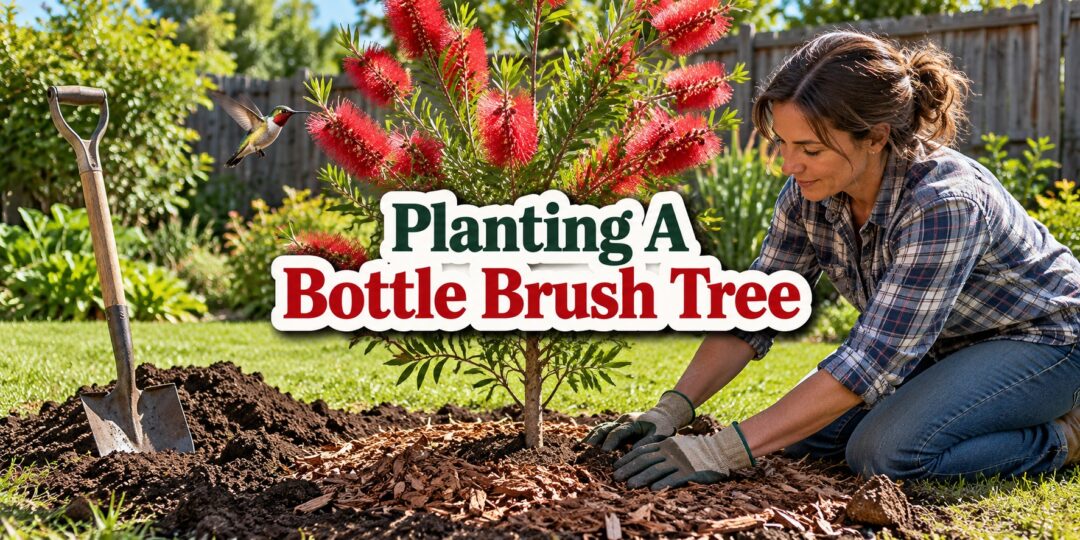
The first time I saw a bottle brush tree in full bloom, I honestly thought someone had wired red pipe cleaners to the branches. Then a hummingbird zipped in, worked over three flower spikes in about ten seconds, and zipped back out. I went home that afternoon and started reading everything I could find about planting one.
Bottle brush is one of those plants that rewards you for getting the start right. Put it in the right spot, plant it at the right depth, and water it properly that first season, and it will pretty much take care of itself for years. Get the start wrong, and you’ll spend a lot of time wondering why it sulks.
Here’s everything I’ve learned about planting a bottle brush tree, from picking a variety that will actually survive your winters to the watering routine that gets it established.
What a Bottle Brush Tree Actually Is
Bottle brush is an evergreen shrub or small tree from Australia, and it belongs to the same myrtle family as eucalyptus and guava. Those famous brushes are really clusters of tiny flowers, and the bristles you see are long, colorful stamens. Most are bright red, but you’ll also find pink, purple, white, and even yellow-green types.
One thing that confuses people at the nursery is the name. Botanists have been moving these plants out of the old Callistemon genus and into Melaleuca, and not every expert agrees with the change yet. So if one tag reads Melaleuca citrina and another reads Callistemon citrinus, you’re looking at the same plant.
Will a Bottle Brush Tree Survive Your Winters?
This is the question to answer before you buy anything. Bottle brush is a warm-climate plant, and the University of California’s integrated pest management program notes that it can be damaged once temperatures fall below about 20°F. Most of the classic red types are only reliable in the warmest parts of the country.
Start by looking up your zone on USDA’s updated Plant Hardiness Zone Map, which is based on the average coldest winter night where you live. Zones 9 through 11 can grow most bottle brush varieties without much worry. Zone 8 is borderline for many types, and zone 7 calls for a very specific plant.
The Hardiest Choice for Colder Gardens
If you garden in zone 7 or a cold pocket of zone 8, look for a variety sold as ‘Woodlander’s Hardy’ or ‘Woodlander’s Red’. NC State Extension rates it as the most cold-hardy bottle brush, able to handle temperatures down to about zero, and it grows into a dense shrub around 6 to 8 feet tall and wide. In a hard zone 7 winter it may die back to the ground, but it usually comes back from the roots in spring.
Because it flowers on new growth, a winter that knocks it back doesn’t cost you the summer blooms the way it would with some shrubs. That makes it a forgiving choice if you’re pushing the limits of your climate.
Growing One in a Container Instead
If your winters are colder than that, you can still grow bottle brush, just not in the ground. Crimson bottle brush does well in a large pot that you roll into a bright, cool sunroom or greenhouse for the winter. NC State’s plant toolbox lists this species as hardy only to around 20 to 25°F, so it needs that protection anywhere colder.
Use a container with good drainage holes and a gritty potting mix, and expect a smaller plant than you’d get in the ground. Indoors, keep an eye out for spider mites and scale, which tend to show up more on potted plants.
Choosing the Right Variety for Your Space
Bottle brush comes in a surprising range of sizes, so match the plant to the spot instead of planning to prune it into submission. Crimson or lemon bottle brush typically reaches 10 to 15 feet tall and wide. Weeping bottle brush has long, drooping branches and can get much taller, while dwarf cultivars stay small enough for a foundation bed or low hedge.
If you want a true tree form, start with an upright species like crimson bottle brush. According to the UF/IFAS fact sheet on red bottlebrush, it can be trained into a small multi-trunk tree around 15 feet tall by removing some of the lower branches over time. Weeping types also make lovely small trees, but they need more water than the others.
A Quick Note for Florida Gardeners
If you live in Florida, skip the weeping bottle brush. UF/IFAS has assessed the weeping form as likely invasive in the state’s natural areas and does not recommend planting it. Crimson and rigid bottle brush are still considered fine choices there, so you have good options.
Wherever you live, it’s worth a quick call to your county extension office before buying any non-native plant. Invasive lists differ from state to state and change over time.
When to Plant a Bottle Brush Tree
In warm climates, you can plant bottle brush in spring or fall, as long as you can keep it watered. I like fall in zones 9 and up because the heat breaks and the roots get months to settle in before the next summer.
In colder, borderline zones, plant in spring once the danger of frost has passed. That gives the tree a full growing season to build roots before it faces its first winter. A bottle brush planted in late fall in zone 7 or 8 goes into the cold with a root system still stuck in the shape of its pot.
Picking the Right Spot
Give It Full Sun
Bottle brush wants full sun, meaning at least six hours of direct light a day, and more is better. It will survive in part shade, but you’ll get fewer flowers and a thinner, leggier plant. The sunniest, hottest spot in your yard is usually the right one.
Make Sure the Soil Drains
Good drainage matters more than rich soil for this plant. Bottle brush tolerates sand, clay, and loam, but it hates sitting in soggy ground, and wet roots are where most of its disease problems start.
Very alkaline soil can also turn new leaves yellow, so a pH reading is worth having. If you don’t know much about your ground yet, a basic soil exam will tell you pH and nutrient levels before you plant.
Leave Room to Grow
Look up the mature size of your variety and give it that much space from the house, fences, and other shrubs. Crowded plants get poor air circulation, which invites fungal trouble. Look up before you dig, too, because a tree that ends up under a power line will need constant cutting back.
What You’ll Need
- A healthy container-grown bottle brush, ideally without roots poking out of the drainage holes
- A round-point shovel and a garden fork
- A sharp spade, pruning saw, or old knife for shaving roots
- A hose or a few buckets of water
- Shredded bark or wood chip mulch
- A yardstick or your shovel handle to check planting depth
How to Plant a Bottle Brush Tree, Step by Step
This is the method I follow for any container-grown tree or large shrub, and it lines up with what university extension services recommend.
Step 1: Call 811 Before You Dig
Call 811 at least two working days ahead so underground utility lines can be marked. It’s free, and it’s a lot cheaper than repairing a cut cable or gas line.
Step 2: Test the Drainage
Dig a small test hole where the tree will go, fill it with water, and watch how long it takes to drain. Kansas State’s tree planting guide treats water that takes more than about 10 minutes to soak in as a sign of poor drainage. If yours drains that slowly, plan to plant a little high, which I’ll explain in a minute.
Step 3: Find the Root Flare
The root flare is where the trunk widens and the top roots start spreading out. Nurseries often have extra soil piled on top of the root ball, so scrape it away with your fingers until you find the flare. That point, not the top of the potting soil, is what should end up level with the ground.
Step 4: Dig Wide, Not Deep
Dig a hole two to three times as wide as the root ball but no deeper than the distance from the root flare to the bottom of the ball. Iowa State Extension explains that a wide hole with sloped sides gives new roots loose, airy soil to grow into. Digging too deep is a common mistake, because the tree settles and ends up buried.
If your drainage test was slow, dig a wider, shallower hole so about a third of the root ball sits above the surrounding grade. That keeps the main root zone out of saturated soil. Slope soil up gently around the exposed sides of the ball.
Step 5: Fix Any Circling Roots
Slide the plant out of its pot by tipping it on its side and tapping the container, never by yanking the trunk. Look at the outside of the root ball. If roots are wrapping around in circles, shave off the outer inch or so with a sharp spade, or tease them apart with your fingers.
This feels harsh, but circling roots keep circling after planting and can eventually choke the trunk. New roots will grow out from the cut ends and head straight into the surrounding soil, which is exactly what you want.
Step 6: Set the Tree and Backfill With Native Soil
Set the tree in the center of the hole and lay your shovel handle across the top to check that the root flare sits level with the ground or slightly above it. Look at the trunk from two directions to make sure it’s straight. Then backfill with the same soil you dug out, breaking up big clods as you go.
Don’t mix compost, peat, or potting soil into the backfill. Iowa State points out that roots tend to stay inside amended soil instead of spreading into the native ground, and in clay that fluffy soil can fill with water like a bathtub. Save your compost for top-dressing later on.
Step 7: Build a Water Ring and Soak It
Fill the hole halfway, then flood it with a slow-running hose to settle the soil and remove air pockets. Finish backfilling, then use the leftover soil to build a low ring around the outer edge of the root ball. That little berm holds water right over the roots instead of letting it run off.
Water slowly until the whole area is soaked. If the soil sinks, add a bit more, but never pile soil on top of the root ball or over the root flare.
Step 8: Mulch, but Keep It Off the Trunk
Spread 2 to 4 inches of shredded bark or wood chips over the planting area. Pull the mulch back several inches from the trunk so it never touches the bark. Mulch piled against the trunk holds moisture and invites rot, insects, and rodents.
Hold off on pruning right after planting, except for broken or dead branches. The tree needs every leaf it has to make food for new roots.
Watering Through the First Year
This is the part that makes or breaks a new bottle brush. A container-grown plant arrives with a dense root ball that’s used to daily nursery watering, and it dries out fast once it’s in the ground. For the first few weeks, all of its roots are still inside that original ball, so that’s where the water needs to go.
Research from UF/IFAS on establishing container-grown shrubs found that about one gallon per watering, aimed right at the root ball, was enough for a shrub from a 3-gallon pot. In north Florida, watering every two to four days gave the most vigorous growth, while once every eight days was enough for survival. Bigger volumes didn’t help, but watering more often did.
In that study, most shrubs were established within about 20 to 28 weeks, once their roots reached the edge of the canopy. Bigger plants and cooler climates take longer, so I treat that as a minimum and not a finish line. Skip watering after a good soaking rain, and keep checking the soil with your finger through the first summer.
After that, bottle brush is impressively drought tolerant. You’ll only need to water during long hot, dry spells, with weeping types being the thirstiest of the bunch.
Feeding Your Bottle Brush
Don’t put fertilizer in the planting hole. Fresh roots are tender and easy to burn, and the plant is focused on growing roots, not leaves, during its first months.
Once it’s settled in, a light application of slow-release fertilizer in spring is plenty. UF/IFAS notes that regular feeding helps keep the flowers bright and the leaves dark green, but there’s no need to overdo it. If new leaves start coming in yellow, that’s often iron chlorosis from alkaline soil, and an iron chelate or iron sulfate treatment can correct it.
Training It Into a Tree Shape
Most bottle brush is sold as a shrub, so getting a tree shape takes a few years of patience. Pick three to five strong stems, or a single straight one, to be your trunks. Over the next several seasons, gradually remove the lower side branches until you’ve raised the canopy to the height you want.
Take off any suckers that sprout from the base or low on the trunk, since they’ll keep pulling the plant back toward a bush. Do your main pruning right after a flush of flowers fades. These plants handle pruning well, and NC State notes that even old plants will regrow after being cut back hard into old wood.
Problems to Watch For
Bottle brush is a tough plant, but it has a few weak spots. Overly wet soil can lead to root and crown rot, and the best prevention is good drainage and a light hand with the hose once the tree is established. A fungus can also cause woody twig galls that disfigure branches, so prune those out when you spot them.
Scale insects and spider mites can show up, especially on stressed plants or those grown in pots. A strong spray of water knocks mites back, and a well-timed horticultural oil spray handles most scale infestations. Scorched leaf tips usually point to frost, salt, or drought stress, which is a siting issue rather than a disease.
Protecting Young Trees Over Winter
If you’re growing in zone 7 or 8, the first two winters are the riskiest. A thick layer of mulch over the root zone helps protect the roots, and those roots are what let a frozen-back plant regrow in spring. If the soil is dry before a cold snap, give it a good drink a few days ahead, since moist soil holds heat better.
On frosty nights, drape a frost cloth or old bedsheet over a small tree, never plastic, and pull it off in the morning. UC’s guidance on freeze and frost damage points out that covers help on frosty nights but do little in a true hard freeze, so don’t count on them to save a variety that’s simply wrong for your zone.
Wait until spring to prune any winter damage. Once new growth starts, you’ll be able to see exactly what’s dead and cut back to live wood.
Planting a Tree Is One Skill. How Many Others Could You Handle Yourself?
Knowing how to choose the right tree, understand your soil, correct drainage problems, establish healthy roots, and care for your land without immediately calling a professional is exactly the kind of practical knowledge that used to be commonplace.
Our grandparents didn’t call it “self-sufficiency.”
They simply knew how to do things.
They knew how to grow and preserve food, repair what broke, maintain their homes and land, make useful things from basic materials, and solve everyday problems with their own hands.
Today, many of those skills have quietly disappeared.
The Lost Skills of Independence brings that forgotten practical knowledge back, with old-fashioned skills designed to help you become less dependent on stores, services, contractors, and fragile modern systems.
Because planting a tree correctly is useful.
But imagine knowing how to grow more of your own food, preserve your harvest, repair instead of replace, make what you need, and keep your household functioning when outside help isn’t available.
The more you can do yourself, the less vulnerable you become when prices rise, supplies disappear, or professional help is simply too far away.
Your most valuable tool isn’t always something hanging in the shed. Sometimes it’s knowing what to do before you ever reach for one.
Why a Bottle Brush Earns Its Place on the Homestead
I’ll be honest, a bottle brush doesn’t produce anything I can eat. What it does is pull in bees, butterflies, and hummingbirds, and a garden with plenty of pollinators around tends to be a more productive garden overall.
It also makes a tough, evergreen screen once it’s established, and it needs very little water or fuss to keep going. For a plant that blooms on and off for months, that’s a pretty good deal.
Get the variety right for your winters, plant it at the right depth, and stay on top of the watering that first season. Do those three things and your bottle brush tree should keep the hummingbirds coming back for a long, long time.
You may also like:
How to Plant a Banana Tree: What I Learned Growing My Own
A Walgreens Is Opening In Your Backyard (Video)
7 Trees You Don’t Want Growing on Your Property
Birch Tree Syrup – The Complete Guide
Why Homesteaders are Hanging Empty Jars on Trees
Vegetable Planting “Tips” That Ruined My Crops