
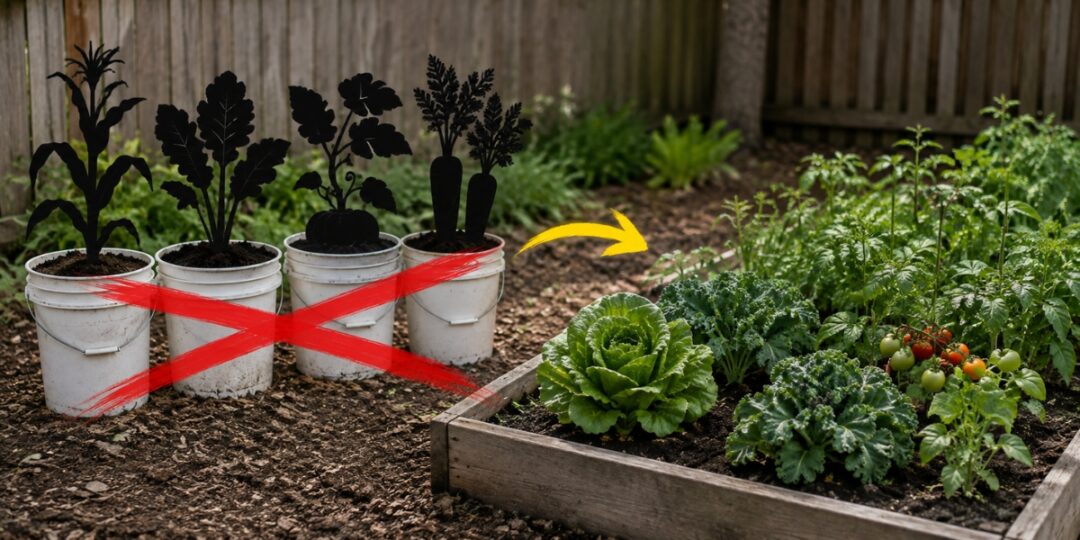
Maybe your garden is small. Maybe the only decent soil on your place sits in the wrong spot, or you’re renting, or your back isn’t up for digging another bed this year. So you start eyeing the stack of buckets by the shed and the old totes behind the barn, and you figure that with enough of them you can grow just about anything.
And you can grow a lot in a bucket. Just not everything.
There are vegetables that will sit in a container all season, take your water and your fertilizer, and hand you almost nothing back in October. Your potting mix isn’t the problem and neither is your watering. Five gallons is only five gallons, and some crops need far more room than that.
So, let me show you which ones to keep out of your buckets, why each one lets you down, and what to plant in those buckets instead.
Sweet Corn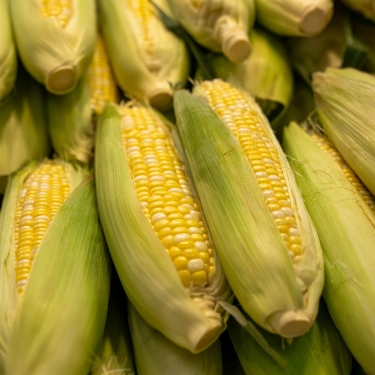
Corn is wind pollinated, and that’s the whole problem right there.
That feathery spike at the top of the stalk is the tassel, and it drops pollen. Down below, each ear pushes out silks, and here’s the part that matters: there’s one silk for every kernel trying to form on that cob. Each strand has to catch a grain of pollen or its kernel never fills in.
So a few silks get missed and you pull back the husk on an ear with gaps in it. Most of them get missed and you’re holding a cob with nine kernels on it.
Corn wants to go in blocks of at least four rows, because a single row sheds its pollen sideways into empty air. You can’t build a block out of buckets without covering the whole patio in them. And each stalk only gives you one or two ears anyway.
What to do instead – Give corn a block of ground, even a small one. A 4 by 4 foot patch with sixteen plants will out-produce sixteen buckets and take a fraction of the work.
Corn is also a staple on every Amish farm. These guys are incredibly resourceful and they realized that corn meets all of their day-to-day needs when it comes to food.
The Amish love corn so much because there are countless ways to preserve it. Just think about the possibilities. You can put it up in cans, you can freeze the cobs, or you can even make flour.
👉 If you want to see how the Amish preserve and use corn, you can find all you need to know here
Also, I discovered a recipe recently that uses cornmeal. Johnny Cake! I know the name sounds funny and confusing, but this is an old pioneer recipe that works very well for breakfast or as a hiking meal. You prepare the cakes in 10 minutes, add some honey butter, and you have a ready-to-serve delicious breakfast in less than 15-minutes.
Here you can find the Johnny Cake recipe. Just like our forefathers used to make them!
Asparagus
An asparagus bed will feed you for fifteen years or more, and that’s exactly why a bucket is the wrong home for it.
A well-established asparagus crown runs five to six feet across, and the roots can reach ten to fifteen feet down in good soil. You can’t be asking this plant to live in a paint bucket.
And you wait two to three years for a real harvest, so you’d babysit that bucket through three winters first.
But the worst part is this: The roots of a container plant sit at just about the same temperature as the outside air, so the rule of thumb is to treat anything in a pot as two zones colder than the zone you actually garden in. Ground soil buffers cold. Plastic doesn’t.
What to do instead – Dig a trench 6 to 8 inches deep along the edge of the garden, space the crowns 15 to 18 inches apart, and pick a spot you know you won’t till.
Or if you find it more practical for your yard, plant them in a garden bed.
The problem that many homesteaders have with garden beds is that they don’t last long and when your asparagus grows for decades, this migh seem like a poor idea.
But what these homesteaders don’t know is that you can build “indestructible” garden beds. These beds last forever and the thing that caught my attention is that you build them almost the same as a regular garden bed. Like you use the same materials and basic technique, so they are easy to build. The difference lies in the paint you use on them and where you put them in your garden.
Click here and see how to build the “forever garden beds” →
Rhubarb
Rhubarb has the same problem as asparagus, plus a size problem on top of it.
A rhubarb plant stays productive for twenty years or more, and a mature one spreads over a three- to four-foot area with leaves up to two feet across. The crown gets wider every season, so in a bucket it runs out of room by year two. You’ll get thin, stringy stalks that never size up, and you’ll blame the variety when the container was the issue all along.
Rhubarb also needs a real cold dormancy. In the ground, that happens slowly and steadily. In a bucket, the root ball freezes solid, thaws on a warm afternoon, then freezes again, over and over, until the crown rots.
What to do instead – Give one plant a permanent corner of the garden. A single healthy crown keeps a family in pie filling, and you can divide it every four or five years and pass the pieces around.
If you don’t know what to do with your rhubarb, you can add it to bread and make “Rhubarb Bread.” This is not your regular bread but is a sweet tart bread full of nutrients. Find the recipe for bread here →
Parsnips and Long Storage Carrots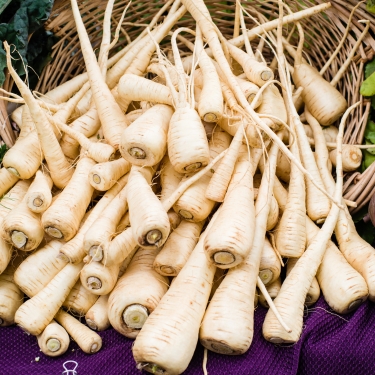
Parsnips want soil worked loose 18 to 24 inches deep. A five-gallon bucket stands about 14 to 15 inches tall, and once you leave headroom for watering, you’re down to maybe twelve inches of usable soil.
When the taproot hits that hard plastic bottom, it stops going down and starts going sideways. This means you get short, stubby, forked roots instead of the long clean ones you were after. Same story with Imperator type carrots and the big storage varieties. The curved sides don’t help either, since roots growing near the wall curve right along with it.
What to do instead – Long roots belong in a deep bed with the stones picked out. If you want carrots in a bucket, switch varieties. Little Finger, Paris Market, and the round Thumbelina types were bred for shallow soil and they do beautifully. Radishes and turnips do too.
Pumpkins and Full Size Winter Squash
You’ve probably seen a photo of a pumpkin vine growing out of a bucket and running across a driveway. It looks clever. It doesn’t work well.
Vining squash wants 50 to 100 square feet per hill, and pumpkin vines want 50 to 60. That vine may sprawl fifteen feet in every direction, but every drop of water and every bit of nitrogen still comes through one bucket of soil.
On a hot August day, a full-sized vine can pull five gallons right through the pot, and the fruit still comes out small.
What to do instead – Give the vines ground. If space is tight, trellis a small-fruited winter squash like Delicata or Honey Bear, and save your big containers for bush-type summer squash, which handles a ten-gallon pot just fine.
Or, if you don’t want to take up ground space, there is another method you can use for squash. You can build a vertical aquaponics farm and hang it on your fence.
I know it sounds amazing and the best part is that it’s also true. This is a project you can start in your backyard, and all you need is the proper guidance.
Maybe the lack of space is why you want to grow vegetables in buckets and containers in the first place. This aquaponics solution helps your plant grow faster and also helps you save up lots of space.
Another advantage is that since your crops grow in water and have no contact with soil, the risk of soil pests and infestations with various fungi from soil is ZERO.
See more about how this system works in this video
Brussels Sprouts
Brussels sprouts are slow, and a container makes the wait worse.
They take 80 to 100 days from transplant, they consume lots of resources to grow, and they give you roughly four to six pounds per ten-foot row. Run that math and one plant hands you about a pound of sprouts for four months of work.
The plants also reach two to three feet tall and turn top-heavy once the stalk fills in. In the ground, you stake them and move on. In a bucket, one autumn windstorm lays the whole thing over and snaps the stalk at the soil line.
What to do instead – Sprouts go in the ground, staked, planted in midsummer for a fall harvest. Put kale or collards in that bucket instead, and you’ll pick leaves off the same plant from June to hard frost.
Storage Potatoes
I know bucket potatoes are all over the internet, and I get the appeal. You’ll get potatoes. You just won’t get a crop worth storing.
The University of Maryland Extension container guide recommends 30 gallons of potting mix for potatoes. A five-gallon bucket gives you one sixth of that, so you’re looking at a meal or two out of a container that ties up a sunny spot for three months.
Heat is the other issue. Potatoes set tubers best in cool soil, and tuber growth slows way down once the soil climbs much past 80 degrees. A dark plastic bucket in full July sun blows past that by early afternoon, and you end up with leafy top growth and almost nothing underneath.
What to do instead – Use 20 to 30 gallon grow bags, an old stock tank, or a mounded row. If you do want a bucket, plant one early variety, pull it as new potatoes in June, and reuse the bucket.
Also, the Amish have an interesting method of growing potatoes. They have been using it for generations and it still works wonderfully. I saw their results at the farmers market and there is a high chance you have seen them too if you buy things from the Amish.
This is a method that takes up no space in your garden because the potatoes grow in the air! Yeah, I know this sounds unreal, but the Amish know what they are doing.
If you want to see how this works and how you can grow potatoes out ot thin air, click here
The Rule Behind All of Them
Every crop on this list fails for one of three reasons, and once you see the pattern, you can judge any vegetable yourself.
Root depth – If the taproot goes deeper than your container is tall, you get a deformed harvest.
Water buffer – A big plant drinks more in a day than five gallons of soil holds, so you’re always one hot afternoon away from stress.
Return per gallon – Some crops need four months and heavy feeding to hand you one pound of food. That’s fine in the garden and a waste of a container.
So before you fill a bucket, ask whether that plant wants more than twelve inches of root room, more than three months in the ground, or more than a few square feet of sprawl. If the answer is yes to any of them, plant it in the dirt.
Turn a Spare Bucket Into a Self-Watering Planter
Since we’re on the subject of buckets, here’s something useful to do with the ones you already have.
The hardest part of container growing is keeping up with the water. A self-watering bucket takes care of most of that by holding a small reservoir underneath the soil, and the plant pulls it up as it needs it. Mine go three or four days between fills in July.
Here’s what you need: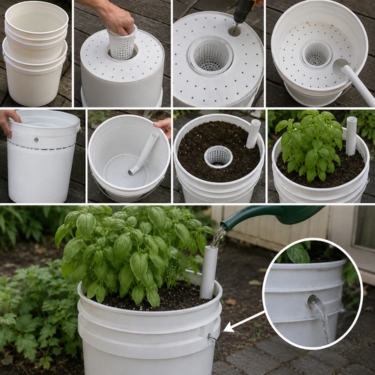
- Two food-grade five-gallon buckets that stack inside each other
- One plastic quart container, like a yogurt tub or a small nursery pot
- About 18 inches of 1-inch PVC pipe, or a length of old garden hose
- A drill with a 1/4 inch bit and a 1-inch bit
- Potting mix
And here’s how you build it:
- Stack one bucket inside the other and look at the gap between the two bottoms. Most buckets nest with three or four inches of space in there. That gap is your reservoir.
- Pull the inner bucket out and cut a hole in the center of its bottom, sized so the yogurt tub drops through and hangs by its rim. That tub is your wick.
- Drill a 1-inch hole near the edge of that same bucket bottom for the fill pipe, then a dozen 1/4 inch holes across the rest of it so air can reach the roots.
- Punch 1/4 inch holes all over the sides and bottom of the yogurt tub.
- Set the inner bucket back inside the outer one and mark where its bottom sits. Drill a 1/4 inch overflow hole in the outer bucket just below that mark. Don’t skip this step, because without an overflow you’ll drown the roots the first time you overfill.
- Cut the bottom of the PVC pipe at an angle so water runs out freely, then push it through the 1-inch hole until it reaches the bottom of the outer bucket.
- Pack the yogurt tub tight with damp potting mix, then fill the rest of the bucket, firming as you go without stomping it down.
- Plant, water once from the top to settle everything, then fill through the pipe until water runs out the overflow.
After that, you water through the pipe and check it every few days. And once a month, water from the top instead, to rinse the fertilizer salts out of the mix.
You can also build a self-watering garden bed. Check out the full method here
What Your Buckets Are Actually Good For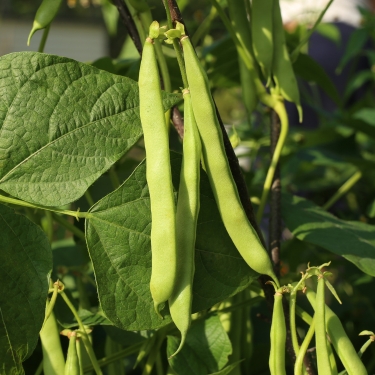
Plenty, once you stop asking them to grow field crops.
Peppers – One plant per bucket, and they like the warm root zone.
Determinate tomatoes – Skip the tall indeterminate types and grow bush varieties like Roma or Celebrity.
Bush beans – Three or four plants per bucket, and you can move them into the sun.
Salad greens and spinach – Shallow-rooted, quick, and easy to shade in summer.
Short carrots, radishes, and turnips – Fast, and the flavor beats anything from a store.
Herbs – Especially mint and oregano, which you want contained anyway.
Final Thoughts
Containers have their disadvantages, but don’t give up on them. Learn what can grow in a container and use them for that. I grow plenty in mine every year, and on a homestead, being able to pick a crop up and move it into the sun or out of the wind is worth a lot.
But five gallons is five gallons. Match the crop to the container, and you’ll get good food out of it all season. Plant the wrong crop and you’ll not understand why your plant is not growing as expected.
You may also like: 
15 Vegetables You Can Actually Pickle Overnight
See How to Easily Winter-Proof Your Entire Garden (Video)
10 Vegetables That Love To Climb
The Right Way to Preserve Vegetables in Oil
Top 7 Best States to Be Self-Sufficient

















Well, you caught me in about 3, maybe four errors. Thank you, I will make the necessary changes. And it looks like we probably have enough growing here in So. Indiana to get a Fall crop out! Thank you! PS. -We love your books!
Thank you! I’m glad this was helpful for you. I am also planning to write an article about fall crops, so stay tuned!