It comes as a surprise to some, but the combination of magnets and spark plugs will generate electricity strong enough to power a light bulb. Even more surprisingly, it will generate that electricity 24/7/365. The power is constant and the only thing to do is replace the light bulb when it eventually burns out.
It’s All About Electromagnetic Induction
The concept of electromagnetic induction was first discovered by Michael Faraday in the 19th century. The magnetic field from the magnets induces an electric current in the spark plugs, generating electricity. There is no external power source needed, and the combination is compact, portable and inexpensive.
Consider the Possibilities
This is a great way to light a remote outbuilding like a chicken coop, shed, barn or even an outdoor area requiring light. You can add an on/off switch to the circuit if you like, but when the electricity is free, that’s less of an issue.
It’s also great for remote areas in an attic, basement, or garage where an electrical outlet is unavailable or used by other appliances. Linen closets, cupboards, storage rooms and other spaces that may not even be wired for electricity are also well served by a perpetual and free source of power.
It’s also an excellent option following a disaster, camping trips, power outages, or any other time you require electricity but don’t have the fuel or the power for it.
It’s Inexpensive and Easy
The total cost for materials is around $20 and the whole project should take less than a couple of hours. We’ll go step by step through the process and talk about options for use beyond lighting.
You could also cannibalize an old motor from an appliance for parts. Most have lots of copper wire and even magnets to power their motors, although neodymium magnets work best. That would mean you only need to buy the spark plugs unless you have a way to salvage them.
Building a Pocket-Size Generator
As we mentioned, it’s possible you may have some of these materials around your home or homestead, which will save you even more. Here’s the list for tools and materials:
Tools
- Wire stripper
- Needle-nose pliers.
- Glue gun
- Glue sticks
- Soldering iron
- Solder
- Soldering paste (flux)
Materials:
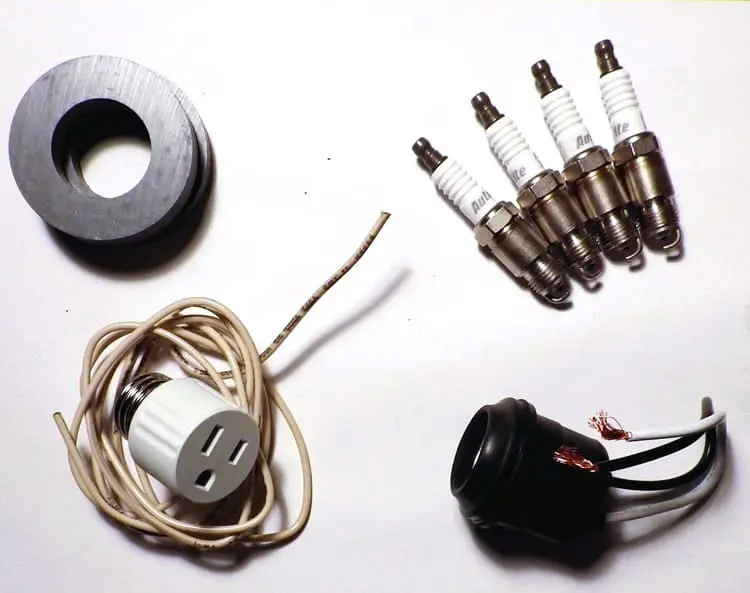
- 2 large neodymium magnets, ½ inch thick and 3 inches in diameter (you can buy them online)
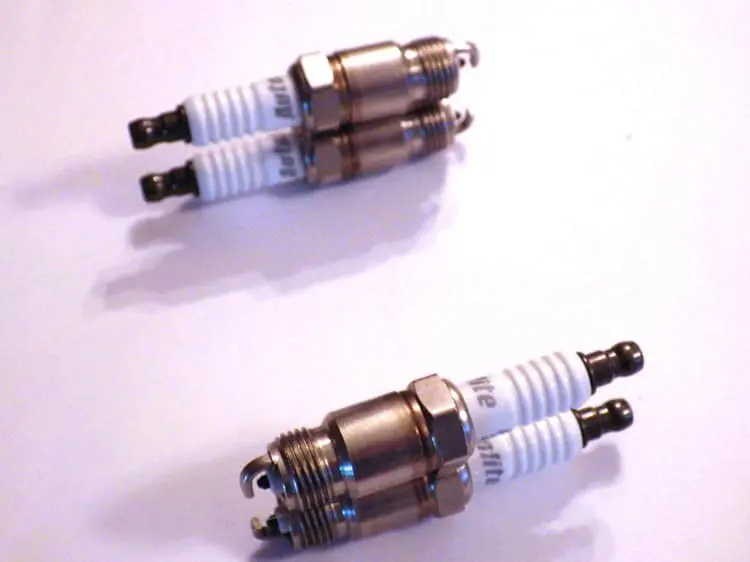
- 4 spark plugs (any type and any size as long as they’re all the same)
- 3 feet of 8-gauge white wire
- 1 foot of 14-gauge copper wire
- Wired lightbulb socket
- Lightbulb
- Screw-in outlet plug (optional)
- Black electrical tape
- Liquid electrical tape
Directions:

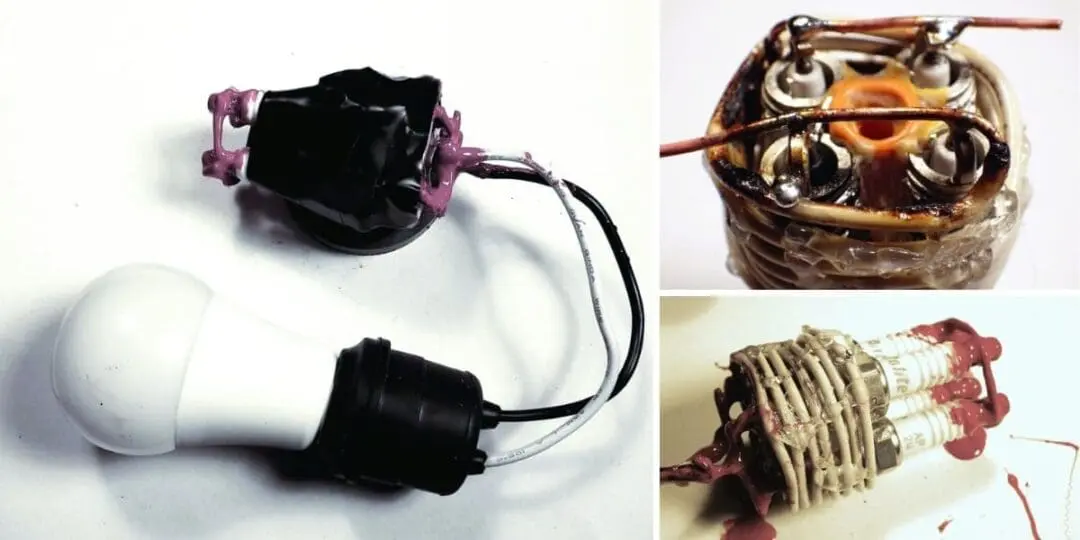
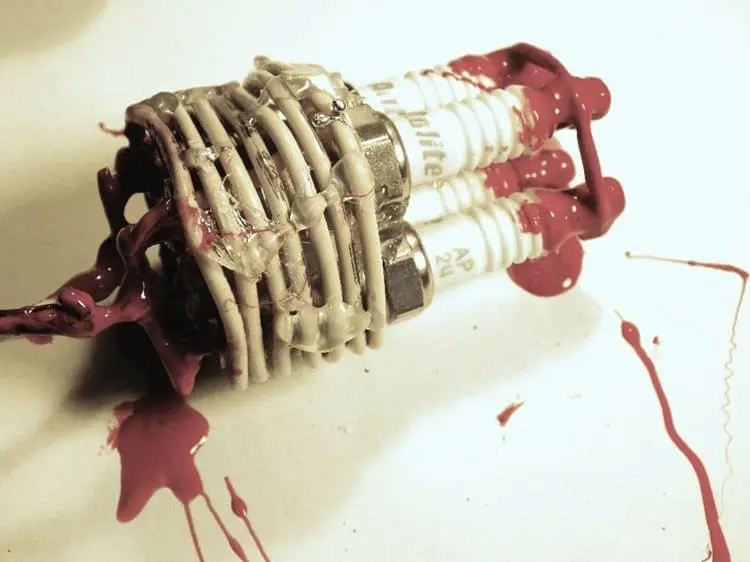
- Use your hot glue gun to glue the 4 sparkplugs into a block of four. Apply the glue to the hexagonal metal ridge.
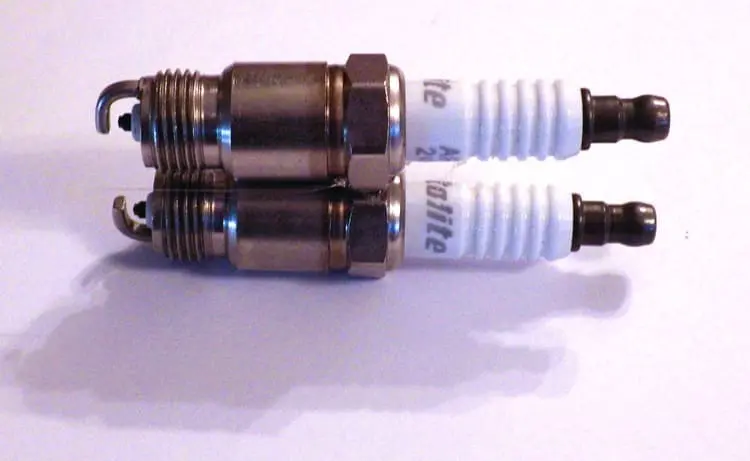
2. Make sure that the curve in the gap is facing in the same direction on the first two spark plugs.
3. Continue to apply the glue on the hexagons until the four sparkplugs are glued into a tight block of 4.
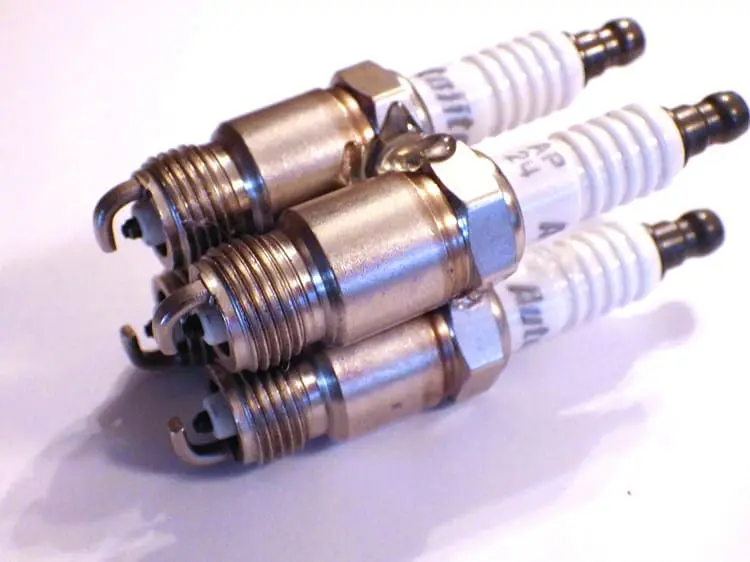
4. Again. Make sure that the curve in the gaps are pointing towards each other.
5. Check for any need for more hot glue to create a tight lockup.
6. Continue to carefully apply glue to cement all four of the sparks plugs together.

7. Cut a short length of plastic tubing or other round shape that will fit into the gap formed by the screw end of the spark plug. The only purpose for this snug-fitting tube is to provide some support for the ends of the spark plugs when you wind wire around all four of the plug ends.
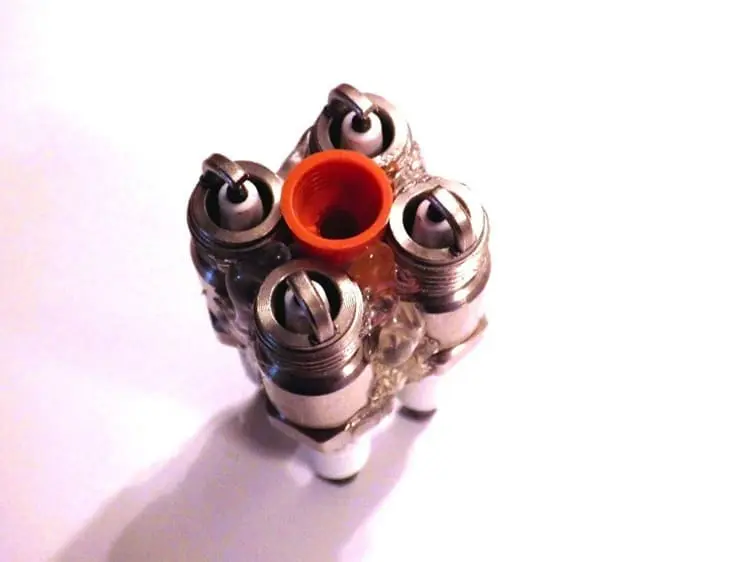
8. Glue the spacer in place within the gap.
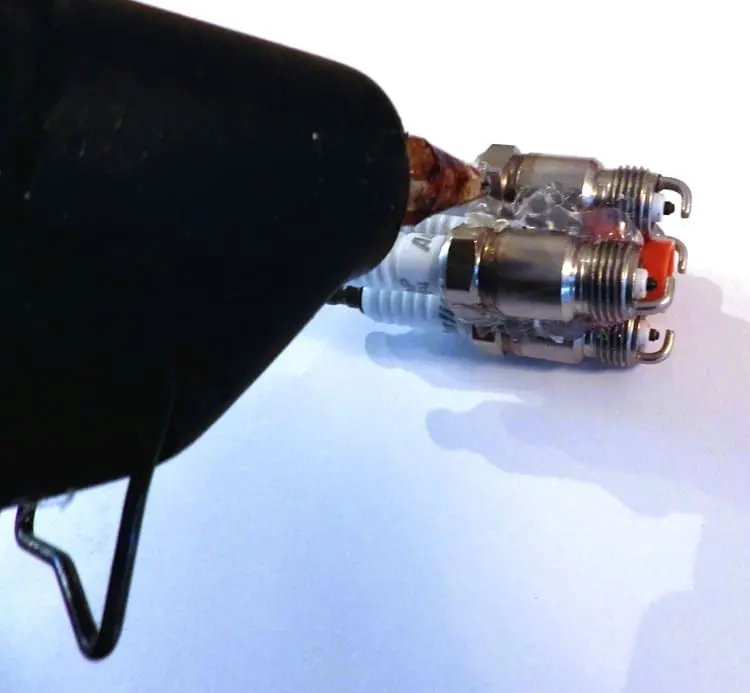
9. Put a dab of hot glue on the top of the spark plug assembly and glue your white, #8 wire, leaving about two inches of overhang.
10. You’ll later strip the end of this wire, or you can strip it about 2 inches before glueing and wrapping.

11. Wrap the white #8 wire around the 4 spark plugs in tight, concentric circles.
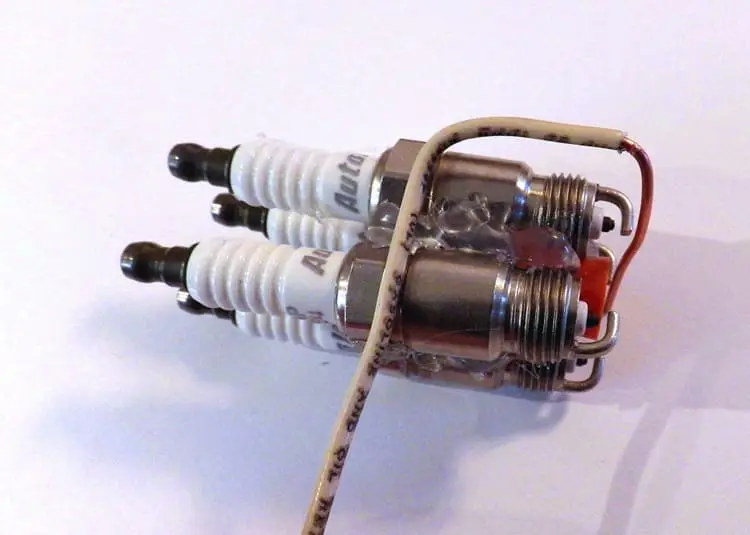
12. Wind the wire to the top of the spark plugs at the gap end of the plugs and strip both ends of the wire. You could also add hot glue to hold the wires in place around the plugs.
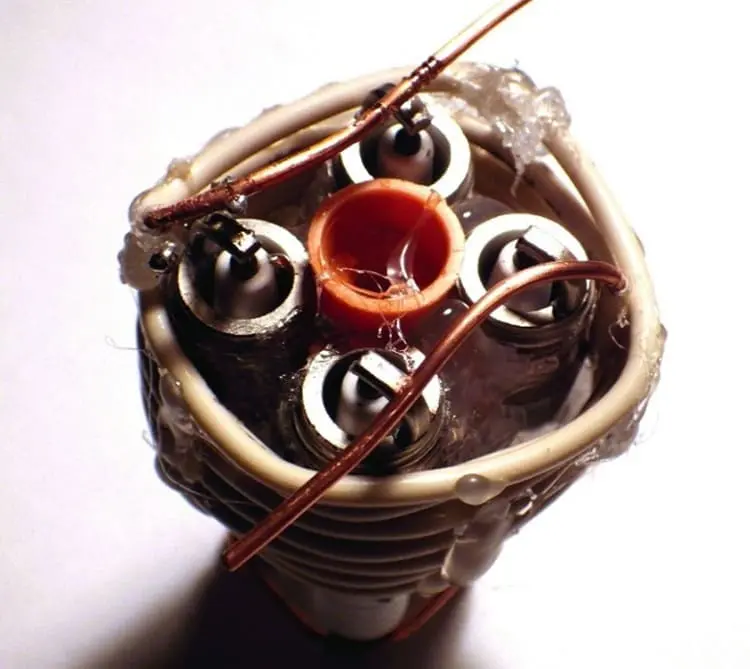
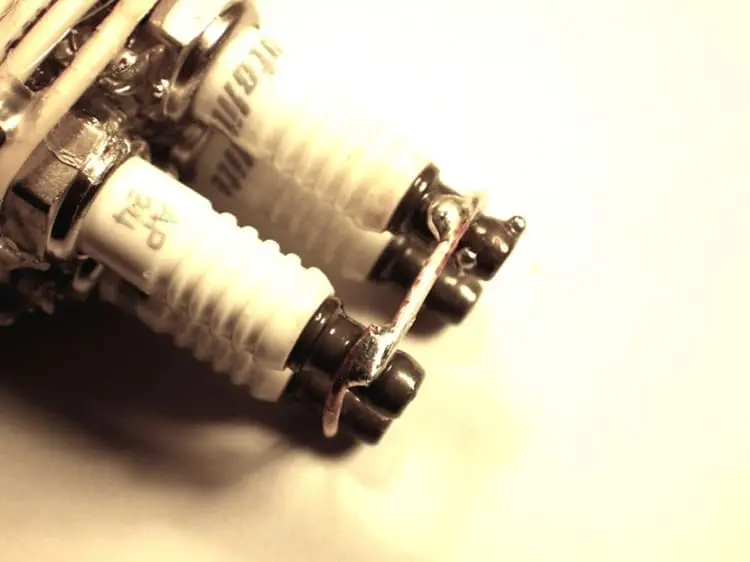
13. You then use needle-nose pliers to fold the exposed copper ends over the spark plug gaps.
14. Solder the exposed copper wire across the spark plugs on both sides.

15. Wrap the stripped piece of #14 copper wire around the top end of the spark plugs.
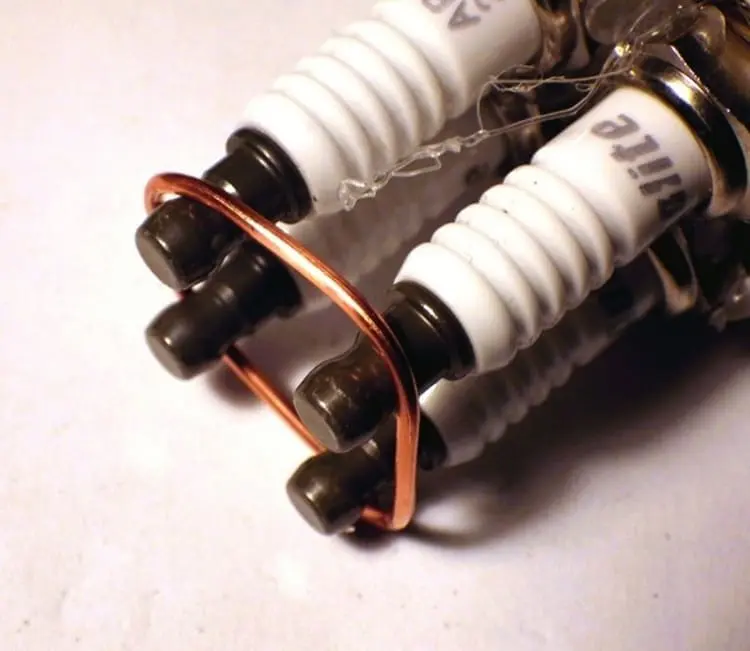
16. Solder to each one of the plugs tops, forming a complete and soldered circle.
17. Solder the light bulb socket wires to the top and the bottom wire, bridging the spark plugs at the bottom.
18. You now have the basic engine assembled for your pocket generator.
19. Before assembling your pocket generator, it may be wise to cover any exposed copper wires. The wires will have an electric charge, and this will avoid a shock. One good solution is a liquid electrical tape.
20. Apply the liquid electrical tape to all exposed copper at the top and bottom of the plug assembly.
21. The basic assembly is now complete once the liquid electric tape dries.
22. One last step is to wrap the plug assembly with black electrical tape.
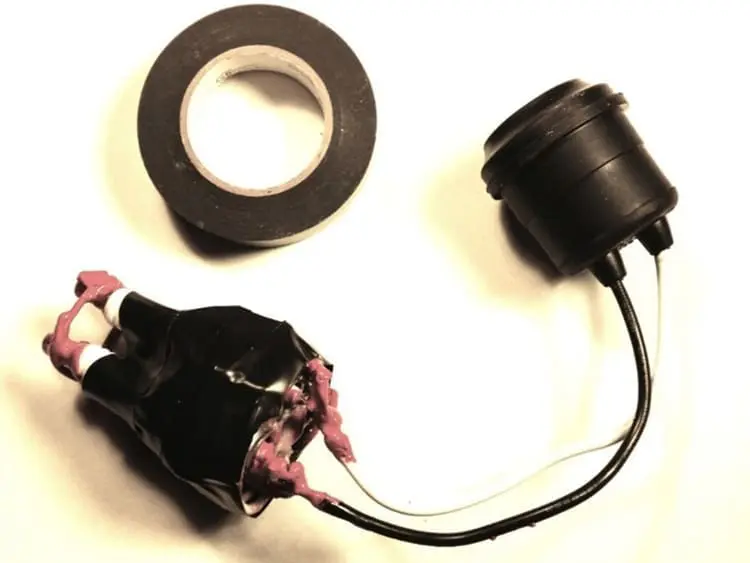
23. And you’re now ready to glue the magnets to the plug assembly.
24. Start by applying some hot glue to the magnet and place the plug assembly on top.
25. Place the other neodymium magnet on tope and the bulb will illuminate.
Beyond the light bulbs
Your portable pocket generator can do more than provide light. What it can power depends on the wattage and voltage you’re generating, which will depend on the number of spark plugs you use and the strength of the magnets. Neodymium magnets are best, although all magnets will give you varying levels of results.
A critical component is a screw in an electrical socket.
That will make it easy to plug in most appliances.
Here are some other possible uses for your portable generator:
- Power the heat for a chicken waterer in a chicken coop in winter to prevent freezing.
- Run a small water pump for perpetual water flow from a lake, creek, or river to anywhere you need it.
- Run an insect zapper in a remote location.
- Power small ventilation fans for a coop, stye or other outbuildings for non-stop ventilation.
- Permanently power an audible perimeter alarm that is motion-activated and some distance from your home or homestead.
Scaling Up Your Portable Generator
A great way to assess the power of your portable generator is with a voltmeter. It can measure volts, watts and amps depending on the setting. To increase the power, you can add more sparkplugs, more magnets or connect more than one portable generator. Measure the output and you can continue until you have the power you need for a particular appliance or application.
But Here’s the Thing About Small Generators…
A pocket generator like this is a handy little project, and it can definitely get you out of a bind when you need light in a pinch. But let’s be real for a second. It’s not going to run your homestead. It won’t keep your fridge cold during a three-day outage. It won’t power your well pump when the grid goes down in January. And if you’ve been homesteading long enough, you know those situations aren’t hypothetical. They happen, and usually at the worst possible time.
The truth is, one small project isn’t enough. What you actually need is a full set of skills and backup systems so that when the power disappears, your life doesn’t fall apart with it. I’m talking about things like building your own bicycle-powered generator, setting up a DIY wind turbine that actually produces usable electricity, rigging up ways to charge your phone and run basic communication when there’s nothing coming out of the wall.
That’s exactly what the No Grid Survival Projects was put together for. It’s a collection of hands-on, step-by-step projects designed specifically for people who want to be ready when the grid isn’t there to save them. These are projects you can build with common tools and materials, and they cover way more than just electricity. Food preservation, water sourcing, heating, shelter, security, and dozens of other systems that a self-sufficient homestead actually needs to function off-grid.

This pocket generator I just built is a good first step. But it’s one step. The No Grid Survival Projects gives you the rest of them. If you’re serious about being truly self-sufficient, this is the resource that fills in the gaps.
You may also like:
20+ Everyday Tools That Will Save Your Life In The Next Crisis
How to Collect Clean, Drinkable Water from Plants (Video)
Don’t Throw Away Your Used Tires! Do This Instead
15+ One-Hour Projects You Need to Get Done By Summer
8 Off-Grid Projects I Regret Building on My Property


What voltage does this produce? Watts?
0 and 0
Wow! Nice electric generator, BUT it sure would be nice to see how the magnets are positioned on the spark plugs??
I would like to build one and try it out, but I not going to waste $20 for something that doesn’t work because the plans are incomplete
Sounds nice, I am very tempted to make one. But a few things are unclear.
1. The placement of the magnets… I assume he puts one round magnet flat, then puts the device on it, and then puts another round magnet on top of that, kind of like a sandwich.
2. The hexagonal parts of the four sparkplugs, are they allowed to touch together or are they insulated from each other by the hot glue? If the metal hexagonal parts are touching, then that would short out the bent ground electrodes (since those electrodes are one piece with the the hex part); then what is the point of connecting those electrodes with the coiled wire, if they are already connected at the hex areas?
3. Most importantly. Most electric “generators” do not really generate anything; they simply convert other types of energy (mostly kinetic (or motion) energy) into electric energy. For this to happen, something must be spinning the magnets around the coil. Only moving magnetic fields induce electron flows, not stationary magnetic fields…. And this generator, what energy does it take as an input and converts it into the electric energy?
This almost sounds like a perpetuum mobile — perpetual engine that takes no inputs to generate outputs…. a theoretical impossibility. In other words, what is its principle of operation?
I wish the author could clarify these points before we all go out spending time on it, to make sure we do it right.
I don’t see any possibility of this actually working, and you’ll notice none of the pictures show the bulb lit, or where the magnets go. Magnets must be moved over a coil (or vice versa) to induce electricity.
This should have been published on April Fools Day.
All the points above are well taken. I had the same question about how to attach the magnets and the ones I saw online are not inexpensive not $20 for two, way more. Like one person said you need to have the magnets to move to generate a current in the wire. Did anyone receive a response or is this a spoof.