The first time I lost a whole year of saved seed, it was not to mice or mold I could see. It was a shoebox of paper envelopes on a shelf in a kitchen that swung from steamy canning days to dry winter heat. By spring, half my bean and pepper seed barely sprouted.
That loss taught me that the container matters as much as the seed. An airtight container for seed storage is the single cheapest upgrade you can make to your seed bank, and it is the difference between seed that lasts one season and seed that lasts many. Here is everything I have learned about choosing the right container, preparing seeds for it, and keeping it in the right spot.
If you are still learning to collect your own, start with our guide on how to harvest seeds from plants you are already growing. Then come back here to store them properly.
Why an Airtight Container Matters So Much
Seeds are alive, just sleeping. Every bit of moisture and warmth they absorb nudges them toward waking up and burning through the stored food that keeps the embryo alive. Keep them dry and cool, and they sleep deeply for years.
Moisture is the big one. Colorado State University Extension explains that seed left out in the air takes on moisture from its surroundings: at 15 percent relative humidity, seed dries down to about 6 percent moisture and stores safely for years, but at 90 percent humidity it holds around 19 percent moisture and germinates poorly after just one year. An airtight container cuts that link to the air outside, so your seeds stay as dry as the day you sealed them.
The numbers on drying and cold are striking. Kew’s Millennium Seed Bank notes that every 1 percent drop in seed moisture roughly doubles a seed’s life span, and every 5°C of cooling doubles it again. You do not need a laboratory to put that to work at home.
Oxygen Is Not Really the Enemy
A lot of folks assume they need vacuum sealing or oxygen absorbers. Colorado State’s research summary says that when seed moisture and temperature are kept low, oxygen has not been shown to affect seed longevity, and germination is unaffected by storage in nitrogen, carbon dioxide, partial vacuum, or plain air. The job of an airtight container is to keep moisture out, not air.
What “Airtight” Really Means
Plenty of containers look sealed and still let humid air creep in over months. Colorado State gives a simple standard I use: a moisture-proof container is one that keeps seed safe while submerged in water. The same publication recommends sealed cans or jars over plastic bags.
You can test any container at home. Put a folded, dry paper towel inside, close it, and hold it underwater in a sink or bucket for a few minutes. If you see bubbles or the towel comes out damp, that container is not airtight enough for long-term seed storage.
The Best Airtight Containers for Seed Storage
There is no single perfect container. I use several types depending on how much seed I have and how often I need to get into it.
Glass Canning Jars
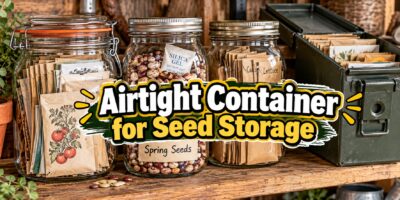
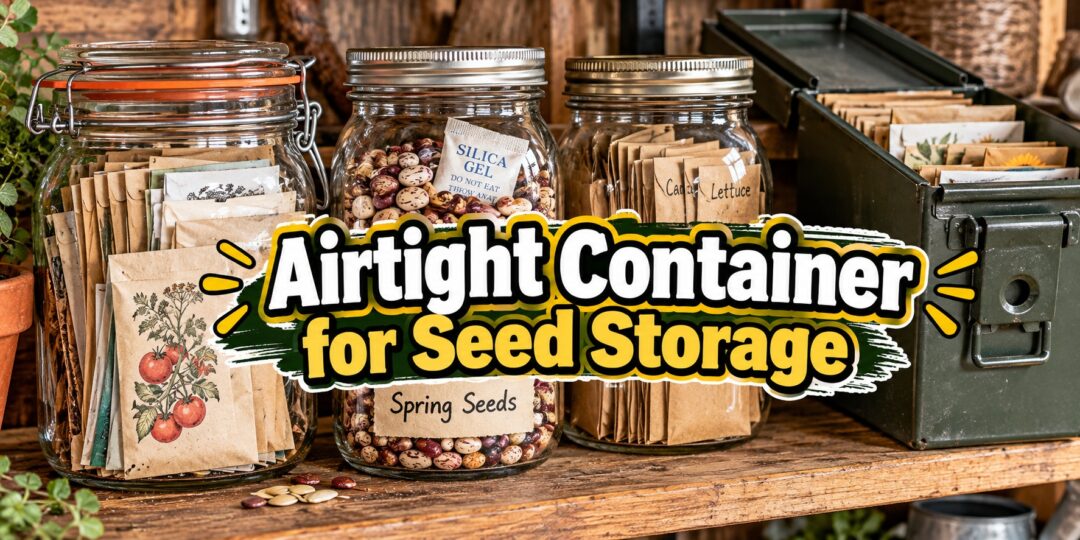
Glass jars with two-piece lids or one-piece screw caps are my workhorses. Glass does not let moisture through, it does not hold odors, and I can see at a glance what is inside. Several seed envelopes fit in one quart jar, so a few jars can hold an entire garden.
Check the lid seal every time you use one. Old rings with rust, bent lids, or sealing compound that has gone hard will let air in.
Bail-Top and Clamp Jars
These are the jars with a glass lid, a thick rubber gasket, and a metal wire clamp. Seeds of Diversity notes that snap-top mason jars work well, but jars with thicker rubber seals and metal clasps make a better seal for long-term storage. I keep my most precious heirloom varieties in these.
Metal Tins and Ammo Cans
Steel ammo cans with rubber gaskets are nearly indestructible, block light completely, and stop mice cold. The Food and Agriculture Organization lists tin cans, metal boxes, and glass jars with tight-fitting lids among its recommended seed containers. Just make sure the gasket is intact and the can is dry inside before you load it.
Food-Grade Plastic Containers and Buckets
Plastic storage containers with gasketed lids work fine for short-term storage and for keeping envelopes organized. For multi-year storage, I treat them as a second layer rather than the main barrier, since many plastics are not as moisture-proof as glass or metal over time. A gasketed bucket full of sealed jars, though, is a great way to protect a whole seed bank from rodents and light.
Mylar Bags and Vacuum-Sealed Pouches
Heat-sealed mylar and heavy vacuum-sealer bags are good moisture barriers and handy for bulk seed or a backup stash you will not touch for years. The downside is that once you cut them open, they are hard to reseal well. Since oxygen is not the problem, you can skip oxygen absorbers and focus on getting the seed dry before you seal.
Small Inner Containers
Paper coin envelopes, pill bottles, and old film canisters are great for separating varieties and writing labels, but they are not the airtight barrier. Put them inside a jar or can. Paper envelopes inside a sealed jar are actually ideal, because the paper keeps varieties apart while the jar keeps moisture out.
What I No Longer Use
- Shoeboxes and cardboard. As the Maine Organic Farmers and Gardeners Association puts it, the shoebox on the shelf does not really qualify as proper storage.
- Zipper bags on their own. Thin bags let moisture through over months and are easy for mice to chew.
- Anything that held strong-smelling food. Some plastics never fully lose odors and oils, and I would rather not find out whether that affects my seed.
Dry the Seeds Before You Seal Them
An airtight container locks in whatever moisture is already in the seed. Seal damp seed, and you have built a tiny mold chamber. Drying comes first, every time.
Colorado State recommends drying seed to below 8 percent moisture for a storage life of up to ten years. Their method is to dry seed at about 100°F for six hours, never in a microwave, and only in a conventional oven if the door stays open and the seed never goes above 100°F. Because direct sun can easily overshoot that temperature, they note drying in the shade may be better.
Seeds of Diversity offers two practical tricks. Package seeds on a dry day, or run a dehumidifier in the room to bring humidity to 35 percent or lower before sealing. For extra drying, seal an envelope of silica gel in a jar with your seed envelopes for two days, then remove the silica so the seeds do not over-dry.
Go Easy on Beans and Peas
Drier is better for most seed, but beans and peas can be overdone. Colorado State warns that drying below about 8 percent can produce hard seed, which refuses to absorb water and sprouts unevenly or not at all. If you suspect your beans or peas are overdried, the same source says they germinate better after two weeks in a humid atmosphere before planting.
Desiccants That Keep the Inside of the Jar Dry
Even a well-sealed jar holds a little humid air from the day you closed it, and that air comes back every time you open it. A small desiccant packet soaks up that moisture.
- Silica gel. Sold for drying flowers at craft stores, silica gel is my first choice. Many types can be recharged by warming them in a low oven, so follow the directions for the product you buy.
- Powdered milk. MOFGA notes that a tablespoon or two of powdered milk from a freshly opened box will absorb excess moisture in a glass jar for about six months. Wrap it in a tissue or paper towel so it stays put, and swap it out twice a year.
- Old-time options. The FAO’s seed storage guidance lists dry wood ash, dry charcoal, powdered milk, toasted and cooled rice, and small pieces of newspaper as moisture absorbers.
Remember that a desiccant is a helper, not a fix. It cannot rescue seed that went into the jar damp.
Where to Keep Your Airtight Containers
Once the seed is dry and sealed, the goal is cool, steady temperatures and darkness. A handy rule of thumb from University of Illinois Extension is that the temperature in degrees Fahrenheit plus the percent relative humidity should add up to less than 100. Storing seeds at 60°F and 30 percent humidity is good; 50°F and 60 percent humidity is not.
The Refrigerator
You will hear people say the fridge is too damp for seeds, and for loose envelopes that is true. Seeds of Diversity rates the fridge a poor spot because it is so humid inside. In an airtight jar, though, that humidity cannot reach the seed, and Colorado State recommends a refrigerator or deep freezer for long-term storage of moisture-proof containers.
One more fridge tip from UW-Madison Extension in Dane County: keep seed away from fruits and vegetables that are past their prime, because aging produce gives off ethylene gas, which can hurt germination. I keep my seed jars on their own shelf, never in the crisper.
The Freezer
Freezing is how the big seed banks do it. The USDA’s National Laboratory for Genetic Resources Preservation stores seed at minus 18°C after adjusting its moisture, and Kew keeps its dried seed at minus 20°C. At home, the freezer is a good choice for long-term backup stock, but only for seed that is thoroughly dry, since Seeds of Diversity notes that seeds dried in silica gel or very dry air will not be damaged by freezing.
Not every seed can be dried and frozen. The FAO lists species such as mango, avocado, cacao, and neem whose seeds do not tolerate drying or cold and should be planted soon after collection. Common vegetable and herb seeds handle drying and cold just fine.
Off-Grid and Low-Power Options
If you have no spare fridge space, a cool, dry closet on the main floor of the house works well, and Seeds of Diversity actually ranks a dry closet above a damp basement, because dry matters more than cold. Airtight jars in a basement or root cellar are also good, since the container shields the seed from the humidity. If you are weighing options for cold storage without the grid, our comparison of a root cellar vs. a solar fridge covers the tradeoffs.
Avoid heated garages and spots near stoves, furnaces, or sunny windows. Big temperature swings cause condensation, which is exactly what you are trying to keep away from your seed.
The Condensation Trap
Here is the mistake I see most often. When you pull a cold jar out of the fridge or freezer and open it right away, warm room air rushes in and condenses on the cold seed inside. Let sealed jars come all the way to room temperature before you open them, which usually takes a few hours for a fridge jar and longer for a frozen one.
Open your containers as rarely as you can. Seeds of Diversity points out that opening a jar immediately equalizes the moisture inside with the room air, and the FAO advises opening seed containers only when necessary. I organize my jars by planting time, early spring, late spring, and fall, so each jar gets opened only once or twice a year.
How Long Will Seeds Last in an Airtight Container?
Colorado State says that in Colorado’s dry climate, vegetable and flower seeds keep at least one year at room temperature without much loss, and storage can stretch to ten years or more under proper conditions. How long a particular seed lasts still depends heavily on the crop.
Illinois Extension gives these rough guidelines for properly stored seed:
- About 4 to 5 years: basil, broccoli, cabbage, cauliflower, cucumber, eggplant, lettuce, pumpkin, radish, squash, sunflower, tomato, watermelon, and zinnia.
- About 3 years: beans, carrots, peas, peppers, and okra.
- About 1 to 2 years: onion, parsnip, fennel, sage, coneflower, and sweet corn.
Estimates vary between sources, so treat any chart as a starting point rather than a promise. PlantTalk Colorado adds that long-lived seeds with hard, water-tight seed coats can stay viable for 15 or 20 years. Onion and parsnip are famously short-lived, so I save or buy those fresh most years.
Test Before You Trust Old Seed
Even in the best container, seed slowly loses vigor. Before I count on an older jar, I run a simple germination test in late winter, and our guide on how to germinate seeds goes deeper into what seeds need to sprout.
Illinois Extension’s method is easy. Place 10 seeds on a damp paper towel, fold it over, seal it in a plastic bag, and keep it somewhere warm, around 70°F, checking every few days. Most seeds sprout within 7 to 10 days, and the number that sprout tells you your germination rate.
If all of them sprout, plant normally. Illinois suggests sowing a little thicker when 70 to 90 percent germinate, and buying new seed when fewer than 50 to 60 percent do. UW-Madison Extension adds that below 40 percent it is usually better to get fresh seed, because the few that sprout may grow weak and unproductive.
For your most valuable varieties, test more than 10 seeds. University of Alaska Fairbanks Extension notes that the reliability of a home test depends on sample size, so pick seeds at random rather than choosing the plumpest ones, and use a larger count when you can spare the seed.
My Airtight Seed Storage Routine, Step by Step
- Dry seeds thoroughly in a warm, shady spot with good airflow, keeping them at or below 100°F.
- Package each variety in a paper envelope labeled with the name, the date, where it came from, and any germination test results.
- Group envelopes by planting season and place them in a glass jar, clamp jar, or gasketed can.
- Add a small silica gel packet or a tissue-wrapped tablespoon of powdered milk.
- Seal the container on a dry day, and test any new container type underwater first.
- Store jars in the fridge, the freezer for very dry backup stock, or a cool, dark, dry closet.
- Let cold jars warm to room temperature before opening, and reseal them quickly.
- Recharge or replace desiccants about every six months, and run germination tests each winter on older seed.
🌱 Saving Seeds Is Just the Beginning. Could You Survive Without Modern Conveniences?
A jar full of carefully preserved seeds represents something far more valuable than next year’s garden. It represents the ability to grow your own food, protect your family’s future, and become less dependent on a system you cannot always control.
But what happens after those seeds sprout? Could you grow enough food to feed your family? Preserve your harvest without relying on electricity? Keep your household running when the power goes out or store shelves are empty?
These are the kinds of practical skills our grandparents understood, but many of us have forgotten.
That’s why Lost Skills of Independence is such a valuable resource for anyone serious about self-sufficiency, homesteading, and preparedness.
This comprehensive guide helps you rediscover traditional knowledge and practical techniques that can make your home more resilient, your family more prepared, and your everyday life less dependent on expensive modern conveniences.
Discover How to Become More Self-Reliant
- 🌱 Grow and protect your own food supply: Explore traditional gardening, seed-saving, and food-growing practices that can help you build a more sustainable homestead.
- 🫙 Preserve what you grow: Learn practical approaches to food preservation and storage so your hard-earned harvest doesn’t go to waste.
- 🏡 Make your home more self-sufficient: Rediscover everyday skills that helped previous generations manage their households with fewer modern conveniences.
- 🔥 Prepare for life without electricity: Explore practical ways to handle essential household needs when the grid is unavailable.
- 🛠️ Save money with forgotten DIY skills: Reduce unnecessary spending by learning to make, maintain, repair, and reuse more of what you need.
- 🌾 Build lasting independence: Develop useful knowledge that can serve you through rising prices, supply shortages, and unexpected emergencies.
Your Greatest Survival Resource Isn’t What You Store. It’s What You Know.
You can stockpile hundreds of seed packets, fill shelves with emergency supplies, and buy all the survival equipment you can afford.
But supplies eventually run out. Skills stay with you.
Imagine knowing how to produce more of your own food, preserve seasonal abundance, stretch limited resources, and solve everyday problems without depending on someone else.
That’s the kind of independence worth working toward.
Lost Skills of Independence is an opportunity to reconnect with the resourcefulness that once made ordinary households remarkably resilient.
Don’t wait until you need these skills to start learning them.
👉 Discover Lost Skills of Independence and Start Building a More Self-Sufficient Future
Final Thoughts
Building a seed bank is one of the most self-reliant things a homesteader can do, but saved seed is only as good as the way you store it. A good airtight container, dry seed, a little desiccant, and a cool, steady spot will carry most of your garden seed safely through many seasons.
Start with a few quart jars and the seed you already have. Next spring, when those old envelopes sprout like they were packed yesterday, you will be glad you did.
You may also like:
Canning Jalapeños: Safe, Tested Ways to Preserve Your Pepper Harvest
The Silent Stockpile Killer. Do You Have It In Your Pantry? (Video)
Canning Spaghetti Sauce the Safe Way: A Complete Guide
Canning Carrots – The Complete Guide
Canning Myths Debunked By The Amish
Deadly Canning Mistakes You Probably Make