Something I’ve noticed over the years is that when homesteaders get stuck on a problem, sooner or later somebody starts looking at how the Amish do it.
And it’s easy to see why.
Amish families that have farmed the same ground for generations, most of them with no power on their farm, are still growing some of the best produce in the country. Just look how popular they are at the farmers’ market.
There are something like 100 Amish and Plain-community produce auctions running across America right now, and many of the greenhouses feeding them run on lumber, water, sunlight, and manure.
Not much else.
So I started paying attention. Then I started copying a few things at home. This is how I actually managed to double my harvest last year.
Here are seven Amish greenhouse ideas worth stealing. Most are cheap, simple, and things you can actually do this season.
Lean The Greenhouse Against a Wall You Already Have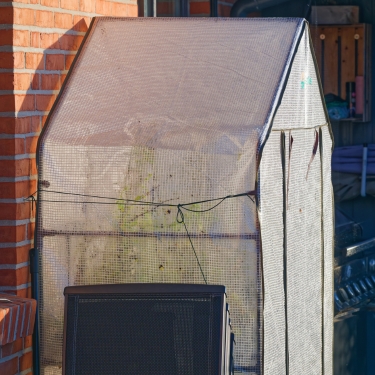
One of the most interesting things about Amish greenhouses is where they’re built.
They’re usually not sitting alone in the middle of a field. Instead, they’re tucked against the south side of a barn, shed, or house.
Right away, you’ve saved one whole wall. That’s less lumber, less plastic, and less work.
But this idea does more than save you some materials. The southern walls sit in the sun all day, warm up, then give this heat back during the night. It’s basically free nighttime heat from a building you already own.
When my husband and I put ours up, we ran it along the south side of the equipment shed. I was mostly thinking about saving money on boards. But in the end it also kept the temperature steady when it started to get cold outside.
Our old freestanding greenhouse warmed up fast and dropped hard at night. This one doesn’t swing nearly as much.
Just make sure the spot faces south and isn’t shaded by noon. A big tree or another building can ruin a good greenhouse spot pretty quickly.
Keep Your Seedlings Warm With a Manure Hotbed
Tomato and pepper seeds don’t do much until the soil gets up around 70 to 75°F. Most people solve that with heat mats.
The problem is that those mats can cost $30 to $100 each!
If you’re starting a bunch of trays, you may need several, and then you’re paying to run them all spring.
Fresh horse manure can do the same job for free.
When manure and straw bedding break down together, they make real heat. Penn State Extension tested a hotbed inside an unheated greenhouse when it was 23°F outside, and the inside of that hot box stayed well above freezing.
Here’s how to set one up:
Make the box. Dig a trench or build a raised box inside the greenhouse, right under where your trays will sit.
Fill it with fresh manure. Horse manure mixed with straw bedding is best. It needs to be fresh. Old manure has already done most of its heating.
Pack it and water it. Tamp it down every six inches or so and soak it well. Packing it helps it heat steadily and last longer.
Cover it with soil. Put about six inches of finished compost or good soil over the manure. Fresh manure gives off ammonia, so you don’t want seedlings sitting right on top of it.
Wait a few days. Let that first hot surge settle down before putting your trays on top.
Now, it’s easy to see why the Amish love this method so much: they have horses.
Most of us don’t. And if you don’t have fresh manure sitting around, or don’t want to spend money on heat mats, the next best thing is to use heat you’re already paying for: the heat inside your house.
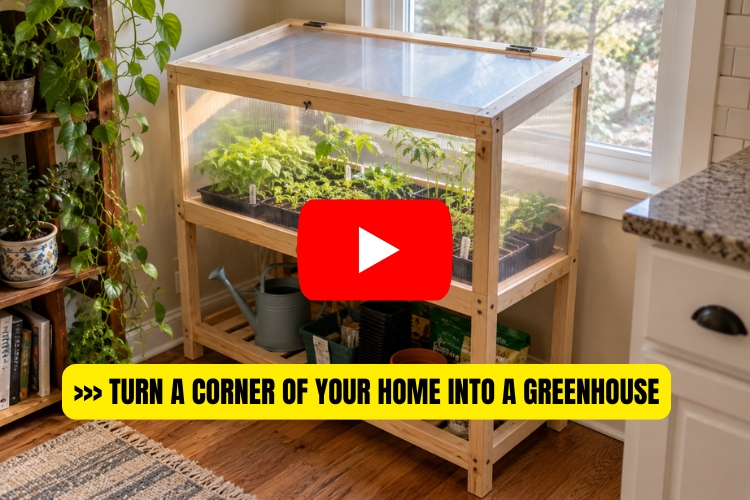
A small indoor greenhouse doesn’t take up much room. You can fit one in a spare corner, a closet with a grow light, or even the kitchen. I actually like the kitchen idea because you’re cooking there every day and making heat anyway.
Your seedlings stay warmer, you can keep a closer eye on them, and you can get a head start on the garden without adding much to your electric bill.
Here you can find a guide on how to build a small indoor greenhouse for your seedlings →
Put Low Hoops Over Your Beds
Trying to heat an entire greenhouse in February is a good way to watch your money disappear.
A simpler answer is to protect the plants instead of heating all that empty air.
Bend wire or thin PVC into low hoops over your beds, then cover them with frost cloth at night. Now the greenhouse is your first layer, and the cloth is your second.
It can buy you several degrees on a cold night, and a basic setup may cost around $20 in cloth.
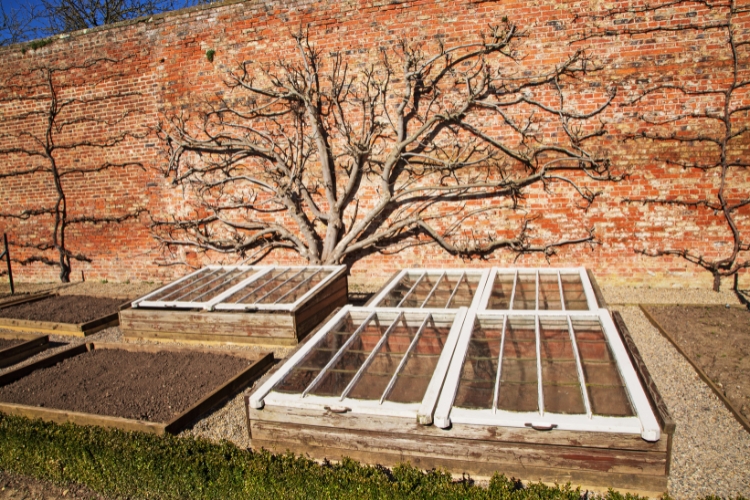
You’ll see the same idea in little cold frames around Amish gardens. Scrap wood, plastic, straw, whatever they have. Nothing fancy. The point is to trap some of the heat coming out of the ground and keep the cold air off the plants.
Stick with crops that can handle cool weather. Spinach, kale, mache, carrots, leeks and collards are all good choices.
The only annoying part with low hoops is pulling the cover off every time you need to weed, water, or pick something.
There’s a better way to build them. You can attach the hoops right to the raised bed and put the whole cover on hinges, so it lifts up like a lid and stays out of your way while you work.
It also gives you a more permanent setup you can use again and again when frost or bad weather shows up.
Here’s how to build the Amish-style version from scrap materials →
Line the North Wall With Black Barrels
Water holds heat really well, and you don’t need electricity to make it work.
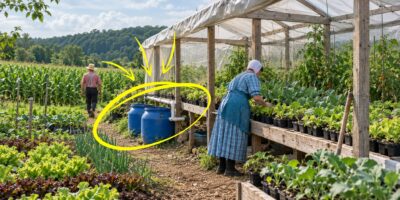
Put 55-gallon drums along the north wall of the greenhouse, paint them flat black, and fill them with water. During the day, they soak up heat. At night, they slowly let it back out.
They won’t make the greenhouse warm, but they can raise the low temperature a few degrees and help smooth out those big day-to-night swings.
I put four barrels in ours three springs ago. I found used food-grade barrels for ten dollars each from a fellow down the road and painted them with a quart of black paint I already had in the shop.
Also, those barrels don’t have to sit there doing just one job.
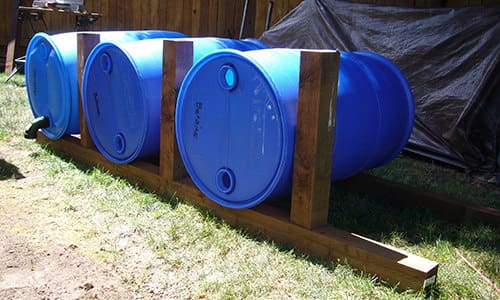
If you’re already using them to hold heat, you can run the greenhouse gutter into them and use the same barrels to catch rainwater. Now they help steady the temperature at night and give you water for the plants later.
I like this 3-barrel setup because it shows a simple way to connect several barrels together, so you can store a lot more of the water coming off that roof.
See how the 3-barrel rainwater system is put together →
That’s how I decided to run the greenhouse gutter into my barrels.
That turned out to be one of my favorite parts. The same barrels that hold heat also store water, so I’m not hauling nearly as many buckets. And the water is already warmer when I use it.
Some Amish growers do something similar with the floor. They’ll use crushed limestone or gravel instead of boards. The rock heats up during the day, hangs onto some of that warmth at night, and helps keep weeds down too.
Add a Vent That Opens Itself
This is one small thing I’ve spent money on when I built my greenhouse.
A greenhouse on a sunny April day can cook what’s inside in about two hours. If you’re not home or you simply forget to open the vent, you can come back to a flat of dead tomato starts.
An automatic vent opener fixes that without using electricity.
It’s a metal cylinder filled with wax that mounts to the vent window. As the greenhouse warms up, the wax expands and pushes the vent open. When it cools, the wax contracts and a spring closes it.
No batteries. No wires. No thermostat.
Most start opening somewhere between 63 and 77°F, and you can adjust them. They usually cost about $45 to $60, and the cylinder can be replaced when it eventually wears out.
For an off-grid greenhouse, that’s pretty hard to beat.
Grow Your Own Transplants
Amish greenhouses aren’t just hobby buildings. A lot of them are family businesses.
Drive through Lancaster County in May, or through Amish areas in western New York and Wisconsin, and you’ll see greenhouses selling bedding plants, hanging baskets, vegetable starts, and seed potatoes.
You can use the same idea on a smaller scale.
A flat of tomato starts at the garden center can cost $20 or more. If you grow your own, you can replace $200 to $400 worth of nursery plants with a $4 bag of seed-starting mix and some seeds.
That adds up fast if you plant a big garden.
A lot of Amish growers also save seed from what they grew the year before instead of buying new seed every spring.
Some of those seeds go back a lot further than most people realize.
Amish families have kept certain heirloom varieties going for more than 50 years, passing the seed from one generation to the next. Even varieties like the old Amish Paste tomato are still being grown this way.
And that’s only part of how they avoid buying the same things over and over every year.
See what the Amish still save and grow for themselves →
Make Your Plastic Last
The plastic skin is one of the highest costs on a hoop house, so it’s worth taking care of.
Good greenhouse film is 6 mil and UV-rated. If you treat it right, it can last for years. The clear plastic sheeting from the hardware store can be a different story. Sun and wind can destroy it in a single summer.
So I advise you to buy the right stuff once instead of buying the wrong stuff four times.
Then protect it.
Pad every contact point. Cover screw heads, bolt ends, and sharp edges where the plastic touches the frame. That’s where little tears usually start.
Stretch it on a warm day. Warm plastic pulls tight and stays tighter. Put it on cold and it can loosen, flap in the wind, and wear itself out.
Wash it. Dust and algae block light. A rinse once or twice a year costs almost nothing.
Keep the old sheet. When you replace the outer plastic, save whatever is still usable. It can become an inner liner or a cover for low tunnels.
Also, check the edges after a hard wind. A little tear is easy to fix with greenhouse tape.
Final Thoughts
None of this is secret knowledge. The Amish didn’t invent hotbeds, water barrels, low hoops, or lean-to greenhouses.
They just kept using simple things that work because they are mostly off-grid.
That’s what I like about these ideas.
You don’t need an expensive greenhouse to get an earlier start. You need good sun, something that can hold heat, and a few smart ways to protect the plants when the temperature drops.
You may also like: 
Top 7 Best States to Be Self-Sufficient
Grow This Plant For Extra Income (It’s So Easy You Can Even Do It Indoors) (Video)
How to Start a No-Dig Garden From Scratch
Why “Weird” Crops Make Your Garden Better