
By August, you can already see the rewards the summer season had for you. The garden is full of tomatoes, the mornings start to feel a little cooler, and honestly, the most telltale sign is that you feel like you want to just take a break.
And I get it, but August is not the end of the gardening season. Some even call it the second planting season. So, the work is not over yet, but all the work you put in now will make your winter easier.
This is why I’ll show you the handful of tasks that matter most right now, and a simple DIY project that you can make in just one afternoon.
Ready?
Plant Your Fall Garden Now
This is the big one, and it’s the task I see skipped the most. People figure the season’s winding down, so why start over? But August is really the start of a second season, and the fall harvest is my favorite of the year.
Now is a good time to sow cool-weather crops because the soil is still warm, so the seeds come up fast, and the plants finish as the weather cools, which is when these crops taste best.
Kale, spinach, lettuce, radishes, carrots, beets, and turnips all do well. Kale and carrots even get sweeter after a light frost, because the plant turns its starches into sugar to protect itself..
The tricky part is timing. But the secret is simple: you have to work backward from your frost date.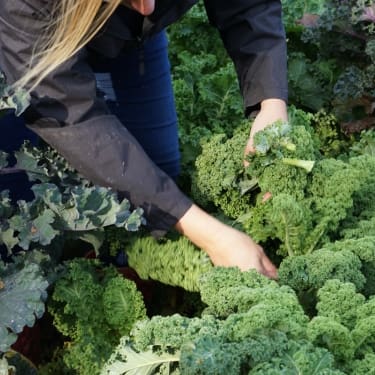
Start by finding the average first frost date for your area. Then look at your seed packet for the “days to maturity,” which is how long the crop takes from planting to harvest.
Count that many days back from your frost date, then add about two more weeks. Those extra weeks matter, because plants slow down in fall as the days get shorter, so everything takes longer than the packet says. The Colorado State University Extension explains this same counting-back method, and it’s what I use every year.
Here’s a real example. Say your first frost lands around October 15th and you want lettuce that needs 60 days. Count back 60 days, add the two-week cushion, and you want that lettuce in the ground by early August. After you’ve done it a couple times, you’ll run the math in your head.
If you’re already behind, use the fast crops. Radishes are ready in about 30 days, and spinach and lettuce move quickly too. There’s usually something you can still get in.
Also, one good idea is to always have a way to protect your fall crops from the cold.
The weather is unpredictable, and many times you might realize that October is much cooler than you were expecting and now your beloved crops are literally freezing.
When this first happened to me three years ago, I decided that maybe I should plant my fall crops in the greenhouse. I did that for a year and many of my crops died because it was too hot inside the greenhouse for them.
This was a huge dilemma I carried with me for a whole season. I was so confused because these fall crops like a little bit of cold, but then the risk of frost is real and also the greenhouse is too hostile and hot for them.
Last year I was at the Amish market and I complained about this problem to one of my favorite ladies from there. She told me that these crops can be a little pretentious, especially if the weather is weird that year. I asked her how she gets all of that beautiful harvest she sells every season and she told me that they use an old Amish method that has been passed from generation to generation.
The method is simple; all you have to do is build some garden beds with a hooped house. This allows you to cover the crops during the cold nights and let them soak in the sun during the day.
Click here and see how to build the Amish garden beds with a hooped house, step-by-step →
Harvest the Garlic and Onions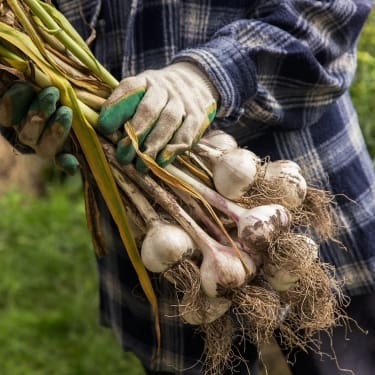
If you planted garlic last fall, August is when you harvest it.
The sign that tells you that the garlic is ready is when the bottom leaves have gone brown, but a few green ones are still hanging on up top. For onions is the same. Once the green tops flop over and start to yellow, they’re done growing, and you can pick them up.
For the next part, I want you to be very careful because it could ruin your garlic. You can’t pull these out of the ground and drop them straight into a bin. They have to cure first. Curing is the difference between garlic that lasts until spring and garlic that goes soft on the counter in a few weeks. All you have to do is let the outer skins dry down until they turn papery, which forms a protective shell around each bulb.
Here’s how I do it. Knock the loose dirt off, but leave the tops on and don’t wash them. Lay everything out somewhere airy and shaded, like a covered porch, a shed, or an open garage. Keep them out of direct sun, because hot sun will cook the bulbs while they sit. Give it about two weeks. Once the skins feel dry and papery and the necks have shriveled down, trim the tops and move them into a cool, dark spot to store.
I generally plant a lot of garlic and I don’t do that just because I like to add it to my food. I mean, I always love some garlic in my meals, but I also use all the garlic I have to make various remedies.
Besides all the tonics I make to help me fight cold and flu, I also make a recipe made from a powerful blend of garlic and dried hawthorn berries.
It is called the “Young Heart” Elixir and combines the heart-protective properties of hawthorn berries with the potential blood pressure regulation benefits of garlic. I’ll drop the recipe below and I hope it will help you as much as it helps me. Also, this is the book where I got the recipe from. If you are interested in other traditional natural remedies, you can find more here.
What you’ll need:
• 1 tbsp dried hawthorn berries
• 1 small piece fresh turmeric (about 1 inch), or ½ tsp dried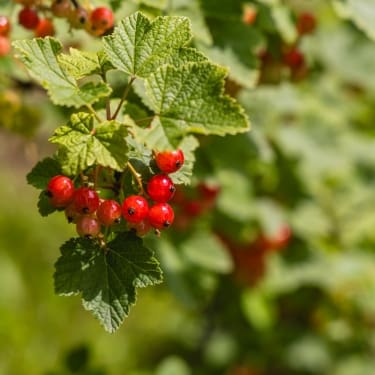
• 1 small piece fresh ginger (about 1 inch), or ½ tsp dried
• 1 to 2 cloves fresh garlic
• Juice of half a lemon
• A pinch of cayenne (optional, for circulation and a little heat)
• 1 to 2 tsp honey (optional, to taste)
• 1 cup water
How to make it:
- Bring the cup of water to a boil. If you’re using fresh turmeric and ginger, peel and thinly slice them first.
- Add the hawthorn berries, turmeric, ginger, and garlic to the boiling water.
- Turn the heat to low, cover, and let it simmer for 15 to 20 minutes so the herbs release their compounds.
- Strain into a mug, then stir in the lemon juice, the cayenne if you want it, and honey to taste.
- Drink it warm. Leftovers keep in the fridge for a day or two.
If you plan to drink this regularly, start with a small serving and build up as you see how it sits with you, and take occasional breaks to check in on how you feel.
It’s so important to take care of your heart because your heart is literally the only organ that keeps you alive. It keeps your blood pumping in your veins all day, every day. You can pretty much live without any other organ, but your heart is vital. And you know what? It beats 100.000 times per day. So it’s doing hard work, it’s never resting.
This is why you need to give it the support it deserves.
The problem is that maybe you don’t have the time to prepare tonics and elixirs to help you keep your heart in shape. I find the above recipe amazing, but it takes some time and if you don’t have it, I get it.
In this case, an easier and faster way to give your heart all the care it needs is this ready-to-use hawthorn-based tincture.
As you can see, this tincture is built around the same star ingredient as my recipe, hawthorn.
It’s formulated to support cardiovascular and metabolic health, meaning it’s aimed at helping with things like steady blood sugar, healthy cholesterol and blood pressure levels, better circulation, and keeping inflammation in check. The bilberry side of the blend is also known for supporting your eyes and vision, which is a nice bonus you don’t get from the elixir alone.
And it is incredibly convenient. A few drops do the job. There’s nothing to simmer or strain, and you can toss it in a bag when you travel. So if you like the idea behind the elixir but know yourself well enough to know you won’t prepare it, this is the honest shortcut.
Try the Heart Health Blend Tincture →
Help Your Winter Squash and Pumpkins Ripen
Your winter squash and pumpkins are filling out now, and two small things help them along.
If a vine already has plenty of fruit set on it, pinch off the growing tips. It feels wrong to cut back a plant that’s still going, but that new growth won’t have time to produce anything before frost. Pinching it back pushes the plant’s energy into ripening the fruit it already has.
The other thing you need to keep an eye on is rot. A squash sitting on damp ground can start to go bad underneath before it’s ripe. Slide something under each one to lift it off the dirt. I use an old shingle or a scrap of board, but a flat rock works fine.
Save Some Seeds While You’re At It
August is a good time to save seed, and if you grow open-pollinated or heirloom varieties, this is how you get free seeds.
Let your best plants go to seed instead of pulling them. Tomatoes, beans, peppers, and bolted lettuce are all worth collecting from. Just make sure you’re saving from open-pollinated plants, not hybrids. Hybrid seed won’t grow true to the parent next year, so you’ll get a mix of traits instead of the vegetable you wanted.
The one rule you can’t skip is drying the seed completely before you store it. Any moisture left in there and you’ll find mold when you open the envelope next spring. Spread the seeds in a single layer, give them a week or so with good airflow, then store them in labeled paper envelopes somewhere cool and dark. Write the variety and the year on each one, because by March you won’t remember which is which.
Also, this is the time when I get herb seeds for my precious herb garden. Not many people know this, but there are a lot of herbs you can plant during the fall. Echinacea, yarrow, marshmallow, chicory, and evening primrose can all be planted when the weather gets colder.
And the second reason I prefer to buy my herb seeds now is that everyone buys them in the spring or late winter. When there are so many people buying, you might end up not being able to buy the seeds yourself. They might go out of stock, the shipping might be terribly late and other such problems.
I don’t want to deal with that and that’s why I get my herb seeds now.
If you want to get some 100% organic NON-GMO seeds, made in the U.S., you can get them from here →
Feed the Soil in Your Empty Beds
As the summer crops come out, you’ll end up with empty garden beds. Don’t leave that soil bare. It bakes hard, dries out, and grows weeds fast.
You have two easy options. Lay down a couple of inches of mulch, like straw or dry leaves, to hold moisture and keep weeds down.
Or, if the bed is going to sit until next year anyway, sow a cover crop. Oats, field peas, and winter rye all work. They come up green, and later you turn them back under to feed the soil for free.
Generally, I use the freshly emptied summer beds to start my fall crops. But I still add some fresh mulch and compost before doing that.
Final Thoughts
If you ask me, all I can say is that the whole month of August feels like juggling for me. I am picking with one hand and planting with the other, and some days it’s a lot. But it’s the month that sets up everything after it. The garlic you cure now feeds you all winter. The lettuce you seed this week shows up on your table in October. The bed you cover today comes back richer in spring.
So don’t let it get away from you. Start easy and with every completed task, you’re closer and closer to a winter where you’ve got everything set.
You may also like: 
What July Says About Your Homestead
Slash Your Electricity Bills by Up to 80%! Try the Energy Revolution System (Video)
What June Says About Your Homestead




















nice
Hope this was useful for you!