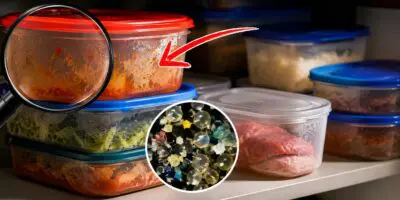
You probably have a cabinet full of plastic containers. I sure do and some of these plastic containers are stained orange from spaghetti sauce, a couple are missing their lids, and at least one smells faintly of last week’s leftovers no matter how many times I wash it.
For a lot of jobs, plastic is just fine. It’s cheap, it doesn’t shatter when you drop it, and it stacks nice and neat. But some of the food and supplies you reach for every day are going bad faster, losing their punch, or even pulling chemicals out of the plastic and into your meal. The biggest problem is that nothing about it looks wrong from the outside.
Keep reading to discover ten things you should keep out of plastic, why each one matters, and where to put them instead. A few of these are going to surprise you, especially the ones that aren’t even food.
Let’s get into it.
Tomatoes and Anything Acidic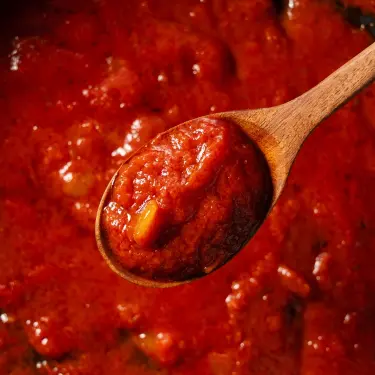
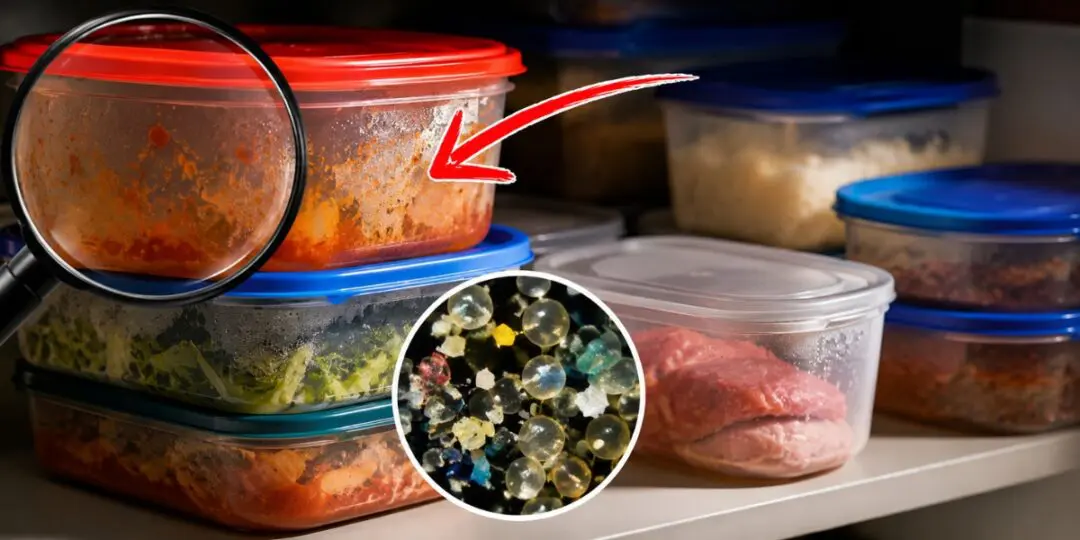
I’m putting this one first because it caught me off guard. I’ve been storing foods with tomatoes in plastic containers all my life and besides being a little bit annoying when I was cleaning the containers, I thought nothing was wrong. It turns out that doing this regularly is actually dangerous and unhealthy.
Tomato sauce, citrus, vinegar dressings, pickled anything. They’re all acidic, and acid slowly eats away at the surface of a plastic container. Once that happens, you’ve got a problem. Research has shown that chemicals like BPA leach out of plastic easily when there’s acidic food sitting in it.
You’ve probably seen this without knowing what you were looking at. That container that’s stained permanently red and smells like tomato sauce even after a hot wash? That’s a clear sign the plastic is breaking down.
Keep your sauce, salsa, and citrus in glass or ceramic instead. A plain glass jar with a lid is perfect and wipes clean every time. I keep a few wide-mouth mason jars set aside just for this, and if you cook with tomatoes much, that one swap will save you a whole drawer of stained tubs.
Hot Leftovers Straight Off the Stove
Dinner’s done, you want it put away, so you ladle that hot soup right into a plastic tub and put the lid on. I’ve done it plenty of times myself.
The trouble is that heat is exactly what makes plastic release chemicals into your food. Pour something hot in, and you’re warming the plastic and making it leach right into the food. The trapped steam doesn’t help either. It turns into moisture inside the container and your food spoils faster and goes soggy.
Let your food cool down on the counter before you put it in a plastic container. Or even better, use glass or stainless steel for anything still warm. I let soup cool a bit, store it in glass jars, and then put it in the fridge.
Vitamins and Supplements
Here’s one that isn’t food at all, and I’d bet almost everyone reading this has a plastic pill organizer somewhere in the house.
Those weekly organizers are handy, no argument here. But moving your vitamins out of their original bottle and into plastic for the long term is not a good idea and works against you. The bottles they come in are built to block light and moisture, and a lot of them have a little desiccant packet tucked inside. Every time you open a plastic organizer, a bit of humid air sneaks in, and that moisture breaks down the sensitive nutrients like vitamin C and the B vitamins. They lose their potency, and now you’ve paid for vitamins that aren’t doing much.
Keep your supplements in their original containers with the lids snug, somewhere cool and dry. Not the bathroom, where shower steam does a number on them, and not in a cabinet over the stove. If you love your weekly organizer, just fill it one week at a time instead of dumping a whole bottle in and letting it sit for months.
To do all of this “by the book,” here’s an ingenious way to stockpile prescription medicines, including insulin. From how to get them to how to store them the right way, you can find all you need here in this guide.
Raw Meat
This one is all about your safety.
When you open a package of meat and want to save the rest, the easy move is to drop it in a plastic container.
The problem is that raw meat leaves juices behind, and when these are in a sealed plastic container, they transform into a warm, wet little pocket where bacteria like Salmonella and E. coli multiply fast. Older, scratched-up containers are worse, since bacteria can enter into the grooves.
If you’re keeping meat in the fridge for a day or two, leave it in the original packaging or wrap it tight and set it on a plate on the bottom shelf so nothing drips down onto your other food. For anything longer, freezer paper or a glass dish with a lid is the better call.
Olive Oil and Cooking Fats
Oils and fats don’t get along with plastic, and most people are completely unaware of this.
Fat works its way into the surface of the plastic, which speeds up how fast the container breaks down and pulls those chemicals into your oil. Plastic also lets in light and air, and those two will turn good oil rancid in a few months.
That’s real money lost when you’ve bought a nice bottle of oil. Store your oils in dark glass or stainless steel and keep them in a cool, dark cabinet, away from the stove. If yours came in a clear bottle, just tuck it somewhere dark and you’ll stretch its life by months.
👉 22 Smart Secrets To Make Food Last Longer
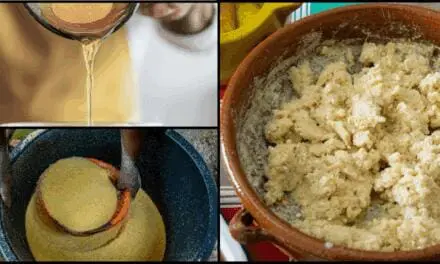
Flour and Cornmeal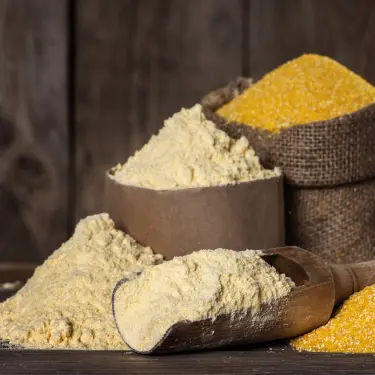
If you bake from scratch like I do, this is something you need to remember.
Flour almost always comes home from the store with weevil eggs already in it. You can’t see them, but they’re there, and those little bugs have no problem chewing through your plastic container. Once they hatch, you’ve got bugs running through your whole baking shelf.
Whole grain flours have another problem on top of that. Their natural oils go rancid as air works through the plastic over time.
So here’s what you can do if you don’t want to deal with all of this. Put any new bag of flour in the freezer for three or four days first. I know it sounds unusual, but this kills the eggs before they ever hatch.
After you do this, store the clean flour in a glass jar or a heavy food-grade container with a tight seal. For the long haul, Mylar bags with oxygen absorbers will keep flour good for years.
Bulk Beans, Rice, and Dry Grains
For anyone building up a real pantry, this is the big one.
A plastic tub or an old soda bottle seems plenty good for dried beans and rice, and for a few months it works fine. But plastic isn’t a true oxygen barrier. Air can make its way around through the walls and the seal, and over time it dries your beans out, spoils them, and invites bugs in.
To make your pantry staples truly last, you have to keep all the air out. The standard among long-term storage folks is once again Mylar bags with oxygen absorbers, then set inside a food-grade bucket or metal can so rodents can’t chew through. This is an amazing trick, but this bucket works as a physical barrier. When we’re talking about long-term food storage, a lot of invisible threats could destroy your stockpile in just a few months.
Avoiding this is easy when you have the right knowledge. I learned this the hard way when I somehow managed to lose my stockpile, the big one I keep in my root cellar, over one summer. It was a terrible and stressful experience and I want you to learn from my mistakes.
You can learn more about “the pest triangle”, the most common food storage pests and how to combat them here.
Stored the right way, white rice and dried beans will sit on a shelf for twenty or thirty years! I keep my everyday beans in glass jars in the pantry and my long-term stash sealed up in Mylar and protected against pests down in the cellar.
Garden Seeds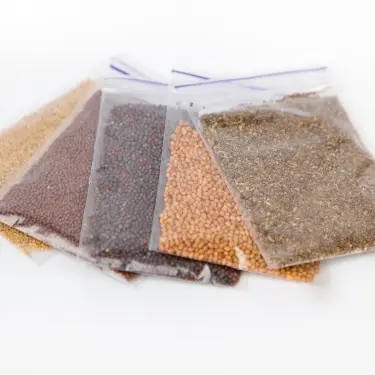
I’d guess you weren’t expecting seeds on a list like this, but if you save them, stick with me.
A lot of gardeners drop their seed packets into a plastic baggie or a bin and assume they’re all set. The catch is that plastic has tiny pores that let in air and moisture. The problem is that moisture is the number one thing that kills stored seeds.
One gardener ran a five-year test and found that seeds kept in plastic bags dropped to around 65 percent germination, while the same seeds sealed in glass jars still came up at 90 percent after the full five years. That’s a big gap when you’re counting on those seeds to feed you next spring.
Make sure your seeds are bone dry, then store them in a sealed glass jar. You can leave them in their paper envelopes and just set the envelopes inside the jar. Toss in a silica gel packet too to pull out any moisture. Keep the jar somewhere cool and dark, and your seeds will hold their life far longer.
But one thing a lot of people overlook is the quality of their seeds. You can have the best storage method, but if the seeds are not good, they’re not going to last. This is why planting seeds from your personal storage ends up in plants that refuse to grow or, even worse, seeds that simply don’t sprout.
If you want to get some high-quality, non-GMO seeds that have been stored properly, this is your chance. Here you can find a lot of useful seeds to have on a homestead. This is the place where I like to buy seeds for my stockpile and I am pleased by the results. All seeds are packed here in the USA.
Onions, Garlic, and Strong Cheeses
Strong smells and plastic have a long memory, and this one sneaks up on you.
Onions, garlic, and aged cheeses give off powerful odors, and plastic soaks those smells right into its surface. Once it’s in there, it never fully comes out. That’s how you end up with cookies that taste garlicy.
Onions and garlic don’t need to be sealed up to begin with. Keep them somewhere cool, dry, and airy. Try something like a mesh basket or a paper bag in the pantry.
For strong cheeses, wrap them in parchment or wax paper first, then loosely in foil, and keep them in the fridge. They’ll stay fresher, and the rest of your food won’t pick up the smell.
Or if you want a better preservation method altogether, you can simply wax your cheese. This is a method that’s been used for hundreds of years by the Amish and the pioneers. They relied on it to keep cheese fresh for up to 3 years.
The way it works is simple. The wax acts like a seal that keeps the cheese safe and protects it from the dry air and the mold spores floating around. The waxed cheese keeps aging slowly and gently inside its little sealed shell. The perfect process for a great and properly preserved hard cheese.
This is the easiest way to wax cheese. It’s the method I’ve been using since I started my homesteading life and what I like the most about it is that it takes very little time. Once you’ve got the cheese, you need one hour to make it last for years. Incredibly convenient. Here you can find the full process and all the materials you need.
Fresh Herbs and Berries
This last one will save you money every single week. If your basil wilts in two days and your strawberries turn to mush before you can finish them, the plastic is part of the reason.
Herbs and delicate fruit need to breathe. Plastic seals them up tight and traps the moisture they give off, and that trapped dampness is what makes them rot and grow mold. Berries, avocados, and tender greens all slide downhill fast with no airflow.
For herbs, trim the stems and stand them up in a jar with a little water, like a small bouquet on the counter. For berries, skip the sealed clamshell. Spread them in a shallow glass or ceramic dish, or a bowl lined with a paper towel, and leave them loosely covered so the air can move. I’ve watched strawberries that used to last three days stretch close to a week just from getting them out of that sealed box.
A Quick Word on Which Plastic Is Worse
Before I wrap up, here’s one practical tip. Not all plastic is the same. The Michigan State University Extension warns that older containers and single-use plastics deserve the most caution, since they’re the ones most likely to contain BPA, and any plastic that’s scratched up or has been microwaved over and over should never hold your food again.
So if you’re going to keep using plastic for the everyday stuff, at least reach for the newer, food-grade containers that are still smooth and clear. Toss the cloudy, cracked, stained ones. They’ve done their time.
Final Thoughts
You don’t have to march into the kitchen tonight and throw every plastic container in the trash. Plastic is still incredible around the house for plenty of jobs.
What I hope you take from this is simpler. Some things should never be stored in plastic containers.
Move those few into glass, ceramic, stainless steel, or proper long-term storage, and you’ve fixed it without spending much at all.
I made most of these swaps slowly, one jar at a time, as old containers gave out and I replaced them. Now my pantry shelf is mostly mason jars, and I can’t remember the last time I had an orange-stained tub.
Just start with the most urgent things and then work from there.
You may also like: 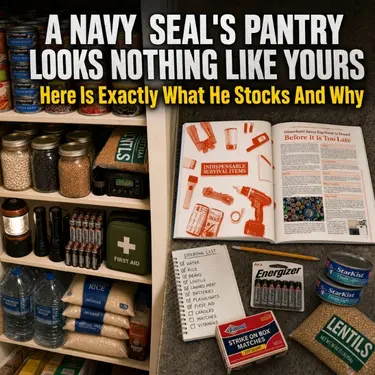
Join Our Homesteading WhatsApp Community!
This Is the Most Effective Way to Build a 5 Year Food Stockpile (Video)
5 DIY Wax Projects for Your House
7 Things You Never (Ever!) Need in Your Pantry
Stop Washing Fresh Eggs! (Do This Instead)


