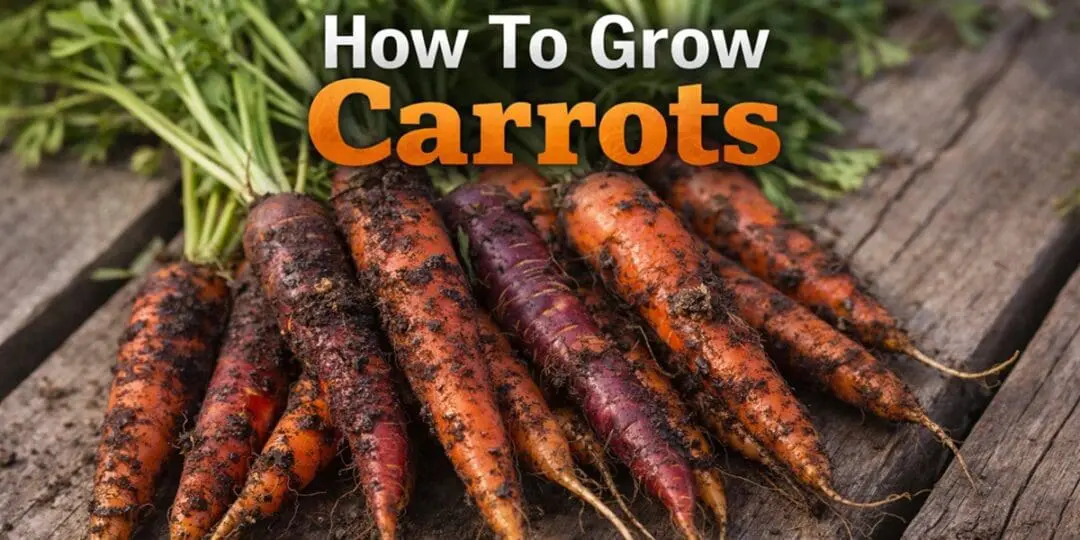
Carrots are worth the trouble. That is the honest starting point for any guide on growing them, because they do ask more of you than most vegetables. The seed is tiny and slow to germinate. The seedlings are hair-thin and easy to lose to weeds in the first three weeks. The thinning step is tedious and easy to skip, at which point the roots fork, crowd, and yield nothing worth eating. And if your soil is compacted, rocky, or full of fresh manure, they will tell you about it in spectacular fashion.
But pull a long, straight, deeply orange carrot out of your own ground, brush the soil off, and eat it standing right there in the garden, and you will understand why people keep growing them. The flavor of a carrot that went from soil to table the same day is entirely different from anything you will buy in a store. Add the fact that carrots store for months in sand, that you can leave them in the ground through frost and harvest them in winter, and that a 10-foot row will feed a family through many meals, and the trouble becomes very worth it.
This guide covers every stage of growing carrots from the homesteader’s perspective: variety selection matched to your soil type, bed preparation, direct sowing, germination tricks that actually work, thinning, watering, fertilizing, dealing with the main problems, harvesting at the right moment, and storing your crop through winter.
Carrots at a Glance
- Botanical name: Daucus carota var. sativus
- Plant type: Cool-season biennial grown as an annual
- Direct sow only: never transplant
- Sowing depth: 1/4 inch deep
- Soil temperature for germination: 55 to 65 degrees F; minimum 40 degrees F
- Days to germination: 14 to 21 days
- Days to maturity: 60 to 80 days depending on variety
- Final plant spacing: 2 to 3 inches apart
- Row spacing: 12 to 18 inches (can be tighter in raised beds)
- Sun requirement: Full sun, minimum 6 hours daily
- Soil pH: 6.0 to 6.8
- Water requirement: 1 inch per week; consistent moisture is critical
- Fertilizer: Low nitrogen; favor phosphorus and potassium
- Storage: 4 to 6 months in cool, humid conditions
Understanding What Carrots Actually Need
Carrots are a root crop, and every problem you will ever have growing them traces back to one central fact: the root is the product. Unlike a tomato or a squash, where the edible part grows above ground and is relatively forgiving of imperfect conditions, the carrot’s value is underground and entirely dependent on what it encounters on the way down. Compacted soil means forked, stunted roots. Rocky soil means split and misshapen roots. Excessive nitrogen means spectacular leafy tops and small, hairy, tasteless roots. Inconsistent moisture means bitter flavor, cracking, and hairy secondary roots.
Carrots evolved in the cool, stony hillsides of Afghanistan and central Asia, where they had to push through difficult ground to find water and nutrients. Modern cultivated varieties have been bred for specific soil types, which is why choosing the right variety for your ground matters enormously before you even buy seeds. Get that decision right and you remove most of the difficulty.
According to Utah State University Extension, carrots grow best when temperatures do not exceed 75 degrees Fahrenheit, and seeds germinate best between 55 and 65 degrees. This is why carrots are a cool-season crop, planted in early spring for a summer harvest or in midsummer for a fall harvest. Hot soil bleaches color, reduces sugar content, and produces bitter roots.
Choosing the Right Carrot Variety for Your Soil
There are four main carrot types, each suited to different soil conditions. Picking the right one is the most important decision you make in the whole growing process. The wrong variety in the wrong ground will not produce a usable crop no matter how well you do everything else.
Nantes
Nantes carrots are nearly cylindrical with a blunt tip and almost the same diameter from top to bottom. They are the sweetest of the four main types and have very little or no core, which gives them a crisp, fine-grained texture excellent for fresh eating and juicing. They grow to around 6 to 7 inches long and mature in 60 to 70 days, making them one of the faster types.
Nantes need loose, well-drained, sandy or well-amended soil to perform. They struggle in clay and compacted ground. If your beds are light and well-worked, Nantes are the best choice for flavor. Good varieties include Scarlet Nantes, Bolero (disease resistant and stores well), and Nelson (fast-maturing and uniform).
Danvers
Danvers are the classic broad-shouldered, pointed-tip carrot, 6 to 8 inches long, with a strong orange color, good flavor, and lower moisture content than Nantes. They were developed in Danvers, Massachusetts, in the 1870s, and were specifically bred to perform in the heavier soils of the northeastern United States. They tolerate clay and compacted ground better than any other type except Chantenay, making them the default choice for most homestead gardens with average or heavy soil.
Danvers also store exceptionally well in a root cellar because of their lower moisture content. Danvers 126 is the most reliable and widely available variety, unchanged in its essential character since it was introduced in the 1940s. Yellowstone is a yellow Danvers type worth growing for kitchen variety.
Chantenay
Chantenay carrots are short and conical, thick at the shoulders and tapering to a blunt point, rarely more than 5 to 7 inches long. Their compact shape lets them push through clay, rocky, and heavy soils that would stop a Nantes or Imperator cold. They are the go-to choice for difficult ground, raised beds with imperfect soil, and container growing.
Chantenay carrots have a rich, earthy flavor with a slight spiciness. They need to be harvested promptly when mature because they turn woody quickly if left in the ground. They store very well once harvested. Red-Cored Chantenay is the classic variety; Royal Chantenay is slightly longer and milder.
Imperator
Imperator carrots are long, slender, and tapered, sometimes reaching 10 to 12 inches in ideal conditions. These are the carrots you see in grocery stores, bred for commercial production in deep, sandy California soils. They require the best growing conditions of any type: very loose, deeply dug, stone-free, sandy-loam soil. In average garden soil they fork, stunt, and disappoint. For homesteaders with raised beds filled with a purpose-built loose mix or sandy soil, they are worth trying for their high sugar content. In typical garden conditions, choose Danvers or Nantes instead.
Paris Market and Mini Types
Paris Market or Parisian carrots are nearly spherical, growing to only 1 to 2 inches in diameter. They need almost no soil depth and are ideal for containers, shallow raised beds, and heavy clay ground where longer types simply will not work. Little Finger is a compact Nantes-type that stays at 3 to 4 inches and suits container growing well. These are excellent first-year options if your soil is not yet ideal.
Soil Preparation
Soil preparation is where carrot growing is won or lost. No amount of good seed or careful watering recovers a bed that was not properly prepared before sowing.
The goal is a loose, deep, stone-free growing medium that the developing root can penetrate without obstruction. Any object a root encounters, whether a rock, a large clod, or a piece of woody organic matter, becomes a point where the root splits, forks, or bends. This produces the misshapen, multi-rooted carrots that are technically edible but a frustration to harvest and peel.
Related: 5 Forgotten Soil-Revival Methods That Can Save Your Harvest
For standard varieties, dig or till to a depth of at least 12 inches. For shorter types like Chantenay or Paris Market, 8 inches is sufficient. Remove every stone you encounter. Break up all clods. If your soil is heavy clay, work in generous amounts of finished compost, coarse sand, or a combination of both to improve drainage and loosen structure. Do not use fresh manure: carrots will fork toward high-nitrogen pockets in freshly manured soil, and the excess nitrogen drives leafy top growth at the expense of the root.
The University of Minnesota Extension recommends sandy loam as the ideal carrot soil. If your soil is heavy or compacted, double-dig the bed and work in a full inch of well-composted organic matter per 100 square feet before planting.
Soil pH should be between 6.0 and 6.8. Soil below pH 6.0 interferes with nutrient uptake and produces pale, stunted roots. Test your soil and correct with garden lime if needed before sowing.
Raised beds are the single easiest fix for difficult carrot soil. A raised bed filled with a custom mix of topsoil, compost, and coarse sand gives you complete control over structure, drainage, and depth, and eliminates the rock problem entirely.
When to Sow
Carrots are a cool-season crop. The roots develop their best flavor, sweetest sugar content, and deepest color in cool soil. Hot conditions make them bitter, pale, and tough.
For a spring crop, sow seed 2 to 3 weeks before your last expected frost date, as soon as the soil reaches at least 40 degrees Fahrenheit. Germination is slow below 55 degrees but the seeds will sit and wait. Do not rush to sow if the soil is still cold and wet, as seeds in waterlogged ground will rot rather than sprout. The target is cool but workable soil.
Related: 7 High-Yield Crops for Small Spaces
For a fall crop, which is often the sweeter and more productive of the two, count backward from your first expected frost date. Most carrot varieties need 70 to 80 days to maturity. Add 2 to 3 weeks to account for the slower growth of fall as days shorten and temperatures drop, then count backward from your frost date. That is your sowing date. In most of the continental United States, this falls somewhere between late June and early August.
Fall carrots are worth growing specifically for flavor. A frost does not damage carrots; it converts starches to sugars and improves them. Carrots left in the ground through light frost taste noticeably sweeter than those pulled in warm weather. According to South Dakota State University Extension, carrots taste best when plants grow rapidly and mature before the heat of summer, and a similar principle applies to fall: they are at their best when they mature into cool conditions.
For a continuous supply through the growing season, make successive sowings every 3 to 4 weeks from early spring through midsummer. Each sowing matures in its own window and extends your fresh harvest rather than giving you everything at once.
How to Sow Carrot Seeds
Carrots are always direct sown. Never start them in pots or trays and transplant. Any disturbance to the taproot at the seedling stage causes forking and malformation that cannot be corrected. The seed goes directly into the ground where the carrot will grow to maturity.
Sowing Method
Make a shallow furrow or depression in the prepared bed, no deeper than 1/4 inch. Carrot seeds sown too deep will not emerge. They need light and warmth within a very short distance of the soil surface to germinate.
Distribute seeds thinly along the row, aiming for roughly one seed every inch. This is harder than it sounds because carrot seeds are tiny and light and tend to cluster. Several practical methods help. Mixing seeds with fine dry sand at a ratio of about 1 part seed to 4 parts sand dilutes them enough to pour and spread more evenly. Seed tapes, which are biodegradable strips with seeds spaced at intervals already embedded, eliminate the spacing problem entirely and are worth buying for carrot seed specifically. Pelleted seeds, individually coated in clay for easier handling, are another good option.
After distributing seed, cover with 1/4 inch of fine material. Do not cover with your garden soil if it has a tendency to crust, because a hard crust on the surface prevents the hair-thin seedlings from emerging. Instead cover with fine sand, vermiculite, or seed-starting mix, all of which stay loose and allow easy emergence. A layer of fine compost also works.
The Germination Problem
Carrot seeds take 14 to 21 days to germinate. During that entire period the soil surface must stay consistently moist. If it dries out even for a day or two during germination, the seeds die. This is the most common reason for poor carrot stands and the most fixable.
Water very gently using a fine mist or watering can rose. Overhead sprinklers are acceptable if the droplets are fine enough not to displace seeds or compact the surface. Heavy water flow moves seeds out of position and washes them into clusters.
Related: How to Germinate Seeds
Covering the seeded bed with a piece of cardboard, burlap, or a board helps retain moisture between waterings. Check daily and remove the cover the moment the first seedlings appear, which will be within a few days of the main flush of germination. A layer of floating row cover achieves the same effect while allowing light through.
Marking your rows with radish seeds sown in the same furrow is a practical trick worth using. Radishes germinate in 4 to 7 days, mark the row clearly so you can weed without guessing, and are harvested and out of the way before the carrots need the space. This technique is particularly useful for new carrot beds where you are still learning the weed-seedling identification problem.
Thinning: The Step Most People Skip
Thinning is the most important maintenance task in carrot growing and the one most often neglected because it feels wasteful and tedious. Do not skip it.
Crowded carrots cannot develop properly underground. The roots push against each other, twist, and produce thin, pale, misshapen results even when everything else is done correctly. Proper spacing is not a suggestion.
Thin in two stages. When seedlings are 1 to 2 inches tall and showing their first true leaves, thin to 1 inch apart. When they reach 3 to 4 inches tall, thin to their final spacing of 2 to 3 inches for standard varieties, or 3 to 4 inches for larger types. For short types like Paris Market, 2 inches is sufficient.
Do not pull thinnings out by hand if you can help it. Pulling disturbs the roots of the carrots you are keeping. Instead, use small scissors to snip the thinnings off at soil level. This kills the unwanted seedling without disturbing its neighbors. The thinnings from the second round, when they are small but identifiable as carrots, are edible as baby carrots.
After thinning, press the soil gently around any plants that were disturbed and water lightly to resettle the ground.
Watering
Consistent moisture is non-negotiable for quality carrots. Irregular watering, meaning the soil dries out and then is heavily watered, causes a specific set of problems: cracked roots, hairy secondary roots, bitter flavor, and forking. These are the carrot’s response to moisture stress and they cannot be reversed once they occur.
Aim for 1 inch of water per week throughout the growing season, delivered consistently. In hot or windy weather, check soil moisture more frequently. During germination and early seedling growth, the top inch of soil must stay moist at all times, which may mean watering lightly every day. Once established, a deep watering once or twice a week is better than frequent shallow watering, because deep watering encourages the root to grow down in search of moisture. Shallow, frequent watering produces shallow-rooted, smaller carrots.
The technique described by MIgardener is worth applying: water heavily, then let the soil dry out to just below the depth of the carrot root before watering heavily again. This drives root elongation, producing longer, more substantial carrots.
Drip irrigation or soaker hoses are ideal for carrots. They deliver water directly to the root zone, keep the foliage dry (reducing disease pressure), and maintain even soil moisture without the surface disruption of overhead watering. If you use overhead watering, do it in the morning so foliage dries before evening.
Two to three weeks before harvest, you can reduce watering slightly. This concentrates sugars in the root and improves flavor. Do not stop watering entirely, as drought stress at this stage causes splitting.
Fertilizing
Carrots are not heavy feeders, but they have specific nutritional preferences that differ from most other vegetables. The key rule is low nitrogen. Nitrogen drives leafy top growth. When a carrot plant has access to excess nitrogen, it puts its energy into the tops and the root is small, hairy, and flavorless. This is why freshly manured beds produce poor carrots and why high-nitrogen fertilizers are the wrong choice.
What carrots need instead is phosphorus and potassium, the second and third numbers in an NPK fertilizer ratio. Phosphorus supports root development and potassium improves flavor, color, and storage quality. A fertilizer ratio of 5-10-10 or similar, applied once or twice during the season according to package directions, is appropriate for in-ground beds with average soil.
Related: Bone Meal Fertilizer: The Secret Soil Booster Hiding in Your Kitchen
If your soil was well prepared with mature compost before planting, in-ground carrots may need no supplemental fertilizer at all. Compost provides a slow, steady release of balanced nutrients that suits carrot growth well. Reserve fertilizer for soils that are clearly deficient or for container-grown carrots, which deplete nutrients faster.
Adding a handful of bonemeal to the planting bed before sowing is a traditional practice that makes sense: bonemeal is high in phosphorus and provides a long, slow feed for developing roots without the nitrogen spike that damages carrot quality.
Mulching and Weed Control
Weeds are a serious threat to young carrots because carrot seedlings are extremely slow to establish and produce almost no shade. In the three to four weeks after germination, weeds can outcompete and smother a carrot stand entirely if not controlled.
Hand weed carefully and shallowly between and within rows. Do not use a hoe aggressively near carrot rows because carrot roots are close to the surface and easy to nick or sever. Light, frequent surface cultivation with a hand tool keeps weeds down without endangering the crop.
Related: Add This to Your Pantry to Keep Pests Away This Winter
Once the carrots are well established, several inches tall, and clearly winning the competition, apply a light mulch of straw or chopped leaves between rows. This suppresses further weed germination, retains soil moisture, moderates soil temperature, and keeps the crown of the carrot shaded, preventing green shoulders. Green on the top of a carrot root is caused by sunlight exposure and while harmless, indicates the root needs to be covered. Mound a little soil or push some mulch up around the crown when you see it developing.
Successional Sowing for a Continuous Harvest
One of the most practical homestead carrot strategies is successional sowing: planting a small amount of seed every 3 to 4 weeks rather than sowing all your carrot seed at once. Each sowing gives you a crop that matures in its own window, giving you a steady supply of fresh carrots across the season rather than a single glut followed by nothing.
A practical schedule for most of the continental United States might look like: first sowing in early spring as soon as the soil is workable, a second sowing 3 to 4 weeks later, a third sowing in early summer, and a final sowing in midsummer timed to mature in fall. Each planting gives you 3 to 4 weeks of prime harvest before the roots become oversize and woody.
Label every sowing with the date and variety. Carrot tops all look the same once established, and without records you will not know which bed to harvest first or when each crop is due.
Common Problems and How to Fix Them
Forked or Misshapen Roots
Forking is the most common carrot disappointment and almost always traces to one of three causes: rocky or compacted soil that the root split around, damage to the primary root tip from carrot fly larvae or physical disturbance during thinning, or excessive nitrogen causing erratic root growth. Fix it by improving soil preparation before the next sowing, switching to a shorter variety if your soil is difficult to work deeply, being careful during thinning to snip rather than pull, and avoiding high-nitrogen fertilizers and fresh manure.
Poor or Patchy Germination
If your carrot stand is thin or patchy, the most likely cause is the soil surface drying out during the germination period, which takes seeds up to 21 days. Other causes include a soil crust preventing emergence, seeds sown too deep, or seeds older than two years. Use fresh seed each year, cover with fine material rather than garden soil, keep the surface consistently moist, and consider covering with cardboard or burlap to reduce evaporation between waterings.
Bitter Flavor
Bitter carrots result from hot temperatures during root development, inconsistent watering, or harvesting very large, overmature roots. Ensure your spring planting matures before the heat peaks, maintain consistent soil moisture throughout the season, and harvest before roots exceed 1 inch in diameter at the crown.
Hairy Roots
Fine hairy roots growing from the main root indicate underwatering or nitrogen excess. The root is sending out extra root hairs to find water or process excess nitrogen. Even out your watering and reduce nitrogen inputs.
Green Shoulders
Green coloration at the top of the root where it was exposed to sunlight. Harmless but slightly bitter in the green portion. Prevent by mounding soil or mulch around the crown as roots develop.
Carrot Fly
The carrot fly (Psila rosae) lays eggs in the soil near carrot plants. The larvae hatch and burrow into the root, creating rust-colored tunnels in the lower two thirds of the root. Adults are attracted to the scent of carrot foliage, particularly when it is disturbed by thinning or weeding. The most effective organic control is floating row cover or fine insect mesh applied from sowing and kept in place continuously. The barrier prevents the adult fly from reaching the soil to lay eggs. According to Gardener’s Path, sticky traps help monitor adult fly activity, and thorough garden sanitation after harvest removes overwintering pupae.
Related: Deterring Unwanted Pests with Lemon and Baking Soda
Aster Yellows
Aster yellows is a phytoplasma disease transmitted by aster leafhoppers. Infected plants show yellowed, twisted foliage and a bushy top called a “witches’ broom.” The roots become hairy, stunted, and bitter tasting, often inedible. There is no cure. Remove and destroy infected plants immediately. The only reliable prevention is floating row cover, which physically blocks leafhoppers from reaching the crop. Control weeds in and around the garden, particularly dandelions, thistles, and wild carrot (Queen Anne’s Lace), which host both the disease and the leafhopper vector.
Alternaria Leaf Blight
A fungal disease causing dark brown or black lesions with yellow margins on the older leaves. It spreads in wet conditions with poor air circulation. Avoid overhead watering late in the day, space plants adequately, rotate carrots out of beds where it appeared, and do not compost infected foliage. Resistant varieties are available, including Bolero and Napa.
Companion Planting
Onions, leeks, and garlic planted near carrot beds are a traditional companion pairing. Their strong scent is believed to confuse or repel carrot flies, which use the scent of carrot foliage to locate their host crop. The evidence is anecdotal but widely reported by experienced growers, and the combination has no downside.
Radishes sown in the same row as carrots serve as a practical tool during establishment. They germinate quickly, mark the row, break the soil surface crust, and are harvested well before carrots need the space.
Related: Three Sisters Planting – How to Plant The Three Sisters Garden
Avoid planting carrots near dill, which can cross-pollinate with carrot plants allowed to flower (though this does not affect the roots of the current crop). Keep fennel away from the entire vegetable garden, as it inhibits most other vegetables.
Harvesting
Knowing When They Are Ready
Most carrot varieties mature in 60 to 80 days from sowing, but days-to-maturity figures on seed packets are estimates, not guarantees. Soil temperature, moisture consistency, and weather all affect actual harvest timing. Use the packet figure as a starting point, then begin checking about a week before the expected date.
The best test is to brush the soil away from the crown of the root and check the diameter. A carrot at the right harvest stage will be about 3/4 inch to 1 inch in diameter at the top. Larger than 1 inch and the root is beginning to lose quality, becoming woodier and less sweet. Pull one and taste it. A properly matured carrot is sweet, firm, and crisp. If it tastes flat or bitter and the texture is soft, let the others go a little longer or check your watering and temperature conditions.
Harvesting Technique
Water the bed thoroughly 12 to 24 hours before harvesting. Moist soil releases carrots much more cleanly than dry soil and dramatically reduces the number of broken roots. For standard varieties in average soil, insert a garden fork 3 to 4 inches to the side of the row, push it down to full depth, and rock it gently to loosen the soil before pulling. For shorter or container-grown varieties, a trowel achieves the same result. Pull by the base of the tops, not just the foliage, to get a firm grip without the greens snapping.
Harvest in the morning when roots are coolest and crisping highest. Roots left in hot afternoon conditions go limp quickly.
Fall and Winter Harvesting
Fall-planted carrots are the homesteader’s most flexible crop. Once mature, they can be left in the ground through light frosts and dug as needed. A hard frost, temperatures below 28 degrees Fahrenheit, damages anything above the soil line but the roots themselves are protected. Cover the bed with a thick layer of straw, 6 to 8 inches, after the soil has cooled in autumn. This insulates the ground against freezing and allows you to harvest fresh carrots through much of winter in most climates by pulling back the mulch, digging what you need, and replacing the cover. This is essentially a free root cellar.
In climates where the ground freezes solid, harvest the entire crop before the hard freeze arrives. Once the ground freezes, you cannot dig.
Storing Your Harvest
Preparing for Storage
Twist or cut off the tops to within half an inch of the crown. Carrot greens left attached draw moisture from the root and cause it to go limp within days. Do not wash carrots before storage if you plan to keep them for months. Washing removes the thin natural coating that helps preserve them. Brush off loose soil and let them cure in a cool, ventilated space for a day or two before going into storage.
Store only undamaged roots. Any carrot with a crack, nick, or cut will rot quickly in storage and the rot will spread to neighbors. Use damaged carrots immediately in the kitchen.
Refrigerator Storage
For small harvests or short-term storage, unwashed carrots stored in sealed plastic bags in the refrigerator’s crisper drawer will stay firm and fresh for 2 to 4 weeks. Washing before refrigerating shortens this significantly.
Root Cellar and Sand Storage
For serious homestead storage lasting 4 to 6 months, the sand-box method is the traditional and most effective approach. Pack carrots upright in a box or container filled with layers of slightly moist sand, sawdust, or peat moss, ensuring the roots do not touch each other. Store in a location that maintains 32 to 38 degrees Fahrenheit with high humidity, ideally around 95 percent. A root cellar, cool basement, or unheated garage that stays above freezing satisfies these conditions in most climates.
According to Johnny’s Selected Seeds, carrots stored in these conditions can last several months when the roots are mature and undamaged going in. Check stored carrots every two to three weeks and remove any that show softness or rot before they spread.
Varieties with lower moisture content, particularly Danvers and Chantenay types, store better than Nantes. Danvers 126, a traditional storage variety, is specifically worth growing if long-term root cellar storage is a priority.
In-Ground Winter Storage
In climates with mild winters, the simplest storage is to leave carrots in the ground under a thick mulch layer and harvest as needed. This eliminates the work of digging and storing the entire crop at once and gives you the freshest possible carrot every time you need one. The caveat is that some continued root development and potential pest damage occurs in the ground, and a sudden deep freeze can damage the roots if the mulch layer is inadequate.
Freezing and Preserving
Carrots freeze well with minimal preparation. Peel, cut to desired size, blanch in boiling water for 2 minutes, shock in ice water, drain thoroughly, and freeze in a single layer on a tray before transferring to freezer bags. Blanching is not optional: it deactivates enzymes that would continue degrading quality even in frozen storage. Frozen carrots keep for 10 to 12 months and go directly from freezer to soup or pan without thawing.
Related: Freeze Dryer vs Dehydrator – Choosing the Right Tool for a Self-Sufficient Home
Dehydrating is another homestead preservation option. Dried carrot slices or shreds store for a year or more and reconstitute well in soups, stews, and stock. A food dehydrator at 125 to 135 degrees Fahrenheit will dry carrot slices in 6 to 10 hours depending on thickness.
Grow Food the Way It Used to Be Done
Carrots reward patience, but they also reveal a larger truth about homesteading: the old ways still work.
Long before garden centers were full of synthetic fixes and complicated systems, families grew dependable food by understanding soil, seasons, storage, seed choice, and simple daily discipline. They knew how to match crops to ground conditions, how to raise enough to carry a household through winter, and how to build a garden that fed people instead of just looking good for a few summer weeks. That is the kind of practical knowledge many people are trying to recover now, and it is exactly why The Amish Ways Book has become so valuable to modern homesteaders.
The Amish Ways Book explores time-tested methods for growing food, preserving harvests, reducing waste, and building a more self-reliant household using proven traditional practices. It is not about trendy shortcuts or expensive systems. It is about dependable, field-tested knowledge that helped families live well with less, produce more from their land, and stay resilient through changing seasons and uncertain times.
Inside, you will discover practical old-school wisdom for:
- Growing more food with simple, reliable methods
- Improving soil naturally and keeping gardens productive year after year
- Preserving harvests for long-term household use
- Reducing dependence on stores and modern supply chains
- Building a lifestyle centered on thrift, resilience, and self-sufficiency
If you enjoyed learning how to grow carrots properly, from soil prep to winter storage, then you already understand the value of knowledge that actually works in real life. The Amish Ways Book takes that same mindset and expands it across the garden, the homestead, and the household.
A Few Final Notes from the Garden
The carrot growers who produce the best crops year after year are the ones who have figured out their soil. They know what depth they can achieve, what organic matter works in their specific conditions, and which variety performs best in their ground. That knowledge only comes from growing them, watching what happens, and adjusting.
Your first season of carrots will teach you more than this guide can. If they fork, you know your soil needs work. If they are bitter, you know your timing or moisture is off. If germination is patchy, you know your surface moisture management needs improvement. Every problem has a cause and a fix, and once you work through them your carrot ground will be dialed in and your harvests will improve dramatically.
The goal on a self-sufficient homestead is not just to grow a few carrots for summer eating. It is to grow enough to carry you through winter. A 20-foot bed of well-grown fall carrots, stored in sand in a cool basement, is a genuine contribution to your food supply from October through March. That is worth the investment in getting the soil right.
You may also like:
Don’t Forget To Join The Self-Sufficient Projects WhatsApp Community
This Is The First Thing You Should Do With The Food In Your Fridge During A Blackout (Video)
Why You Should Put Plastic Forks In Your Vegetable Garden
How to Make Sun Dried Tomatoes


