This is one of those mistakes that you notice when it’s already too late. Maybe you spent years building a beautiful garden and then you discover that same garden is threatening the integrity of your house.
I’ll give you a short checklist that can save you a small fortune in home repairs, but first, let’s see what the problem actually is.
All that water you use in your garden has to go somewhere and if your setup is even slightly wrong, this water might head directly to the foundation of your home.
The good news is that fixing it isn’t complicated or expensive. If you catch this in time, you won’t need a contractor. All you need is to understand where the water is going and make a few changes so it no longer affects your house.
What Happens When Water Reaches the Foundation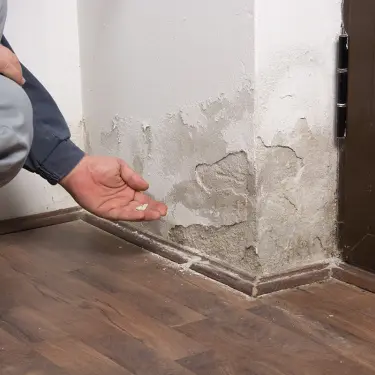
First of all, it’s important to understand what is happening when water reaches your house. Once this is clear, the rest will just make sense.
Your foundation sits in soil. When that soil gets soaked over and over, it swells up. When it dries out, it shrinks back down. This swelling and shrinking cycle puts pressure on your foundation walls, and if no action is taken, that pressure will crack them. Clay soil is the one that causes the most problems since it holds water and moves the most, but no soil is safe if it stays wet long enough.
Then, if you’re living in a place with hard winters, the freeze can also cause lots of problems. This one also has a name engineers use: frost heave. In the winter, the water that soaks into the ground next to your foundation freezes when the cold sets in.
When it turns into ice, the water expands, and in fine soils like clay and silt, it does something worse than just swell in place. It pulls more moisture up toward the freezing zone and forms ice lenses that lift the ground several inches.
This is incredibly harmful for your foundation walls, and the worst part is that this keeps happening over and over as the ground freezes and thaws through the season. One winter won’t ruin a house. But year after year of wet soil freezing and lifting against your walls will surely do.
Water also erodes things. It carries soil away grain by grain, and over time, it can wash out the support right under your footings. A house needs solid ground beneath it.
Try this simple DIY soil test today
So when I say garden runoff can bring a house down, I’m not being dramatic. It’s slow, but it’s one of the most expensive problems you can end up with.
What Type of Soil Your House Is Built On 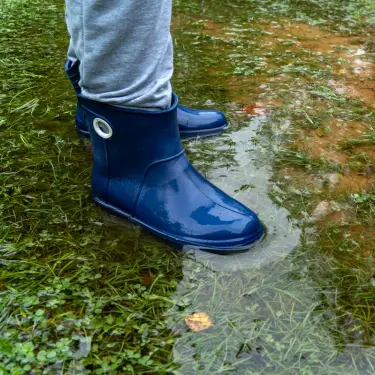
For most homeowners, this is a subject that rarely comes up. The only time you might hear about it is if there were already some problems. If everything has been good, well, there is a high chance you’ll have no idea about the soil your house is sitting on right now.
But this is very important information because once you know the type of soil, you also know how that soil behaves in certain situations such as an excess of water, and you know how to act accordingly. There are many unfortunate incidents that could have been prevented by simply being aware of this information.
Now, you might be wondering, ok, but how do I find out the type of soil my house is built on? And this is a fair question.
The first option is to check the USDA Web Soil Survey, run by the Natural Resources Conservation Service. Here you have a map and you can indicate where your house is located. Then the app will search through a database and give you the result. Easy right?
Unfortunately, when things are this easy, they are most of the time not that accurate. Here’s the catch. This tool tells you the native soil for your area, which is great for the yard and garden but isn’t always the same as what’s packed right against your foundation.
When a house gets built, the crew often brings in fill dirt and compacts it around the footings, so the soil touching your foundation may differ from what the survey shows a few feet away!
The good news is that there is another easy method you can use which is much more accurate because you’ll be testing the soil yourself with stuff you already have around your house.
For example, clay is the main troublemaker. It has tiny particles that don’t let the water flow. They hold it in the soil, and in the end, the water will mess up your house’s foundation.
Then we have sand, which is the best-case scenario, and then we also have silt that sits right in the middle.
For this test, all you need is a regular mason jar and a sample of the soil. It takes 15 minutes and will tell you precious information about how your house was built.
👉 Click here and see how to do the DIY mason jar soil test.
What’s Really Sending Water at Your House
Here’s the part most folks get wrong, and I want you to know I see it all the time.
People build their garden beds and lay out their watering without ever thinking about which way the ground slopes. They pick the sunniest spot, or the most convenient spot near the water hose, and they build there.
Sometimes that spot happens to sit right up against the house, and the ground happens to tilt back toward the foundation.
When that’s the case, every time you water and every time it rains, you’re sending water straight at your walls. A raised bed full of wet soil pressed against your siding is even worse, because now you’ve got a constant source of moisture sitting against the house with nowhere good to drain.
I’m not telling you to tear out the garden beds. I just think it would be helpful for you to go look at where your water ends up and decide if you need to make any changes.
Signs Water Is Reaching Your Foundation
You don’t need any tools for this first part. Just go outside, ideally during or right after a heavy rain.
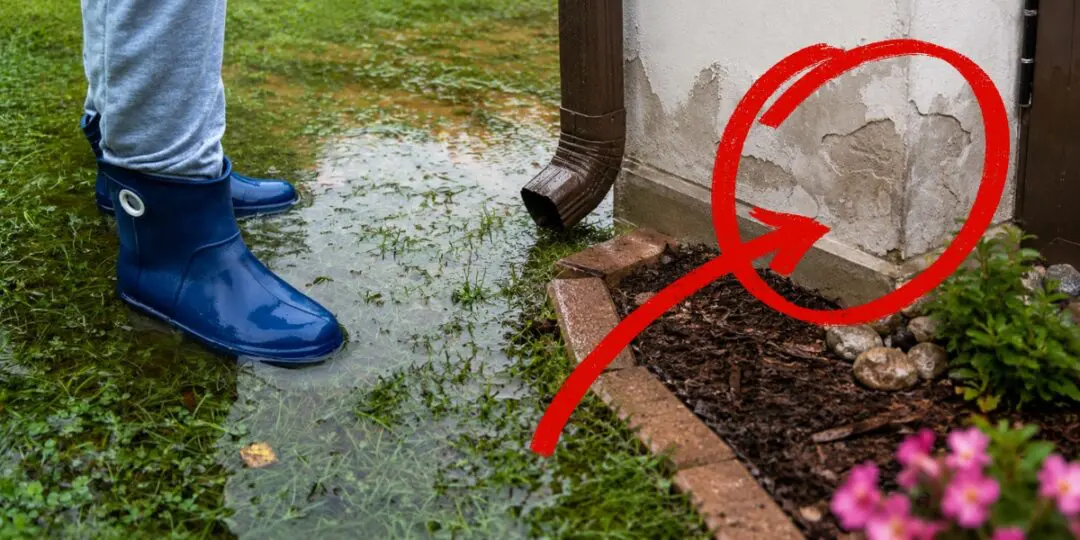
Walk around your house and carefully watch where the water goes. Is it running away from the walls, or pooling against them? Look for low spots where puddles sit for hours after the rain stops. Standing water within ten feet of your foundation is a warning sign that tells you it’s time for immediate action.
When things dry out, keep looking. Check for soil that’s been washed into little channels or fans, since that tells you water has been carving a path. Then head down to the basement or crawl space if you have one. A white, powdery, chalky residue on the inside of the foundation walls is called efflorescence, and it’s a sign that water is seeping through the concrete and leaving mineral deposits behind as it dries.
👉 DIY Wind Turbine From Salvaged Motors
Keep an eye out for hairline cracks in the walls, doors that have started sticking, or floors that feel like they’re tilting. Those are the house telling you something’s wrong below.
If you’ve got raised beds against the house, press your hand to the siding behind them after a wet stretch. If it feels damp, that moisture is going somewhere it shouldn’t.
Fix The Slopes 
This is the heart of the whole thing, so I want to slow down here.
The ground around your house should slope away from it on all sides. Not toward it, not flat, but gently downhill heading out into the yard. The standard rule that builders and drainage folks use is a drop of about six inches over the first ten feet from your foundation. That works out to a gentle grade you can barely see, but that’s enough to keep water moving the right direction.
If your ground slopes the wrong way, you fix it by adding soil up against the foundation and tapering it down as you move out. When you do this, leave several inches of your foundation showing above the soil line. Some guides say four inches at a minimum, and others suggest leaving as much as a foot and a half exposed to keep termites from using the soil as a bridge into your siding.
Either way, don’t bury the foundation. Covering it invites moisture and pests right up against the materials you’re trying to protect, and it makes problems harder to spot.
For the soil itself, skip the bagged stuff from the garden center. That’s usually a compost-heavy mix, and it holds too much water and packs down over time. You want a screened topsoil, the kind you can buy by the pile at a local landscape yard. It’s cheaper in volume and it does a better job.
Here you can find a table from The University of Illinois Extension about the right measurements of the slopes.
Take Care of The Garden Beds
Once your slope is sorted, look at your garden beds.
If you’ve got a raised bed pushed right up against the siding, pull it out a bit. You want at least a foot of space between the bed and the wall; a couple of feet is even better. That gap lets air move, keeps the soil from pressing moisture into your house, and gives water a place to drain that isn’t your foundation. A strip of gravel in that gap helps a lot, since it lets water sink straight down instead of pooling.
Watering matters here too. If you’re standing there with a hose soaking the bed nearest the house every evening, you’re feeding the problem. Switch to drip irrigation on those beds. Drip puts water right at the roots where the plants want it, and it keeps you from dumping far more water into the ground than the plants can actually use. Less runoff, healthier plants, and a drier foundation all at once.
So water what you need to water and don’t leave the hose running while you walk off to do something else. A simple timer can save you from forgetting.
How to Build Garden Beds the Right Way
The secret is that the way you build your garden beds has a say in all of this. Poor construction leads to water pooling and, ultimately, can cause damage.
This is where I’d point you toward the way the Amish build their garden beds. They’ve been growing food without modern shortcuts for generations, and they figured out a long time ago how to build beds that hold the right amount of moisture for the plants while letting the rest drain away properly.
Their beds are simple, sturdy, and built to last, and the drainage has always been part of the design.
👉 You can see here how to build your raised garden beds just like the Amish.
Give the Water Somewhere to Go 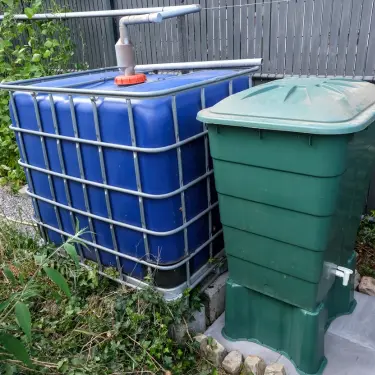
Sometimes a good slope isn’t enough on its own, especially if your land is flat or you’re catching runoff from higher ground nearby. When that happens, you need to create a path for this water.
A swale is the simplest tool for this. This is a shallow, wide channel dug into the yard that catches water and carries it away from the house to a lower spot, a ditch, or a storm drain. You don’t need machinery to make one on a small scale. A swale that’s around a foot deep and a few feet wide can move a surprising amount of water during a storm without any pump or power. The trick is keeping a steady, gentle slope along its length so water keeps flowing and doesn’t pool in the middle.
A rain garden is another good option, and one I like because it does double duty. It’s a planted low area filled with deep-rooted native plants that soak up runoff and let it filter slowly into the ground. Just make sure you put it more than ten feet from the house. The whole point is to pull water away, not collect it next to your walls.
And don’t forget your gutters and downspouts. They are good at collecting rainwater but dump all of it right where it can do the most damage.
Add extensions so the downspouts release water several feet out into the yard instead of right at the base of the house. It’s a cheap fix and it solves a huge chunk of the problem on its own.
Or, if you want to be truly self-sufficient and not waste all that rainwater, you can build a simple rainwater catchment system.
When I built mine, I followed the instructions listed here because this is more than just a catchment system. This is also a storage system that keeps your water safe and ready to use long term.
Final Thoughts
None of this is hard work, and none of it costs much. A little soil to fix the slope, a foot of breathing room behind your beds, a downspout extension or two, and the willingness to walk your yard during the next good rain and actually watch where the water goes.
That last part is the real lesson here. Most foundation trouble starts because nobody was paying attention to the water until it was too late. Now you know what to look for, and that puts you ahead of most homeowners who’ll go their whole lives without giving it a thought.
I still walk my own place after big storms, coffee in hand, watching the runoff trace its way down toward the back fence the way it’s supposed to. It’s a small habit, but it’s saved me more than once.
You may also like: 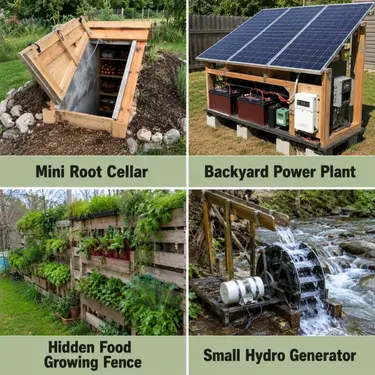
Join Our Homesteading WhatsApp Community for the Best DIY Projects!
The Most Common Edible Trees Growing In Your State (Video)
What Happens if You “Water” Your Garden With Spoiled Milk
9 Plants That Grow With No Water
The Best Time to Water Plants: A Natural Grower’s Guide


