The modern world has led us to be dependent on stores, public services, and the grid. But you might not want to put your lives in the hands of corporations, which is why raising your own animals is a big step towards self-sufficiency.
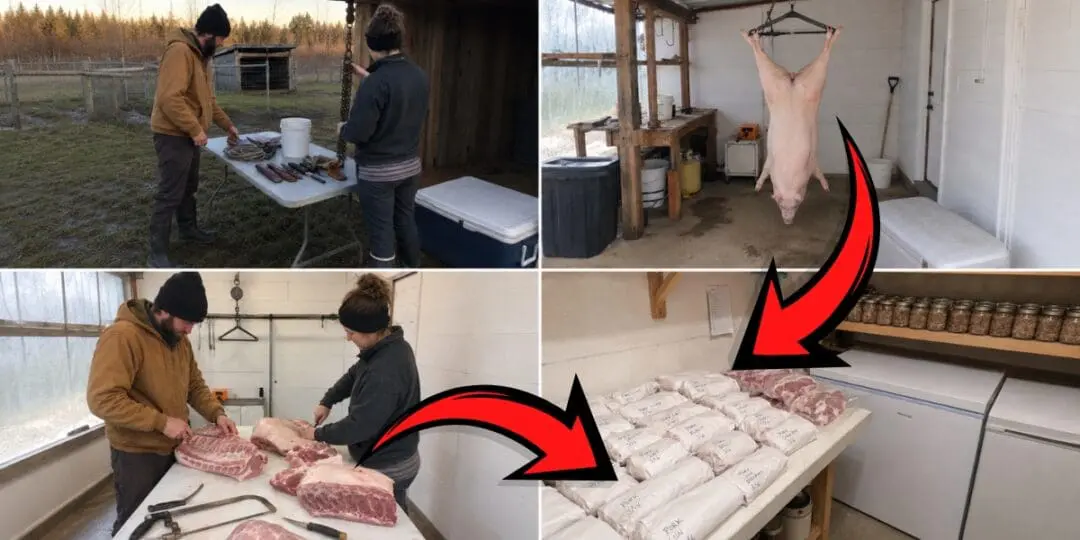
Raising your own pig and butchering it is one of the most rewarding things you can do on a homestead. You know exactly what the animal ate, how it lived, and how it was handled at the end. There is no middleman, there is no additional money to be spent, and you get away with a year’s worth of pork, lard, and cuts you might not even find at the grocery store.
Butchering at home is serious work and it can take a day or even two. You need a good plan, the right tools, and a steady hand. In the end, all of this effort is worth it, but it is important to know how to do a proper job.
This guide walks you through every step in the order it happens, so you can use it with confidence when you decide to butcher a pig.
Picking the Right Day
Yes, the day you do the butchering matters.
Cold weather is your best friend on butcher day. The temperature at night should be around 32°F and daytime highs should not be warmer than 45°F. I can’t stress enough about this, cooler meat is not only firmer and easier to cut, but also safer because bacteria will not grow as fast.
Start this process early in the morning. The earlier the better.
Pull feed from your pig 12 to 24 hours before slaughter, but keep fresh water available.
One thing I want to warn you about is that doing this alone might be very hard. A finished hog can weigh 200 to 350 pounds. You should consider getting at least one helper, ideally two.
The Tools You Need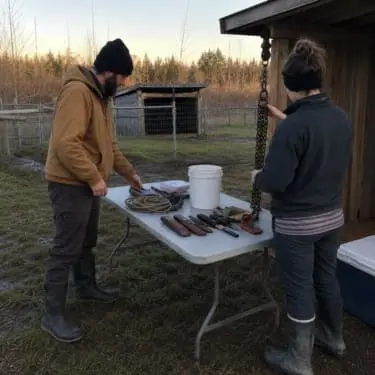
- A .22 rifle or shotgun with the right ammunition. (If you want to dispatch the pig yourself. Also, here’s a guide that helps you make your own black powder at home.)
- A 6-inch sticking knife for bleeding.
- A skinning knife or bell scraper, depending on whether you scald or skin.
- Boning knives for breaking down the meat.
- A bone saw (hand or reciprocating) for splitting the backbone.
- A sharpening steel to keep edges keen as you go.
- Strong rope, chain, or a gambrel plus a way to lift: tractor bucket, block and tackle, or a sturdy pulley. (The pulley is the most accessible, and you can buy one from here.)
- Scalding gear if you keep the skin: a clean drum or vat, a heat source, a thermometer, and a propane torch for hair.
- Buckets and totes for blood, organs, and trim.
- An empty fridge
- Personal gear: gloves, boots, a heavy apron, eye protection.
How to Humanely Dispatch the Pig
You always want a calm pig as it offers cleaner meat. Stress causes poor bleeding and darker, tougher pork. So, don’t chase the poor pig down or yell at it.
Make sure the pig is in a small area and then approach it calmly. You need to be close enough to land a clean shot.
Aim one finger’s width above eye level on the midline of the forehead, angled toward the tail. For older boars or thick-skulled pigs, use a shotgun instead of a .22.
After the shot, check the pig’s eyes. The eyes should not blink when touched. Also, make sure there’s no rhythmic breathing, and the head hangs limp. If any of those signs are missing, deliver a second shot right away.
The moment the pig is out, roll it onto its back, find the breastbone between the front legs, and then slide the sticking knife in just in front of the breastbone with the blade pointing toward the tail. This will sever the carotid artery and the blood will start to flow fast.
Scalding vs. Skinning
Now, there are two ways to take care of the hide.
Scalding and scraping. This one keeps the skin on, giving you cracklings, rind-on bacon, and skin-on hams for curing.
For this process, you need to heat clean water to 145–150°F and lower the carcass in for a few minutes until the hair slips free when you tug it. Then you’ll take it out and scrape against the hair growth using a bell scraper or the back of a knife.
To make things easier and less messy, try to heat the water outside of your house. If you don’t have an outside stove, you can build a simple rocket stove in less than 2 hours. Full instructions here.
A propane torch is perfect because it handles stubborn patches. Don’t let the water heat past 155°F or the hair follicles will set. If you don’t have a full vat, soak burlap or heavy towels in hot water and lay them over the carcass section by section.
Skinning is faster and needs less equipment. No vat, no thermometer, no hot water. This will also lose the skin entirely, so there will be no cracklings or rind-on cuts.
With one hand you will hold the knife and with the other you’ll pull the skin. Keep in mind that the hand you are using to hold the knife should be clean to avoid accidents.
Cut around each leg and down the centerline. Angle the knife outward as you peel so you don’t cut into the fat.
For most homesteaders, skinning is the easier call since you don’t need any scalding equipment.
Gutting the Pig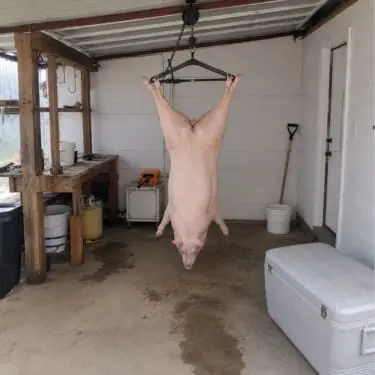
For this step, you need to be very careful with your hands since precision matters the most. You don’t want to nick an intestine or worse, pop the gallbladder. This will give the meat an awful taste and make it spoil faster.
Remove the Head
This is the first thing you need to do. For this, you’ll cut down through the neck to the atlas joint (the first vertebra) and twist the head free. Set it aside. You’ll come back to the jowls and tongue later.
Tie Off the Bung
Cut a circle around the anus about half an inch out, then tie the rectum off tight with a string or a heavy zip tie. This keeps the gut sealed when you pull the organs out.
Opening the Belly
Here’s the trick to opening the belly without cutting the intestines. Hold the knife with the sharp edge pointing outward, away from the guts, and use the back of the blade to ride along under the skin. Think of it like unzipping a jacket.
Use your other hand to push the guts away from the blade as you go. Make one smooth cut from the pelvis all the way up to the breastbone.
Removing the Organs
Reach inside, grab the tied-off bung, and pull it down through the body cavity. The intestines and stomach will come along with it. If something is still attached, snip it free with the tip of your knife.
Once the guts are out, you’ll see a wall of muscle stretching across the inside of the cavity, like a curtain separating the belly from the chest area. That’s the diaphragm. Cut around it, close to the ribs. Behind it, you’ll find the heart, lungs, and windpipe. Pull them forward and down, cutting them loose where they connect at the top of the chest.
And don’t forget to work slowly to avoid punctures.
Saving the Organs
They are nutritious and you can use them in many recipes, but the thing with organs is that they spoil first. Because of this, you’ll need to take care of them before you take care of the rest of the pig.
Check each one of them before you keep it. Feel the lungs for hard lumps. Check the liver for white streaks, spots, or abscesses. Cut the heart open and look inside. If anything looks weird, throw that organ out.
Then look for the gallbladder. You’ll find it on the liver. It’s a small green sack tucked against the underside. Once you find it, but it. You need to do this because if it bursts, the liquid inside, called the bile, will ruin everything it touches.
Then, for the kidneys, peel the thin outer skin (it pops right off). Rinse everything in cold water, trim off fat and connective tissue, and get them on ice fast.
And don’t forget the leaf fat. That’s the soft, white sheet of fat wrapped around the kidneys. This is the good stuff for making lard. Pull it out while the carcass is still warm because it peels away so much easier. Bag it up and stick it in the fridge.
Intestines can be cleaned and used as sausage casings, but that’s a project on its own.
Splitting the Pig Down the Middle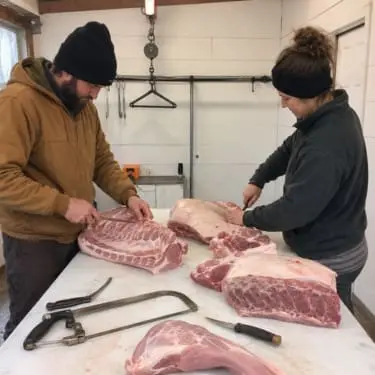
Hang the pig somewhere sturdy by its hind legs. Since you took out the organs, the cavity is now empty and ready to be split in half, just like they do in the slaughterhouse.
Start where the hind legs meet. You’ll see the pelvis, the hard bony bridge between the two hams. Cut through it with a knife if you can, or switch to the saw if the bone is too thick. Then move to the front and saw down through the breastbone.
Now the only thing holding the two sides together is the backbone running down the middle. Saw down its center from one end to the other. Try to stay right on the middle line so both halves come out even.
The two sides will want to close together as you cut, which pinches the saw blade. This is where help comes in handy. With one helper on each side pushing the halves apart while you work, things will be so much easier.
Try to leave about 12 to 15 inches of skin still connected up near the front legs. That keeps the whole thing balanced on the gambrel until you’re ready to take the halves down.
Chilling the Pig
I know it’s tempting to start cutting right away. But please don’t. Warm meat is soft, messy, and bacteria love it.
You should aim for below 40°F within 24 hours. A freezer is ideal, and a fridge works well for small cuts. But a clean, well-ventilated shed at around 32°F overnight will do the job too in cold-weather climates.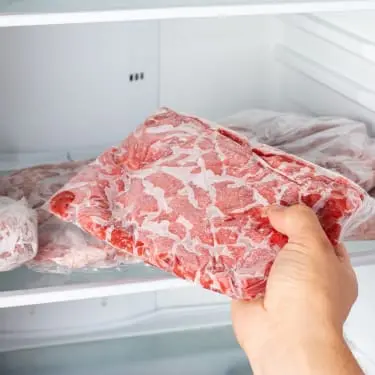
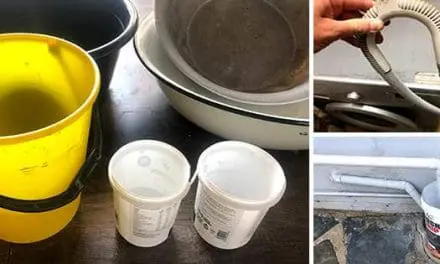
No cooler? Living on a homestead means that sometimes you might not have a freezer available. This is a reality. Maybe you already have all your harvest inside the there, chickens, and so on.
When you butcher a pig, you need cold storage and you need it now. The good news is the Amish solved this a long time ago. Their cold storage design runs on zero electricity, costs almost nothing to build, and keeps meat at safe temperatures using basic processes that you can easily recreate on your homestead.
See how to build your own Amish fridge here.
Break the carcass down into the four big pieces (shoulder, ham, loin, belly), wrap each one in plastic wrap, and pack them into coolers with plenty of ice. Leave room for air to circulate and keep adding ice throughout the day.
South Dakota State University Extension recommends getting the carcass to 33 to 38°F before you start cutting, and I’d follow that advice.
Breaking Down the Big Cuts
This is where the real fun starts. Or at least this is what I like to tell myself to make things feel easier.
But don’t forget that one of these big sides of pork becomes all the cuts your family will eat for the next several months.
Lay one half on a clean table, skin side down, then cut the feet off above the joint if you don’t plan to keep them.
The Ham
Feel along the back end of the carcass, near where the leg meets the body. You’ll find a curved hip bone sitting in there.
Cut across the backbone about two inches in front of that bone, toward the head end. Saw through the spine and hip bone, then finish with a knife. Consider saving the fat. If you’re planning to cure this ham, that fat is what keeps the meat from drying out.
The Loin and Belly
Whatever is left between the shoulder cut and the ham cut is the loin and belly, still joined together. At the ham end, find the tenderloin running along the backbone and mark where it ends.
At the shoulder end, mark a point about one to two inches toward the belly. Connect those marks with a long knife cut. When you hit ribs, switch to the saw, then finish with the knife.
You now have four main pieces: shoulder, ham, loin, and belly. Do the same on the other half and you are all set.
The Shoulder
Count two ribs back from where the head was. Saw through the backbone, breastbone, and shoulder blade between the second and third ribs. Finish the cut with a knife.
The shoulder gives you a lot of meat, and if you’re wondering what to do with all of it, here’s something most people don’t think about. You can make your own SPAM at home. Yes, the same SPAM that’s a staple in any pantry.
The best thing about homemade SPAM is that you know exactly what you put in it. No chemicals, no preservatives, and no mysterious ingredients you don’t want in your food.
It tastes better than anything from a store bought can, and it stores well too. Up to 3 years! Or even more if you have a dark, cool pantry.
Here you can see how to make homemade SPAM from fresh pork shoulder.
The Lesser Cuts (What to Never Throw Away!)
When it comes to pigs, I don’t throw anything away. Some of the best eating on a pig comes from the parts most people ignore.
Jowl. The jowl is, in my opinion, the most underrated cut on the whole pig. Cure and smoke the cheek meat the same way you’d do bacon. Italians call it guanciale, and it makes beans, greens, and pasta sauces taste like something else entirely.
Hocks. The knobby joints just above the feet. Tough and bony, but that’s the point. Cook them low and slow, and they turn into something special. Toss a smoked hock into a pot of beans or collard greens and you’ll taste one of the best meals of your life.
Trotters. The feet are packed with collagen. Simmer them for hours and you get a broth so rich it sets into jelly when it cools. Perfect for bone broth, stock, or head cheese.
Wrapping and Freezing
After you’ve done all this work and come so far, you don’t want to lose the whole pig because of bad packing.
This can happen if you’ve never done this before, but I am here to give you all the tips I learned after doing this for years. And if you ask me, packing is my favorite part when it comes to butchering livestock.
There are three main things you should keep an eye on: airtight, skintight, and labeled. Airtight keeps freezer burn away. Skintight means no air pockets between the wrap and the meat. And a label with the cut name, the date, and the weight saves you from playing guessing games in front of the freezer. 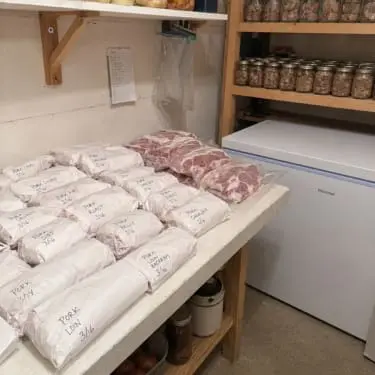
In order to achieve this, there are two approaches I like to use.
Freezer paper works well. It has a plastic lining on the inside that keeps juices in. Wrap tight, fold the ends like you’re wrapping a gift, and seal with freezer tape.
Vacuum sealing is even better if you have the equipment. Roll the top of the bag down before you load the meat in. That keeps the seal area clean.
Make sure the meat is below 40°F before you wrap anything. Lay packages in a single layer in the freezer until they’re frozen solid, then stack them. Keep your freezer at 0°F or colder. The meat will hold well for about a year.
If you don’t want to have a freezer full to the brim with pork, you might want to try something else. Stuffing packages in tight with no space between them slows freezing down and leads to freezer burn, which is the last thing you want after a full day of butchering.
The solution here is simple. People have been using this trick for generations, and some communities, such as the Amish, are still heavily relying on this practice even today.
Pressure-canned pork sits on a pantry shelf for years with no electricity. No thawing, no planning ahead. You just grab a jar and go. But there are a few things you might not be aware of that can cut the shelf life of your cans in half.
Small mistakes in pressure, timing, or how you seal the jars make the difference between pork that lasts five years and pork that goes bad in six months.
This is why it’s better to learn the canning secrets from the Amish themselves.
Try using their caning methods next time you can meat and you’ll see the difference in quality.
Final Thoughts
The first time you’ll do this, it will take you longer than expected. You’ll have to stop and think, double-check your cuts, and probably redo a few wraps that didn’t seal right. That’s normal.
Now, if you want to skip the first part, the one where you dispatch the pig, you can obviously do that. You can get a carcass from a local producer or from a farmers’ market. You can start the whole process by breaking down the big parts and then putting them in your freezer.
All in all, I truly believe that butchering is a skill every homesteader should have, as it makes you more self-sufficient and, in the end, saves you some money. Why put that money in someone else’s pocket when you can keep it and use it however you like?
You may also like: 
10 Things To Never Feed Your Pigs
What Happens if You bury a Barrel in Your Own Backyard? (Video)
I Tanned a Hide With Nothing but Eggs and Animal Brain
This 200-Year-Old Trick Keeps Meat Fresh Without Salt, Smoke, or Refrigeration
I Made Bone Broth WRONG for Years! This Method Changed Everything


