If you raise livestock or go out hunting, you might already be familiar with the butchering process. The meat goes in the freezer, the bones go in a stock pot, and then you have the hide sitting somewhere in the shed doing nothing.
You are aware that it’s worth something, but you are not sure what to do with it. Making clothing, bags, and all kinds of things out of hides is an option, but maybe you don’t want to do this. That’s why most of the time you end up tossing it in the trash.
Selling it is another option, but raw hide is not selling for much. A few dollars at best…
I was in the same situation until I learned something that changed the whole process. It’s all natural, no chemicals involved, and now I turn my hides into the softest, most durable leather I’ve ever put my hands on, and then I sell them for profit.
Let me show you how!
Why Brains and Eggs?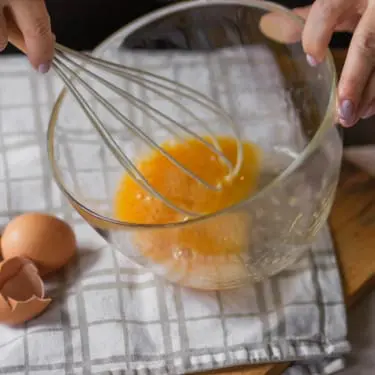
Before you start, it helps to understand what you’re actually doing and why this method works.
Most leather you see in stores goes through something called chrome tanning. It’s a factory process that uses heavy chemicals to treat the hide. It’s fast, but the leather ends up stiffer and the whole thing produces toxic waste.
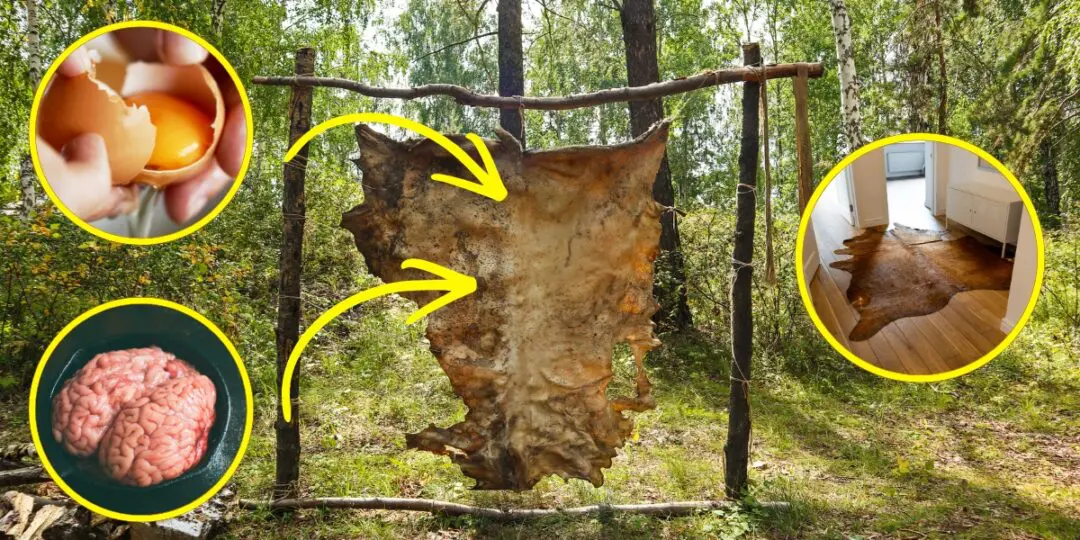
Brain tanning is the opposite of that. It’s slow and physical, but it gives you leather that breathes, stretches, and stays soft even when it gets wet. People have been doing it this way for centuries. Indigenous peoples across North America and Eurasia turned hides into what’s called buckskin using this exact method, long before factories were ever a thing.
The reason it works is simple. Animal brains and egg yolks both contain lecithin, a natural substance that lets fat mix with water. When you work that mixture into a hide, the fats get between the collagen fibers that make up the skin. Without those fats, the fibers stick together as the hide dries and you end up with rawhide. Stiff, rigid, not good for much. But coat those fibers with the right fats and they slide past each other instead, giving you soft, flexible leather.
One deer brain handles one deer hide. A pound of pig brains does the same job. And if you can’t get brains, a dozen egg yolks work too and you get the same great results.
If you decide that you want to make these hides to sell them or to barter, I suggest you start with the basics. Selling them for the best price is an art and those who handle it perfectly are none other than the Amish.
We scrape the bottom of the barrel more than most, Bishop Eli, a member of the Amish community, once said, and this might highlight the money mindset the Amish live by. Most of them are surprisingly skilled business people who are able to avoid IRS problems and other pitfalls despite a lack of some modern technologies that make this easier.
See how the Amish handle their cash and get the best tips to sell your hides for the highest prices.

What You’ll Need
Most of this you probably have around the homestead, or you have the materials needed to build them.
- A hide. Deer, goat, or any hoofed animal. Fresh is easiest to work with, but salted, frozen, or dried hides work too. Thaw and rinse before you start.
- A scraping beam and scraper. The beam is a smooth, rounded surface to drape the hide over. A smooth log or a piece of PVC pipe works well. Lean it at an angle with one end on the ground and the other resting against a table or wall, so the top sits about waist height. For the scraper, something with a dull edge, like a dulled drawknife or planer blade.
- Buckets, gloves, and a sharp knife. Large buckets for soaking, rubber gloves for your hands (especially if you use lye), and a knife for trimming.
- Your dressing solution. One deer brain, about a pound of pig brains, or twelve egg yolks. You decide what you use. Plus warm water and roughly ¼ cup of olive oil or rendered animal fat. The oil helps the solution get deeper into the hide.
- A wringing pole or cable. Something to twist the water out between soakings. A strong stick, or a steel cable strung between two trees.
- Smoking setup. Punky wood, which is rotten hardwood that smoulders instead of burning. Douglas fir works too. Plus a way to hang the hide over the smoke.
Getting Your Hide Ready
Lay your hide flat and take a good look at it. Check for holes or deep knife marks from the skinning. If thin strips are hanging off the legs or ragged bits around the neck and tail, go ahead and trim those now. They won’t tan well and they’ll just slow you down.
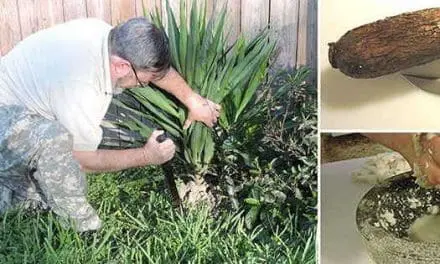
Fleshing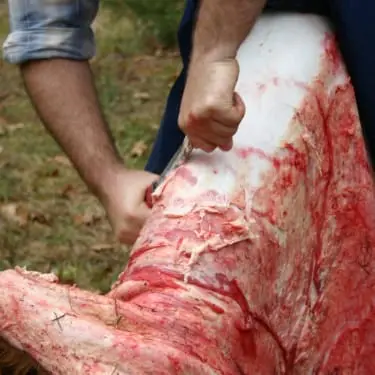
Put the hide flesh-side up on your scraping beam. The beam should be angled so the top end leans into your body at about hip level and the bottom end rests on the ground. Press your hips against the hide to pin it in place. This frees up both hands for the scraper.
Scrape off every bit of meat, fat, and the thin white tissue connecting them to the hide. Use firm, steady downward strokes and keep the hide on the curved part of the beam where you have the most control. On a flat section, the blade can dig in and tear right through.
The Inca Superfood That NASA Still Uses on Space Missions Today
Move the hide around the beam as you go so you’re always on that sweet spot. You’ll get a feel for it quickly. When the scraper is in the right place, material peels off in smooth sheets. When you hit clean skin, it sounds and feels different under the blade.
Don’t rush this. If you leave fat or membrane behind, the dressing can’t reach those areas and you’ll end up with stiff patches in your finished leather. Good fleshing now saves you problems later.
When you’re done, rinse the hide with clean water to wash off blood and leftover bits. If you need to stop here, cover both sides with a thick layer of salt, about half an inch, and let it sit on a tilted surface so the moisture drains off. Or throw it in the freezer.
Removing the Hair

The simple way: submerge the hide in clean water and let it sit for several days. Flip it once a day and tug the hair to test it. When it pulls out with no resistance, you’re ready.
The faster way: make a weak lye solution from wood ash. Fill a bucket with water and stir in hardwood ash, about one part ash to ten parts water. Let it sit for a few hours, then test it. When the water feels slippery between your fingers, it’s strong enough. Put the hide in and let it soak. This cuts the wait to a day or two, but be careful. Wear gloves when handling the solution, and keep checking on the hide. Leave it in too long and the lye starts breaking down the skin itself.
Once the hair slips, put the hide back on the beam and scrape off all the hair plus the grain layer underneath. The grain is the thin outer layer of skin, almost like a film. It has to go because it blocks the dressing from reaching the fibers. The neck area is the thickest and toughest, so spend extra time there.
After scraping, rinse your hide well. If you used lye, rinse several times. Any lye left in the hide will work against the dressing and keep it from doing its job.
Note: Don’t throw away the hair! You can use it as tinder and start a fire even when it’s raining.
Getting the Water Out
Before applying the dressing, squeeze out as much water as you can. If the hide is full of water, there’s no room for the dressing to get in.
Roll the hide around a pole and twist it hard, or loop it over a stick wedged between two trees and wind it tight. Keep going until nothing drips. This takes real effort on a large hide, so consider this because you might need help.
Get comfortable with this step. You’ll repeat it between every round of dressing.
Mixing Your Dressing
If you’re going with brains: warm about 1.5 gallons of water until it’s hot, but you still need to be able to hold your hand in it. Mash or blend the brains into a smooth paste, whisk them into the water, and add about ¼ cup of olive oil or rendered fat. It should look like a thin milkshake.
If you’re going with eggs: beat twelve yolks until smooth. Mix them into about half a gallon to a gallon of warm water. A splash of olive oil or grapeseed oil adds extra fat. You are once again looking for the same thin milkshake consistency.
The water needs to be warm enough to help the fats blend, but not so hot that it cooks the eggs or brains. If you see solid bits floating around, the water was too hot. Dump the mixture and start fresh.
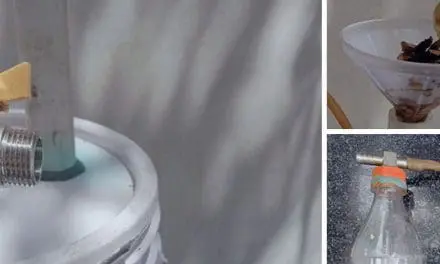
The first time I tried doing this, I was unaware of the implications and simply prepared the mixture on top of my kitchen stove. The problem is that this mixture is not the best smelling and you might regret making it in the same kitchen where you cook your food.
This is the reason I decided that every time I do this or any other project that has the potential to smell bad, I will use my outside rocket stove. This is the easiest way to avoid messing up your kitchen during DIY projects.
Get the full instructions here and you’ll have your own rocket stove in less than two hours.

Working the Dressing Into the Hide
Lay your wrung-out hide into the warm dressing and start working it with your hands. Knead it, stretch it, massage the solution into every part. You want those fats getting deep into the fibers.
Let it soak for 15 to 30 minutes while you keep working on it. Then pull it out and wring it again. Wringing forces the solution deeper and makes room for more on the next round.
Put it back in and repeat. Go through this soak-and-wring cycle two to four times. Each round pushes more fat into the hide. As Harmony Cronin explains in her Outdoor Life guide, brains are the preferred dressing, but eggs and oil get the job done too. You might need an extra round or two with eggs.
After your last round, put the hide in a plastic bag overnight. This lets the moisture spread evenly through the whole hide, so you don’t end up with dry and wet spots when you start softening.
Softening
I’m not going to sugarcoat this. Softening is the most physically demanding part, and there’s no shortcut.
As the hide dries, the fibers want to stick back together. Your job is to keep pulling them apart, over and over, until the hide is completely dry and the fibers stay separated on their own. If you stop while it’s still damp, the fibers bond back together and you end up with stiff spots.
Drape the hide over a steel cable between two trees and pull it back and forth using your body weight. This is called flossing and it’s one of the best ways to work a hide. If you have no cable, a smooth fence post or the back of a sturdy chair works as well.
Then it’s time for staking. Roll a section of the hide and pull it over the edge of a stake or post. Press hard enough to feel the fibers stretching and separating. Bouncing, rubbing, and smacking the hide against a hard surface all help.
Get rid of the tough spots. The neck and any thicker areas dry more slowly and stiffen faster. Give them extra time. Touch the hide as you go. If a spot feels cool, it’s still damp inside. If it feels stiff when you pull, keep working it.
These Common Places Become Danger Zones Within 6 Hours of a Collapse
This can take a few hours to most of a day, depending on the hide and the weather. You’re done when it feels dry all the way through, soft everywhere, and bounces back when you stretch it. For an even softer finish, rub the surface with a pumice stone to buff away loose fibers.
Locking It In With Smoke
Everything you’ve done can be undone if the hide gets wet and you haven’t smoked it. Smoke changes the fibers so they stay soft permanently, even after washing. Skip this and the next time your leather gets soaked, you’ll be softening it all over again.
If you have two hides, sew them together along the edges with the grain sides facing in to make a bag. If you have just one hide, fold it in half and sew up the open sides. Use heavy thread, twine, or sinew, and keep your stitches about half an inch apart. The bag doesn’t need to be airtight, but it needs to hold its shape and funnel the smoke through the leather. Hang this bag about two to three feet above a small fire pit.
Build a bed of coals and feed it small pieces of punky wood. You want thick, steady smoke with zero flame. If the wood catches fire, the heat will scorch your hide and ruin days of work. Keep the fire low and smouldering. Or you can build your own smoker.
Smoke until the hide takes on an even color all the way through. For most hides, this takes two to four hours per side. You’ll know it’s working when you can see the color going deeper into the leather, not just sitting on the surface. Flip the bag inside out halfway through so both sides get equal coverage. The color depends on your wood. Douglas fir gives a warm brown. Other hardwoods go lighter, more golden or yellow.
When the color looks right, take the hide down, rinse it gently, and hang it somewhere shaded to air dry.
Things I Learned the Hard Way
- Eggs are more forgiving than brains. Brains give slightly better results, but egg yolk dressing is easier to mix, easier to store, and less likely to go wrong on your first try. If this is your first time, go with eggs.
- Your dressing will spoil. Brain and egg solutions go bad fast, especially in warm weather. Work somewhere cool, keep your containers covered, and if the smell turns, toss it and make a new batch. Spoiled dressing won’t tan properly and will make the whole hide stink.
- Start with something small. Don’t try a full deer hide your first time. Grab a rabbit skin or a small goat hide. Same technique, faster, less exhausting, and less painful if something goes wrong.
- This works on fish skins too. Beat a dozen egg yolks or mash half a pound of brains, mix with half a gallon of warm water, and put your fish skins in for 20 minutes to overnight. Wring them out, wash with mild soap, and tack flat to dry.
- It’s messy. You will be covered in brain or egg yolk. Your arms will be sore. At some point during softening, you’ll wonder why you didn’t just buy leather. Every person who’s done this has had that moment. Keep going. What comes out the other side is worth it.
What You End Up With
When you hold a piece of brain-tanned buckskin you made yourself, it doesn’t feel like anything from a store. It’s soft but strong at the same time and smells like wood smoke. This hide made by you can be washed and it stays soft. You can sew it into bags, moccasins, knife sheaths, and gloves, and it’ll outlast most things in your closet.
But what gets me every time is knowing nothing went to waste. The hide that would have gone in the trash is now something I made, something I’ll use, something that came from an animal I raised or harvested with my own hands.
If you’ve never tried this, pick up a hide next time you butcher or ask your local butcher to save one. It’s a messy, tiring process that takes a few days of real work. But once you’ve done it, you will be so pleased by the result that you will want to do it again.
You may also like: 
Pioneer Skills That Are Slowly Dying (But Shouldn’t)
Amish Survival Hacks that Can Help You Thrive in a Long-Term Blackout (Video)
7 Amish Blacksmithing Skills That Will Save You $500 a Year
6 First Aid Skills You Should Know Before A Crisis
11 Must-Have Items for Your Wilderness Survival Shelter


