It all began with sourdough bread: flour, salt and water coming together with time as the catalyst to convert simple, natural ingredients into a delicious everyday staple.
I discovered how weather conditions influenced the outcome; the temperature and humidity influenced the mood of the sourdough culture. It was like the food was made with permission from he conditions around us. While discussing this observation with an elderly lady in a village near our homestead, she told me how she had once built a mud oven with local children.
The idea that one could use local natural materials to build an oven was fascinating, it seemed to complete the circle of baking bread. It was evident that this was my next home project, and I didn’t waste any further time getting started.
The amount of time it will take you to build an oven will depend on the size and design that you wish to have. Each oven is unique, I would urge you to make a custom plan for your own oven before you get started. It is crucial to estimate your capacity for labor, materials, and time; as well as a vision of how this oven would be eventually used.
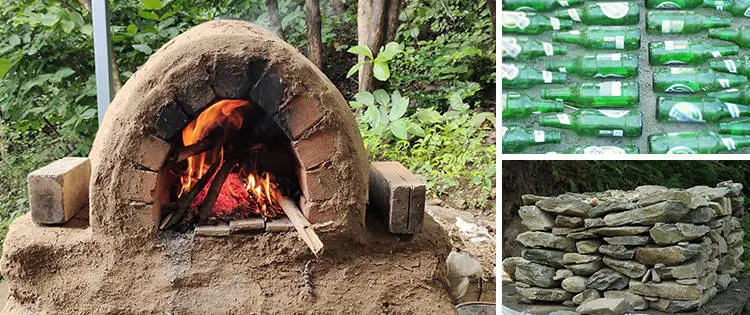
The basic structure is around an oven cavity in which food would be baked, and an enclosing wall to contain the heat. Firewood is burnt in the cavity, heating up the air inside as well as the floor and walls of the oven. By designing the materials used for the floor and the walls, we try to make sure this heat is retained for a long time, and we minimize heat losses to the surrounding environment.
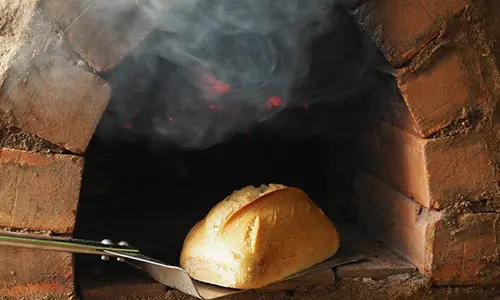
When adequate fuel has been burnt, the oven stays hot for a long time. You can now stop the burning of firewood and use the space in the oven for baking.
The shape of the oven, the size of the door and the materials used will determine how efficiently your oven stores heat, which in turn will define how much food can be cooked in the oven in one session.
Materials needed:
- Clay (from a nearby lake side, or even dug out from your garden)
- Sand and Wood shavings or chopped straw
- Empty glass bottles of similar size without the caps
- Fire bricks or regular bricks
- Plastering (limestone or cow dung or a clay slurry)
- A piece of sheet metal or wood to make your oven door
- Access to plenty of water and A large tarp sheet that’s used as a workspace to mix your ingredients
Use the tarp to help mix the materials. You will need to repeatedly mix the materials in small batches.
There are two types of mixes you will need:
- Thermal Mix: This is a mixture of clay and sand (1:1) with water. This mixture is the basic mix for the walls of the oven, and it absorbs and retains heat thus keeping the oven warm for a long time.
- Insulation Mix: This is a mixture of wood shavings/straw with just enough clay and water such that you can form a ball with the material.
With the concept ready and materials in place, here’s a rough guide on how to go about building your own mud oven.
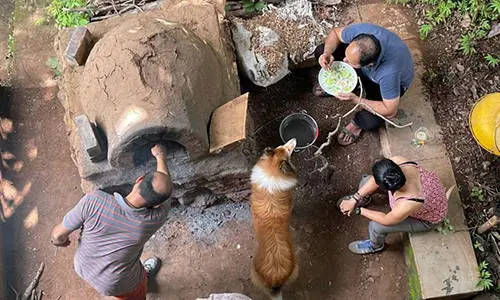
It is worth spending some time thinking about where this oven will be located. It should be in a ventilated space, preferably with options for storage of tools and firewood nearby. While it can be outdoors, be sure it isn’t exposed to the rain. Think about how the oven will be used too, with space for groups of people to be near it, a counter to prep food on, and area to eat and be social.
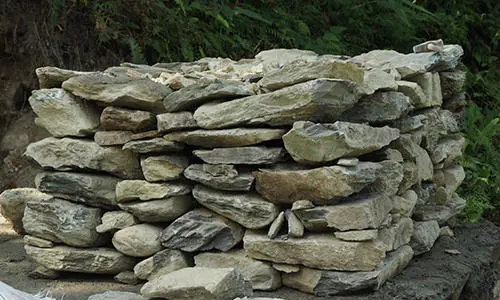
Now create a foundation for the oven. Building an oven on the floor would make it rather inconvenient to use – so think of a platform that is sturdy enough to build the oven on. I collected rocks from the garden and built a rock platform at a height that was convenient for me. I created a platform that was about 5 feet by 5 feet for my oven size.
Glass bottles are laid on the floor of the oven to create insulation on the floor of the oven. The bottles are laid out uniformly, leaving gaps between the bottles. We had some beer bottles left from a recent party, and we decided to use them. Fill the space between the bottles with insulation mix and create a smooth and level surface. Wait until this layer is dry enough to hold its shape before proceeding.

The next layer should be 4-5 inches high. It is a layer of thermal mix that is surrounded by insulation along the edges. I laid fire tiles over this surface to have a smooth and clean oven floor.
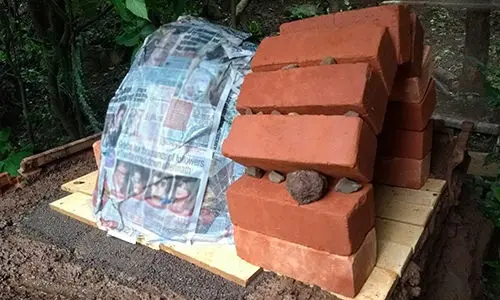
It is now time to design the size and shape of the oven cavity and door. I chose an oblong dome, with an arched door in the front. Mix sand with a little water and shape a dome which would be in the shape of the oven cavity. Cover the dome with slightly damp newspaper.
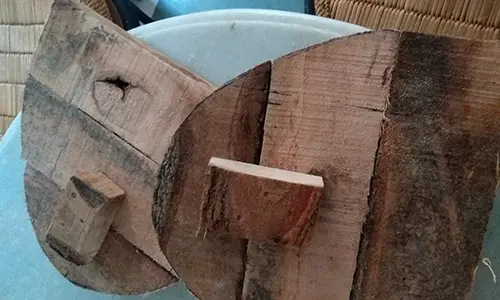
Cut the sheet metal or the wood to the shape you would like for the oven door. Place this against your sand dome. Use bricks to make a doorway around it to match the shape. The sand dome and the door together represent the cavity that would be available inside the oven, and we now need to build the oven around this space.
Related: DIY Year Round Self-Sustaining Garden
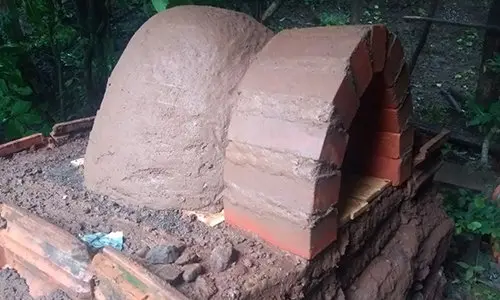
Use the thermal mix to build the retaining wall of the oven. Work in circles starting from the floor and slowly cover the entire shape including doorway. If you have built an arch, make sure you pack the gaps between the bricks with this thermal mix.
Once this clay is dry enough to hold it shape, you can take out the door and the sand that is inside the oven. Use your hand and dig out the sand carefully, stop when you can feel the newspaper. You do not need to worry about pulling out the newspaper as it will burn away when the oven is in use.
Your oven is ready, now we just need to make it a little more efficient: cover the walls of the oven with a layer of insulation to make sure heat does not escape to the surroundings. Once the insulation is dry, you can plaster the oven for a smooth finish, according to the materials and aesthetic that you prefer.
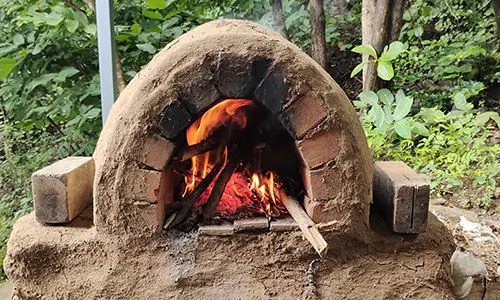
Using a wood-fired mud oven requires you to learn how to use it well.
This project taught me how to build a good fire. It is important to burn a strong fire in the oven for 2-3 hours to make sure the thermal mix has heated up and is holding enough heat before you can use the oven for baking.
With time you will learn how much wood you need to burn, and how to strategically use the oven cavity so that it heats up quickly and efficiently.
Much like sourdough bread, nature plays a role here as well. I learnt how to identify dry and dead wood that I always collect when I go on local walks and hikes. Time is the catalyst here too, rushing the baking process never pays off.
Using a mud oven is about being in the state of mind to adapt to local conditions, being patient enough to allow the oven to be ready for baking and learning how to enjoy the company around you while you wait.
It is a worthwhile investment of labor and time, for it has left me with years of joyful usage since I first built it.
You may also like:
 Are You A Community Member Or A Lone Wolf?
New Invention 12X More Efficient Than Solar Panels (Video)
How To Make Bio Fuel From Kitchen Scraps


I am wanting and excited about this outdoor oven, I have one question I live in town and in a flood zone the last flood was April 2021 It got inside my house this year. I was wondering if I could make it out of concrete on account of the flooding it may flood again next year and then again it may be 10 years before it happened again. I thought it would be a good thing to have so I can cook while the electric appliances are out of order and my gas cook stove.
How do we prevent it from getting exposed to rain if it’s outdoors?
You can build a small roof above it, or place it in a place where it’s already covered
I would suggest a small canopy/pavilion over the top.
Is there no chimney or means of exhaust? Looks fun!
From were does the oxygen needed to feed the fire enter the oven?