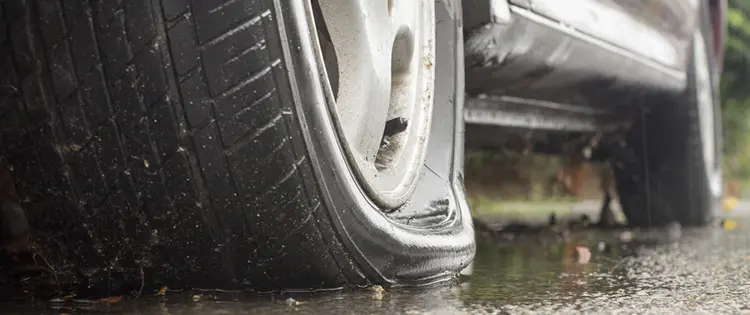
It’s the Monday morning rush and just when things get really tight, you see your car sadly listing to one side and the rim is far too close to the ground. Well, perhaps now would be a good time to phone in, and say you are going to be late, because it will take you a good fifteen minutes to change the tire.
On TV, at the Grand Prix, it’s only a couple of seconds. But here, things move a little slower, so to avoid a whole lot of unnecessary stress, take you time and follow the instructions.
Safety Is Your First Concern
 A flat tire in your driveway at home, or on a quiet road, is unpleasant. But a flat tire on a busy street, can be seriously dangerous, so do take care!
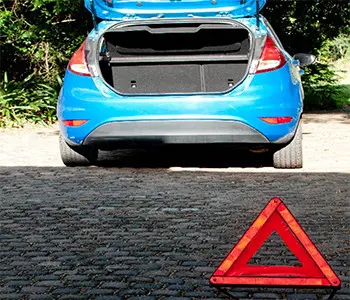
If you find yourself on a busy road, the first thing to do is to pull over to the side of the road to get out of the traffic, and then set up your warning triangle some distance from your car facing oncoming traffic.
This will give oncoming motorists a warning to take evasive action. The greater the distance between your car and the warning triangle, the safer you will be.
Setting Up To Change The Flat Tire
So, you have got out of the car, seen the flat tire, and the very first thing to do is to get back in the car and make sure that your hand brake is on. Also the car needs to be in gear or for automatic cars, the car is in park. You don’t want the car to be moving around when you jack it up.
Now you need to get to the tools and spare tire. Cars do have several variations on how they stow the spare tire and the tools required to change it, however generally you will find the spare under the luggage area together with the tools.
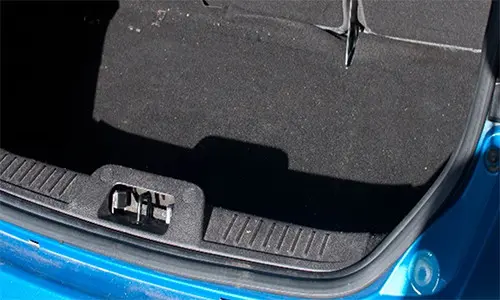
Look for the small handle which allows you to pick up the base of the luggage area, exposing the spare tire and the tools.
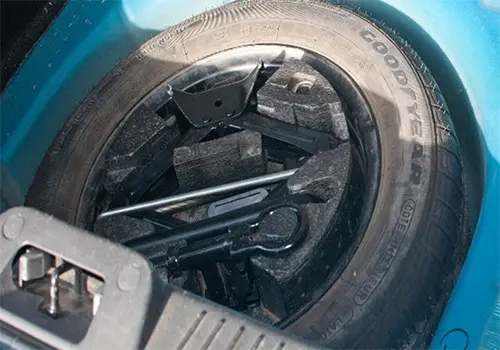
In many instances the jack together with the other tools are in the center of the spare tire, but sometimes there is a special panel that houses these tools. So if you can’t find the tools with the spare tire, consult the car manual to establish their whereabouts.
You will have to remove the set of tools that are neatly packed in a fitted container and then the fitting holding down the spare tire will be exposed. This fitting needs to be unscrewed (turn it anti clockwise) to be able to remove the spare tire from the luggage area.
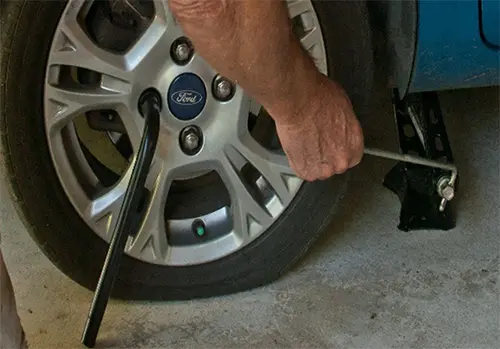
Begin by loosening the nuts that hold the wheel. There will normally be four or sometimes five wheel nuts. At this stage you only want to loosen them a little, perhaps just one turn. If you find that you are unable to loosen them because they are too tight, you may want to try fitting the tire spanner in a horizontal position (around ten o’clock on a clock position) and then you can step on the spanner.
It is a good idea to loosen the nuts in an alternate fashion. So, top one first, next the bottom one, then the left one and last the right one.
Lift The Car Up
Once all the nuts have been loosened, it will be time to fit the jack in position. Scissor type jacks are the most common, and are fitted close to the flat wheel. To fit the jack correctly, I’m afraid you will have to get down low, and make sure that the jack is positioned correctly under the car in such a way that it will not slip.
Once correctly positioned you will have to raise the jack by turning the handle in a clockwise direction until the bottom of the flat tire is raised off the ground.
Now you can remove all the wheel nuts. Make sure you keep them safe.
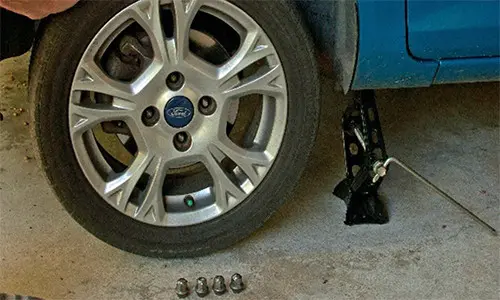
Check that there is sufficient clearance below the flat tire and remember that the spare tire is going to need extra clearance because it is fully inflated. (Well, I’m hoping that your spare tire is fully inflated.)
Now with a gentle tug, the wheel should slip off the hub, and you will be ready to fit the spare tire.
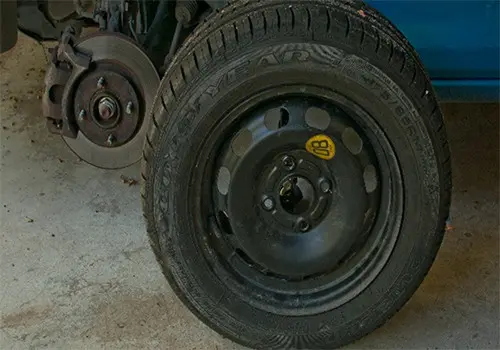
You may notice that your spare tire is much thinner than the standard tires. It can be in some situations, depending on the model of the car you drive. In addition, if the spare is thinner, it is going to have a speed restriction marked on it (maximum speed allowed).
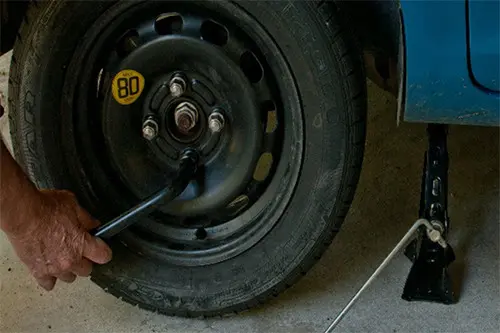
Now what you need to do is to turn the spare wheel, so that the holes for the bolts line up with the bolts on the hub. Once you have the wheel on the hub, fit the top nut and hand tighten it. Next fit the other nuts and tighten them by hand as well.
Good To Go
Tighten all the nuts using the wheel spanner, but don’t tighten them all the way, as this will be done once the jack has been removed. Remember to tighten the nuts alternatively, top then bottom, left then right.
Once you have all the nuts tightened let the jack down, by turning the handle of the jack in an anti-clockwise.
Keep turning the jack down until you feel it loosen itself from under the car and then you can slide it out. Take the wheel spanner and give each nut another tighten. If you feel that you are not strong enough to make the nuts tight enough, fit the spanner horizontally at the 3 o’clock position and stand on the spanner handle. Do this for every nut. Hold onto the car when doing this, as the spanner handle will slide down as you apply pressure.
Now the spare is fitted, and sadly, if you don’t have something to clean your hands with, they will remain a touch grubby. But hey! You have changed the tire. And once the flat tire is in the luggage area and all the tools are packed, you can drive on. Don’t forget to pick up the warning triangle before you drive off.
You may also like:

What An EMP Affects And How You Can Protect Your Car And Electronics (Video)
How To Build A Small Storage Shed From Pallets
Backyard Projects That Might Get You Arrested


I see in these photos that the spare tire has a speed limit mark, so I guess it is thinner than a normal tire. My car has a really thin spare tire, and it is also a bit smaller. What’s up with this?
Compared to full-sized spare tires, the smaller ones are designed to save weight and trunk space. Since they are not designed for long-term use, they typically feature a smaller physical size (basically if you have a flat tire, the small spare one will allow you to drive to the nearest service station).