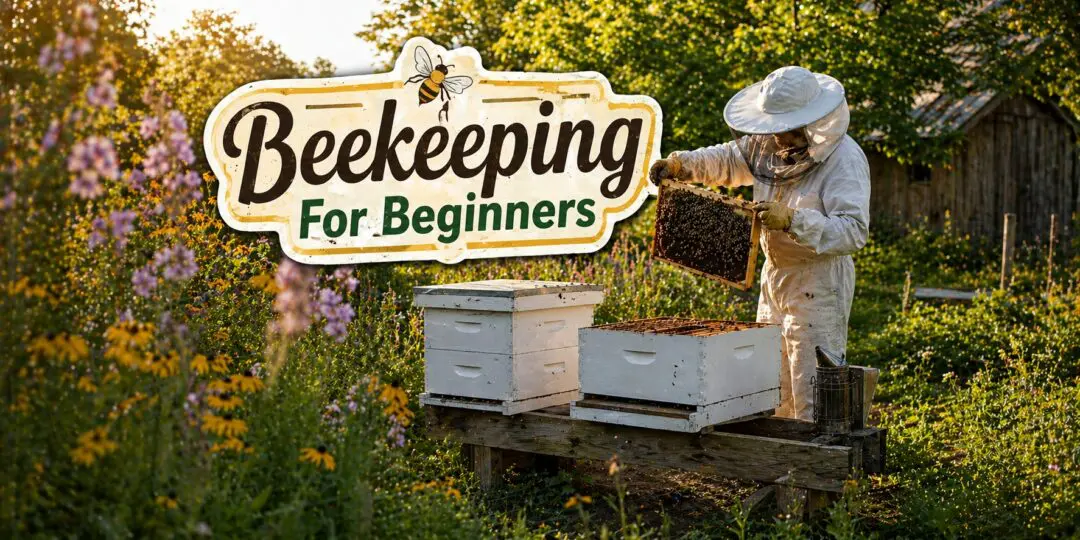
There are not many additions to a homestead that pay dividends in as many directions as a beehive. You get honey, obviously. But you also get better pollination for your garden, wax for candles and salves, and a front-row seat to one of the most sophisticated examples of collective biology on the planet.
Beekeeping sounds intimidating at first. The gear is unfamiliar, the terminology takes some getting used to, and the idea of deliberately working around thousands of stinging insects is not exactly a comfortable mental image. But the reality is that most beginner beekeepers are surprised by how manageable it is once they get going. The bees largely know what they are doing. Your job is mostly to give them a good home, check in regularly, and stay out of their way when they need you to.
This guide covers the practical side of getting started: the right hive for a beginner, what equipment you actually need, how to pick a site, where to get bees, and what to expect across your first year. It is written for someone starting from zero with no prior beekeeping experience.
One thing worth doing before you buy anything is checking the beekeeping recommendations from your local university extension service. The University of Missouri Extension, for example, recommends taking a beginning beekeeping class before investing in bees and equipment, and that advice holds regardless of what state you are in.
Before You Buy Anything: Check Your Local Rules
The single most important step before you order your first hive kit is finding out whether beekeeping is allowed on your property. This is not just a formality. Local ordinances vary enormously across the country, and getting this wrong can mean dismantling your setup or dealing with neighbor complaints down the line.
In most residential areas of the United States, backyard beekeeping is permitted, but it usually comes with conditions: minimum setback distances from property lines and neighboring structures, caps on how many hives you can keep, and sometimes a requirement to register your hives with the county or state agricultural department.
The complexity here is that city, county, state, and HOA rules can all apply simultaneously, and the most restrictive one wins. The University of Minnesota Bee Lab maintains a useful database of city and county ordinances governing backyard hives across the country that is worth checking as a starting point before you dig into your own jurisdiction.
If you live in a neighborhood with an HOA, check the governing documents first. Some HOAs prohibit beekeeping outright regardless of what local ordinances say. If you rent, you will need your landlord’s written permission. If you own your land outright in a rural or semi-rural area, you are much less likely to run into restrictions, but it still pays to verify.
Choosing Your First Hive
There are three main hive types that most beginner beekeepers encounter: the Langstroth, the top-bar, and the Warre. Each has its advocates, and none of them is wrong. But for a first-time beekeeper, one of them has a clear practical advantage.
Langstroth Hive
The Langstroth is by far the most common hive design in the United States. It is built around a stack of rectangular boxes, each holding frames of honeycomb that can be removed for inspection, rearranged, and replaced. The design is standardized, meaning parts and frames are interchangeable across suppliers. Replacement equipment is easy to find. When you have a problem and need advice from another beekeeper or your local beekeeping association, the Langstroth is almost certainly what they know.
For beginners, this matters a lot. You can call your county extension office, watch a how-to video, or ask a question at your local beekeeping club, and the advice will apply directly to your setup. Start here unless you have a compelling specific reason to do otherwise.
Top-Bar Hive
Top-bar hives use a single horizontal bar running across the top of the hive, which the bees build comb down from naturally. There are no frames, and the design is lower-intervention and closer to how bees would build in a hollow tree. For beekeepers who want minimal management and a more natural approach, it is appealing. The trade-off is that honey yields are generally lower, inspections are more involved once the comb is established, and there is much less standardized information and community support available if you run into problems.
Warre Hive
The Warre hive is a vertical design that adds boxes to the bottom rather than the top as the colony grows, mimicking how bees expand naturally downward. It requires less active management than a Langstroth but makes inspections more difficult and is less compatible with standard Langstroth equipment and the broader network of parts and advice available to most American beekeepers. Worth exploring after your first year or two, but not the ideal starting point.
Bottom line: Start with a Langstroth hive. An 8-frame or 10-frame model works well for beginners. The 8-frame boxes weigh less when full, which makes inspections more manageable.
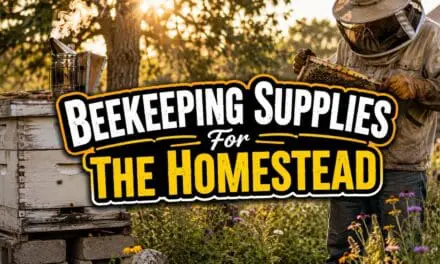
Equipment You Actually Need
The beekeeping supply world is full of optional gear that can make a beginner feel like they need to spend a thousand dollars before a single bee arrives. You do not. Strip it back to the essentials and add things as you find you need them.
Protective Gear
A full beekeeping suit with integrated veil, gloves, and closed-toe boots are your non-negotiables. As a beginner, you will be slower and less confident in the hive than an experienced beekeeper, which means more time with the frames, more movement, and a higher chance of agitating the colony. Good protection lets you work calmly without flinching, which matters more than it sounds. A calm, deliberate beekeeper makes calmer bees.
The Hive Tool
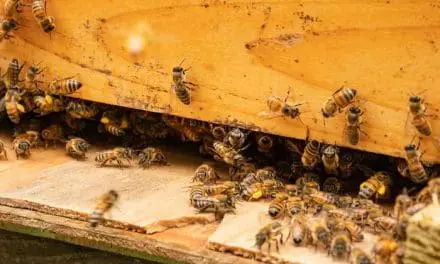
Bees seal every gap in the hive with propolis, a sticky resinous substance they produce from plant material. Without a hive tool, you cannot get a frame out of the box. This flat steel pry bar with a hooked end is inexpensive and essential. Buy two. You will lose one.
The Smoker
When you puff cool smoke at the hive entrance and across the top bars before opening the hive, the bees respond by gorging on honey, apparently anticipating a need to evacuate. This behavior, which is the basis for how a smoker calms a colony during inspection, suppresses their defensive alarm response and gives you a much more cooperative hive to work with. Use pine needles, wood chips, burlap, or dried herbs as fuel. Never use treated wood or anything that might leave chemical residue.
A Bee Feeder
When you install a new package of bees or nucleus colony, they are starting from scratch. No drawn comb, no honey stores, and possibly a nectar dearth depending on the time of year. A feeder that holds a simple 1:1 sugar-water mixture gives them the energy to start drawing out comb and building up the colony. A front entrance feeder is the easiest option for beginners.
The Hive Itself
For a Langstroth setup, a starter hive typically includes a bottom board, two deep brood boxes, a medium super for honey, an inner cover, and an outer cover. Many suppliers sell these as kits, assembled or flat-packed. Buy new equipment for your first hive. Used equipment can carry disease, particularly American foulbrood spores, which can survive in wood for decades.
Choosing the Right Location
Where you put your hive affects both the health of the colony and your relationship with your neighbors. A well-placed hive is one that your bees can thrive in, that you can work comfortably, and that does not send your bees across a neighbor’s patio or a walking path.
- Face the entrance east or southeast so the hive catches morning sun, which encourages bees to start foraging earlier in the day
- Avoid low-lying areas where cold air settles and moisture accumulates — elevated positions with good drainage are better
- The hive needs at least partial sun and shelter from strong prevailing winds, particularly in northern climates
- Place the hive so the flight path moves away from foot traffic rather than across it. A hedge, fence, or tall shrubs near the entrance forces bees to fly up quickly, which keeps them above human head height
- Leave enough room to stand behind and beside the hive comfortably during inspections. You need at least three feet on each side
Most beginning beekeepers start with one hive, but experienced beekeepers consistently recommend starting with two. Two hives let you compare colonies side by side, share frames between them if one is struggling, and give you a reference point when something looks off in one of them. The University of Missouri Extension specifically suggests two to five hives as an ideal starting size for a new beekeeper, noting this is small enough to manage but resilient enough to handle winter losses.
How and When to Get Your Bees
You have three practical ways to start a colony: a package of bees, a nucleus colony (nuc), or catching a swarm. For most beginners, the package or the nuc is the right choice. Swarm catching is a skill in itself and not the most predictable way to start out.
Package Bees
A package is typically a screened box containing around 10,000 bees and a caged, mated queen. The bees and queen are not related and will need a few days to accept each other after you install them. Packages are usually shipped by mail from bee suppliers, and the installation process is straightforward once you have walked through it once. They are widely available, generally less expensive than a nuc, and give you the satisfaction of building the colony from scratch.
Nucleus Colony (Nuc)
A nuc is a small working colony: typically four or five drawn frames of comb with brood in various stages, honey stores, worker bees, and an established, laying queen. The advantages of starting with a nucleus colony are significant for beginners: the queen is already accepted and producing, the bees are already organized, and the colony builds up faster than a package. Nucs are more expensive, but many experienced beekeepers consider them worth it for a first hive.
When to Order
This is where many beginners make a costly mistake. Bee suppliers take orders for spring delivery starting in late fall and winter, and popular suppliers sell out fast. If you are planning to start hives in spring, order your bees by January or February at the latest. Ordering in March or April is often too late to get spring delivery. Place your order early, even if you have not finished assembling your equipment.
Timing tip: Use fall and winter to research, plan, and order everything. Have your hive assembled, painted, and in place at least two to three weeks before your bees are scheduled to arrive.
What to Expect in Your First Year
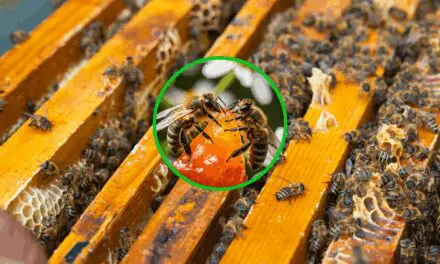
The first year of beekeeping is primarily about learning to read your hive and developing a feel for what a healthy, functioning colony looks and sounds like. Do not expect a big honey harvest in year one. Most beginner beekeepers leave whatever honey the colony produces for the bees to overwinter on, which is exactly the right call.
Spring
When your bees arrive, install them in the hive and resist the urge to check every other day. Give a new package a week before your first inspection. During spring inspections, you are looking for evidence of a laying queen (eggs and young larvae in an organized brood pattern), building population, and sufficient space. If the colony is expanding quickly, add another box before they run out of room. A crowded hive will swarm, and a swarm is half your bees flying away.
Summer
Summer is peak activity. The colony will be at its largest, forage will be coming in, and honey will be accumulating in the supers. Continue inspecting every ten to fourteen days. Watch the space in the hive and add boxes when the existing ones are about two thirds full. This is also the season to monitor for Varroa mites, which we cover in the next section.
Fall
Fall is preparation time. Stop harvesting honey by late summer and let the bees build up stores for winter. A colony in a cold climate needs roughly 60 to 80 pounds of honey to survive the winter. The annual honey yield a healthy colony can produce is often cited as 50 to 100 pounds of surplus once established, but year one colonies rarely have surplus, and that is fine. Treat for Varroa in late summer or early fall, reduce the hive entrance to limit mouse access as temperatures drop, and make sure the colony is not too small heading into winter.
Winter
In cold climates, the colony clusters tightly to generate heat and survives on stored honey through the winter months. Do not open the hive during cold spells. You can do a quick visual check on a mild day above 50 degrees, but resist the urge to pull frames. You are primarily watching for signs of life at the entrance on warmer days and making sure the hive has not been knocked over by wind or wildlife.
Varroa Mites: The Most Important Thing to Understand
If there is one thing that separates beginner beekeepers who lose their colonies from those who keep them alive, it is Varroa mite management. Varroa destructor is an external parasitic mite that feeds on developing bees and adult bees alike, weakening them and transmitting viruses in the process. Every unmanaged colony in the United States has Varroa mites. The question is not whether your bees have them, but whether the population is at a level the colony can survive.
The consequences of ignoring Varroa are severe. A 2025 report from the USDA’s research on colony collapse and Varroa-transmitted viruses identified high levels of deformed wing virus vectored by Varroa mites as the primary driver of catastrophic colony losses across major U.S. commercial operations in early 2025, with losses exceeding 60 percent across nearly 184,000 colonies. Varroa management is not optional.
Monitoring
The alcohol wash and the sugar roll are the two standard methods for counting your mite load. Both involve collecting around 300 bees from the brood area of the hive and agitating them with either alcohol or powdered sugar to dislodge the mites, which you then count. A mite count of 2 percent or less (2 mites per 100 bees) is generally considered manageable. Above 3 percent, you should treat.
Treatment Options
Organic acid treatments such as oxalic acid and formic acid are widely used by backyard and hobbyist beekeepers because they are effective and leave no harmful residues in honey or wax. Oxalic acid in particular is highly effective against mites on adult bees and is easiest to apply in broodless periods, typically in late fall or early winter. Your state may have specific rules around what treatments are allowed, so check with your local extension service before treating.
Common Beginner Mistakes Worth Avoiding
Between Varroa mites, bacterial diseases like American foulbrood, fungal issues, and environmental stressors, there is a real list of things that can go wrong in a hive. The EPA’s overview of bee health threats documented by the EPA gives useful context for how multiple stressors interact to affect colony survival. But most beginner failures come down to a handful of predictable mistakes rather than rare diseases.
- Opening the hive too often: Every inspection is a disruption. Once a week is too often for an established colony. Every ten to fourteen days in summer is plenty.
- Not treating for Varroa: This is the most common reason beginner beekeepers lose their first colony. Test your mite load monthly during the active season and treat when the threshold is reached.
- Adding boxes too late: A colony that runs out of space will swarm. Add a super when the current box is two thirds full, not when it is overflowing.
- Buying used equipment without inspection: Old frames and boxes can harbor American foulbrood spores that will infect and kill a new colony. Start with new equipment for your first hive.
- Not keeping records: What you see in the hive today will not be obvious next week. A simple notebook or even a notes app on your phone where you record date, colony condition, queen status, and mite count will save you a lot of confusion over time.
Join a Local Beekeeping Association
No amount of reading replaces time in the hive alongside someone who has done this before. A local beekeeping association gives you access to experienced beekeepers who know the plants, the pests, and the climate in your specific area. Most associations welcome beginners, run introductory courses, and often have mentorship programs that pair new beekeepers with experienced ones.
Associations are also often your best source for up-to-date information on local regulations and registration requirements. The UC Davis California Master Beekeeper Program on regulations and best practices is one example of the kind of organized, peer-reviewed guidance that a good association or university extension program can offer, regardless of what state you are in.
The American Beekeeping Federation and your state’s beekeeping association are both good starting points for finding a local club. Most hold meetings in fall and winter when the hives are quiet and there is time to learn before the busy season begins.
Turn Your Hive Into a Working Home Apothecary
Most people start beekeeping for the honey. But the real value of a hive goes far beyond what you can put on a spoon. Beeswax, propolis, pollen, even raw honey itself—these are some of the most powerful, time-tested ingredients in natural medicine. The difference is knowing how to actually use them.
That’s where Forgotten Home Apothecary comes in.
Instead of stopping at harvest, this guide shows you how to turn what your bees produce into real remedies you can rely on. You’ll learn how to make healing salves with beeswax, antimicrobial tinctures using propolis, soothing syrups, skin treatments, and dozens of other preparations that used to be common knowledge in every self-reliant household.
It also walks you through the broader system—how to identify medicinal plants, combine them with what your hive produces, and build a complete home apothecary that doesn’t depend on pharmacies or fragile supply chains. The kind of knowledge that turns a simple beehive into a year-round source of practical, usable medicine.
Because honey is just the beginning. What you can do with it—and everything else your bees give you—is where real self-sufficiency starts.
👉 Learn how to turn your harvest into real remedies here!
Final Thoughts
Beekeeping is one of those skills that takes about a year to get comfortable with and a lifetime to master. The first season will feel uncertain at times. You will open a hive and not be sure what you are looking at. You will worry about your queen. You will probably lose a colony at some point, and it will sting more than a bee ever did.
But it is also one of the most genuinely absorbing things you can do on a homestead. The rhythm of the hive across the seasons is satisfying in a way that is hard to explain until you have experienced it. The first time you pull a frame heavy with capped honey that your bees built from the flowers in your garden, you will understand why beekeepers keep doing this for decades.
Start with two hives. Order your bees early. Learn to identify healthy brood. Test and treat for Varroa. Keep notes. Find someone local who knows bees. The rest you will figure out as you go, which is how most good homestead skills are actually learned.
You may also like:
Join our WhatsApp Channel for Homesteading Tips And Tricks
A Walgreens Is Opening In Your Backyard (Video)
Why Growing Bees Is Easier Than You Think
How to Make a Perfect Bee Pollen Smoothie
Have You Been Using Fake Honey?


