The root cellar isn’t your only option!
Everybody talks about root cellars. And I get it, because a good root cellar is a wonderful thing to have on a homestead. This is the place most people use to store their harvest.
But if you don’t have one already, building one is a real project. Even more, some of us don’t have the space for it…
Here’s something interesting! Let’s do a little time traveling.
Think about the pioneers. They stored food too, and plenty of it. But a lot of them kept moving across this country. Do you think they dug a root cellar everywhere they stopped for a few months?
The answer is no. They were smarter than that.
They had another method, and they carried it over from across the sea.
What Is a Potato Clamp
The name itself tells you all you need to know about it.
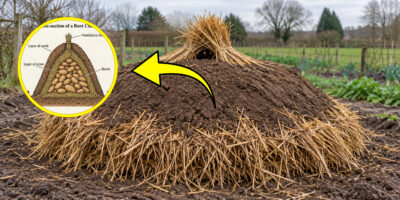
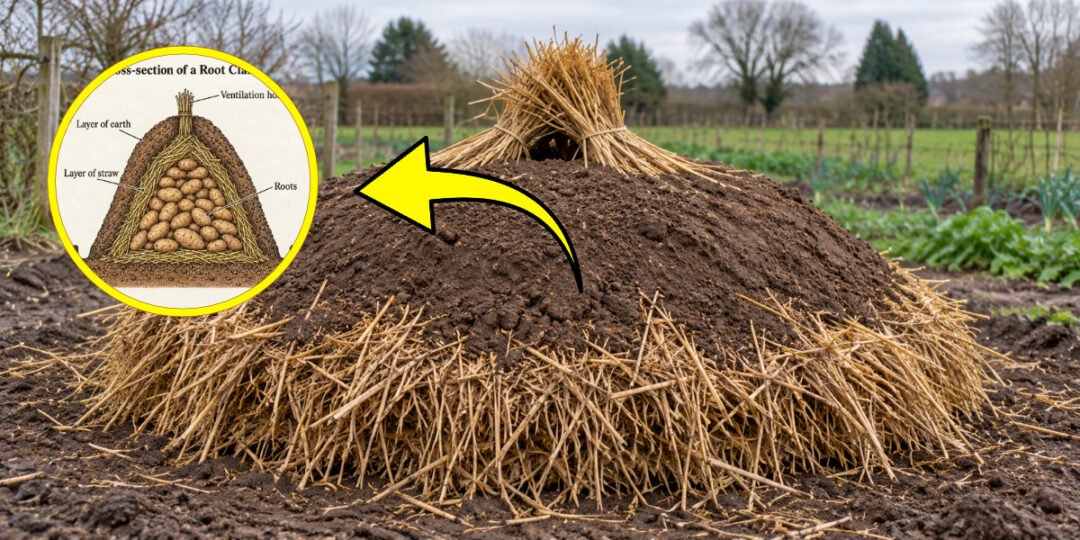
This is a pile of potatoes sitting on the ground, packed in straw and covered over with dirt. And building it is as simple as it sounds. You don’t need lumber or concrete and the best part? Nobody is going to ask you for a permit for this project!
All that dirt holds a steady cool temperature and the straw keeps the frost off while letting the pile breathe.
Late fall is the perfect time to build the potato clamp and here’s a quick guide to help you.
How to Build Your Clamp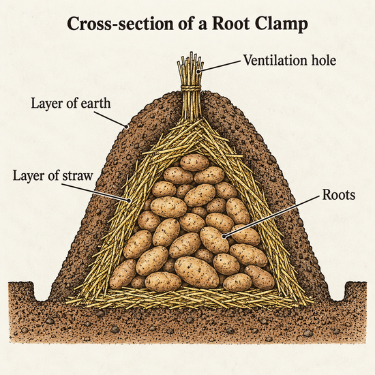
You’re building a cone with a round base, and a short, wide one keeps better than a tall, skinny one. Keep the pile under about knee height.
- Find your driest ground – Scoop out a shallow dish 6 to 8 inches down, no deeper. If you’re unsure how your ground drains, don’t dig at all. Build on the surface instead, because a hole will hold water on you while a mound just sheds it.
- Straw first, then your potato – Put down about 4 inches of dry straw for the potatoes to sit on, then stack your sorted spuds up into a cone on top of it.
- Wrap the sides – Cover the whole cone in another 4 to 6 inches of straw. Work the bottom ends down tight where the straw meets the dirt, and be generous there, because the edges are where frost finds its way in. Carry it nearly to the top and leave that last bit at the peak loose.
- Weigh the straw down – Straw blows around, so lay a ring of earth around the bottom edge and drop a shovelful on top here and there to hold it. Then leave it alone three or four days. Your pile has a lot of heat and damp to shed at first, and you want that gone before you close it in.
- First coat of soil – After three days, cover the whole thing with around 3 inches of soil, keeping that loose straw at the peak uncovered. The tuft sticking up is your chimney.
- Trench it and cap the chimney – Step out a foot from the base and dig a trench 6 inches deep all the way around, then open up one end so the water runs off downhill. That trench dirt goes straight back onto the pile. Beat it smooth with the back of your spade so rain slides off instead of soaking in. Then lay a board or a scrap of sheet metal over the straw tuft and set a rock on it, so the rain can’t get down the chimney.
- Top it off when frost threatens – Come back before the first hard freeze and bring your cover up to a full 6 inches of soil. That handles ordinary frost, and a hard winter might want twice that. Don’t pile it on without thinking though, because too much soil holds the warmth in and sets your potatoes sprouting.
Do THIS With The Potatoes Before You Store Them!
If you want to keep potatoes inside a Pioneer potato clamp, you need to follow a few steps just to make sure things will go the way you want them.
If you’re harvesting your own potatoes, leave them in the ground until the vines die back on their own and stay dead for about two weeks. That’s what toughens up the skins. Te easiest way to check is to rub one with your thumb. If the skin slips off easily, give them a few more days.
Dig on a dry day and get them out of the sun quickly, because sun and wind damage them before you ever store them.
Then you need to cure them. For this, you spread them out somewhere shady and leave them a week or two. A shed or a covered porch works fine.
Also DON’T WASH THEM. I know, I know, they look awful sitting there covered in dirt. But washing strips off the coating they came with and invites rot, so just brush the loose stuff off and leave them be.
Then comes the sorting. Anything cut, soft, green, or bruised stays out, because one bad potato takes the rest down with it.
Now, I know some of you aren’t too happy about storing potatoes with dirt still on them. But what if you could skip all that dirt in the first place?
Growing potatoes in the ground works. But if I’m being honest, it still asks quite a bit from you: garden space, digging up the harvest, and dealing with all that dirt you can’t even wash off before storage.
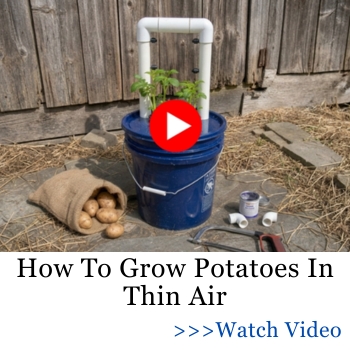
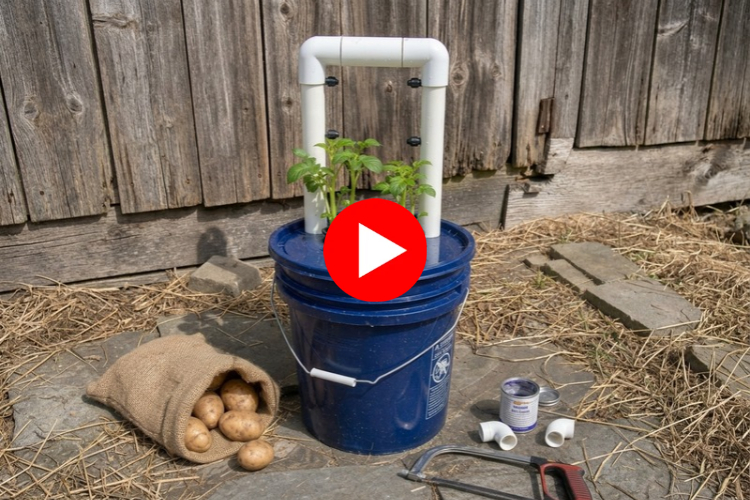
The Amish have another way of growing potatoes without any soil or digging at all.
Their method feeds and waters itself using nothing but gravity. It’s completely off-grid, and the whole setup fits in about the space of a porch step.
Once you see how simple it is, the usual potato bed starts to feel like the harder way to do it:
Will The Potato Clamp Work in Every State?
Well, I want to set things clear from the start. A clamp works where your winter actually stays cold, and the rule of thumb is temperatures averaging around 30 degrees or lower.
So think the Upper Midwest, the northern Plains, New England, and the mountain states. Down in Georgia or along the Gulf, your clamp just warms up, and your potatoes will probably sprout pretty fast.
But here’s the thing. If you live in one of the warmer states, you don’t have to give up on underground food storage.
Homesteaders have found another way to use the same idea. And I think it’s worth looking into.
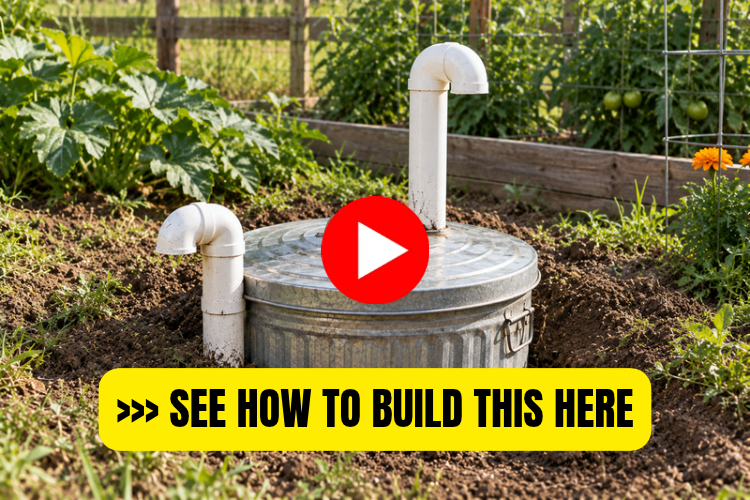
It’s a hidden off-grid refrigerator that you can build right in your backyard.
Instead of burying your vegetables under a pile of straw and dirt, you put them inside a metal container buried in the ground.
It doesn’t need electricity, doesn’t take up much room, and can help keep suitable vegetables cool without having another appliance running all day.
And unlike a potato clamp, you can open it whenever you need something.
I’ve included a picture of the setup below.
If you’re curious about how it’s built, the illustrated building instructions are right here.
Getting Your Potatoes Back Out
Here’s one thing you need to be prepared for. Once you open a clamp in freezing weather, you have to empty it, because you can’t seal it back up.
This is why I advise you to build two or three smaller clamps instead of a big one. So go with two or three small clamps instead of one big one.
Don’t leave one sealed past February either, because after that they sprout hard in there and lose a lot of what makes them worth eating.
Pick a mild day above freezing so you’re not fighting frozen dirt, bring a basket, and plan on taking the whole lot. Sort as you go and set the soft ones aside.
What Else Can You Store in There?
Plenty!
Carrots, beets, turnips, and rutabagas love the same cold, damp conditions your potatoes do, so they go in the same clamp without any trouble. Just lay a little straw between them so they aren’t sitting against each other.
And here’s a trick worth using. Put a little of several crops in each clamp instead of filling one with potatoes and another with carrots. You have to empty whatever you open, so in this way you get a little bit of everything.
But there are also a couple of things that don’t belong in the clamp. Sweet potatoes rot in a clamp because it runs too damp and cold for them, and squash and pumpkins want dry air instead.
The Root Crop Seeds I Tried This Year
Now, there’s something I want to share with you that I’ve never mentioned on this blog before.
It’s actually something new I discovered myself this year. And after trying it in my own garden, I’m so pleased with the results that I just had to tell you about it.
I’m talking about this amazing root crop seed pack I found!
I planted carrots, beets, turnips, and rutabagas from this collection, all four crops I mentioned earlier that you can keep in your potato clamp. And I have to say, they turned out really well!
But here’s what I especially like about these seeds.
They’re non-GMO, untreated, and heirloom or open-pollinated. Just the kind of seeds I prefer growing on my homestead.
The pack comes with 15 different root crop varieties, each in its own resealable Mylar packet. So you don’t have to plant everything at once. You can save the leftovers for another season.
Having tried these seeds myself, I can wholeheartedly recommend them.
And if you’re still able to plant fall crops where you live, this might be a good time to give them a try.
Final Thoughts
Looking at this, all I can say is that this is a great alternative for a root cellar.
This is what people did for a few hundred years before anybody had a refrigerator. They knew that cold ground and some straw could do a good job.
So, if you don’t want to build a root cellar, this is the way to go!
You may also like: 
9 Foods You Can Forage For Free Near Your House
How To Build A Small Root Cellar In Your Backyard With Only $400 (Video)
7 DIY Projects Using Cinder Blocks
Why the Amish Are Immune to Inflation and How You Could Be Too
7 High-Yield Crops for Small Spaces