
We started the journey of this series in the winter and here we are… It’s already June! How is time even flying this fast?
This is technically the first summer month and a surprisingly busy month when you’re living on a homestead. All the work you put in back in March is finally starting to pay off, but this is just the beginning. Depending on where you live, the hot weather is bringing in some unique challenges and the way you handle them now will keep your homestead running smoothly the whole summer.
So, during the next few days, I want you to walk out into your garden and just look around.
Are the tomato leaves curling up at the edges? Are there small holes in your squash leaves with a sticky residue underneath? Is the soil cracking around your beans? These small signs tell you what to do next, and June is the month to act on them before things get away from you.
Here is what I focus on every June around my place, and what I suggest you keep an eye on too.
Plant a Second Round of Vegetables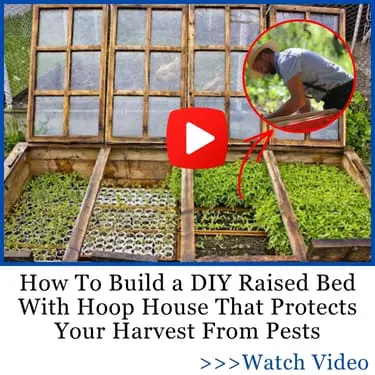
One thing I do every June is fill in the gaps. For example, if you had lettuce, radishes, spring peas, or any other spring veggies in your garden, they are most probably gone by now. But since we want to keep things effective, that dirt should not sit empty for the next four months.
You can plant a second round of bush beans, beets, radishes, cucumbers, summer squash, and carrots right now. Anywhere you pulled a spring crop, drop new seeds in within a day or two so the bed does not get a chance to dry out and harden. This is also backed up by the University of Maryland Extension.
Sweet corn is another good one to keep planting. If you put a new row in every other week until early July, you stretch your harvest out for weeks instead of getting hit with all the ears at once. I have done this for years and it makes putting up corn so much easier.
If you are in a hotter part of the country, heat-tolerant greens make a big difference. Things like Swiss chard, Malabar spinach, and amaranth will hold up when regular spinach throws in the towel.
This is also the time to start thinking about fall. I write my fall planting dates on the side of my fridge in June, so I do not forget when August hits and life gets busy.
How to Take Care of Pests Before They Take Over Your Garden
This month is also when the bugs show up in force. What can I say, they love the nice weather.
So, try to inspect your garden daily because if you’re not careful, you are going to lose plants. I lost half a row of summer squash one year because I waited too long, and I do not want that to happen to you.
Here are the pests I keep my eyes on this month, and what to do about each.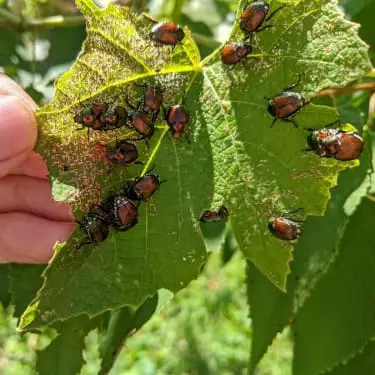
Squash bugs – These come out in early June and start feeding right away on your cucumbers, melons, and squash. The females lay clusters of small bronze-colored eggs on the undersides of the leaves, packed in tight little rows that almost look like tiny copper rivets when the sun hits them.
Flip your squash leaves once a week and check. I use a piece of duct tape to lift the egg clusters right off the leaf.
Squash vine borers – These might catch you off guard! You walk out at dawn and a vine that was fine yesterday is laid out flat on the ground like somebody pulled the plug.
The moths lay their eggs at the base of squash plants in June, and the larvae burrow into the stem and block the flow of water through the vine. If you catch a wilting vine, slit it open with a knife, pull the borer out, and bury the cut section under moist soil so it can root again.
Japanese beetles – Most feeding starts in mid to late June in the North and a few weeks earlier in the South. I used to hand-pick mine into a jar of soapy water early in the morning when they are slow, and you can hear them hit the water with a soft little plop one after another. The traps you see in stores tend to attract more beetles than they catch, so I skip those.
Cucumber beetles, flea beetles, and the first wave of tomato hornworms also start showing up now. Just walk your rows in the morning, lift leaves, and look. That habit alone will save your garden more than any spray.
The Easy Solution
If you want to make things easier and not spend every morning picking bugs out of your plants or using inefficient traps from the store, here’s something that worked for me.
Medicinal plants go a long way and they’re not good only for humans. Medicinal plants can also take care of your garden and the Amish were aware of this.
Garlic is one of these miracle plants that the Amish still use on their farms. Garlic contains a compound called allicin that has strong antioxidant, anti-bacterial, and anti-inflammatory properties. They use this common plant to make a natural homemade pest control spray.
The recipe is quick and simple and that’s what I like the most about it. You can make it fast and it is also effective.
What you do next is simply spray the plants suffering from insect infestations on both sides of the leaves in the evening and let the garlic go it’s job. Do this for 3 to 5 days and you’ll see the insects are gone.
If you want to make the Amish pest control spray for your plants, you can get the recipe here.
Want Nice Tomatoes? Give Them a Little Bit of Help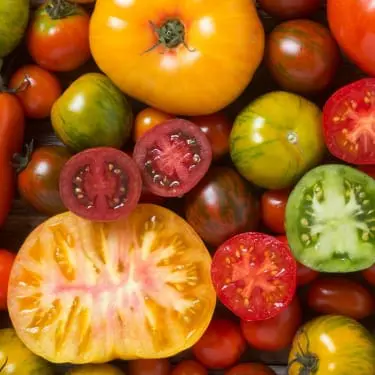
Tomatoes usually start to grow fast by June, and there are a few things you can do right now to set them up for a big harvest.
Pinch the suckers if you are growing indeterminate varieties. Suckers are the little shoots that grow in the V between the main stem and a branch. If you leave them, the plant puts energy into more leaves instead of more fruit.
You should also prune the tomatoes to open up the canopy. Cutting off the lower leaves that touch the ground helps keep soil-borne diseases off the plant. I take off everything below the first set of fruit.
If you see yellow spots with dark centers on your lower leaves, that is likely septoria leaf spot or early blight. Pick the bad leaves off, throw them in the trash and not the compost, and water at the base of the plant from now on. Never overhead.
➡️ The “follow-the-leader” planting trick for sweeter tomatoes
While you are at the tomato bed, set up your stakes or cages if you have not already. June plants are still small enough to train but big enough to start flopping over.
Leave the Asparagus Alone
If you have an asparagus bed, this is the month to step back. You should stop cutting spears in early June and let the fronds grow out for the rest of the season.
The fronds are how the plant builds back its energy for next year. I know it is hard to stop when you are still getting good spears, but cutting too long weakens the crowns and you pay for it the following spring.
Let it go to fern, give it a top-dressing of compost, and look forward to a strong harvest next year.
This Watering Mistake Can Destroy Your Harvest
This is the month when watering is starting to be a big deal. And it’s not like it wasn’t important before, but since the rains thin out, the heat builds, and your plants are growing so much faster, the way you use water in the garden is now something you need to be smart about not just consistent.
I water deeply once or twice a week instead of a little every day. Deep watering pushes the roots down into the soil, where it stays cooler and moister. Shallow daily watering keeps the roots near the surface of the ground and if July finds them like this, the strong heat will destroy them.
Mulch is your friend in June. A three-inch layer of straw, shredded leaves, or wood chips around your plants does three things at once. It holds moisture in, keeps weeds down, and keeps the soil cool. I mulch everything by the end of June if I have not already.
And if you can, water early in the morning. The plants have all day to use the water, and you lose much less to evaporation.
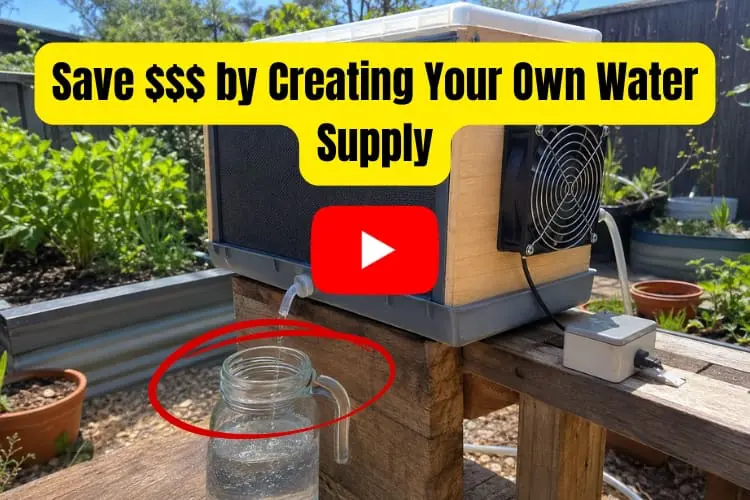
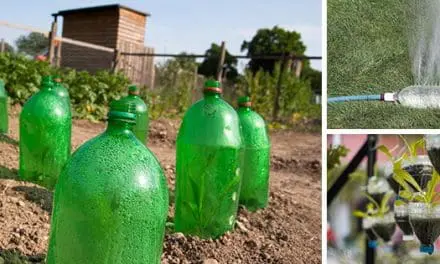
But here’s a little trick that can help you lose even less water to evaporation. How would it be to get all of that humidity your garden creates and turn it into fresh drinkable water? This would be peak self-sufficiency, right?
Well, I want you to know that this is completely possible and a practice used by many USA-based homesteaders.
This system is basically a dehumidifier you can use in your garden that will help you take advantage of all the available water. But what you need to know is that it’s designed to be used outside and produce real, fresh, drinkable water out of thin air. This is what makes it different from the basic device you can buy from Amazon.
If you want to get your own system, you can find it here.
Always Harvest These Two by the End of June
Strawberries are usually ready by early to mid June across most of the country, and they all come on at once. If you are not ready, you will lose half of them to mold.
The easiest way to handle a big strawberry haul is to freeze them. Wash, hull, lay them out on a tray in a single layer, freeze them solid, and then bag them up. They keep for about a year and you can pull them out for jam in cooler weather when you are not sweating over the stove.
If you want to can them right away, strawberry jam is one of the most forgiving recipes for a first-time canner. Just pick in the morning and can in the afternoon if you can manage it, because strawberries lose quality fast once they are off the plant.
Herbs are the other harvest to stay on top of this month. Basil, oregano, thyme, and parsley are all growing fast, and a good prune actually helps them produce more. I cut mine back by about a third in mid-June, dry the trimmings on a tray in a warm room, and crumble them into jars for winter cooking.
How to Get Your Animals Ready for the Heat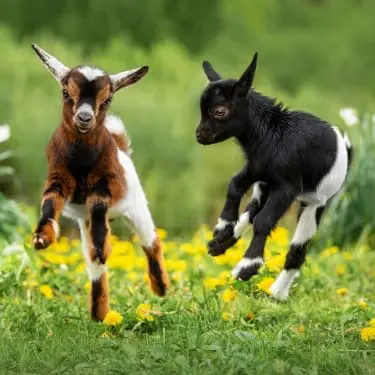
While the garden is the obvious focus, your animals are heading into the hardest stretch of their year. Chickens are the gateway livestock on any homestead, and they handle cold a lot better than heat. The same is true for rabbits, pigs, and most goat breeds.
Here is what I do every June for my flock.
Check your water situation – I add a second waterer to the run in June, so my hens always have a backup. Cold water makes a real difference on a hot day, and I drop a few ice cubes in each waterer when I am out there in the afternoon.
Make sure there is shade – Every animal on your homestead needs a shaded spot they can get to all day long. If your run does not have any natural shade, you need to add some, and I am going to show you how in the next section.
Feed cooling treats – Frozen watermelon, frozen berries, and cold cucumber slices are a hit with chickens. I freeze leftover fruit scraps in muffin tins with water and toss the cubes into the run on hot afternoons.
Clean out deep bedding – Deep litter is wonderful in winter, but the same composting action generates heat in summer. I strip the coop down to a thin layer of clean shavings in June and let it stay that way until fall.
This $50 DIY Project Will Keep Your Chickens Comfortable the Whole Summer
Here is a small DIY project you can try this June. Putting a shade cloth over part of your chicken run will drop the temperature underneath by around ten degrees or more, and you can build it in an afternoon for under fifty dollars.
The first summer I put one up, I made the mistake of running the cloth down the sides of the run too, thinking more coverage meant cooler birds.
What I actually did was trap the heat in and cut the airflow off. By the second summer, I figured out that it is the top that matters.
What You Need
- A piece of 50 percent sunblock shade cloth, around 10 by 20 feet, for most backyard runs. Go for one with reinforced taped edges and pre-installed grommets so it does not tear at the corners.
- A pack of shade cloth clips or ball bungee ties to hold the cloth in place without cutting it. These are reusable and so much easier than zip ties.
- A 100-foot roll of paracord for tying off corners and reinforcing edges.
- Four to six stainless steel eye hooks or screw hooks. Stainless steel will not rust out on you in one season.
- A handful of UV-resistant zip ties as backup for windy spots.
I’ve made sure to link everything that I used, so it can be easier for you to get all you need in case you want to try the project.
How to Do It
- Pick the side of the run that gets the worst afternoon sun. That is usually the west or southwest side.
- Screw your eye hooks into the top corners of the run frame, or into nearby posts, fence rails, or even the side of the coop. Make sure they are anchored into solid wood, not just chicken wire.
- Stretch the shade cloth across the top of that section, leaving the sides open so air can still flow through. Position it with a slight slope from one side to the other so rainwater runs off instead of pooling on top.
- Tie one corner to a hook with paracord, pull the cloth tight, and tie off each of the other corners. Use the ball bungees or shade cloth clips along the edges to keep the cloth from sagging in heavy wind.
- Step back and check for any low spots that might catch water or wind. Tighten as needed.
By putting the shade cloth over the top of the run, you still allow a cool breeze to blow through from the sides while blocking most of the sun’s rays from above. That airflow matters as much as the shade itself.
If you want to actually see how much the temperature is dropping under your new setup, a simple outdoor min/max thermometer in the run will show you. I keep one in mine and it is satisfying to watch the numbers come down on a hot afternoon.
Take the cloth down before winter so the snow does not tear it, and it will last you several seasons. Mine is going on its fourth summer and still looks like new.
Final Thoughts
I know, I know, this month is full of work, but the best part is that it’s also one of the most rewarding months. Something is coming in from the garden almost every day, and the rest of it is still growing strong.
This is the month I keep a notebook on the kitchen table with a pencil stuck in the spiral, and every time I come in from the garden, I jot down what I saw. A few squash bug eggs on the second row. The first strawberries ready. The hens panting by mid-afternoon. Those notes are how I remember what to do differently next year, and they have made me a better homesteader than any book ever did.
You may also like: 
What May Says About Your Homestead
This Is How You Build a Shed in Just One Weekend. Get the Instructions. (Video)
You’re Not a Real Homesteader if You Don’t Grow This…
Top 7 Best States to Be Self-Sufficient
The $0.5 Livestock Feed That You Can Make at Home


