I never thought much about what happens when boiling water and plain flour are mixed. I just imagined it sounds like something that makes a mess on the stove.
Once I decided to actually look into it, I found out you can turn this simple mix into all kinds of useful stuff around the homestead. Things that cost next to nothing and start with one ingredient we all have in our pantries.
Some of these projects are old tricks that people have been using for centuries. Others might catch you off guard. All of them start the same way. A bag of flour and a pot of boiling water.
Soft Wraps and Flatbreads From Scalded Dough
This is the one that got me hooked on the whole idea of boiling flour. I had a bag of whole wheat flour that was making tough, dry flatbreads no matter what I tried. Then I learned about scalding the flour with boiling water before kneading it. The difference was wild.
When boiling water hits flour, the starch granules swell up and pop open. This is called gelatinization, which just means the starch absorbs a ton of water and turns soft. At the same time, the proteins that normally make dough tough and chewy relax instead of tightening up. The result is a dough that’s soft, flexible, and stays that way for days instead of going stiff after a few hours.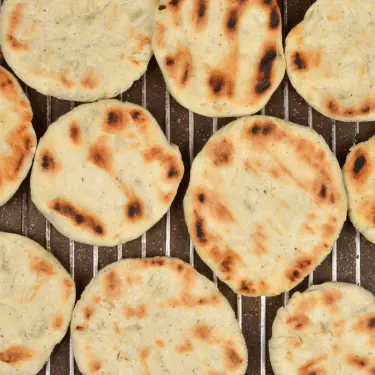
Here’s how I do it:
- Put 1 cup of flour in a heatproof bowl. Whole wheat, rye, or spelt all work great.
- Bring half a cup of water to a full boil and pour it over the flour while stirring with a wooden spoon. It’ll look like a shaggy mess at first. That’s normal.
- Once it’s cool enough to touch, knead it until smooth. Add a splash of cool water if it feels too dry.
- Cover it and let it rest for 30 minutes. This gives the starch time to fully absorb the water.
- Pull off small balls, roll them thin, and cook on a hot, dry skillet until you see brown spots on both sides.
👉 The Amish Won’t Touch This Food. Why Do You Still Have It in Your Pantry?
Stack them and cover with a towel to keep the steam in. These stay soft for days because of all that trapped moisture. I make a batch now and then and use them for wraps, tacos, or whatever I feel like eating. Sometimes I just eat them plain as they are.
If you’ve been fighting with tough homemade bread, try scalding even just part of the flour before mixing. It makes a real difference.
Since spring is already here, I like to take advantage of it and bake a special type of bread that my whole family loves. This bread is much more nutritious than your usual loaf as it contains high amounts of vitamins A, C and K while also being a source of calcium. All you have to do is add this incredibly common ingredient to your normal bread or even to the flatbread recipe I presented above. The most important part is when you add this ingredient, because adding it at the wrong time can sabotage the whole thing.
Spoiler: This secret ingredient is one of the most recognizable plants in the world; I bet you already have it in your backyard, or you can find it around the closest corner of the street.
👉 Click here and see the full dandelion bread recipe!
Nontoxic Wheat Paste Glue
This is a recipe for one of the oldest adhesives to ever exist. Bookbinders and paper conservators have been using wheat paste for centuries because it’s strong, it dries clear, and it won’t damage paper over time. On a homestead, it’s perfect for fixing torn book pages, sticking labels on jars, sealing seed envelopes, or any paper craft where you don’t want to mess with synthetic glue.
The way it works is pretty straightforward. When you mix flour into boiling water, the starch gets sticky and the gluten proteins form a network that hardens as it dries. That’s what gives it a solid bond.
This is the quickest recipe:
- Whisk a quarter cup of flour into 1 cup of cold water until you get a smooth paste that has no lumps.
- Bring 3 cups of water to a boil. I use a saucepan for this, but every pot that’s not too deep works. Slowly pour in the flour mixture while stirring the whole time.
- Turn the heat down and let it simmer for about 5 minutes until it thickens up to something like pudding.
- Take it off the heat and let it cool. If you want extra stickiness, stir in a teaspoon of sugar.
Store it in a covered jar in the fridge and it’ll last about a week. To use it, just brush a thin layer onto one surface, press the pieces together, and let it dry under something heavy like a book or a brick. If you want a smoother paste for detailed work, strain it through a fine mesh before using. A drop of clove oil or a pinch of salt keeps mold away.
Slug Trap
If slugs have been tearing through your garden, this one’s for you. Oregon State University tested a bunch of different baits to see what attracts slugs best, and bread dough beat out beer, vegetables, and fruit by far. Their tests trapped tens of thousands of slugs using nothing but flour, water, and yeast. That’s the kind of result that makes you want to try it yourself!
The best part is it’s completely nontoxic. No chemicals, no risk to your pets or wildlife, and it costs almost nothing.
Here’s how to set it up:
- Mix 1 cup of flour, 2 cups of water, and 1 packet of active dry yeast in a bowl. Add more water if you need to until it pours easily.
- Grab a recycled yogurt cup or cottage cheese container and pour the slurry in.
- Dig a shallow hole in the garden and set the container so the rim sits level with the soil. Slugs need to be able to crawl right in.
- Check it every morning. Remove the slugs, give the slurry a stir, and add a little water if it’s drying out.
- Refresh the whole batch once a week.
Try setting a few traps out before spring planting to knock slug numbers down early. It stays effective for about eight days before you need to replace it.
Seed Tapes for Perfectly Spaced Rows
If you’ve ever tried to plant tiny carrot or lettuce seeds one at a time, you know how frustrating it can be. They stick to your fingers, they clump together, and you end up thinning out half of what you planted. Seed tapes solve this problem. You stick the seeds to a strip of paper at the right spacing, and when planting day comes, you just unroll the strip, cover it with soil, and water.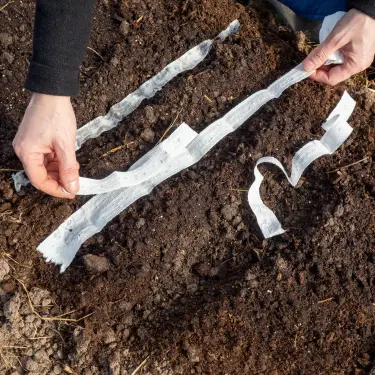
The glue that holds it all together is just flour and water.
Just follow these simple steps:
- Cut strips of toilet paper or paper towel about 2 inches wide and 12 inches long.
- Mix half a cup of flour with enough water to make a thick paste. It should look just like gravy, not soup.
- Mark dots on the paper at whatever spacing the seed packet says. A ruler and a pencil are all you need.
- Dab a tiny bit of paste on each dot with a toothpick and press a seed into it.
- Let the strips dry completely. Then roll them up and store them in labelled bags with a pinch of powdered milk or a silica packet to absorb any moisture.
👉 NASA Confirms: We’re Entering the Worst Drought in 1,200 Years. See What to Do Next!
When it’s time to plant, lay the tape in your furrow, cover with soil, and water like normal. The paste dissolves and the seeds are right where you want them. This is also a great project to do with kids on a winter afternoon. They love it, and you’ll be set for spring planting before you know it.
One Quick Safety Note
Before you dive into any of these, there’s one thing worth mentioning. Raw flour is not safe to eat. It can carry harmful bacteria, and several outbreaks in the U.S. have been traced back to raw flour and raw dough.
Always wash your hands and surfaces after handling it, and don’t let kids nibble on dough or paste during craft projects.
If you want to make flour safe for handling, spread it on a baking sheet about three-quarters of an inch thick and bake it at 400°F for six minutes. Or just use the boiling water method in the recipes above. Either way, a couple of minutes of heat makes everything safe to work with.
Other Projects You May Like
Everything in this article started with one bag of flour and a pot of boiling water. Imagine what you could do with a full library of projects built around the same idea. Using cheap, everyday materials to make things that actually matter.
No Grid Survival Projects is a book with over 70 of these builds:
- Water systems
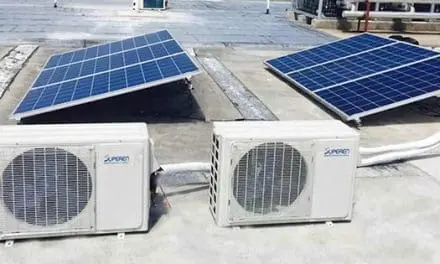
- Solar setups
- Food preservation
- Pest control
- Home security
- And a lot more
Every project tells you exactly what it costs, how long it takes, and walks you through each step with photos, sketches, and full guides. You don’t need to be handy. You just need to follow along. People are picking this up not just for emergencies but because the projects save them real cash every single month.
The book is printed in limited quantities and this is your chance to get it for a pretty big discount.
When this run sells out, that’s it.
👉 Get No Grid Survival Projects + 3 Free Bonuses Here

Final Thoughts
Some free time, one bag of flour, and a pot of boiling water. That’s all it takes. Whether you’re making flatbreads that stay soft for days, trapping slugs without chemicals, or getting your spring seeds perfectly spaced, boiled flour stretches what you already have into something useful.
Try one of these projects and once you see how well it works, you’ll probably want to try the rest too.
You may also like: 
Join Our Homesteading WhatsApp Community!
See How to Make the Long-Lasting Bread of the 1800s (Video)
10 Ingenious Uses for Flour Around Your Home
Common Plants You Can Turn Into Flour in a Crisis
20 Foods You Can Preserve in Pantyhose


