Every spring it’s the same thing. You pick up more seedlings, start more trays, squeeze in one more row, and somehow the harvest doesn’t change at all. The garden gets bigger, but the results stay the same. This is incredibly frustrating!
If this is something you can relate to, the problem isn’t how much you’re growing, but how you’re growing it. Four simple changes can get you more food, healthier soil, and better harvests from the space you already have.
No new beds, no extra seeds, and no more spending money at the nursery again. Each change comes with a small DIY project you can finish in a weekend. If your garden feels like it’s stuck in the same spot year after year, this is the perfect place to start.
Give Your Pollinators a Place to Live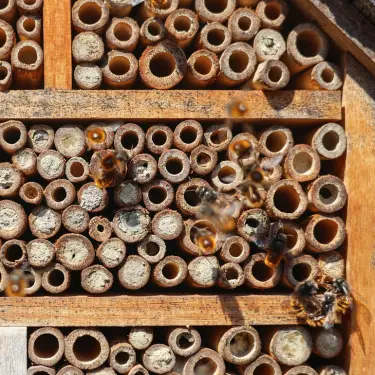
A lot of folks think planting more flowers will bring in more bees. And sure, flowers help. But if your yard doesn’t have anywhere for bees to actually nest, they’ll swing by for some nectar and then take off.
Related: Why Growing Bees Is Easier Than You Think
Mason bees do not produce honey, but they are some of the hardest-working pollinators out there (sometimes they pollinate 100 times more than honey bees) and they’re super easy to set up for. According to the University of Maine Cooperative Extension, a bee house should face east or southeast so the morning sun warms it up, sit about 3 to 5 feet off the ground, tilt slightly downward so rain drains out, and be close to flowers so the bees don’t have to go far.
You can build one in about an hour:
- Grab a bundle of bamboo tubes or drill holes into a chunk of untreated wood. About 5/16 of an inch wide and 6 inches deep works great.
- Pack them into a small waterproof box or even an old tin can with a lid on it.
- Mount the whole thing on a fence post, stake, or wall within about 50 yards of your garden.
- Clean the tubes once a year and swap them out every couple of seasons.
Set a shallow dish of water nearby with some pebbles in it so the bees can land and drink without drowning. You’ll notice the difference in how much fruit your garden produces by the end of summer.
But once you’ve got your pollinators, you’ll also want to keep them healthy so they can do their job. The best part is that the most common enemies of your mason bees are also the most common enemies of your plants, mainly flies and fungi. This gives you a great advantage because you can tackle two problems with ONLY ONE solution.
The Amish knew this best and this is how they found a way to protect their bees and their plants at the same time with this zero effort pest control spray. It’s all natural and you can make it with stuff you already have in your garden. All natural “problems” have a natural solution and this spray does exactly that. You don’t need store-bought chemicals that poison your soil and food; all you need is right there in your backyard.
👉 Click here and get the step-by-step recipe for the Amish herbal pest control spray.
Once your mason bees are safe, they don’t need much maintenance. Give them water and wait to see your garden bloom.
Work With the Trees You’ve Already Got
If your fruit trees are growing tall, shading everything out, and dropping fruit you can’t even reach, the last thing you need is more trees. What you need is to work with the ones that are already in your garden.
There’s a technique called espalier, which is just a way of training a fruit tree to grow flat along a wall or a wire trellis instead of growing out in every direction. Think of it like giving your tree a lane to follow.
This method puts fruit right at eye level, fits into tight spaces, improves airflow through the branches, and makes picking so much easier. You’re getting more usable fruit from less space. This is ideal for anyone who feels they don’t have enough space in their backyard.
Here’s how to get one going:
- Set two solid posts about 8 feet apart and run galvanized wire between them at 18-inch gaps. Three or four rows of wire is plenty.
- Pick a young dwarf apple or pear tree. These take to training the best.
- Plant it in front of the bottom wire and pick two flexible side branches, one going left, one going right. Tie them gently along the wire. Cut off anything else that’s fighting for space.
- Every year, train new branches along the next wire up. Cut away anything growing straight out or crossing over other branches. This pushes the tree to grow fruiting spurs, which are those short little stubs where the fruit actually comes from.
Give it plenty of water and a good feeding, especially in the first year or two while it’s getting going. Even if you don’t set up a full trellis, just pruning an existing tree to open up the middle and bring the canopy down lower will help you pick more and waste less.
Stop Putting All Your Seeds in the Ground at Once
This is one of the easiest traps to fall into. You get excited in the spring, plant everything at the same time, and then in July, you’ve got more lettuce than you know what to do with and by September, your garden beds are sitting empty. 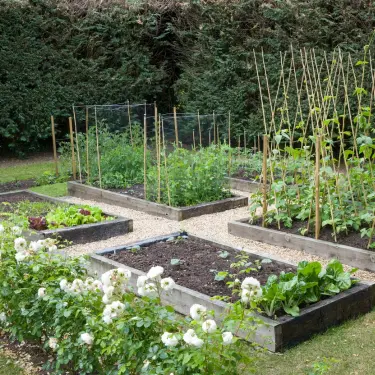
The fix is a simple method called succession sowing. Instead of planting a whole row of lettuce in one go, you plant a small section every couple of weeks. That way, something is always coming up, something is always ready to pick, and your garden is working all season instead of just a few weeks.
This is one of the smartest ways to keep food coming out of your garden without adding any extra space.
Here’s a simple plan for a 10-foot bed:
- Lettuce: Sow about a foot of row every two weeks from early spring all the way through fall. You’ll always have fresh greens ready to cut.
- Carrots: Plant an early type first, then drop in a slower one two weeks later. By the time you pull the first batch, the second is filling in right behind it.
- Bush beans and radishes: Plant them side by side. Radishes pop up fast and mark the rows. By the time the beans need room, the radishes are already on your plate.
Between each planting session, toss in a handful of compost to keep the soil fed. Try mixing fast growers like greens in between slower ones like root vegetables. This is called intercropping, which is just a fancy way of saying you’re using every inch of space instead of leaving empty gaps.
Garden beds are amazing, but depending on where you live, they can also create a breach in your gardening strategy. Maybe you want to follow the steps listed above, but if you’re located in a colder climate or in the mountains, this plan might not work effectively. This can also apply to those living in the south, too, because sometimes early spring mornings can be incredibly cold and you know very well that one such morning can destroy an entire harvest.
The solution here is simple and doesn’t even take up that much time. You don’t need to destroy your garden beds, and you don’t need to build an entire greenhouse. This is a time and space-efficient idea that will take care of your plants when things get chilly. A hinged hoop house is easy to build and is also based on the garden beds you already have. Building it takes less than two hours and it will make your early season less tedious.
👉 Click here and get the full instructions + pictures.
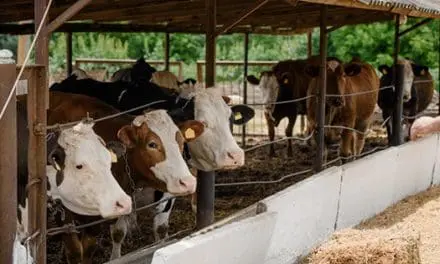
Let Your Livestock Help
If you’ve got chickens just hanging around in a run all day, you already own the best garden tool and you’re not even using it. Chickens in a fenced-off area will eat bugs, scratch up weeds, turn the soil over, and leave behind droppings loaded with nitrogen. That’s free pest control, free tilling, and free fertilizer all in one shot.
Related: The Best Chicken Breeds for Your Homestead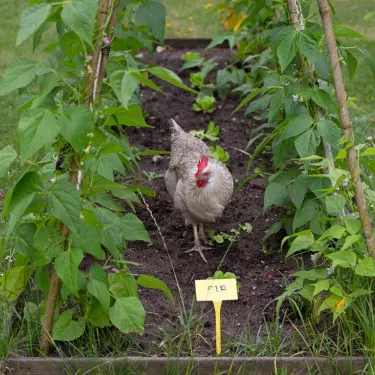
The trick is keeping them where you want them and off the stuff they’ll destroy. That’s where a chicken tractor comes in. It’s basically a lightweight, movable coop with no floor that you set down over a patch of garden and slide to a new spot every few days.
Here’s a basic way to put one together:
- Use PVC pipe or lightweight lumber to build a frame about 4 by 8 feet.
- Cover the sides and top with chicken wire. Throw a tarp on one end for shade and rain.
- Leave the bottom wide open so the birds are standing right on the dirt.
- Move it to a fresh spot every two to three days so they clean up without tearing things apart.
A good rule of thumb is one bird for every 50 square feet. Let them loose on your garden beds after you harvest and pull them off before you plant the next round. By the time they’re done, the soil is turned, the bugs are gone, and the droppings are already mixed in. You’re basically getting your garden beds prepped for free.
No chickens? No problem. Ducks are great for slugs, and rabbits in a movable pen drop some of the best garden fertilizer around.
Final Thoughts
You don’t need a bigger garden to get more food out of it. Give your pollinators somewhere to call home and they’ll pay you back in fruit. Train your trees instead of buying new ones and you’ll pick more from less space. Spread your plantings out so the beds stay busy all season. And let your animals earn their keep where it counts.
Each of these is a weekend project that can change how your garden performs for years to come. Pick one, try it this season, and see what happens. That’s how this whole thing works. You try, you watch, you learn, and you keep going.
You may also like: 
Bucket Gardening: How to Grow Your Own Food Anywhere
How To Make A Scalable Self-Sustaining Greenhouse (Video)
The Natural Garden Booster Hidden in Most American Kitchens
How Planting in Rows Could Destroy Your Garden
The Native American Way To Self-Water Your Backyard


