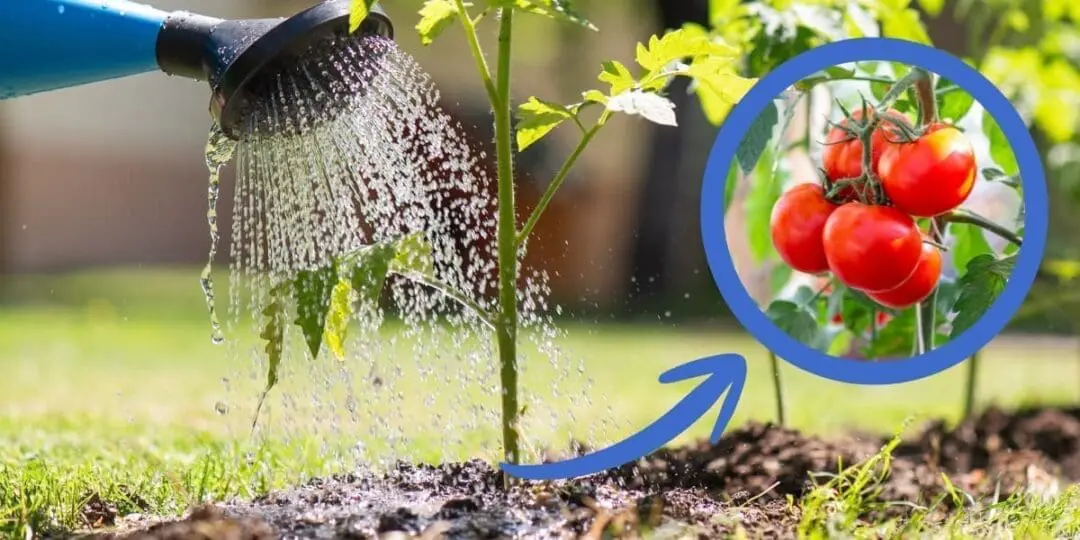
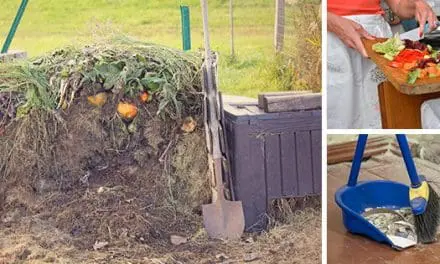
You just cooked and drained a pot of cloudy water into your sink. Maybe you do this three times a week. After cooking dinner, prepping food, or boiling vegetables. Most of us do. If you’re running a tight homestead, you might even pride yourself on zero-waste practices: scraps go to chickens, coffee grounds to the compost, vegetable water to stock. But that starchy, clouded water? Straight down the drain.
This is a common mistake. When you get rid of the water used to cook rice, potatoes, pasta, or beans, you’re pouring down the drain one of the most effective soil-microbe activators, a natural garden booster that all of us produce almost daily and for free in our kitchens.
If you are sick of NPK hacks or the daily post about the best fix for deficient plants, you should keep reading. Feeding the living system that makes your plants resilient, drought-tolerant, and genuinely self-sufficient is so much easier with this natural garden booster that we all have in our kitchens. Let me show you what you’ve been missing.
Why Even Experienced Homesteaders Overlook This
You may already know your soil. You’ve built compost systems, taken care of mineral levels, tracked your nitrogen-phosphorus-potassium ratios, and probably spent a lot of time fine-tuning your garden beds in order to get the best yield possible. Most of us approach soil improvement through inputs: what can we add that plants need? And this is not a wrong framework, but it’s incomplete. Your plants need something more, and you might be overlooking it.
What’s usually missing isn’t another input, but a way of building garden beds that support healthy soil. Interestingly, this isn’t a new idea at all. Traditional growers who couldn’t rely on artificial fertilizers shuch as the Amish farmers, had to design their garden beds so soil life stayed active by default.
Once you master how those systems are structured, it becomes clear why some gardens thrive with almost no intervention. Click on the video below and discover how the Amish build their garden beds without using fertilizers or other inputs.

The way soil functions is trickier than most of us think. Before plants can access nutrients, microorganisms need to be active, multiplying, and working. They’re the ones cycling nutrients, building soil structure, improving water retention, and creating the biological conditions that let plants thrive with less intervention. Plants don’t absorb nutrients directly from the soil. Those nutrients must first be converted by microbes into plant-available forms.
If you are focusing on only what to feed your plants, you are simply ignoring what feeds the organisms that do all the work.
To make things clear, starch water doesn’t fertilize. It does not feed your plant directly, but it provides immediately available carbon to soil microbes. This is incredibly hard to achieve when you don’t want to spend a fortune on carbon-rich alternatives.
What’s Actually in That Cloudy Rice Water
Let’s get a little more specific. I’m talking about the cooking water left after boiling rice, pasta, potatoes, beans, or any starchy grains. As long as it’s unsalted and unseasoned, you can use it to boost your garden. Salt disrupts soil biology. Seasonings can introduce oils or compounds that interfere with microbial activity. So, plain water only. I learned it the hard way.
So what’s dissolved in that cloudy liquid you’ve been dumping? Mostly starches and simple carbohydrates that leached out during cooking, along with trace minerals released from the food itself. For you, this can look insignificant, and I can understand; I thought the same thing. But for soil microbes, starch is an immediately usable carbon source. This is good food for them.
The woody compost most of us have in our gardens is a carbon source that is not so easily accessible. It needs months to break down so the microbes can feast. In the case of the starch water, the carbon is simple and fast-acting. Bacteria can metabolize it in hours!
👉The Natural Painkiller that Grows in Your Backyard!
Most homestead soils are carbon-limited, not because you’re not composting (you are), but because active, dissolved carbon is rare. Your compost provides long-term carbon, but it takes time to decompose. Starch water delivers carbon in a form that soil organisms can use right now. That’s the functional difference, and it’s why this works even if you’ve already got decent soil.
What Happens When You Pour It on Your Soil
Once this natural garden booster enters the living soil, the bacteria respond. They get the food they need and start multiplying rapidly. This makes them start cycling nutrients that were previously locked up in your soil. Fungal networks follow, expanding into areas where bacterial activity has loosened soil structure. This cascade effect accelerates nutrient availability, improves soil aggregation, and increases water retention. Imagine all of this being possible without you adding a single unit of NPK.

Compost remains essential long term, but starch water activates the system, so the nutrients you’ve already added become accessible to your plants faster and with less loss. This is also how companion plants work. They enhance the microbiome of the soil and boost beneficial bacteria such as Bacillus and Pseudomonas.
One trick that I tried and worked incredibly well was planting these companion plants, but hear me out, I skipped the basil and the oregano. I wanted more practicality, so I chose to use medicinal herbs as my go-to companion plants. Homesteading is all about being efficient.
While browsing online for seeds, I stumbled upon this seed kit with all the medicinal herbs you might need that also work as companion plants. From chicory to chamomile, you find everything in this kit.
That’s why I saw such noticeable results even though my soil was already in decent shape. The starch and the companion plants were accelerating the biological processes that made everything else work better. My garden became more drought-resistant not because I added water, but because improved soil structure held moisture longer.
Why I Stopped Using Molasses and Started Using This Instead
In the homesteading community, molasses is a rather popular choice among those who want a microbial food source for their garden. Maybe you’ve used molasses before. Were you satisfied with the results?
Personally, I did for years, as it’s a common technique in compost tea brewing and soil drenching. The results were satisfying for me, and here you might ask me why I switched to starch water.
Answering this is simple. Molasses is concentrated, purchased, and easy to overdo. When you add too much of it, you create microbial spikes that destroy the soil by locking the nitrogen.
The biggest pro of starch water is the fact that it is diluted by nature. It’s nearly impossible to over-apply because the carbon content is low enough that soil microbes process it without creating those boom-and-bust cycles that are easy to create with molasses.
This makes starch water ideal if you’re not monitoring constantly, if you want reliable results without precision measuring, or if you’re working with degraded soils that can’t handle intense microbial activity without consequences.
There is also the practical reality that matters the most on a working homestead: starch water is free and renewable. You are producing it constantly when you cook, so why not take advantage of it?
How to Use It Without Affecting Your Soil 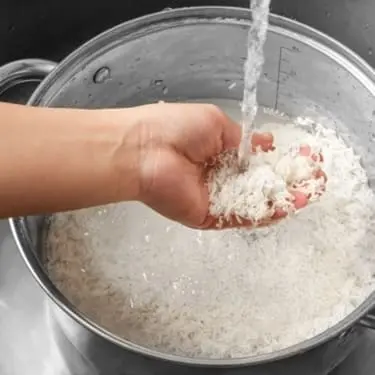
As I already stated, starch water is pretty safe. I’ve tested this enough to know what works and what creates problems. Yes, there are some instances when it’s better not use it.
Damp soil is the best type of soil for starch water. Applying it to dry soil wastes the carbon because microbes can’t move through dry soil to access it. The best timing is after rain or irrigation, when microbes are already alert.
Frequency: once or twice per week, maximum. I tried more than that early on and ended up feeding surface organisms without penetrating deeper soil layers. This attracted pests. Not worth it.
Amount: whatever you have from cooking. No dilution needed unless you’ve boiled something down to a thick consistency. Standard pasta or rice water goes on as it is.
Pour it directly onto mulched areas, around perennials, into compost piles, or in orchard understories. These are environments with established microbial populations that respond quickly. I use it most heavily on my compost piles and around my fruit trees.
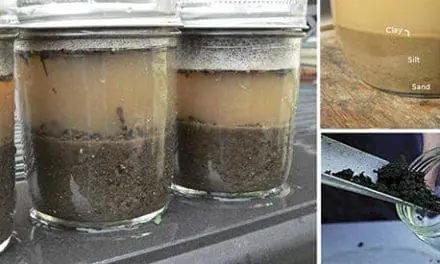
In case you are not sure what the structure of your garden soil is, you should try the DIY mason jar soil test. Most soil contains 3 components: sand, slit and clay. The way they are distributed will determine which plants grow the best in your garden.
This test helps me decide what changes I should make to the soil, depending on what I plan to grow. As soon as I understood how the structure of my soil affects my plants, I started to have a more productive harvest.
If you want to learn how to do the test yourself, click here.
The thing I like the most about this simple practice is that all you need is a mason jar. Nothing more. I prefer to do this every year as it helps me decide what crops to plant.
The Advanced Method (That Can Lead to Some Fantastic Results)
Now that you already know the basics, it’s time for some secret homesteader knowledge. If you want more control over the results, instead of using starch water immediately, let it sit loosely covered for 12-48 hours at room temperature. This is the perfect move and bacteria love it.
When those 12 to 48 hours have passed, you will uncover the water and the first thing you should notice is a slightly sour smell. Not rotten, just tangy. Beneficial bacteria are multiplying, pre-digesting the starches, and creating a more diverse microbial culture.
The fermentation process also produces organic acids that help unlock bound minerals in your soil, particularly if you’re dealing with alkaline conditions like many of us in the West.
This technique works especially well for compost pile activation. I pour fermented starch water over dry layers or woody material that’s been slow to break down. The active microbes jumpstart decomposition in areas where it’s stalled.
If it smells genuinely rotten or develops visible mold, discard it. If you’re worried you won’t recognize the smell, just trust your nose.
Where This Doesn’t Work
Every tool has limits, and I’m not going to pretend starch water is universal. Here’s where it fails or creates problems.
Don’t use it in seed trays or on seedlings. Too many active microbes in these conditions encourage disease. Your young plants have an undeveloped immune systems and they won’t survive. Also, don’t use it in hydroponic systems as it’ll clog lines and create anaerobic zones.
👉Learn how to build your own aquaponics system using this EASY method!
Avoid it in pest-heavy environments unless you have active mulch cover. Exposed starch water on bare soil attracts ants, flies, and other insects drawn to simple carbohydrates. Mulch creates a barrier and ensures the carbon reaches soil organisms instead of surface feeders. If you’re dealing with serious pest pressure, fix that problem first before adding any carbon source.
Why This Is Perfect for Real Self-Sufficiency
It’s all about recognizing and redirecting the flows you already have. Every week, you might generate gallons of starch water that could activate soil biology, accelerate compost, and reduce dependence on purchased fertilizers.
This fits into a larger pattern I’ve noticed over the years of homesteading. The systems that are the most productive and resilient are the ones that are able to identify what they waste and convert this into a functional resource with minimal labor. Starch water requires zero additional effort on your part. You’re already boiling pasta or rice several times a week. The only change is where the water goes afterward.
For those of us getting older or anyone building lower-intervention systems, this matters more than it might seem at first. You are improving your garden without adding a task. This is incredibly valuable for your time.
Next time you drain pasta or rice, pour it on your compost pile instead of down the drain. Watch what happens over two weeks. If the results make you happy, then expand to garden beds, perennials, and orchard areas.
You may also like:

Bone Meal Fertilizer: The Secret Soil Booster Hiding in Your Kitchen
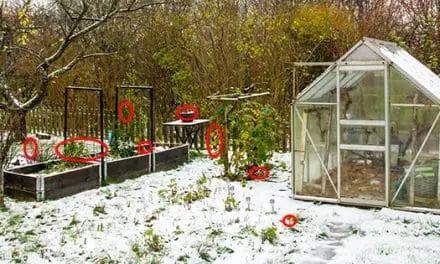
Learn How to Build an Indestructible Greenhouse the Amish Way (Video)
The One Plant That Can Fix Your Entire Garden – And You’re Probably Ignoring It
The Unseen Garden Pests You’re Accidentally Feeding
DIY Self-Watering Raised Garden Beds


