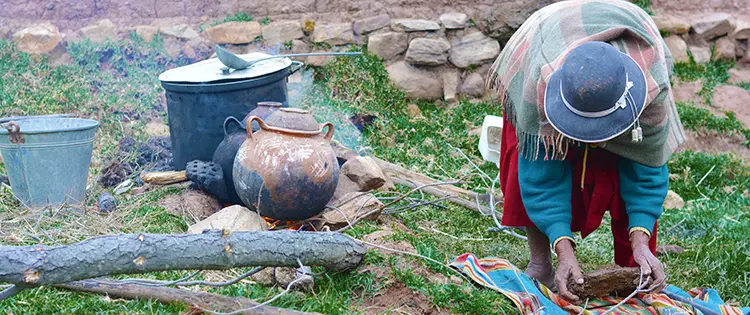
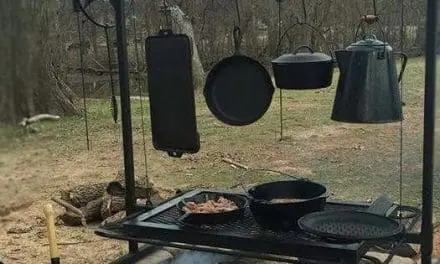
Today we’ll be looking at several general Indigenous recipes from the North American continent. I think every homesteader should know and try these Native American recipes. These are not specific to any tribe but are a common element in many nomadic tribes’ cooking.
Since they lived without modern conveniences and we wish to provide you with recipes that allow you to do the same, here we go!
One quick note; we’ll be writing these recipes as my own tribe usually does. I strongly recommend reading the entire way through a recipe before you zip out to the store to gather ingredients.
Soup Balls
Soup or stew balls are not only easy to make but are also inspired by Native American recipes, offering a practical way to preserve food for 2-5 years on a shelf. It’s my favorite soup recipe.
Start by making your favorite noodle or ball mix. Cut the noodles into strips and weave them into a ball about twice the size of a tree ornament. You can use a glass bowl to help shape it—just ensure there are no gaps, leaving only a small opening at the top to add other ingredients later. Allow the noodles or dumplings to dry as you normally would.
Related: 10 Canning Recipes From The Amish
Once you have a “nest” of dry noodles, add in chipped, dried vegetables such as carrots, split peas, celery, onions, and potatoes. You may also wish to add dried meat such as beef or chicken, as well as barley or rice to accompany the noodles.
Once the ball is full, weave the rest of the ball closed and allow the noodles to dry. Keep this ball in a cool, dry storage location. Ziploc bags are not necessary but may be convenient.
To use, simply bring water or broth to a boil and toss in 1-2 soup balls. These will expand quickly, rehydrate your ingredients, and soup will be on the table in no time!
Native American Recipes: Pemmican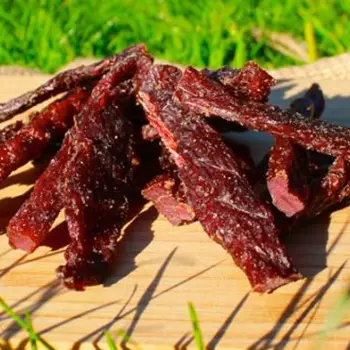
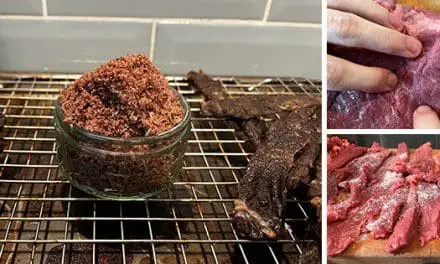
Pemmican is an amazing way to use up extra red meat that you have lying around, especially if the hunting gods have been kind to you over the long hunting season. Sometimes, hunting season rolls around again and we still have a bounty in our freezers.
Make jerky your favorite way. Ours is simply thin-slicing backstraps of venison and placing it in the dehydrator until it is done.
If available, you may also add your favorite dried fruit to this (or feel free to create it with a dehydrator if you have a bunch of fruit hanging around, too!). You want this stuff dust-level dry, so turn that dehydrator all the way up.
Related: Making Machaca – Mexican Pemmican (Shelf Stable Meat)
Once the jerky and fruit are finished, place them in a blender and vaporize them.
Render lard in a pan until it is fully liquid. We strongly suggest using kidney tallow or tallow you get from your butcher; it is usually pretty cheap. Add your powdered fruit and protein to the rendered lard and mix thoroughly. Pour into a lined brownies tin (8×8 is great) and allow to harden. You can slice into bars now.
Pemmican lasts forever. If it is rancid, a simple sniff will let you know. Your ratio is 1 part meat (dry), 1 part fruit, to 1.5-2 parts lard. Feel free to add extra protein+fruit powder if you want your pemmican to be stiffer.
Kanucki
Kanucki is a simple trail mix that will keep you going all day long!
I recommend:
- Freshly shelled pecans
- Dried cherries or strawberries
- Edible flowers such as dandelions (dried is best)
- Alfalfa sprouts (dried)
- Dried soybeans or dried sweet corn
Simply mix these ingredients together in a bag and shake them up. This is fantastic trail food and will keep on a shelf for ages. The dandelions and greens of that plant are also full of antioxidants, which is a nice perk for those of us who cramp up easily on the trail!
Native American Recipes: Wiiwish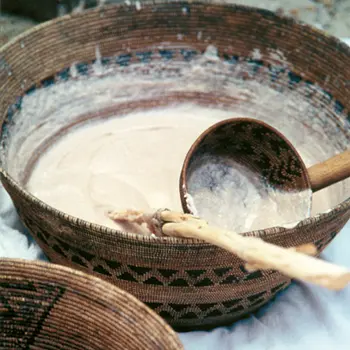
We’re heading up into the trees for this one, drawing inspiration from Native American recipes. Start by gathering a few pounds of acorns and shelling them to reveal the tender inner nuts. Place the nuts in water and let them rest.
When the water turns brown (or after a few hours), change it out. If the nuts keep turning the water brown, continue leeching and replacing the water frequently. Once the water runs clear, you’re ready for the next step.
Mash your acorns. You can use a food processor for this, but the traditional way is to use a mortar and pestle. Once you have a thick paste, toss a small patty of it on a hot griddle. These are a great substitute for pancakes and are fantastic with butter. Needless to say, acorns have an enormous shelf life and can be stored in a cool, dark place until they are ready to be shucked.
If possible, we recommend you swap out your acorns at least every other year unless there are emergency circumstances at hand.
Fry Bread
Fry bread comes in a thousand different types, shapes, and sizes. The additives that some tribes use are incredible in number, while others simply toss a flour-based paste into some lard and call it good.
For this one, we’ll be keeping it simple. You’ll need a 1 to 10 ratio of baking powder to flour. A sprinkle of salt is plenty and absolutely optional. Mix your baking powder and flour, then add just enough water to get a slightly sticky consistency when mixed with the hands. When you have thoroughly mixed it, go ahead and heat some lard in a large and deep cast iron pan on the stove (or over a campfire, if you so desire).
When the lard is completely liquid, gather a large spoonful of batter and toss it into the lard. The fry bread is ready when it is golden brown all over. You can expect it to look rather like a sopaipilla when it is fully cooked. Fry bread will last on the counter when fully cooled for 1-2 weeks, though this is heavily affected by the type of lard you use. It appears that Crisco and vegetable lard tend to go rancid more quickly than good beef tallow.
Native American Recipes: Succotash Mix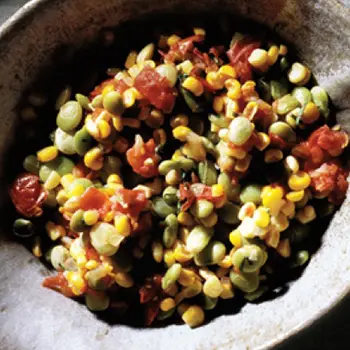
This one has a thousand names so we’re keeping it to a simple English translation. Succotash is simple, easy food, and this blend will get you there with some dried vegetables jarred, ready, and waiting to be used over the next decade. Yeah, that’s right; this dried succotash will wait up to ten years for you to come to make it!
In a 1-quart mason jar with a sealing top, add the following:
- 1 cup of dried lima beans
- 1 cup of dried corn
- 1/2 cup dried okra
- 1/2 cup dried tomatoes
- 1/4 cup dried red bell peppers
- 1/4 cup dried onion
- 1/2 tsp salt
- a handful of whole peppercorns
Put your jar lid back on and put this on the shelf until you need a quick dinner or side dish. To cook, simply add butter to a pan and melt it. Tip this jar into the pan and add 1/2-1 cup of hot water to the pan then place the lid on. Cook until vegetables are soft and season to taste.
And there you have it! Six simple Indigenous survival dishes inspired by Native American recipes that will keep you satisfied no matter where you are.
We’d love to hear from you if you try them out. What are your favorite traditional Native American foods? Comment below and let us know how it goes!
You may also like:
Amish Recipes Every Homesteader Should Know
Cheap and Easy to Build Root Cellar in Your Own Backyard (Video)
20 Grandma’s Depression Foods We Will Need Soon
The Forager’s Guide To Wild Foods: Book Review


