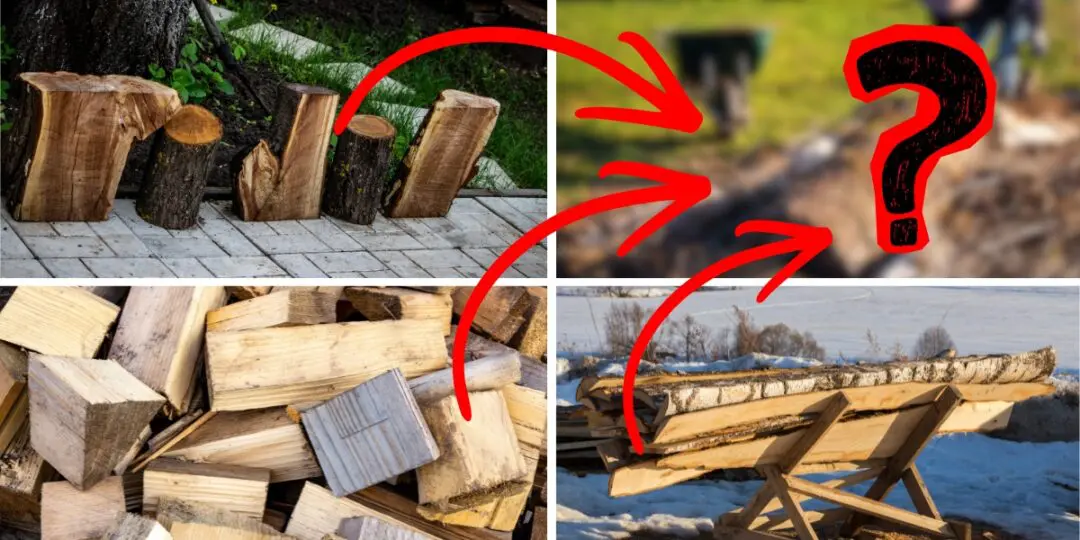
I’ve been heating with wood almost my whole life and if your first choice in terms of heating is also wood, then you know that as soon as spring starts, you’ve got a pile of odd-shaped logs, half-rotted rounds, and branches that aren’t worth splitting but feel wrong to just throw away. Getting rid of them is one of the most annoying homesteading activities, or at least this is how I feel about it.
I used to just let that stuff sit there in the most remote corner of my backyard until it turned to mush. But over the years, I’ve found that leftover firewood is one of the most useful things on a homestead, if you know what to do with it.
The best part is that none of the following ideas cost you a dime. You’ve already paid for the wood, and now it’s time to make good use of it. I love working with what I already have, and after all, this is the whole point of living a self-sufficient life. The less I depend on stores and systems I can’t control, the better I sleep at night.
So before you toss that pile or let it rot, take a look at what it can still do for you.
Turn It Into Natural Fertilizer
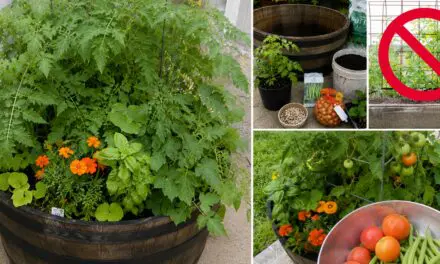
Every fire leaves behind ash, and you probably just shovel it out and dump it. But wood ash is loaded with calcium, potassium, and other minerals your garden needs. According to Michigan State University Extension, wood ash acts like a natural fertilizer that’s especially rich in potassium, one of the key nutrients your plants need to grow strong and healthy.
A few things to keep in mind:
- Make sure you’re only using ash from untreated, natural wood. Nothing painted, stained, or pressure-treated.
- It raises your soil’s pH, so it works best if your soil is on the acidic side. If your pH is already above 6.5, skip this method.
- You don’t need much, about 20 pounds per 1,000 square feet per year. More is not better in this case.
- Try sprinkling thin layers into your compost pile to add minerals and balance out acidic scraps.
- You can also dust some around plants that slugs love. The texture and pH discourage them, though you’ll need to reapply after rain.
Always let your ashes cool completely and store them in a metal container. A hot coal in a plastic bucket will never be a good idea, so always choose metal.
👉 THIS Is Why A Navy SEAL Poured Cayenne Pepper on His Open Wound
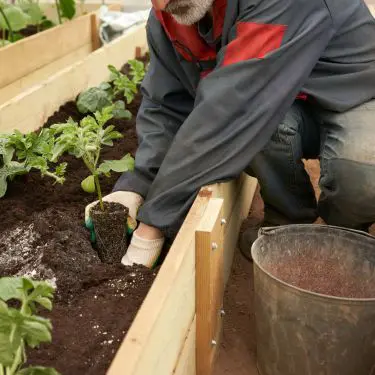
I can confidently say that I’ve been gardening for a while and one thing I learned along the way is that once you know the structure of your soil, it’s like you’ve unlocked a hidden superpower. Yeah, I know this might sound over the top, but when you get to know your soil, you are also able to choose the right plants which will give you the best harvest.
After I moved out of my first homestead, I had some trouble growing tomatoes. They hated the new soil and after all the hard work I’d put in during the spring, I got almost nothing. But the problem was worse than that. Besides not producing anything at all, a lot of the plants did not survive to see the summer sun! This was such a tragedy for me because I was used to making tomato sauce as soon as fall started and now I had to buy tomatoes from the local market to do that.
After some research, I decided to test my soil and see what’s going on. I tested the pH, but what turned the tables for me was the mason jar soil test. Yes, this sounds simple, because it really is simple. All you need is a mason jar, a sample of the soil you want to test, and some water. I stumbled upon this test online and after I saw it had good reviews from a bunch of people, I decided to try it myself. It was the best decision because it helped me discover that my soil didn’t have the structure preferred by tomatoes. This, combined with the wrong pH, meant my garden was doomed to never have tomatoes.
👉Click here and try the test yourself.
Since then, I’ve been growing my tomatoes in custom garden beds with soil that was adapted for their needs and I get a good harvest year after year.
Build a Hügelkultur Bed 
This one changed the way I garden. Hügelkultur is a German word that basically means mound gardening. You bury logs and branches under layers of leaves, compost, and soil, and over time, that wood breaks down like a giant sponge. It holds water, releases nutrients, and even generates a little warmth as it decomposes.
I built my first one three years ago using a pile of logs I had no other use for. Dug a shallow trench, stacked the wood about two feet high, threw on everything I had, leaves, kitchen scraps, old straw, then covered it all with soil. That first season I barely had to water it, even through a dry July. The squash I planted on top went absolutely wild and gave me a harvest like I’ve never had before.
This idea is incredibly easy to apply. All you have to do is scrape off the top layer of grass and roots, lay branches and logs along the center, then build up layers of debris and soil into a dome shape. Here’s how I’d suggest getting started:
- Stick with dead, untreated hardwood. Avoid black walnut since it releases a toxin that kills most plants.
- Try to aim for at least 3 feet wide and 3 feet high.
- Throw in a nitrogen-rich layer like manure or blood meal to offset the wood pulling nitrogen from the soil as it breaks down early on.
- Plant your deep-rooted crops like squash and perennials on top, and put shallower vegetables on the sides.
It’s one of those projects that keeps giving back year after year. And you’re building it with stuff that would have just rotted in a pile, so why not just give it a try?
Grow Mushrooms 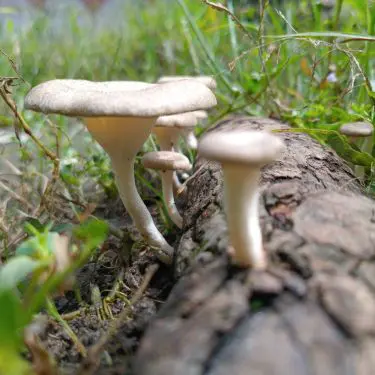
If you’ve got oak, maple, or poplar logs sitting around, you’ve got everything you need to grow shiitake mushrooms. My neighbor has been doing this for years and I’ve been eyeing his setup every time I walk past. Logs cut during late winter work best because the wood still holds plenty of sugars for the mushroom roots to feed on.
Here’s what I’ve found after doing a little bit of research:
- Start by drilling holes about 4 to 6 inches apart along the log.
- Push in mushroom spawn, either sawdust or dowel plugs.
- Seal the holes with wax to lock in moisture.
- Stack the logs in a cool, shady spot and keep them damp. For this, I would definitely choose the big walnut tree I have in my backyard.
👉 How to Make Nature’s Amoxicillin
It takes 6 to 18 months for the first mushrooms to show up, but a single log can keep producing for 3 to 5 years after that. Oyster and lion’s mane mushrooms work too and tend to colonize faster. When the logs are spent, chip them up for mulch or toss them into a hügelkultur bed.
You could keep paying $12 a pound at the grocery store for mushrooms coming from who knows where, or you could grow your own from a log that was going to waste. Your call.
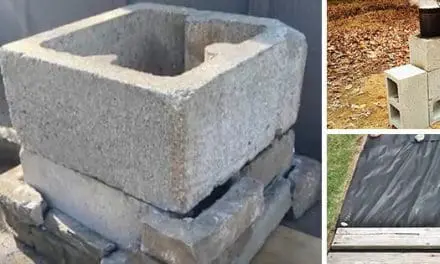
Build Something With Cordwood
Cordwood building uses short log ends, usually 12 to 24 inches long, stacked sideways in mortar to form walls. So, it uses logs just like the ones I have as “leftovers” every winter. This is an old technique and one of the most affordable ways to put up a small structure. You can use logs that are too crooked, too short, or too odd for anything else.
A 16-inch-thick cordwood wall with an insulated cavity in the middle holds heat surprisingly well, better than you’d expect from a bunch of log ends and mortar. The mortar is usually made from cement, sand, sawdust, and lime, though some folks use cob, which is made of clay, sand, and straw mixed together. Your choice. 
You don’t need to build a whole house this way, but a garden shed, a root cellar entrance, or a chicken coop wall made from cordwood is a good weekend project. I also saw some posts on Pinterest from homesteaders who press colored glass bottles into the mortar to let light through. This looks great and if you already have bottles lying around, it costs you nothing.
Now, if you enjoy building with wood or you want to start doing this, I have to tell you a quick thing about my husband, Mark. He’s the woodworker in our family and for the longest time, half his projects ended up sitting unfinished in the garage. The plans he’d find online were always missing something. A measurement here, a skipped step there, and suddenly the whole project is a disaster.
At some point, he came across Ted’s Woodworking, which is a huge library of plans that were actually built and tested before being published. He’s been using it for a while now and I can tell the difference. He now finishes most projects and that’s how we got our living room coffee table and one of our nightstands. He found the plans in this library and got the job done. Also, a little bonus for me: he stopped coming back from the lumber yard in a bad mood. 👉 I’ll leave the link here in case it helps.
Make Soap
When you soak hardwood ash in water, it pulls out a substance called potash, which is a compound that works as a natural lye. It’s not as strong as store-bought lye, but people have been making soap this way for hundreds of years, so you can give it a try.
Here’s the basic process:
- Put your cooled hardwood ash in a non-metal container and cover with rainwater.
- Let it sit for a full day, give it a stir now and then.
- Drain off the brownish liquid, that’s your lye water.
- Test the strength by floating an egg in it. If the egg barely floats, you’re in the right range.
- Heat up your fats, lard, tallow, or vegetable oil, and slowly stir in the lye water until it thickens.
What you get is a soft, gel-like soap you can easily store in jars. It won’t come out in hard bars unless you add commercial lye, but it cleans well and it’s completely homemade. Wear gloves and goggles when handling the lye, though, it’s still a dangerous chemical that can hurt your skin.
The best part about this project is that at least you know exactly what’s in your soap, which is more than you can say about most things on a store shelf these days.
Related: Homemade Medicinal Nettle Soap (Step By Step Recipe)
Chip Your Leftover Firewood Into Mulch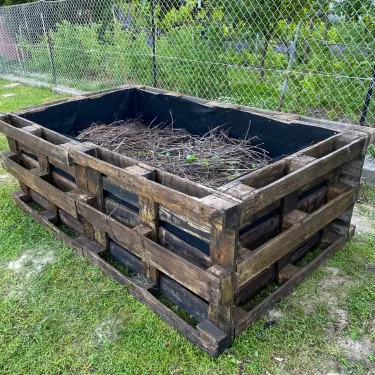
If you’ve got a wood chipper or know someone who does, leftover firewood turns into some of the best mulch you can get. Wood chips hold moisture, keep weeds down, regulate soil temperature, and feed the soil as they break down.
- I spread my chips about 2 to 4 inches deep around trees and shrubs.
- Keep them a few inches away from trunks so you don’t get rot issues.
- If you’re using them in vegetable beds, I’d stick to the pathways rather than digging them into the soil.
- Just top them up as they break down through the season.
👉 See How This Tree Holds 30,000 Gallons of Water Inside Its Trunk
If you have no chipper and don’t know anyone who has one, contact your local arborist. A lot of them will drop off free leftover wood chips just to save themselves some time.
Clear Icy Paths
This one is worth knowing about. Wood ash won’t melt ice, but it gives you traction on slippery surfaces. So, it’s perfect in the winter if you want to keep your homestead clean of ice. The dark color also absorbs sunlight and helps warm things up faster. It’s a safer option than rock salt, which eats away at your concrete, kills your plants, and ends up in your water.
- I just sprinkle a thin layer of dry ash over my icy steps, walkways, or wherever it’s slippery.
- If the ice is really bad, I’ll mix it with some coarse sand for extra grip.
- Just remember to sweep up the excess once the ice melts.
It’s not going to replace a bag of ice melt, but for everyday winter walking around the property, I think it does the job.
Final Thoughts
That’s what I love about this way of life. You don’t need to run to the store or order something online. You look at what you’ve got and you figure out what to do yourself. Honestly, the way things are going, knowing how to do more with less isn’t just a hobby anymore. It’s a skill that might matter more than any of us expect.
I’ve done a handful of these projects myself and I’m planning to try more this year, especially the cordwood shed and the mushroom logs. If you’ve found your own ways to put leftover firewood to good use, drop it in the comments. I bet there are tricks in this community I haven’t even thought of yet.
You may also like: 
Join Our Homesteading WhatsApp Community!
Why The Amish Make Ash Circles Around Their Plants (Video)
12 Types of Wood You Should Never Burn
Building a Sawbuck: Work Smarter in the Woodpile
25 Wood Craft Projects You Should Have In Your Backyard


