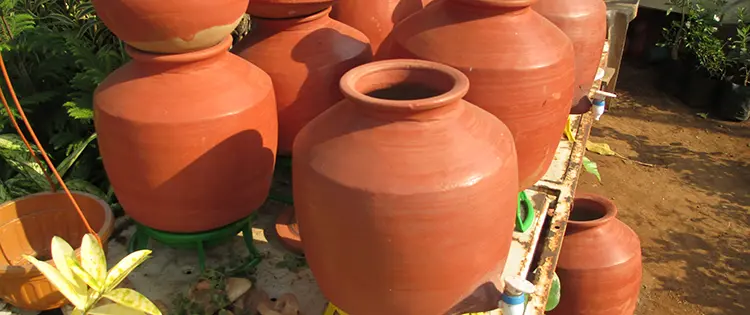
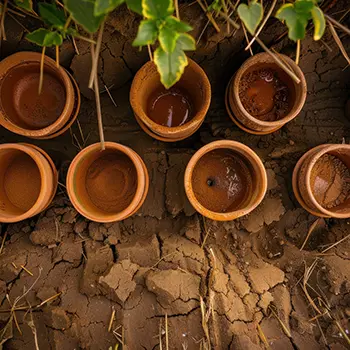
Clay pots are fired pots typically referred to as terra cotta. People often use clay pots for plants, from flowers to vegetables to herbs. They come in a variety of sizes, but most have a traditional pot shape with a drainage hole centered in the bottom. Many also rest on a terra cotta saucer to collect and hold excess water.
Both the pot and the saucer present opportunities for uses beyond holding dirt and plants.
What’s interesting is the way people have used clay pots for centuries for uses other than planting. That’s because terra cotta has some unique qualities that lend themselves to other uses.
The most remarkable property is the porous nature of terra cotta. It allows moisture to permeate the pot and transpire both into and out of the pot. This porosity also allows air molecules to move freely through the walls of the pot. The resulting uses and inventions were remarkable.
What Kind of Clay Pot to Buy — and What to Avoid
Before you build any of these projects, the most important decision you will make is which pots to use. The wrong pot will either perform poorly or not work at all for most of these applications.
Unglazed versus glazed — this is the most critical distinction
Nearly every project in this article depends on the porous nature of terra cotta. That porosity only exists in unglazed pots. Glazed terra cotta — the kind with a shiny, sealed surface in colors like white, blue, or dark brown — has had that porosity sealed off entirely. It looks like terra cotta but behaves like ceramic. Do not use glazed pots for the Zeer pot, the rainwater filter, the olla irrigation system, the air cooler, or the fermentation crock. For those projects, unglazed is non-negotiable.
Glazed pots work fine for the clay pot cooker, the bread oven, and decorative storage uses where porosity is not required.
What to look for when buying unglazed terra cotta:
- A rough, matte surface inside and out with no shiny coating anywhere
- A consistent orange-red or earthy brown color all the way through — if you scratch the surface lightly it should be the same color underneath
- A slightly rough texture that absorbs a drop of water quickly — if water beads on the surface the pot has some kind of sealant on it
- Uniform thickness — thin-walled pots crack easily when buried or used over heat sources
What to avoid:
- Any pot labeled “weather resistant” or “frost proof” — these have often been treated or fired differently in ways that reduce porosity
- Pots with visible cracks or chips — especially for buried root cellar use or heat applications
- Very cheap thin-walled imports — these crack easily under temperature stress and are not worth the trouble for functional builds
- Pots with a white chalky residue on the outside — this is efflorescence from mineral deposits and while not harmful it can indicate low-quality clay that may not hold up
Best places to buy:
- Garden centers and nurseries carry the widest range of sizes at reasonable prices, especially in spring
- Thrift stores and estate sales often have large terra cotta pots for a fraction of retail price — inspect carefully for cracks before buying
- Online marketplaces can work for smaller pots but shipping large pots is expensive and breakage risk is high
- Big box hardware stores carry basic sizes but the quality varies — check the thickness and surface texture before buying
Size guide for common projects:
- Zeer pot: outer pot minimum 16 inches, inner pot minimum 10 inches
- Tea candle heater: outer pot 6 to 8 inches, inner pot 4 to 6 inches
- Root cellar: largest pot you can find — 18 to 24 inches gives meaningful storage capacity
- Olla irrigation: 8 to 12 inches works well for most garden beds
- Fermentation crock: 12 to 16 inches depending on batch size
Here’s How You Can Use Clay Pots In Your Homestead
The Zeer Pot Refrigerator 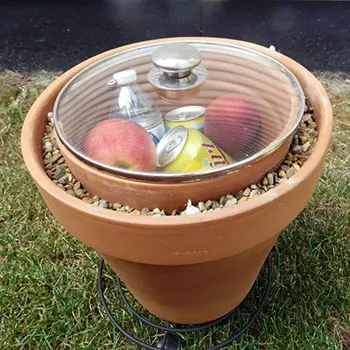
A great way to use clay pots in your homestead is to make a Zeer pot. The Zeer pot originated in Africa centuries ago and is used to this day to keep foods and drinks cold. It’s basically a clay pot in a clay pot separated by a layer of sand that is saturated with water. As the water evaporates due to outside temperatures and wind, the evaporation has a cooling effect on anything in the pot.
The size of Zeer pots varied from large pots measured in feet to smaller pots measured in inches. Multiple pots were often used and water was the common ingredient for powering the cooling effect of the pots.
Related: How I Lived With No Fridge And No Heat For The Last 5 Years
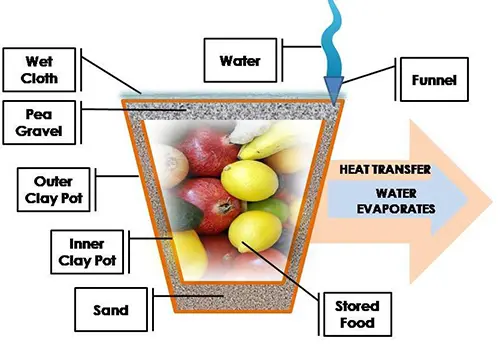
Critical to the success of the Zeer pot is a tight-fitting lid and sometimes a wet cloth or piece of fabric across the top. As long as the sand in the gap between the pots is moist, the temperature inside will be lower than the outside temperature. At its best, a Zeer pot can reduce temperatures to 40 degrees Fahrenheit. Here’s a cutaway that reveals the concept.
The critical success factor with a Zeer pot is to keep the sand moist and to expose it to the wind as much as possible. As the wind moves the transpired moisture away the cooling effect increases. Even in the sun, a Zeer pot will work, but a Zeer pot works better in the shade and in the wind.
A Zeer pot is a great solution on any camping trip or bugout. Think of it as a portable refrigerator that can keep anything cold or food safe when you have no other resources.
The Zeer pot is just one example of the incredible off-grid techniques the Amish use to thrive without modern conveniences. But there’s so much more to learn. The Amish Ways book is packed with time-tested methods for food preservation, DIY projects, and practical homesteading knowledge that can help you live self-sufficiently.
The book covers everything from building your own root cellar to crafting homemade remedies, all with clear instructions and easy-to-follow steps.
And honestly, I wish more people knew about this.
How to Build a Zeer Pot: Step by Step
Here is exactly how to build one so you are not left guessing.
What you need:
- One large unglazed terra cotta pot (at least 16 inches in diameter)
- One smaller unglazed terra cotta pot (at least 10 inches in diameter)
- One terra cotta saucer large enough to cover the top of the outer pot
- Clean coarse sand — enough to fill the gap between the two pots
- Water
- A cork or stone to plug the drainage hole of the outer pot
Step 1: Plug the drainage hole of the larger outer pot using a cork, stone, or a folded piece of cloth. This keeps the wet sand from draining out the bottom.
Step 2: Pour a two-inch layer of sand into the bottom of the large pot. This creates a base for the inner pot to rest on and keeps it centered.
Step 3: Place the smaller pot inside the larger pot, centered. The gap between the two pots should be roughly two to three inches all the way around. If the inner pot sits too low, add more sand beneath it until the rims of both pots are roughly level.
Step 4: Fill the gap between the two pots with dry coarse sand, packing it in firmly as you go. Leave about an inch of space at the top.
Step 5: Pour water slowly into the sand gap until it is completely saturated. You will need to do this daily — or twice daily in hot, dry weather — to maintain the cooling effect.
Step 6: Place your food or drinks inside the inner pot.
Step 7: Wet the terra cotta saucer and place it upside down over the top of the outer pot as a lid. A wet cloth or piece of burlap placed over the top before adding the saucer improves the cooling effect further.
Maintenance: Check the sand moisture morning and evening. If it feels dry to the touch even an inch below the surface, add more water. Position the pot where it gets maximum airflow — a shaded, breezy spot is ideal. The more wind moves across the surface, the faster evaporation occurs and the colder the interior gets.
What to Realistically Expect from a Zeer Pot
Before you build one, here is an honest look at the numbers so you know what you are working with.
In ideal conditions — low humidity, strong airflow, full shade, and consistently moist sand — a well-built Zeer pot can reduce internal temperature by 30 to 40 degrees Fahrenheit below the outside air temperature. In a 90 degree Fahrenheit day with dry air and a good breeze, the interior can reach as low as 50 to 60 degrees. That is genuine food-safe refrigeration territory.
In moderate conditions — partial shade, light breeze, moderate humidity — expect a temperature drop of 15 to 25 degrees. Still useful for slowing spoilage and keeping drinks noticeably cool, but not cold enough to safely store meat for extended periods.
In humid conditions — above 70 percent relative humidity — the cooling effect drops significantly because evaporation slows down. In very humid climates like the southeastern United States or tropical regions, you may only achieve a 5 to 10 degree drop. In these conditions the Zeer pot works better as a short-term food slower than a true refrigerator substitute.
Climate breakdown:
- Dry desert climates (American Southwest, North Africa, Middle East): excellent performance, 30 to 40 degree drop achievable
- Mediterranean and semi-arid climates: good performance, 20 to 30 degree drop typical
- Temperate climates with moderate humidity: moderate performance, 15 to 20 degree drop
- Humid subtropical and tropical climates: limited performance, 5 to 15 degree drop
What foods store well: Root vegetables, fruits, leafy greens, hard cheeses, cooked grains, and eggs all store well in a properly functioning Zeer pot. Raw meat and dairy require the lower end of the temperature range and should be consumed within one to two days unless you are achieving consistent sub-40 degree temperatures.
What foods do not store well: Anything requiring true refrigeration below 40 degrees Fahrenheit in humid or warm-but-humid conditions. Do not rely on a Zeer pot for raw meat storage in a humid climate.
Troubleshooting the Most Common Problems
Zeer pot not cooling enough:
- First check: is the sand actually wet all the way through, or just damp on top? Push your finger two inches into the sand gap. If it feels dry, soak it thoroughly and check again in an hour.
- Second check: is there enough airflow? A Zeer pot sitting in a still, enclosed space will barely cool at all. Move it outside or near an open window or fan.
- Third check: are you using glazed pots by mistake? Glazed terra cotta does not allow moisture to permeate the walls and will not work. The pots must be completely unglazed inside and out.
- Fourth check: is your climate too humid? If you are in a high-humidity region, the Zeer pot has physical limits. Add a small battery-powered fan directed at the outer surface to force evaporation and improve performance.
Tea candle heater not producing enough warmth:
- Add more candles — six produces noticeably more heat than four, and you can push to eight if your base is large enough to hold them safely.
- Check the air gap between the two pots. If the nuts are loose and the pots are sitting flush against each other, heat transfer drops significantly. Retighten the bolt assembly.
- Move the heater to a smaller, more enclosed space. A tea candle heater will take the edge off a small bathroom or closet-sized space much more effectively than it will warm a large open room.
- Make sure the pot platform holds the outer pot close enough to the candle flames — two to three inches above is ideal. Too far away and most of the heat escapes before the pot absorbs it.
Root cellar pot letting in moisture:
- This usually means the drainage hole was not plugged properly before burial. Dig the pot up, seal the drainage hole completely with waterproof exterior caulk, allow it to cure fully, and re-bury.
- If the pot itself has cracks, moisture will enter regardless. Inspect pots carefully before burial and discard any with visible cracks.
- Make sure the rim of the buried pot sits slightly above ground level and the lid overlaps the rim generously. Water pooling around the lid edge is the most common entry point.
Rainwater filter producing cloudy output:
- Your sand layer is likely too coarse or too thin. Use fine sand rather than coarse, and ensure the sand layer is at least four inches deep.
- Replace the charcoal layer if it has been used more than ten to fifteen times — it loses effectiveness over repeated use.
- Always boil or treat filtered rainwater before drinking regardless of how clear it looks. The clay pot filter removes sediment and some impurities but is not sufficient alone for safe drinking water.
Fermentation crock developing mold on top:
- Surface mold on ferments is common and not necessarily a sign of failure. White mold on the surface can be skimmed off and the ferment beneath is usually fine.
- Black or pink mold indicates contamination — discard the batch and sterilize the pot before starting again.
- Make sure your vegetables are fully submerged beneath the brine at all times. Any vegetable exposed to air above the brine line will mold quickly.
Honest limitation: The Zeer pot works best in dry, hot climates with good airflow. In humid environments above 70 percent relative humidity — common in the southeastern United States, the Pacific Northwest, and most tropical regions — the cooling effect drops sharply because evaporation slows. In these climates the Zeer pot is useful for slowing spoilage but should not be relied on as a primary food storage solution. It also requires daily water refilling — if you forget for even a day in hot weather the sand dries out and the cooling effect stops within hours.
The Tea Candle Heater 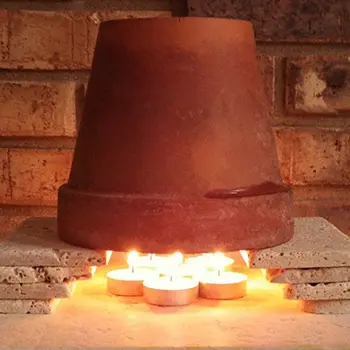
Clay pots also can act as excellent heat exchangers so I started to use clay pots as a tea candle heater. Something as simple as an arrangement of tea candles under clay pots can create an indoor heat source with surprising results. It’s an excellent solution for times when the power fails and temperatures drop.
It’s actually a combination of two clay pots over the candles to hold and radiate heat. Various Internet videos and articles demonstrate the concept, and the heat is not only consistent but surprisingly effective. Better yet, tea candles emit little in the way of noxious fumes so they can burn with little ill effects.
A clay pot heater can be located anywhere as long as it’s away from anything flammable like draperies or fabrics.
This is a great emergency heat alternative during a power outage or to simply provide some heat to a room that never seems to get enough heat. It’s also used by gardeners to provide heat to a greenhouse when temperatures dip low, and some added heat is needed to keep the greenhouse warm.
Tea candles average about a 6-hour burn time but they’re cheap and easily replaced as time goes on. Better yet, you can place multiple terra cotta heaters around the house or greenhouse to simply keep everything much warmer.
This is just one of the many affordable and simple ways to heat your home. But during a blackout, you need more than just a tea candle heater to stay safe. I’ve discovered several methods that can help you not only survive a blackout but also keep your home warm. These are some of the most cost-effective and secure options I’ve found, and I wanted to share them with you here.
How to Build a Tea Candle Heater: Step by Step
What you need:
- Four to six tea candles
- One small terra cotta pot (4 to 6 inches diameter)
- One medium terra cotta pot (6 to 8 inches diameter)
- Two or three nuts and a long bolt that fits through the drainage holes of both pots
- A fireproof base — a ceramic tile, a brick, or a metal tray
- A small metal rack or four equal-height bolts to elevate the outer pot over the candles
Step 1: Thread the bolt through the drainage hole of the small inner pot from the outside in. Stack two or three nuts onto the bolt inside the pot, then thread the bolt through the drainage hole of the larger outer pot. Add a final nut on the outside of the larger pot and tighten everything firmly. This creates an air gap between the two pots which is critical — the inner pot heats up first and radiates heat into the outer pot, which then radiates it into the room. Without the gap the system does not work nearly as well.
Step 2: Place your fireproof base on a stable, flat surface well away from anything flammable. A ceramic tile on a wooden table works fine as long as the candles are not close to the table edge.
Step 3: Arrange four to six tea candles on the fireproof base in a tight cluster. The more candles you use the more heat you generate, but four is enough to produce a noticeable warming effect in a small room.
Step 4: Place a small metal rack or four equal-height bolts around the candles to create a platform. The assembled double pot sits on this platform directly above the candles. The bottom of the outer pot should sit roughly two to three inches above the candle flames — close enough to absorb heat efficiently but not so close that it smothers the flames.
Step 5: Light the candles and place the assembled double pot on the rack above them.
Step 6: Allow fifteen to twenty minutes for the pots to fully heat up. Once hot, the outer pot will radiate warmth steadily into the surrounding space.
Maintenance: Replace tea candles as they burn out — roughly every six hours. Never leave a burning candle heater unattended. Keep a glass of water nearby as a precaution. When moving the assembly after use, remember the pots retain heat for a long time and will cause burns if handled carelessly.
Honest limitation: A tea candle heater will take the chill off a very small enclosed space — think a bathroom, a small bedroom, or a tent. It will not meaningfully heat a living room, an open-plan kitchen, or any space above roughly 100 square feet. Each tea candle produces approximately 30 watts of heat. Six candles together produce the equivalent of a 180-watt heat source — enough to feel the difference in a small space but nowhere near enough to replace central heating. Treat it as an emergency comfort measure, not a heating solution.
Clay Pot Cooker 
You can use clay pots as an effective cooker. A bit of heat underneath makes a terra cotta pot an ideal way to cook rice or anything else. The trick is to use the terra cotta bottom as a lid to seal in the moisture while anything is cooking in the pot. A handle can be attached to the top to make cooking easier.
You can cook anything in a clay pot cooker that you might cook in a crockpot. Just add the ingredients and some broth or water and let it go. The heat source under the pot can again be something as simple as tea candles or a charcoal fire or even a hot plate if you have power.
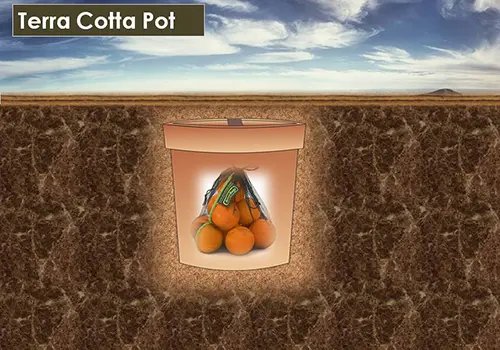
The Miniature Clay Pot Root Cellar
A clay pot buried in the ground can create a surprisingly effective way to store food. The good news is that some clay pots are extremely large and burying them can give you a distinct advantage when it comes to storing foods like potatoes and other root vegetables. For that matter, anything requiring refrigeration can be kept in a clay pot root cellar.
You can use the bottom base as a cover and literally plant them in a series to keep and hold vegetables all year round. Just make sure you mark where your clay pot root cellar is planted and what it contains along with a date.
A clay pot buried in the ground can create an effective food storage solution, especially for root vegetables. But if you’re looking for an even easier way to keep your food fresh without worrying about temperature fluctuations, you might want to consider this Easy Cellar.
It’s a modern twist on traditional root cellar methods, and you’ll be surprised at how it simplifies long-term food storage. Plus, thanks to its design, it can also double as a disaster-proof family shelter in your backyard—all for less than $400.
Honest limitation: A clay pot root cellar works by using the stable cool temperature of the soil beneath the frost line. In cold climates this works well — soil temperature a foot or more below the surface stays between 50 and 60 degrees Fahrenheit year-round in most temperate regions. In warm climates where soil temperature stays above 65 degrees, the effectiveness drops significantly and spoilage will occur faster than expected. Also, clay pots are porous — if your soil stays very wet for extended periods, moisture can seep in and promote mold. Seal the drainage hole and check the contents monthly.
Are There Other Ways To Use Clay Pots in My Homestead?
I’ve only tried these 4 ingenious ways to use clay pots on my homestead, but I have plenty more at home and a long ‘to-do’ list of ideas. I wanted to share both with you so we can explore more uses together!
Water & Moisture Control
- Ollas for Watering Plants
I always wanted to use clay pots as ollas. An olla is an old-school way to water plants without wasting a drop. Just bury an unglazed clay pot near your plants, leaving the top open above the soil. Fill it with water, and the clay will slowly release moisture as the plants need it. This keeps the roots hydrated while cutting down on evaporation and runoff. It works great for vegetable gardens, raised beds, or even potted plants.
- Rainwater Filter
You can use clay pots to help filter rainwater before drinking or using it for animals. Just layer sand, charcoal, and small rocks inside an unglazed clay pot, then pour the water through. The clay naturally absorbs impurities, and the layers inside trap dirt and debris. It won’t purify water completely, but it’s a great first step before boiling or using a real filter. This setup works well in emergencies or off-grid living.
Honest limitation: A tea candle heater will take the chill off a very small enclosed space — think a bathroom, a small bedroom, or a tent. It will not meaningfully heat a living room, an open-plan kitchen, or any space above roughly 100 square feet. Each tea candle produces approximately 30 watts of heat. Six candles together produce the equivalent of a 180-watt heat source — enough to feel the difference in a small space but nowhere near enough to replace central heating. Treat it as an emergency comfort measure, not a heating solution.
Food Preservation & Storage
- Fermentation Crock
Clay pots are perfect for fermenting foods like sauerkraut, pickles, and kimchi. Their natural material helps regulate temperature and keep air flowing while locking in moisture. To use one, just pack in your veggies, cover them with a salty brine, and place a weight on top to keep them submerged. Let it sit for a few weeks, checking for bubbles and tasting along the way. The longer it ferments, the stronger the flavor!
- Cheese Aging Pot

If you make your own cheese, you can use clay pots as a mini cheese cave. The porous material helps keep humidity just right so the cheese doesn’t dry out too fast. Just line the inside with a damp cloth, place your cheese on a small rack, and cover it loosely with a lid. Keep it in a cool place and check on it regularly. Over time, the cheese will develop better texture and flavor.
Cooking & Food Prep
- DIY Clay Bread Oven
You can turn two big clay pots into an outdoor bread oven. Just place one pot upside down on a fireproof base and use the other as a lid. Heat it with coals or a small fire, then slide in your dough. The clay holds heat really well, baking bread evenly just like a brick oven. This setup also works for roasting meats and even making homemade pizza.
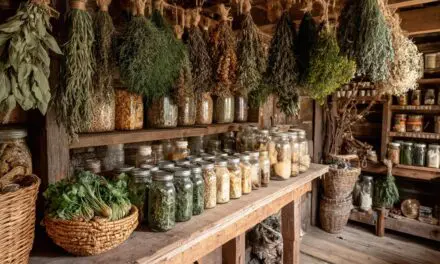
- Herb Drying Pot
Drying herbs is easy when you use clay pots because they naturally absorb moisture from the air. Drill small holes in the pot, hang fresh herbs inside, and set it in a warm, breezy spot. The holes let air circulate, helping herbs dry evenly without getting moldy. You can even stack a few pots together to dry different herbs at once. This method works great for oregano, basil, thyme, and other garden herbs.
If you’re not growing your own medicinal herbs yet, you might be missing out when times get tough. This Medicinal Garden Kit contains 10 different types of seeds, offering 4,818 NON-GMO seeds in total. This kit ensures you’re prepared to grow your own herbal remedies in case of a crisis. Packaged in the USA, these seeds will give you peace of mind knowing you can have the power of natural medicine at your fingertips when you need it most.
Animal Care
- Self-Watering Chicken Dish

Chickens need fresh water, but they love to kick dirt into their bowls. You can make a simple self-watering dish with a clay pot and a shallow pan. Just flip the pot upside down inside the pan and fill it with water. The pot will slowly soak up and release water, keeping it fresher longer. It’s a great low-maintenance way to keep your flock hydrated, especially in the summer.
- Cooling Station for Animals
On hot days, clay pots can help keep your animals cool. Fill a big pot with water and place it in a shaded area near your chickens, goats, or dogs. As the water evaporates, it naturally cools the air around it. You can also soak a clay pot and place it in a coop or barn to lower the temperature a little. This trick works best in dry climates where evaporation happens fast.
Heating & Cooling
- Heat Sink for Warmth
Clay pots can store heat during the day and slowly release it at night, making them a great way to keep a space warm. Set a few in a sunny window or next to a wood stove to absorb heat. Once the sun goes down, they’ll radiate that warmth back into the room. This won’t heat a whole house, but it helps take the chill off small spaces. It’s a simple way to save on heating costs in the winter.
- DIY Clay Pot Air Cooler
If you need to cool a room without electricity, use clay pots air coolers. Soak an unglazed clay pot in water, then place a damp cloth over it and drill a few holes in the sides. Set a fan behind it, and as the water evaporates, it will cool the air. This method works best in dry areas where evaporation happens quickly. It won’t replace an AC, but it can make a small space more comfortable.
Pest & Garden Uses
- Slug & Snail Trap
Slugs love hiding in dark, damp places, so you can use clay pots to trap them. Just place a pot upside down in your garden, propping up one side with a small rock. Overnight, slugs will crawl under it for shelter. In the morning, lift the pot and remove them before they munch on your plants. This is a chemical-free way to keep your garden pest-free.
- Worm Composting Bin
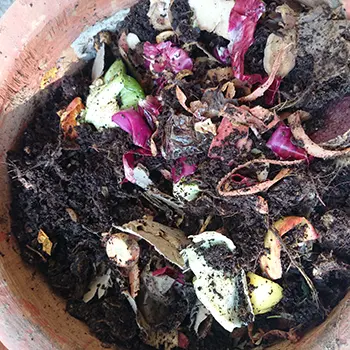
Turn a large clay pot into a worm composting bin for breaking down kitchen scraps. Drill some drainage holes in the bottom, then add damp soil, worms, and food scraps. The clay helps regulate moisture so the worms stay happy. Over time, they’ll turn scraps into rich compost for your garden. Just check it every few weeks and scoop out the finished compost.
Other Uses
- Hidden Storage in the Garden
If you need to stash small supplies or emergency cash, a buried clay pot makes a great hiding spot. Dig a hole, place the pot inside with a tight lid, and cover it with soil or mulch. You can even disguise it with a plant on top. The pot protects your stuff from moisture, and no one will think to dig it up. Just make sure you remember where you buried it!
- Bee & Butterfly Watering Station
Pollinators like bees and butterflies need water, but they can drown in deep bowls. A clay saucer filled with pebbles and shallow water gives them a safe place to land and drink. Set it near flowers or in your garden to attract more pollinators. Refill it often, especially in hot weather. This little trick helps keep your garden buzzing with life.
Where to Start: A Beginner Priority List
If you are new to clay pot projects and feeling overwhelmed by the options, here is where I would tell you to begin — in order of ease, cost, and immediate practical value.
Priority 1: The Tea Candle Heater
Start here. It costs under ten dollars if you already own clay pots, takes thirty minutes to assemble, and gives you an immediate emergency heating backup. It is also the best way to get comfortable working with terra cotta before committing to bigger builds. Do this first, test it this week, and keep it stored and ready.
Priority 2: The Olla Irrigation System
If you have a garden of any size, burying an olla next to your most water-hungry plants will immediately reduce your watering workload and improve plant health. It requires no building — just bury a pot, fill it with water, and cap the top with a stone or saucer. You will see results within the first week.
Priority 3: The Zeer Pot
Once you are comfortable with terra cotta and understand how porosity works from the olla project, build a Zeer pot. It requires more materials and a bit more patience to dial in but delivers the most impressive result — a functional refrigerator with zero electricity. If you live in a dry climate, prioritize this one even higher.
Priority 4: The Clay Pot Root Cellar
This one takes more planning — you need to choose the right location, dig to the right depth, and think about drainage. But once it is in the ground it requires almost no maintenance and gives you year-round food storage that costs nothing to run. Do this in autumn before the ground freezes so it is ready for spring harvest storage.
Save for later:
- The bread oven and clay pot cooker require more materials and practice — great projects once you have the basics down
- The fermentation crock is excellent but requires some knowledge of fermentation safety before you start
- The worm composting bin is low-risk and low-effort but lower immediate survival value compared to the first four
The pattern is simple: start with the projects that cost the least, teach you the most about how terra cotta works, and deliver immediate practical value to your current situation. Build confidence with small wins before committing to the larger builds.
Stockpile Clay Pots
Terra cotta pots are cheap. Stock up. At worst, you’ll have plenty of ways to plant herbs, flowers, and start seedlings. At best, you’ll have multiple options for heating, cooling, and food storage you may not have considered before.
Do you use clay pots in any of these ways? Got a favorite trick or one I missed? Let me know in the comments!
You may also like: 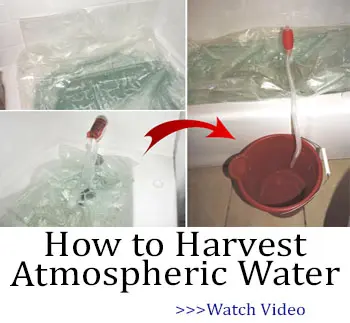
How to Build the Oven That Cooks Without Fire, Fuel, Smell, or Smoke (Video)
Amish Powerless Tools For A World Without Power
How To Survive In A World Without Water
Household Items People Repurposed During the Great Depression
10 Good Spots To Hide Your Food In A Crisis


How do you seal the hole in the bottom of the pot, especially for using it to cook?