Store-bought garlic cheese is fine. Homemade garlic cheese is something else entirely. When you control every ingredient, you decide how much garlic goes in, which herbs you add, how long it ages, and what kind of milk you start with. The result is a product that is fresher, more flavorful, and cheaper per serving than anything sitting in a refrigerated case at the grocery store.
This guide covers five different ways to make garlic cheese at home, from the quickest 10-minute garlic cream cheese spread to a properly aged hard garlic herb wheel that takes several weeks but rewards the patience. In between, there is a soft garlic cheese log, a compound garlic butter that doubles as a cheese-adjacent spread, and a from-scratch garlic cheese bread that puts the store version to shame.
No specialist equipment is required for most of these recipes. A saucepan, a strainer, some cheesecloth, and a few mason jars will get you through the majority of this guide. The aged hard cheese benefits from a simple aging setup but even that can be improvised with what most homesteaders already have on hand.
Why Make Garlic Cheese at Home?
The economics alone make a strong case. A pound of quality garlic herb cheese at a specialty grocery store runs anywhere from $8 to $15. A gallon of whole milk yields roughly 1.5 to 2 pounds of soft cheese or about 1 pound of harder pressed cheese, and a gallon of milk costs $3 to $5 in most parts of the country. Add garlic, herbs, and salt and your total ingredient cost per pound of finished cheese is a fraction of the retail price.
Beyond cost, homestead cheese making builds a skill that compounds. Once you understand the basic principle of how milk acidifies, curdles, and separates into curds and whey, you can make dozens of cheese varieties. Garlic cheese is an ideal starting point because the bold flavor is forgiving of minor variations in technique. A slightly under-pressed wheel or a softer-than-intended texture is still delicious when it is loaded with roasted garlic and fresh herbs.
The USDA Agricultural Research Service notes that home dairy production has seen consistent growth among small-scale homesteaders and urban farmers over the past decade, driven largely by the desire for ingredient transparency and the satisfaction of whole-food production.
There is also the preservation angle. A well-made hard garlic cheese, properly waxed or vacuum sealed, stores for months without refrigeration in a cool cellar. That is meaningful self-sufficiency, not just a hobby.
Garlic Preparation: The Foundation of Every Recipe in This Guide
Before getting into individual recipes, it is worth covering garlic preparation properly because how you prepare the garlic changes the flavor profile of every cheese in this guide significantly.
Raw Garlic
Raw garlic is sharp, pungent, and assertive. It works well in cream cheese spreads and soft cheeses where you want an immediate, punchy garlic flavor. Use it finely minced or pushed through a garlic press. Raw garlic intensifies over time as it sits in a cheese, so use less than you think you need if the cheese will sit overnight or longer before serving.
Roasted Garlic
Roasting transforms garlic from sharp and aggressive to sweet, mellow, and deeply savory. Cut the top off a whole garlic head to expose the clove tips, drizzle with olive oil, wrap in foil, and roast at 400 degrees Fahrenheit for 35 to 40 minutes until the cloves are golden and completely soft. Squeeze the roasted paste directly into your cheese mixture. Roasted garlic is the better choice for aged cheeses and for anyone who finds raw garlic too intense.
Garlic Confit
Garlic confit is made by slow-cooking peeled garlic cloves submerged in olive oil at a very low temperature, around 200 to 250 degrees Fahrenheit, for 45 minutes to an hour. The result is silky, almost buttery garlic cloves with a flavor that is milder than roasted and sweeter than raw. The infused oil is a bonus ingredient. Both the cloves and the oil work beautifully in any recipe in this guide.
One important safety note on garlic confit: garlic stored submerged in oil at room temperature creates conditions that can support Clostridium botulinum growth. Always refrigerate garlic-in-oil preparations and use within 1 to 2 weeks, or freeze for longer storage. This applies to the confit oil used in cheese making as well.
The FDA’s guidelines on garlic-in-oil safety are clear on this point: commercially prepared garlic-in-oil products must be acidified or refrigerated. The same applies to homemade versions.
 Recipe 1: Soft Garlic Cheese Spread
This is the most accessible recipe in the guide and a good starting point if you have never made cheese before. The technique is essentially a simple acid-set cheese, where vinegar or lemon juice causes the milk proteins to coagulate and separate from the whey. The result is a soft, spreadable cheese similar in texture to a fresh chevre or a thick ricotta, with garlic and herbs worked through it.
The whole process from cold milk to finished cheese takes about 45 minutes plus a couple of hours of draining time.
Ingredients
- 1 gallon whole milk (not ultra-pasteurized, which will not set properly)
- 1/4 cup white vinegar or the juice of 2 large lemons
- 1 teaspoon fine sea salt, plus more to taste
- 4 to 6 cloves of garlic, roasted or raw, finely minced
- 2 tablespoons fresh chives or flat-leaf parsley, finely chopped
- 1 tablespoon fresh thyme leaves
- Black pepper to taste
- Optional: 1 tablespoon olive oil stirred through the finished cheese for richness
Method
- Pour the milk into a large, heavy-bottomed saucepan. Heat over medium heat, stirring occasionally to prevent scorching, until the milk reaches 185 to 190 degrees Fahrenheit. Use a thermometer if you have one. If you do not, watch for the milk to begin steaming heavily and just barely start to show small bubbles around the edges. Do not boil.
- Remove from heat. Add the vinegar or lemon juice and stir gently once or twice. You will see the milk begin to curdle almost immediately, separating into white curds and yellowish-green whey. If curdling is slow or incomplete after 5 minutes, add another tablespoon of acid and stir once more.
- Let the pot sit undisturbed for 10 to 15 minutes to allow the curds to fully form and firm up.
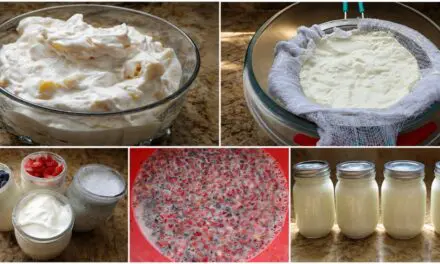
- Line a colander or strainer with two layers of cheesecloth and set it over a large bowl to catch the whey. Gently ladle or pour the curds into the lined strainer. Do not dump the pot aggressively as this breaks the curds into very fine pieces.
- Gather the corners of the cheesecloth and tie them together. Hang the bundle over a bowl or suspend it from a kitchen faucet and allow it to drain for 1 to 2 hours. The longer you drain, the firmer the final cheese. For a very soft, creamy spread, 1 hour is enough. For a cheese that holds its shape when scooped, drain for 2 hours or more.
- Transfer the drained curds to a bowl. Add the salt, minced garlic, fresh herbs, and black pepper. Stir thoroughly to combine. Taste and adjust seasoning. The cheese will mellow slightly overnight as the garlic integrates, so it can be seasoned a little more assertively than you think is necessary.
- Pack into a clean glass jar or ramekin. Cover and refrigerate. The cheese is ready to eat immediately but improves after 4 to 8 hours in the refrigerator as the flavors develop.
Storage and Yield
This recipe yields approximately 1.5 to 2 cups of soft garlic cheese spread depending on how long you drain it. Stored covered in the refrigerator, it keeps well for up to 1 week. Do not freeze soft fresh cheese as the texture becomes grainy after thawing.
The whey collected during draining is not waste. It is protein-rich and can be used in bread baking in place of water, added to soups, used to soak grains and legumes, or fed to chickens and pigs if you keep livestock. On a homestead, nothing from this process needs to go down the drain.
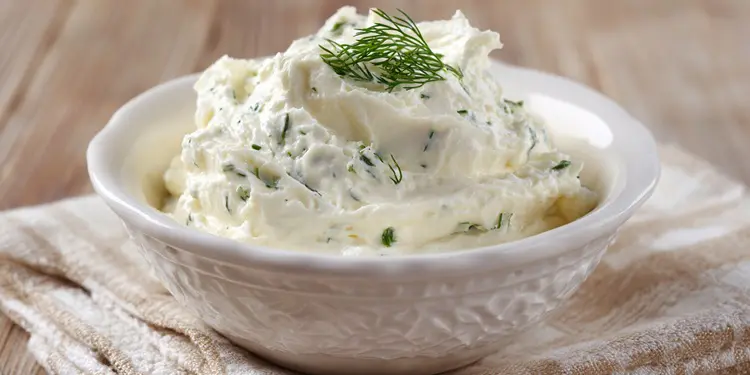 Recipe 2: Garlic Cream Cheese
This recipe produces something closer to commercial whipped garlic cream cheese in texture but with a cleaner, fresher flavor. It uses a combination of whole milk and heavy cream, which gives the finished cheese its characteristic richness. The technique is the same acid-set method as Recipe 1, but the higher fat content of the cream changes both the texture and the mouthfeel of the result significantly.
Ingredients
- 3 cups whole milk
- 1 cup heavy cream
- 3 tablespoons white vinegar or fresh lemon juice
- 1/2 teaspoon fine sea salt
- 3 to 4 cloves roasted garlic, mashed to a paste
- 1 teaspoon garlic powder (in addition to the roasted garlic, for depth)
- 1 tablespoon fresh dill or chives, finely chopped
- Pinch of white pepper
Method
- Combine the milk and cream in a saucepan. Heat over medium heat to 185 degrees Fahrenheit, stirring frequently to prevent the cream from scorching on the bottom.
- Remove from heat, add the vinegar or lemon juice, and stir once. Allow to sit for 10 minutes without stirring. The higher fat content of this mixture means the curds will be softer and smaller than the all-milk version. This is correct.
- Line a strainer with a double layer of cheesecloth and drain for 30 minutes only. You want this cheese to retain more moisture than the standard spread to achieve a creamy, whipped texture.
- Transfer the drained curds to a food processor or use a hand mixer. Add the salt, roasted garlic paste, garlic powder, herbs, and white pepper. Process or beat for 60 to 90 seconds until completely smooth and whipped. Scrape down the sides and process again briefly.
- Taste and adjust. The garlic flavor should be present but not overwhelming. Transfer to a container, cover, and refrigerate for at least 2 hours before serving to allow the texture to firm slightly.
Serving Suggestions
Garlic cream cheese spreads easily straight from the refrigerator and works on bagels, toast, crackers, and as a base for stuffed mushrooms or celery. It also makes an excellent filling for homemade pasta or as a topping for baked potatoes straight from the garden.
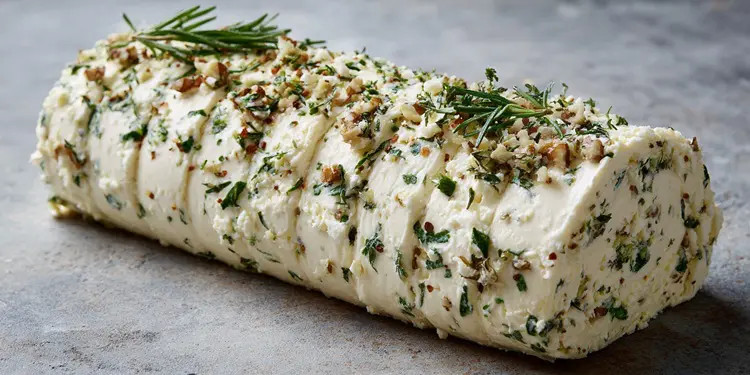 Recipe 3: Soft Garlic Cheese Log
A garlic cheese log is a shaped, chilled soft cheese that can be rolled in herbs, crushed nuts, or cracked pepper to create a finished presentation suitable for a charcuterie board. It uses the same curd base as Recipe 1 but is pressed more firmly and shaped before chilling.
Ingredients
Use the same ingredient list as Recipe 1. Additionally prepare a coating of your choice from the following options: finely chopped fresh rosemary and thyme mixed together, crushed toasted walnuts or pecans, cracked black pepper and sea salt flakes, smoked paprika and dried chili flakes, or finely chopped sun-dried tomatoes.
Method
- Follow Recipe 1 steps 1 through 5, but drain the curds for the full 2 hours minimum to achieve a firm enough texture to shape.
- Mix in the garlic, herbs, salt, and pepper as in Recipe 1.
- Lay a large piece of plastic wrap on your work surface. Spoon the cheese mixture onto the plastic in a rough log shape. Roll the plastic tightly around the cheese, twisting the ends to compress the cheese into a tight cylinder approximately 8 to 10 inches long and 2 inches in diameter.
- Refrigerate for a minimum of 4 hours, or overnight. The cheese needs to be cold and firm before coating.
- Spread your chosen coating ingredients on a plate or sheet of parchment. Unwrap the chilled cheese log and roll it firmly in the coating, pressing gently so the coating adheres on all sides.
- Re-wrap in fresh plastic wrap or parchment and return to the refrigerator until serving. The log will keep for up to 5 days refrigerated.
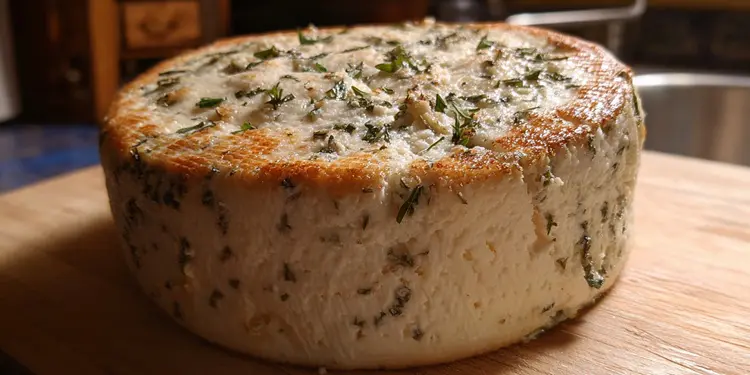 Recipe 4: Hard Aged Garlic Herb Cheese
This recipe produces a pressed, aged wheel of garlic herb cheese that is firmer, more complex in flavor, and longer-lasting than any of the soft cheeses above. It takes more time and a small amount of additional equipment, but nothing that requires a significant investment. This is practical homestead cheese making: useful, economical, and genuinely satisfying.
The aging process transforms the cheese over 4 to 8 weeks. As moisture leaves the wheel, the flavor concentrates, the texture firms, and the garlic and herb notes develop a depth that fresh cheeses simply cannot achieve.
Equipment Needed
- A cheese press or a DIY equivalent (a follower inside a PVC pipe with a weight on top, or a small cutting board with cans stacked on it over a draining rack)
- Cheesecloth
- A cheese mold or a colander lined with cheesecloth
- Cheese wax or vacuum seal bags for finishing
- A cool, humid aging space: a dedicated mini-fridge set to 50 to 55 degrees Fahrenheit works well, as does a cool basement or root cellar
Ingredients
- 2 gallons whole milk (not ultra-pasteurized)
- 1 packet direct-set mesophilic starter culture, or 1/4 cup of cultured buttermilk as a substitute
- 1/2 teaspoon liquid rennet diluted in 1/4 cup cool non-chlorinated water
- 1 full head of roasted garlic, cloves mashed to a paste
- 2 teaspoons fresh or dried rosemary, finely chopped
- 2 teaspoons fresh or dried thyme
- 1 tablespoon plus 1 teaspoon fine sea salt
Method
- Warm the milk in a large pot to 86 degrees Fahrenheit. Add the mesophilic starter culture or buttermilk, stir gently, cover, and allow to ripen for 45 minutes to 1 hour without heat. The culture is beginning to acidify the milk during this time.
- Add the diluted rennet and stir with an up-and-down motion for 30 seconds only. Cover and allow the milk to set undisturbed for 45 minutes to 1 hour. The milk will set into a firm, jelly-like mass called a gel. Test for a clean break by inserting a knife at a 45-degree angle and lifting: the curd should split cleanly with whey pooling in the cut.
- Cut the curd into 1/2-inch cubes using a long knife, making horizontal and vertical cuts through the gel. Allow the cut curds to rest for 5 minutes.
- Slowly raise the temperature of the curds to 102 degrees Fahrenheit over 30 minutes, stirring gently every few minutes to keep the curds from matting together. The curds will shrink and firm as they cook and release whey.
- Remove from heat and allow the curds to settle to the bottom of the pot for 5 minutes. Drain off most of the whey. Stir in the roasted garlic paste and chopped herbs and mix well to distribute evenly through the curds.
- Line your cheese mold with damp cheesecloth and pack the curds in firmly. Fold the cheesecloth over the top of the curds. Apply the follower and press at light pressure (approximately 5 to 10 pounds) for 30 minutes.
- Remove the cheese from the mold, unwrap, flip, re-wrap in fresh cheesecloth, and press again at medium pressure (20 to 25 pounds) for 12 hours.
- Remove the wheel from the press and unwrap. Prepare a brine of 1 cup salt dissolved in 4 cups of water. Float the cheese wheel in the brine for 12 hours, flipping once at the halfway point. The brine forms the rind and seasons the cheese throughout.
- Remove from brine, pat dry with a clean cloth, and place on a clean drying mat or wooden board. Allow to air dry at room temperature for 1 to 3 days, flipping daily, until the surface feels dry to the touch and a light rind is forming.
- Move the wheel to your aging space. Age at 50 to 55 degrees Fahrenheit with humidity around 80 to 85 percent. Flip the wheel daily for the first 2 weeks, then every other day. Wipe the surface with a clean damp cloth if any unwanted surface mold develops. After 4 weeks the cheese is mild and semi-firm. At 6 to 8 weeks it is considerably more complex and fully firm.
- Once aging is complete to your preference, apply two coats of cheese wax (melted in a double boiler and brushed on) or vacuum seal for storage. Waxed cheese will keep for several months in a cool cellar or refrigerator.
The National Center for Home Food Preservation provides guidelines on safe temperatures and humidity levels for home food aging and preservation that apply directly to home cheese making environments.
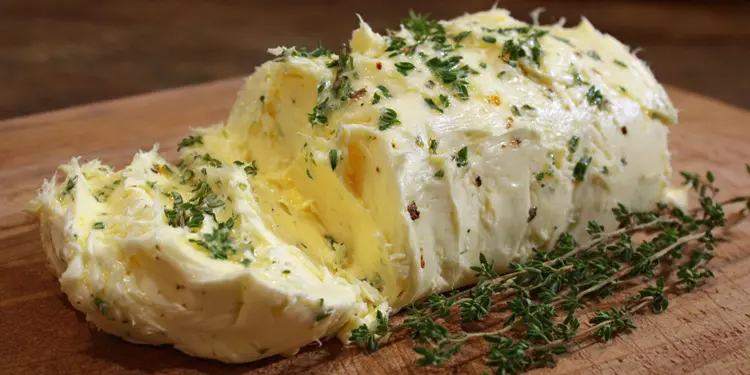 Recipe 5: Garlic Butter Cheese Spread
Garlic butter occupies the space between butter and soft cheese. It is not technically a cheese but functionally it serves many of the same purposes on a homestead table and is included here because it completes the garlic cheese spectrum from spreadable to aged. Compound garlic butter made from scratch from homemade or quality store-bought butter is one of the most useful condiments a homesteader can keep in the refrigerator or freezer.
Ingredients
- 250 grams (roughly 2 sticks) unsalted butter, softened to room temperature
- 6 cloves garlic, 4 roasted and mashed, 2 raw and very finely minced
- 2 tablespoons fresh flat-leaf parsley, very finely chopped
- 1 teaspoon fresh thyme leaves
- 1/2 teaspoon sea salt
- 1/4 teaspoon black pepper
- Optional: 1 tablespoon finely grated Parmesan for a more cheese-forward flavor
Method
- Place the softened butter in a bowl. Beat with a fork or wooden spoon until it is uniformly soft and slightly fluffy.
- Add all remaining ingredients and mix thoroughly until evenly combined. Taste and adjust salt.
- To store as a roll: turn the butter out onto a sheet of plastic wrap or parchment paper, shape into a log roughly 1.5 inches in diameter, and roll tightly. Twist the ends to seal. Refrigerate for up to 2 weeks or freeze for up to 3 months.
- To store in a crock or ramekin: pack the butter mixture firmly into a clean jar or ramekin, smoothing the top. Cover and refrigerate. Remove from refrigerator 10 minutes before serving to allow it to soften slightly.
Garlic butter stored as a log can be sliced into rounds as needed, making it particularly convenient for topping steaks, roasted vegetables, baked potatoes, or corn on the cob straight from the garden. It is also the base for the garlic cheese bread recipe below.
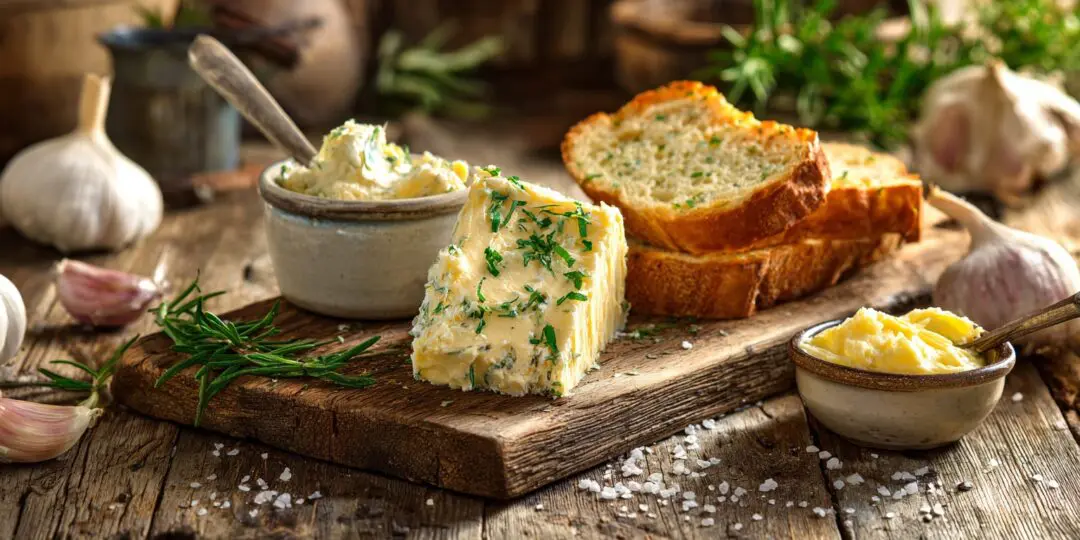
 Recipe 6: Homemade Garlic Cheese Bread
Garlic cheese bread made with homemade bread, homemade garlic butter, and homemade soft garlic cheese is a different category of food from the frozen grocery store variety. This recipe builds the whole thing from scratch and is designed to use the products already made in this guide.
The Bread
Any sturdy, crusty bread works for garlic cheese bread, but a simple homemade Italian-style loaf or a sourdough boule gives the best results. If you bake your own bread regularly, use whatever loaf you have. If you are making bread specifically for this recipe, a basic white sandwich loaf or a no-knead rustic loaf both work well. The key requirement is a crust firm enough to hold up to the butter and cheese without becoming soggy before it reaches the oven.
Ingredients for the Garlic Cheese Bread
- 1 loaf of sturdy homemade or quality store-bought bread, cut in half lengthwise
- Full batch of garlic butter from Recipe 5 above
- 1/2 to 3/4 cup of soft garlic cheese from Recipe 1 or Recipe 2
- 1 cup shredded mozzarella or a firm melting cheese of your choice
- 2 tablespoons grated Parmesan
- Fresh parsley for finishing
- Optional: red pepper flakes for heat
Method
- Preheat your oven to 400 degrees Fahrenheit. Line a baking sheet with parchment paper or foil.
- Place the bread halves cut-side up on the baking sheet. Spread a generous layer of garlic butter over each cut surface, covering all the way to the edges. Do not be conservative here: the butter soaks into the bread and forms the flavor base of the whole recipe.
- Dot or spread spoonfuls of the soft garlic cheese over the buttered surface. It does not need to cover every inch evenly. Patches and mounds of soft cheese create variation in the final texture.
- Top with the shredded mozzarella, distributing evenly. Finish with a dusting of grated Parmesan over the top.
- Bake for 12 to 15 minutes until the cheese is melted and beginning to brown at the edges and the bread is golden and crispy on the bottom. For more color on top, switch to the broiler for the final 2 to 3 minutes but watch it closely.
- Remove from the oven and scatter fresh parsley over the top immediately. Allow to cool for 2 minutes before cutting into portions. Cutting too soon causes the cheese to slide off the bread.
Variations
Pull-apart garlic cheese bread is made by cutting a whole loaf in a crosshatch pattern, stopping just short of cutting all the way through the bottom crust. Pack garlic butter and cheese into each cut, wrap the loaf loosely in foil, and bake at 375 degrees Fahrenheit for 20 minutes. Open the foil for the last 5 minutes to crisp the top. This version is ideal for sharing at a table and the pull-apart format makes portioning easy.
Garlic cheese toast is a single-serving version made in a skillet rather than the oven. Butter one side of a thick slice of bread with garlic butter, place it butter-side down in a cold skillet, top with soft garlic cheese and a little shredded mozzarella, cover the pan, and cook over medium-low heat for 3 to 4 minutes until the bottom is golden and the cheese is melted. No oven required, which matters when cooking off-grid or over a wood stove.
Troubleshooting Common Garlic Cheese Problems
The milk will not curdle
The most common cause is ultra-pasteurized (UHT) milk. The high-heat processing used for ultra-pasteurization denatures the proteins that need to coagulate for cheese making. Check the label before you buy: look for milk labeled simply as pasteurized, not ultra-pasteurized or UHT. If your milk curdles very weakly, try adding more acid in small increments and ensure the milk temperature is high enough before adding the acid.
The soft cheese is too watery
Drain longer. The texture of acid-set cheeses is almost entirely controlled by drain time. If your spread is runny or wet, wrap it back in cheesecloth and hang it for another hour. Adding a pinch of extra salt also draws out additional moisture through osmosis.
The garlic flavor is too strong after overnight refrigeration
Raw garlic intensifies significantly as it sits in a dairy product. If this is a recurring issue, switch to roasted garlic for any cheese that will be stored overnight or longer. Roasted garlic mellows and sweetens during the aging process rather than sharpening. You can also use less raw garlic initially and add more to taste just before serving.
The hard cheese developed unwanted surface mold
Some surface mold during aging is normal and not a cause for alarm. White and blue-gray molds that appear on the rind can be wiped away with a cloth dampened in a brine solution (1 tablespoon salt per cup of water). If the mold is black or the cheese smells strongly off or ammoniated, discard that wheel. To minimize unwanted mold, maintain consistent humidity in your aging space and flip the cheese regularly so no single surface stays damp for extended periods.
The cheese log will not hold its shape
The curds were not drained long enough before shaping. Return the cheese to a cheesecloth-lined strainer and drain for at least another hour before attempting to shape it again. Adding a small amount of cream cheese (1 to 2 tablespoons) to the mixture also helps it bind and hold a shaped form.
Storing and Preserving Homemade Garlic Cheese
Different garlic cheese formats have very different storage requirements and shelf lives. Knowing how to store each type correctly prevents waste and keeps your homestead dairy production efficient.
Soft garlic cheese spreads and garlic cream cheese store covered in the refrigerator for 5 to 7 days. The garlic flavor continues to develop during this time. These cheeses do not freeze well due to texture changes upon thawing. Make them in small batches you will use within the week.
Garlic butter keeps refrigerated for 2 weeks and frozen for up to 3 months with no quality loss. Sliced rolls of garlic butter can go directly from the freezer to a hot pan or onto hot bread, making them extremely convenient to keep on hand in quantity.
Hard aged garlic cheese waxed after aging will keep for 3 to 6 months in a cool cellar or refrigerator. Vacuum-sealed wheels keep even longer. Once cut, wrap the exposed surface tightly in wax paper followed by plastic wrap and consume within 2 to 3 weeks.
Garlic cheese bread is best consumed the day it is made but leftovers reheat well. Wrap cooled slices in foil and reheat in a 350-degree oven for 8 to 10 minutes. Avoid microwaving as it makes the bread chewy and the cheese rubbery.
For general guidance on safe home food preservation temperatures and storage practices, the USDA Complete Guide to Home Canning and Food Safety is the most authoritative free resource available and is directly applicable to dairy storage decisions.
Scaling Up: Making Garlic Cheese in Larger Quantities
Once you have the basic techniques down, scaling up garlic cheese production for a full homestead or a small market operation is straightforward. Soft cheeses scale linearly: double the milk, double everything else, and the process is the same. Hard cheeses also scale well up to about 4 gallons per batch without needing significantly different equipment.
If you keep dairy animals, a dairy goat producing a gallon of milk per day gives you enough raw material to make fresh garlic cheese weekly while drinking the remainder. A single Jersey cow produces 5 to 8 gallons per day, enough to supply a household with all forms of garlic cheese described in this guide simultaneously, with whey left over for livestock feed.
For market gardeners and homesteaders looking to sell value-added dairy products, check your state’s cottage food and home dairy laws before selling any homemade cheese. Laws vary significantly by state. Some states allow the direct sale of fresh cheeses from a licensed home kitchen. Others require a licensed dairy facility. Knowing the rules in your jurisdiction before you invest in equipment is the practical first step.
Frequently Asked Questions About Making Garlic Cheese
Can I use goat milk instead of cow milk for these recipes?
Yes, and many people prefer it. Goat milk produces a slightly tangier, more distinctly flavored soft cheese that pairs particularly well with garlic and herbs. The technique is identical for all soft cheese recipes. For the hard aged recipe, goat milk produces a firmer, drier wheel than cow milk due to its different fat globule structure. Reduce the rennet very slightly (about 10 to 15 percent less) when working with goat milk to avoid an overly firm curd.
Do I need rennet to make garlic cheese?
Not for the soft cheeses in this guide. Recipes 1, 2, and 3 use acid (vinegar or lemon juice) as the setting agent, which requires no rennet at all. Rennet is required for Recipe 4, the hard aged garlic cheese, because acid alone does not produce a curd firm enough to press and age properly. Liquid rennet is available from homebrewing supply stores, online cheesemaking suppliers, and many health food stores.
Can I add garlic to cheese after it has been made?
For soft cheeses, yes. You can stir roasted garlic and herbs into a finished soft cheese at any point. For hard cheeses, the garlic needs to be incorporated during the curd stage before pressing, as adding it to the outside of a formed wheel results in surface flavor only and does not penetrate the interior of the cheese.
Why does my homemade garlic cheese taste sour?
A sour flavor in acid-set cheese usually means one of two things: either too much acid was used during curdling, or the cheese was not rinsed after draining. After draining soft cheese curds, a quick rinse under cold water before adding the garlic and herbs washes away excess acid and produces a milder, cleaner-tasting cheese. For hard cheese, excessive sourness usually indicates the culture was allowed to acidify the milk for too long before the rennet was added.
How do I make garlic cheese without dairy?
Cashew-based garlic cream cheese is the most successful non-dairy substitute and is genuinely easy to make at home. Soak 2 cups of raw cashews in water for 4 to 8 hours, drain, and blend with 3 tablespoons of lemon juice, 2 tablespoons of nutritional yeast, 1/2 teaspoon of salt, and roasted garlic to taste. Blend until completely smooth, adding water a tablespoon at a time to reach the desired consistency. Refrigerate to firm. The flavor is different from dairy garlic cheese but the texture and spreadability are very similar.
What is the best garlic variety for garlic cheese?
Hardneck garlic varieties such as Rocambole and Porcelain have a more complex, nuanced flavor than softneck varieties and are generally preferred for cheese making when available. Softneck varieties including Artichoke and Silverskin are milder and more widely available in grocery stores. For roasted garlic preparations, the variety matters less because roasting mellows flavor differences. For raw garlic applications, hardneck varieties give a more interesting result if you can source them.
Final Thoughts: Garlic Cheese as a Homestead Staple
There is a reason garlic cheese shows up in food traditions across every continent. Garlic and dairy are two of the most produced and preserved ingredients in agricultural history, and combining them produces something that is greater than either part alone.
Making garlic cheese from scratch is one of those homestead skills that pays off quickly. The first batch of soft garlic cheese takes less than an hour of active work. After that, the technique is second nature and the only question is which variation to make next. The hard aged wheel takes longer but most of that time is the cheese doing its own work in a cool corner of the cellar while you are busy with everything else.
Start with Recipe 1. Get comfortable with the curdling and draining process. Make Recipe 5 on the same day for virtually no extra effort. Once those feel routine, move to the hard aged cheese and build that skill set. Within a season you will have a full garlic cheese operation running on your homestead from a single reliable source of milk and a head of garlic from the garden.
That is what self-sufficient food production actually looks like in practice: small skills stacked on top of each other until the whole system feeds itself.
Making garlic cheese at home is more than just a recipe. It is a shift in how you think about food, control, and independence.
Right now, you are learning how to turn milk, garlic, and a handful of simple ingredients into something better than anything on a store shelf. That is powerful. But it is only one piece of a much bigger picture.
Because here is the reality most people avoid:
If the supply chain breaks, the grocery store disappears overnight. No warning. No backup. No second chance to “stock up later.”
And when that happens, knowing how to make garlic cheese is valuable…
But knowing how to feed yourself entirely without the system is what keeps you alive.
That is exactly what The Lost Ways teaches.
It is not theory. It is not modern survival fluff.
It is a collection of the exact food production, preservation, and self-reliance skills that carried people through the Great Depression and long before supermarkets ever existed.
Inside, you will discover:
- How families preserved food for months and years without refrigeration
- Forgotten techniques for storing dairy, meat, and produce long-term
- Simple, practical methods to create food from what you already have
- How to build a food system that does not depend on stores, trucks, or electricity
The same mindset that lets you make garlic cheese from scratch…
Is the mindset that lets you survive when everything else stops working.
Because the truth is simple:
Skills like this are not hobbies. They are insurance.
You may also like:
Join The Self-Sufficient Projects WhatsApp Channel

Cheap and Easy to Build Root Cellar in Your Own Backyard (Video)
Freeze Dried Cheese: The Complete Guide to Storing Cheese for 25+ Years
How to Make Homemade Cottage Cheese
Ingenious Ways To Preserve Cheese At Home


