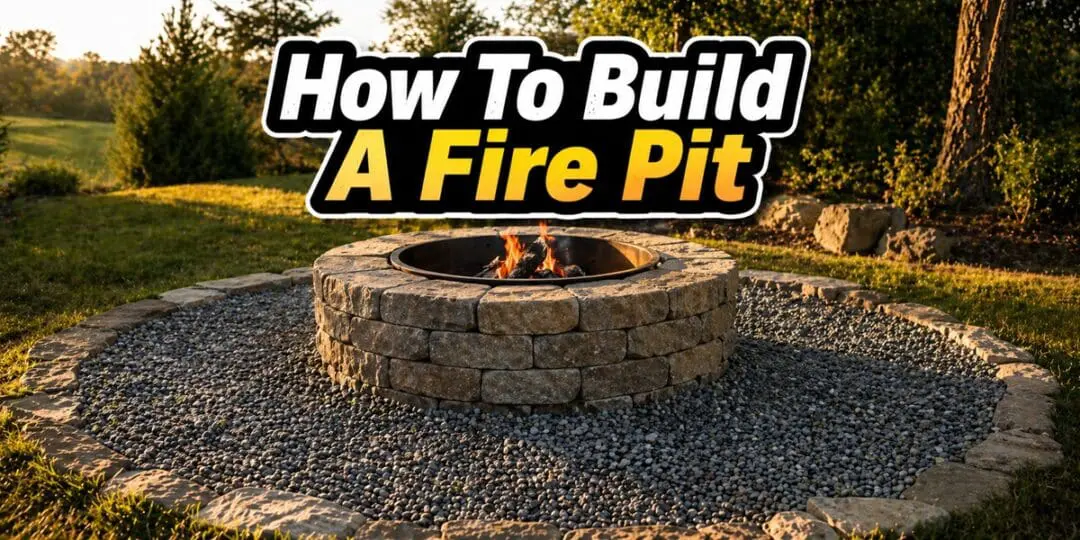
A fire pit is one of the most practical additions you can make to a self-sufficient property. It gives you a reliable outdoor cooking station, a heat source that does not depend on electricity or gas, and a place to burn brush and waste wood cleanly. Done right, it also lasts for years without needing much upkeep.
This guide walks you through the full process, from choosing your location and materials to finishing the build and using it safely. Whether you want a simple in-ground pit you can put together in an afternoon or a dry-stacked stone ring that looks like it belongs there, you will find the approach that fits your setup.
Before You Dig: Planning and Permits
The first step is not picking up a shovel. It is finding out what your local code allows. Many municipalities have specific rules about fire pit placement, size, and whether open burning is permitted at all. Ignoring this step can result in fines or an order to tear out what you built.
Check with your local fire marshal or zoning office before starting. According to the U.S. Fire Administration, most jurisdictions require fire pits to be a minimum of 10 feet from any structure, fence, or overhanging tree branch. Some require 25 feet. Know your local number before you pick a spot.
Also call 811, the national dig-safe hotline, before breaking ground. Underground utilities including gas, water, and electrical lines are buried in residential lots at depths that a basic pit excavation can reach. The call is free and required by law in most states.
Choosing Your Location
Once you know the rules, walk your property and think practically about placement. The ideal spot is:
- At least 10 to 25 feet from your home, outbuildings, fences, and overhanging vegetation
- On level or nearly level ground, so the pit sits stable and water does not pool inside
- Away from dry grass, mulch beds, or any combustible ground cover
- Upwind of seating areas when your prevailing wind is considered, so smoke blows away rather than into faces
- Accessible enough to carry firewood to without a long haul
Avoid low spots in your yard where cold air pools, as these areas tend to draw smoke down rather than letting it rise. A slight rise or open flat area with good air movement is ideal.
Choosing Your Fire Pit Type
There are two primary builds covered in this guide: the in-ground pit and the above-ground stone ring. Each has its place depending on your property, your goals, and how much work you want to put in.
In-Ground Fire Pit
This is the simplest build. You dig a hole, line it, and you are done. An in-ground pit sits flush with the surrounding ground, which makes it harder to trip over and gives it a low visual profile. It is also the easiest to hide or decommission if needed. The downside is that it is harder to cook over because you cannot easily access the fire from all sides at a comfortable height, and water can collect in the pit during rain if drainage is not addressed.
Above-Ground Stone Ring
A dry-stacked stone or block ring is the most common and versatile backyard fire pit. It holds heat well, provides a windbreak for the fire, gives you a raised edge to rest cookware on, and looks like it was built to last because it was. It takes more material and more time than an in-ground pit, but the result is a permanent feature that adds real value to your property.
This guide covers the stone ring build in full because it is the more complete project. The in-ground steps are a subset of this process.
Materials You Will Need
For a standard 36-inch diameter above-ground stone ring, gather the following before you start:
| Material | Quantity / Notes |
| Retaining wall blocks or natural fieldstone | Approximately 40 to 50 blocks for two courses at 36″ diameter |
| Pea gravel or crushed stone | 2 to 3 cubic feet for drainage base inside the pit |
| Sand | 1 bag for leveling the base ring |
| Landscape fabric (optional) | To line beneath the gravel if weed suppression is needed |
| Spray paint or marking chalk | For marking the circle on the ground |
| Steel fire ring insert (optional) | Protects stone from direct flame heat; extends wall life significantly |
| Gravel for the surround | A 2-foot wide ring of gravel around the exterior for a fire-safe perimeter |
| Shovel, level, rubber mallet, measuring tape | Basic tools; no power tools required |
What Stone to Use and What to Avoid
Stone selection matters more than most guides admit. Fire heats rock rapidly and unevenly, and certain types of stone can crack, spall, or in extreme cases explode when exposed to high heat, especially if they have absorbed moisture.
According to research from Penn State Extension, dense, non-porous stones with low moisture absorption handle heat cycles best. Good options include:
- Granite: Dense, durable, widely available as fieldstone or landscape block
- Basalt: Volcanic origin, excellent heat tolerance, common in western states
- Sandstone and limestone: Usable but more porous; avoid if the stone has been stored wet or is visibly damp
- Manufactured retaining wall blocks (concrete): Reliable and consistent; the most predictable option for a first build
Stones to avoid entirely:
- River rocks and creek stones: These absorb water in their pores over time. When heated, trapped moisture expands and can shatter the rock violently
- Slate: Tends to split along natural seams under thermal stress
- Any stone that has been submerged or stored in wet ground for extended periods
If you are sourcing stone from your own land, let it dry out thoroughly in the sun for several days before building. When in doubt, use manufactured concrete retaining wall blocks from a home improvement store. They are inexpensive, uniform, and built for this kind of application.
How to Build a Fire Pit: Step-by-Step
Step 1: Mark the Circle
Decide on your pit diameter. A 36-inch interior diameter is a practical standard: large enough for a real fire and a grill grate, small enough to manage without wasted material. Tie a string to a stake, measure out 18 inches (half the diameter), and use the string as a compass to mark a circle with spray paint or chalk. Mark a second circle about 12 inches outside the first to define your block footprint.
Step 2: Excavate
Dig out the interior of your marked circle to a depth of about 6 to 8 inches. The goal is to remove the top layer of organic soil, which can smolder, and create a stable base below the frost line in your area if possible. Keep the excavated soil nearby for backfilling around the base later.
For the exterior, remove the top 2 inches of sod and soil in the ring where your blocks will sit. This gives the first course a stable, flat foundation.
Step 3: Lay the Drainage Base
Fill the bottom of the pit with 4 to 6 inches of pea gravel or crushed stone. This layer handles drainage. When it rains, water passes through the gravel and drains into the soil below rather than pooling in the bottom of your pit and sitting against the stone walls. Tamp it down lightly and check that it is reasonably level.
Step 4: Level and Set the First Course
Spread a thin layer of sand over the surface where your first course of blocks will sit. Use a level to make sure each block sits flat. This first course is the most important part of the whole build. If it is out of level, every course above it compounds the problem.
Set your blocks end to end around the circle. For a 36-inch diameter pit using standard 12-inch retaining wall blocks, you will need approximately 9 to 10 blocks for the first course. Adjust spacing evenly and check level across multiple points as you go. A rubber mallet helps seat blocks without breaking them.
Step 5: Stack Additional Courses
Stack your second and third courses, offsetting the joints so no two vertical seams line up directly above each other. This offset, called staggering, is what gives a dry-stack wall its structural integrity. Two to three courses is sufficient for most fire pits, bringing the wall to roughly 12 to 18 inches above grade depending on your block height.
No mortar is needed or recommended for a basic fire pit. Dry stacking allows the wall to flex slightly with thermal expansion and contraction, which actually makes it more durable than a mortared wall in this application. If you want a more finished look, a single bead of high-temperature construction adhesive between courses can lock things in without making the wall permanently rigid.
Step 6: Add the Gravel Safety Ring
Extend the area around the exterior of your pit outward by at least 2 feet and cover it with a 2-inch layer of pea gravel. This non-combustible perimeter prevents the grass or ground cover directly around the pit from catching embers and gives you a clean, well-defined space to work around the fire. The National Fire Protection Association (NFPA) recommends keeping a non-combustible zone of at least 2 feet around any outdoor fire source as a baseline safety measure.
Step 7: Install a Steel Fire Ring Insert (Recommended)
A steel fire ring insert sits inside the stone ring and acts as a liner. It keeps the direct flame and heat from contacting the stone walls repeatedly, which significantly extends the life of your stone. It also contains ash more neatly and makes cleanup easier. Insert sizing is typically sold to match standard pit diameters; a 30-inch insert fits well inside a 36-inch stone ring, leaving a small gap between steel and stone that allows airflow.
If you skip the insert, your stone pit will still work fine. Just expect that after two or three seasons of heavy use, the inner faces of the blocks closest to the fire may show heat stress. This is cosmetic, not structural, in most cases.
Step 8: Test Fire
Before you cook anything over the pit or use it for an evening, run a small, low test fire. Use dry seasoned wood and keep the fire modest for the first burn. Watch for any blocks that seem to shift, any cracking sounds, or any smoke coming from unexpected places. Let the fire burn down completely and check the structure once it has cooled. Tighten any blocks that shifted slightly. After one good test fire, the pit is settled and ready for regular use.
In-Ground Fire Pit Variation
If you want a simpler build without block stacking, the in-ground version uses the same excavation steps but skips the stone ring. Dig a pit 12 to 18 inches deep and 36 inches in diameter. Line the walls with a single course of flat fieldstone or fire brick set vertically, or skip the liner entirely if the soil is firm and non-sandy. Fill the base with gravel for drainage. Done.
The tradeoff is that an unlined in-ground pit will erode and widen over time, especially after rain. A lined in-ground pit holds its shape much longer. Either way, create the same 2-foot gravel perimeter around the rim for safety.
Fire Pit Safety Rules
A well-built fire pit is only as safe as how you use it. These are the non-negotiable basics:
- Never leave a fire unattended. This is not a suggestion.
- Keep a bucket of water or a garden hose within reach at all times when the fire is burning
- Never burn treated lumber, plywood, OSB, particleboard, painted wood, or trash. These release toxic compounds when burned
- Burn only dry, seasoned hardwood for a clean, hot fire with minimal sparks
- Keep children and pets at a safe distance from the pit edge at all times
- Do not use accelerants like gasoline, lighter fluid, or alcohol to start or boost a fire in a stone pit
- Fully extinguish the fire before leaving. Drown it with water, stir the ash, and drown it again. Coals can stay hot for hours after the flames are out
- Check local burn bans before every use, especially in dry seasons. Your county fire department or state forestry service website will have current restrictions
Cooking Over Your Fire Pit
One of the primary reasons to build a fire pit on a self-sufficient property is cooking. A few pieces of simple equipment make your pit a functional outdoor kitchen:
- A heavy-duty swinging grill grate that mounts on a post beside the pit lets you swing food over or away from the fire without handling a hot grate
- A flat cast iron grill grate resting on the stone walls works for most grilling; the wall lip supports the grate on both sides
- A cast iron Dutch oven with legs can sit directly on coals for slow cooking, stews, bread baking, and more
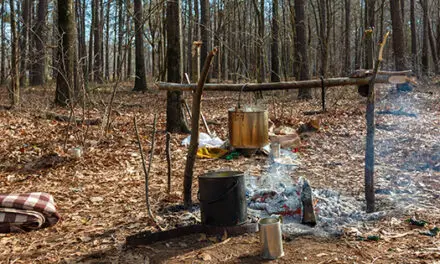
- A campfire tripod with a hanging hook suspends a pot directly above the flames for boiling water or soup
For the best cooking fire, let the wood burn down to a deep bed of coals before cooking. Flames are unpredictable and uneven. Coals provide steady, consistent radiant heat that is far easier to cook over. Hardwoods like oak, hickory, apple, and cherry produce the best cooking coals.
The USDA Forest Service recommends using only local firewood where possible to avoid transporting invasive insects and tree diseases that can spread to new regions through firewood.
Maintaining Your Fire Pit
A stone fire pit needs very little maintenance, but a few seasonal tasks will keep it in good shape for years:
- Remove ash after every few uses. Ash retains moisture and accelerates deterioration of the stone and any steel insert
- At the start of each season, check every block for cracks, spalling, or shifting. Reset any blocks that have moved and replace any that show deep cracking
- If you have a steel insert, wire-brush it in spring to remove rust, and apply a light coat of high-temperature spray paint or stove black if needed
- Top up the interior gravel layer every year or two as it compacts and settles
- Cover the pit with a metal or stone cap during extended periods of rain to keep water from saturating the base gravel and surrounding stone
Common Mistakes to Avoid
Most fire pit failures come down to a handful of preventable errors:
Using River Rock
This is the most common and most dangerous mistake beginners make. River rock looks great and is free if you have a creek nearby, but moisture trapped inside the stone can turn a campfire into a small explosion. Use dry fieldstone, granite, or manufactured block.
Skipping the Drainage Layer
A pit without a gravel base holds water. Standing water inside your pit corrodes steel inserts faster, keeps ash wet and heavy, and can saturate the surrounding soil in ways that destabilize the wall base. Four inches of gravel costs almost nothing and solves all of these problems.
Building Too Close to Structures
People consistently underestimate how far embers travel. A 10-foot setback is a minimum, not a recommendation. On a breezy evening, embers from an open fire can travel 20 to 30 feet. Build with distance to spare.
Making the Pit Too Large
A 36-inch diameter is about right for a backyard fire pit. Larger pits require significantly more wood to fill with fire, are harder to cook over because the center becomes unreachable, and create larger ember fields around them. Bigger is not better here.
Neglecting the First Course Level
If the first course is not level, the wall will lean or shift as courses are added. Take your time on the base. Everything above it depends on it.
Remember
A fire pit gives you heat, cooking, and a way to stay operational when the grid is down.
But here’s the part most people miss…
A fire pit is just one piece of a much bigger system.
If the power goes out for days—or longer—you need more than a place to cook. You need water, energy, food systems, backup plans, and the kind of setups that keep working when everything else stops.
👉 That’s exactly what No Grid Survival Projects was built for.
Inside, you’ll discover how to:
• Build low-cost systems that work with zero electricity
• Create reliable off-grid cooking, heating, and water solutions
• Turn simple materials into long-term survival infrastructure
• Set up your property to stay functional no matter what fails
Your fire pit is a great start.
But real self-sufficiency is when your entire setup keeps running… even when nothing else does.
Final Thoughts
A fire pit is not a complicated project. With a free afternoon, a load of block or stone, and a bag of gravel, you can have a fully functional outdoor fire station on your property by the end of the day. The key is choosing the right location, using the right materials, and taking the time to level the base properly.
Once it is built, it pays back that investment every time you use it, whether that is for cooking, warmth, processing brush from a clearing project, or simply having a reliable heat source that does not depend on anything outside your property line.
Build it solid and it will outlast most things in your backyard.
You may also like: 
Join Our Homesteading WhatsApp Community!
Why The Amish Make Ash Circles Around Their Plants (Video)
DIY Smokeless Fire Pit: How to Build One That Actually Works (Step-by-Step)
How to Start a Fire with a Sharpie Marker
How to Make a Dakota Fire Hole That Burns Without Smoke


