Some foods are best served cold, but most are meant to be eaten hot. When electricity is down, or it ends up costing you a fortune, you’ll just make do with cold or room temperature food at best. But, what if there is a way to use the sun to heat up your meals?
This small DIY solar oven is powerful enough to cook an egg and heat up your leftovers.
Don’t throw away that pizza box, things are about to get very toasty.
Step 1
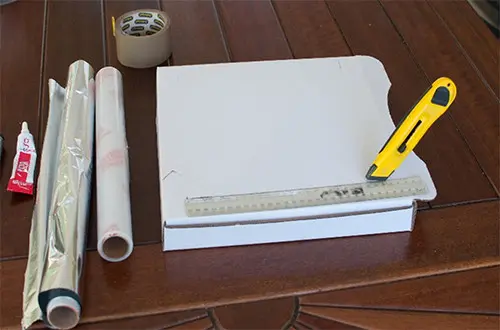
You are going to need the following items to get your oven hot enough.
- Aluminium foil to cover the lid and the base of the box.
- A piece of black paper or cardboard to fit inside the base of the box.
- Cling-wrap to seal the cut out in the lid.
- Tape or, if you prefer glue, to stick the cling-wrap to the box
- A ruler or a straw to hold the lid in position.
Step 2
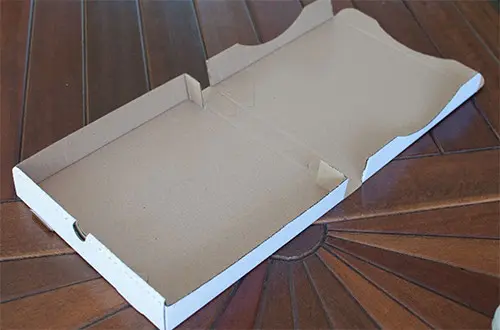
The lid needs to be cut open on the three sides, leaving about an inch all the way around.
The easiest way to do this is to use a plastic ruler and hold it against the side of the box, and use it as a guide for the knife. Cut the three sides of the box leaving the hinged sign uncut. The width of the plastic ruler was the ideal size for leaving a margin around the lid.
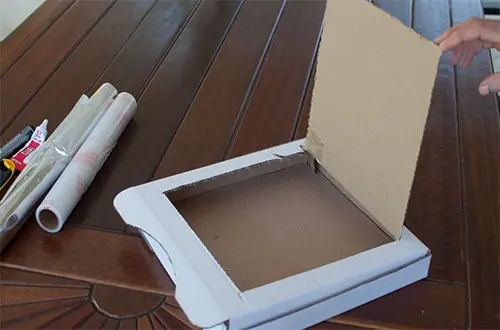
Once the three sides have been cut gently, fold the inside section of the lid up, to form the panel that will reflect the sunlight into the box.
Step 3
Now you have the cut out completed, the most difficult part of the project is done.
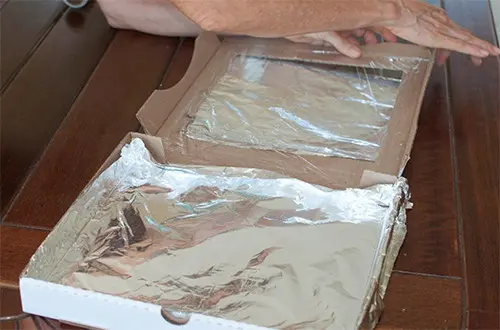
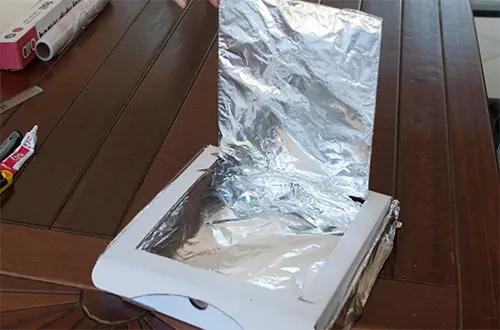
The lid needs to be covered with aluminium foil, and so does the base of the box. It is important to try to keep the foil as flat as possible, because any wrinkles will reduce the efficiency of the foil.
To secure the aluminium foil to the lid and the interior of the base, you can use glue, but I found sticky tape to be far easier.
Step 4
Now that the aluminium foil is secured to the lid of the box, you will need to line the base of the box with another piece of aluminium foil.
You can simply fit the foil in the base of the box and overlap it on the sides.
Next you will need to fit a black piece of paper or cardboard in the base of the box.
A piece of cardboard painted with black board paint was our chosen way of getting this done, but any black paper will do.
Step 5
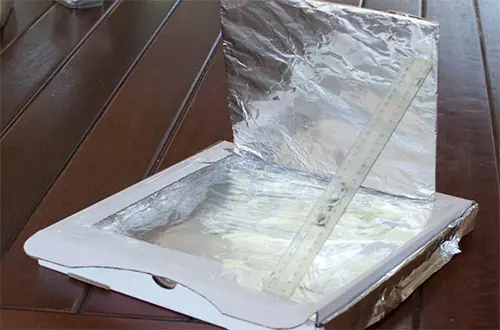
Now you will need to seal the box. To do this, two pieces of cling-wrap are required. Again, I found using sticky tape was easier than glue, but you decide what is more comfortable for you.
One piece of cling-wrap must be fitted to the inside of the lid and the other piece is fitted to the outside of the lid. This is to ensure that the heat is trapped inside the box.
Step 6
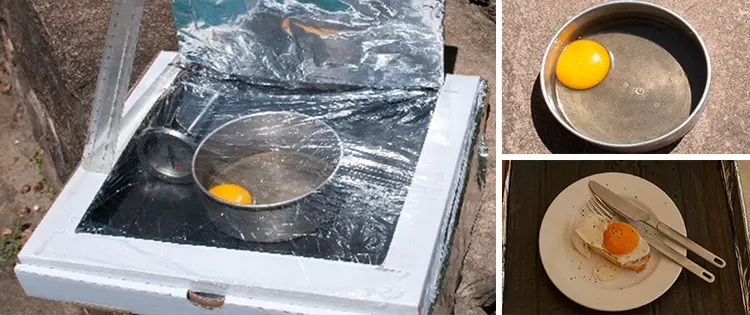
With the cling-wrap in place the oven is ready for action. Now you will need to find a sunny spot sheltered from the wind. The handy plastic ruler that was used for the lid cut out, can be brought back into use now, by sticking a piece of sticky tape to each end of the ruler and using this to position the reflector lid of the box. This will ensure that the sun rays are directed into the box.
Step 7
To test out the efficiency of the oven, an egg was placed inside, together with a thermometer, so the temperature could be measured. I was amazed at how fast the egg began to cook, and the temperature inside the oven got to almost 200 degrees Fahrenheit.
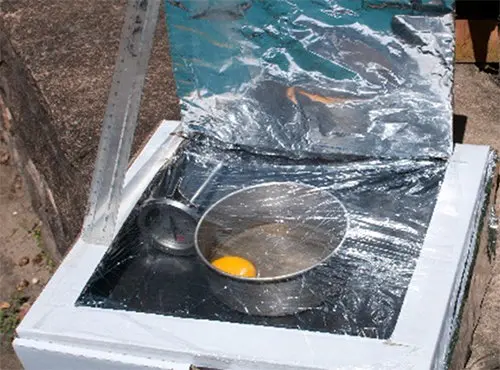
Final Step
And now for the best part: the egg is cooked and an unexpected late morning snack is ready.
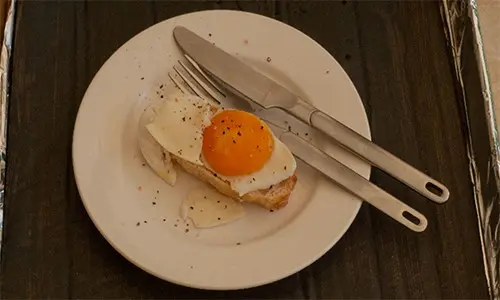
It is difficult to comprehend just how powerful solar energy can be. Perhaps a timely reminder that sunscreen is not something to be taken lightly.
This little DIY basic oven from a pizza box is more than capable of heating up the left over pizza. It is easy to make and it comes in handy. Enjoy!
You may also like:
 DIY Raised Beds For Your Backyard
Cheap and Easy to Build Root Cellar in Your Own Back Yard (Video)
25 Powerless Appliances for Your Homestead Kitchen

