The goal of simplifying my life, led me to try and declutter the interior of my home and make space around the garden.
The first assignment I had for myself was to remove all the tools which were laying around in the house.
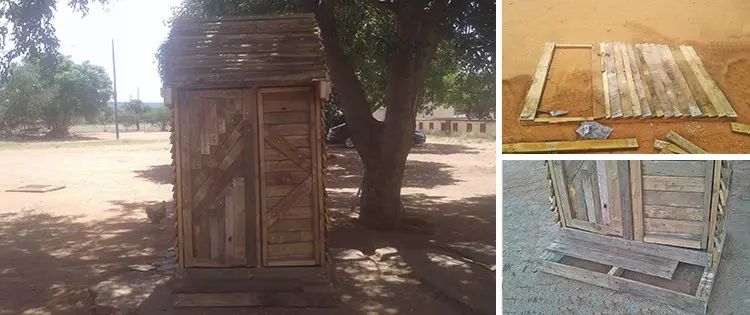
Because I don’t have a workshop or a barn, this meant that I had to build a small storage shed in my backyard, to store all these items. If perhaps you were looking to do the same, I have put down all the steps for you to follow. There are also other possibilities to build a storage shed, however I found this one to be a very cheap, simple and effective way to build it.
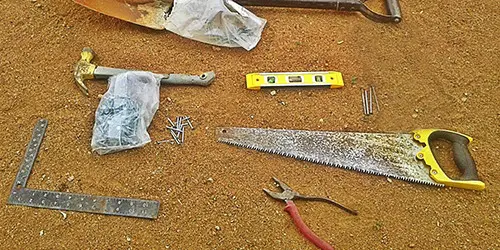
Required Tools For The Build
These are pretty standard and easy to get: hammer, tape measure, 90 degree ruler, saw, pliers, level.
Required Materials
Since this shed will be made from wood pallets, the majority of items come from there: I needed 10 wood pallets for my shed.
Extras: a pack of 3 and one of 4 inch screws, wooden frames, wooden rafters, varnish or paint and door knobs, if desired, in the end.
The Step-by-Step Process For Building The Small Storage Shed
- Map out the structure of the back part of your shed
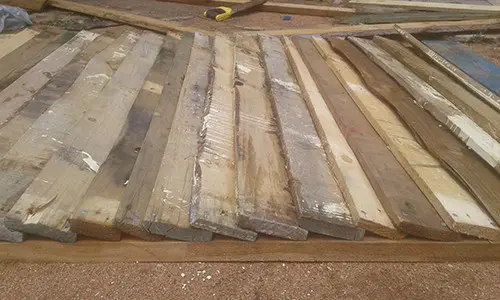
- Start filling up the rectangular structure
Remove all screws from the pallets with a pliers and a hammer. Then fill the inner side of the rectangle with lumber.
Start filling up space in the rectangular structure, by placing one lumber over another. This is done so that water cannot enter inside when it is raining.
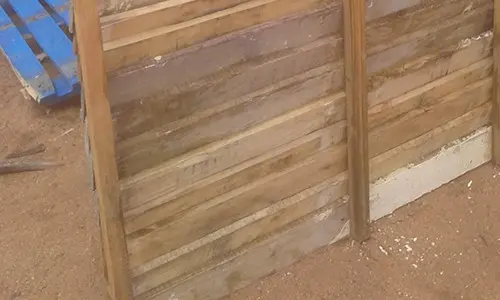
- Elevate the back of your storage shed that you just finished
Upon finishing the back part of your storage shed, elevate it and see if it is properly aligned.
- Create the frame of the front part of your shed
The back is now finished… We now move on to creating the frame of the front part of your shed.
Start by connecting the bottom part of the back and front, followed by the top. Doing this, will result in your structure being able to stand on its own without any support.
Make sure it is equal in length with the back part.
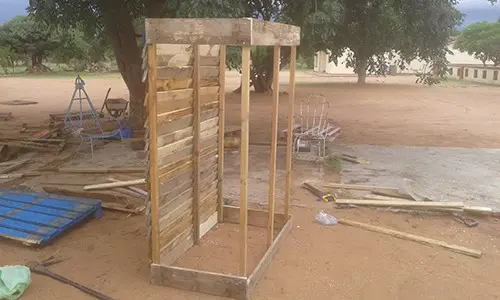
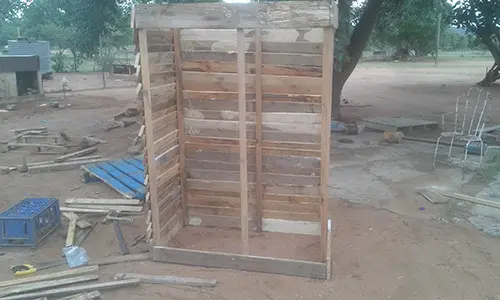
- Close the sides of the frame
Because the frame is set, it is now easy to fill the sides with lumber using the 3 inch screws.
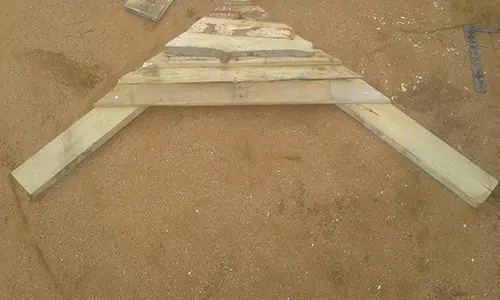
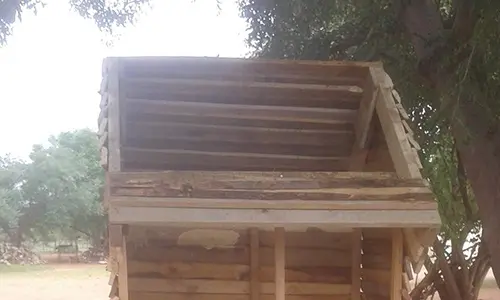
- Start creating the frame of the roofing
You are now done with the base structure of your backyard storage shed. You are going to have to start creating or mapping out the roof.
Having done that you will move on to connecting all the pieces of lumber. Remember the one-on-top-of-the-other rule we have been using to keep out the rain.
After finishing the first part of your roofing base, create an identical base to the one you created first.
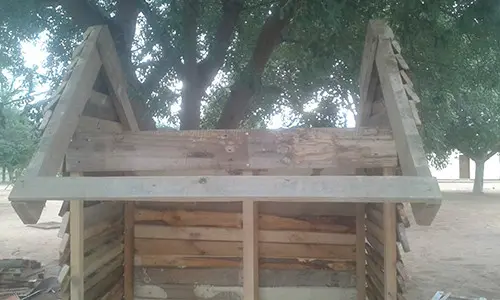
- Place the two roofing frames on the top of your base shed
Having finished creating the two roofing frames you will have to place them on top of the base shed that you created earlier.
Now connect the two frames starting from the front to the back. Fill up the remaining space of the roof with lumber. Also insert some screws diagonally, where the roof touches the top of the frame.
- Cover the remaining negative spaces
After finishing the roof, you will find that you are left with negative spaces left by the roof itself, and the base of your shed. You will have to cover them so that rainfall does not enter your shed. And also this will strengthen the connection between the roof and the shed walls.
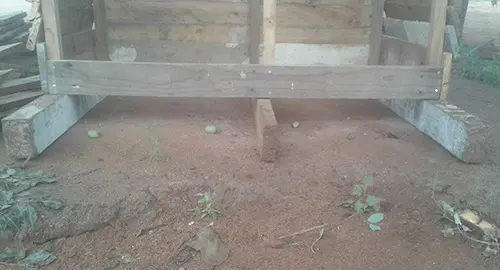
- Place your shed on top of rafters
This process will need for you to ask somebody for help. You need to lift the shed and put it on top of the wooden rafters.
Fill the bottom part of the shed with lumber so the floor will be finished.
Note: This step can be done before the building of the roof, whilst the materials and the rest of the structure are not yet heavy, or right at the beginning, you could build it straight on top of them. However, my brother helped me, I thought this way would be easier.
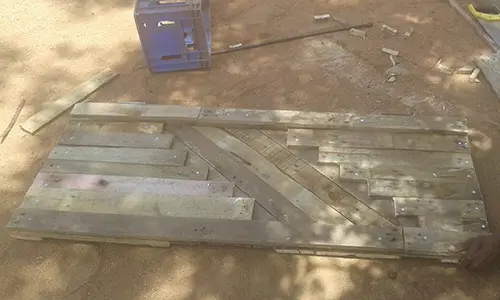
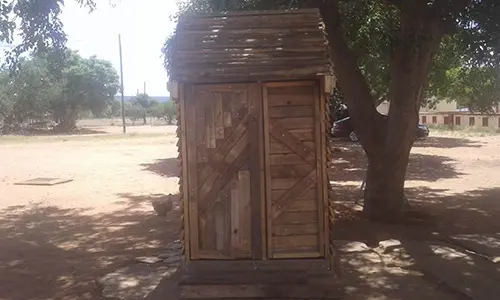
- Map and create your doors and install them
Start by creating the frame of your first door and filling it up with lumber. Move on to the second door.
After that, you have to screw in your hinges and install the doors.
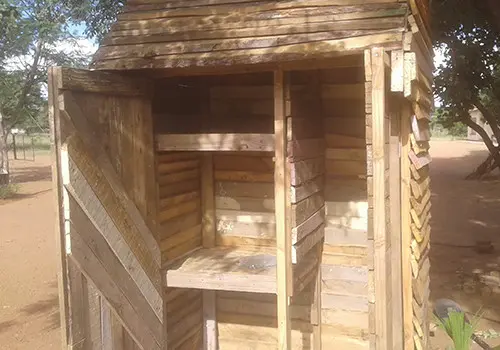
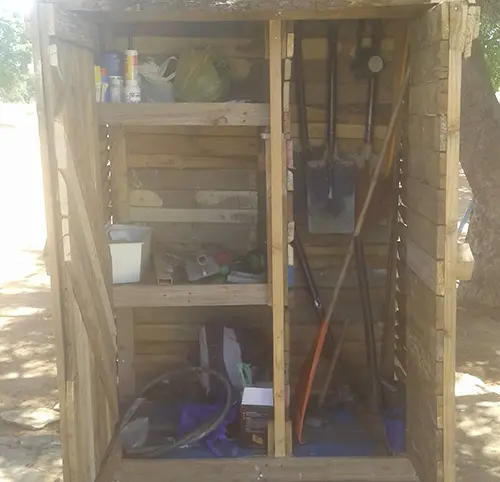
- Construct Your Preferred Interior
I made my model divided in half. One part for the larger or longer objects, the other for shelves and space to hang smaller tools.
I filled up the mid area with lumber to complete the shelf in one half of the shed, starting from the bottom to the top.
Then went to the other side and hammered in some screws where I hang some of my larger tools. The advantage of screws is that you can easily take one out and insert it again in another spot, for a different tool; no mapping required.
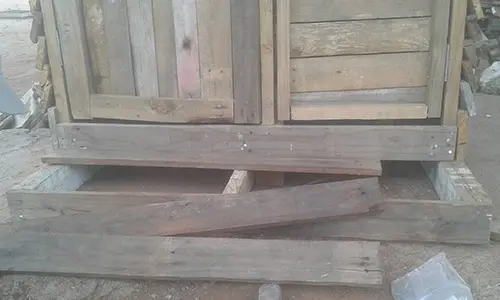
- Construct the outside floor
You have three rafters protruding from underneath your shed. Get some lumber and cover them so that your shed is complete. Your shed will have better foundation if those rafters are longer and the flooring is essential to keep the base dry when it’s raining.
- Finishing touches
Add two doorknobs. Since I don’t need to lock this shed up, I don’t need a sophisticated and safe mechanism.
Varnish or paint the shed, so it will not get damaged from the sun or rain.
Related: 25 Wood Craft Projects You Should Have In Your Backyard
After you have finished this DIY project, start using it by collecting the tools and place them in their specific designed places.
Depending on your personal budget and preferences, you can add roof tiles, windows if you make it bigger (in this case you need longer logs, not pallets), etc.
Keep in mind that this shed is not intended to have a nice design. I built it from some leftover pallets I had, in order to have my tools organized in one space.
Also regarding the foundation, please note that this type of shed can be easily moved in any corner of your backyard if needed. So there isn’t a solid and finished foundation on which you build the shed. Make sure the location of the shed will be safe and solid.
This shed was built for my personal use and it does its job perfectly. Where and how do you keep your tools?
You may also like:
16.000 Wood Working Projects You Can Add To Your House (Video)
How To Make A Self Feeding Fire
The 10 Best Trees For Homesteaders
What To Do If You See A Bat On Your Homestead


This is really neat, thank you! I would be proud to have a couple of these for different things. Plus, could be done for free! GREAT idea!
Good afternoon why its it that am unable to print from your presentation
Hi Levi, Thank you for reaching out.
At this moment we do not have a “print this article” button, however your feedback will be put to good use. You could save the webpage and print it, but the payout will not remain the same.
God bless,
The Self-Sufficient Projects Team