There is a gentle dance when fresh herbs are added either as part of the dish, or generously sprinkled as a garnish to form a taste and visual duet of delight. Fresh herbs have a life to them, that is absent from those that have rested for too long in a packet in the refrigerator and have lost their bounce and energy.
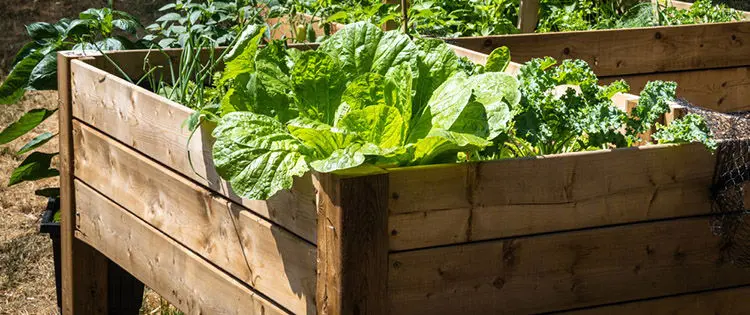
A raised bed for herbs is a wonderful idea to bring a freshness of flavors to your table and enhance the most ordinary of meals, and transform them into a gastronomic delight.
And, best of all, herbs are easy to grow and your hard work will be rewarded in a surprisingly short space of time.
The Advantage Of A Raised Bed
Raised bed gardening makes things so much easier to grow and look after whatever it is you want to grow. Let’s face it: crawling around on the ground with the fork in your hand is not the top-ranking thing to enjoy in the garden. And it gets worse, because it won’t only be you crawling around the flora in your garden, but hungry moles will find a way to nibble at your almost award-winning crop, long before you have had the chance to harvest.
The solution is the raised bed, and in years to come when getting down on hands and knees becomes a little more difficult, you will congratulate yourself on your incisive forethought. The moles will begrudgingly move off to other pastures muttering about the mean-spirited raised bed gardener with the top-quality vegetables.
Required Materials For A Raised Bed
Raised beds are easy and quick to build, and timber is the most common material used. Two by six or two by eights are the recommended sizes of timber. The overall size of the bed is dependent upon the space available, but generally the width of the bed is governed whether access will be from one or two sides, and if only one side will provide access then the maximum width will be the maximum length of your comfortable stretch.
Normally, this would be not more than three foot. The maximum length is limited to the strength of the timber sides, so six to nine feet is probably as long as one could go without introducing additional supports; because the fill inside the bed will result in some sideways stress on the planks.
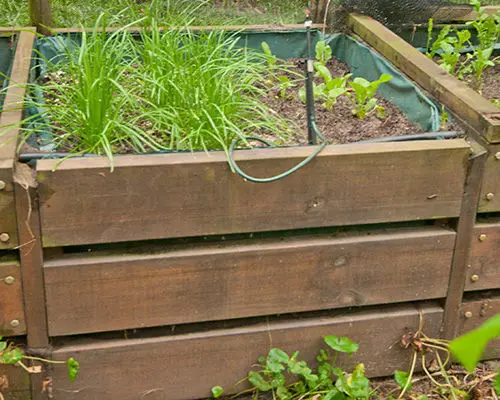
The ideal height of the top of the bed is around knee height. This will allow for three or four inches of gap between the top of the soil and the lip of the bed. There is some merit in lining the inside of bed with shade cloth, and ten percent cloth, is quite adequate to keep out the hungry moles and other unwanted visitors. The model below is not the one from my backyard, it is presented just for you to see the bottom structure.
What Goes Into The Raised Bed?
The starting point here is to measure the internal dimensions of the bed. What is required is the volume, and for that, you need to multiply the height by the width and the length, so three feet wide by two feet high by eight-feet-long bed, will have a volume of 3 times 2 times 8, which would require 48 cubic feet of fill.
It is critical to use compost and soil, and here the advice of your local gardener or landscape specialist will come in handy, because the quality of your crop is largely dependent upon what you put into the bed. So take care and follow the advice of your local specialist. Or, if you know already how to compost, it is perfect!
Related: The Ultimate Guide To Composting
What To Plant
The long-awaited moment has arrived, and now the bed lies ready for the introduction of your first crop. If there is one rule that should be at the very top of list it is this: plants grow and get big, and if they are too close to each other then problems arise. Not only will the plants crowd each other out and result in stunted growth, but the closeness of the foliage will make it an ideal venue for insects that you don’t want to entertain.
So rule number one is to allow enough space between plants, and concentrate on having replacement seedlings ready to introduce when required.
If the bed is going to be used for herbs, then there are a few rules to follow. Herbs are generally divided into two groups for the purposes of raised bed planting.
Typically, at the back of the bed will be the bushier herbs like rosemary and sage and basil. They will be there for a couple of seasons, and perhaps a better place for them is in pots on their own; however if they form part of the bed, they should be at the back to allow for the smaller herbs to be tendered in front of them. It is also important to take into consideration the time from planting to harvesting for some herbs. Coriander, or cilantro, is going to be harvested fairly quickly in comparison to the rosemary as will parsley. Take care as well when dealing with aggressive crops like lemon grass which will tend to take over an area in a very short space of time.
Other herbs like thyme, oregano and marjoram, hug the ground and are low growing herbs that are so frugal in their requirements, and yet so graceful in their contribution to the table.
Somewhere in every good restaurant will be a couple of raised beds filled with fresh and vibrant herbs. And every so often, the fleeting image of a sous chef rushing out to harvest a few leaves of a required herb to compliment a dish, will tell you all the work and effort that went into making the raised bed was so very worthwhile.
How To Build A Raised Bed
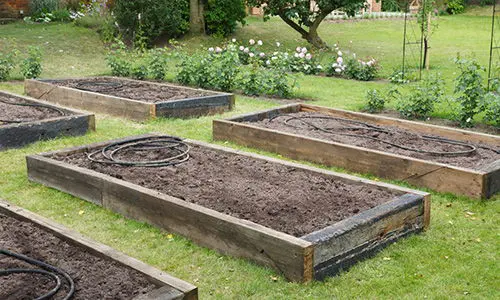
It will make things a lot easier if the area where the raised bed garden will be built is leveled off. And another thought to bear in mind, is that once the first raised bed is completed, there is every chance that additional beds will be added in the future. So time spent planning a complete garden, will make the project run smoothly.
Having the area leveled is important, but not as important as the amount of sunshine that will be available during the growing season. Check carefully that there are no trees nearby that will create substantial shadow over the raised bed, as this will have a negative effect on plant growth.
So, when deciding how big the box is going to be, the first step is to cut the long sides to length. And if possible, use bought lengths where the off cut from the length will be long enough to use for the width. For example, if your bought length is 8 feet, then a bed size of five feet by three feet, will be the most economical. Also bear in mind that four legs will be required. Normally pieces of two by two and a little longer than the height of the box will suffice. It is better to attach the legs to the longer sides, and then assemble the box in position by attaching the smaller side pieces. Remember that the legs should be fixed inside the longer lengths two inches from the end to allow for the fixing of the side pieces.
With the box assembled, check that the sides are square and that the entire box is leveled, both on the long length and the shorter width. If a protective coating is going to be applied, this is the stage for such an application. A plastic liner fixed to the insides of the box is a good idea, as is a permeable ground cover. Twenty percent shade cloth is quite adequate for a ground cover. With everything in place, it’s time to choose the best materials to utilize to fill the box.
The easy way to calculate the total amount of fill required, is to multiply the length by the width by the height which will provide a cubic foot amount. As an example, if the five by three box mentioned above is two foot high, it will take thirty cubic feet of fill. (Five times three times two.)
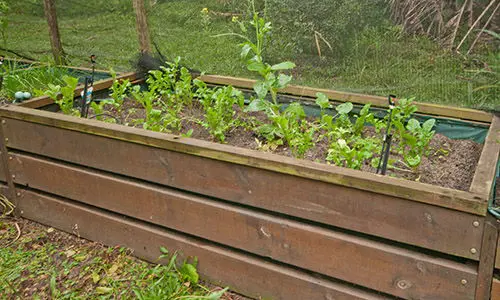
Another element to consider is irrigation in the raised bed. A point to consider, is that plants differ in their water requirements, so the ability to alter the supply of water within the box is a distinct advantage. Also, consider the situation if additional boxes are added in the future, and ensure that it will be easy to extend the irrigation system accordingly.
It is all a matter of fine tuning what the garden can produce and what the kitchen demands, but how good is it to go out to the garden and pick fresh herbs even for the simplest of meals?
Freshly picked herbs tell so much about the care taken in the preparation of the meal. And this can be made easily and safely with the help of a raised bed.
You may also like:
 Boost Your Soil Quality With This Compost
If You See This Plant in Your Backyard, Burn It Immediately! (Video)
How to Build a Water Purification System in 10 Minutes
How to Adjust the pH in Soil and Water for Abundant Harvests


Adding ollas to those raised beds for irrigation would make life that much easier.
I was very surprised to find no mention to use UNTREATED lumber. I built a large bed out of old treated 2 x 8 pine boards. Folded it with good dirt. Beautiful garden first year then realized I made a terrible mistake as the old lumber was treated with arsonic. All a waste.
I did the same thing and was told by a friend. But then I later learned Arsenic is no longer used in pressure treated lumber.
I was interested in the Easy Cellar concept but the video is soooooo long and needs to get to the point sooner. I already have the Self- Sufficient Backyard book. Thank you for that.