There are plenty of reasons why you may want to have an outdoor oven: it is great for hosting gatherings, it keeps the temperature of your kitchen lower in the warmer months, and it adds amazing appeal to your backyard. Whatever your reason is, there is no need to go on the hunt for a specialized craftsman – you can build this yourself with easy to find materials and the time you have on your hands.
If this is the dream you want to turn into reality, let’s get started!
Materials Needed
Before you go hit up the building supply store, make sure that you have any needed permits. You may live in an area where they are not required but that is the exception to the rule. You wouldn’t want to have to tear down all your hard work and start over again just because you didn’t get a permit.
The size that you are going to build your oven will depend on the amount of space that you have and the budget you are working with. There are a variety of sizes and shapes which are simply personal preference, but we are going to use just a simple plan that will only take you a few steps to build:
- 1.5” x 24” plain steel bar ¼” thick x 4
- 8” x 12” concrete wall blocks x 18
- 16” x 16” square concrete paving stones x 4
- 12” x 12” square concrete paving stones x 4
- standard paving bricks x 47
- 8” x 16” paving stones x 6
Prepping Your Foundation
 Decide where you are going to put your oven and how large it is going to be. Make sure that you are placing your oven where it is away from other buildings, trees, or other flammable materials. Put down a load of 5/8 gravel and spread it around evenly. Rake it flat and use a level to ensure the depth is the same all around.
Creating The Foundation Base
The most important thing is that you have a solid fireproof base. Concrete pavers are your best bet for strength. Simply place four 16” x 16” concrete pavers in a square and use a level to ensure that they are completely even.
Laying Your Foundation
Place six 8” by 12” stone bricks in the middle of your base.
Try to make sure they are perfectly centered. Now your first layer is done! Add another layer of six 8” by 12” stone bricks, turning the pieces so they are horizontal instead of vertical.
Continue adding layers, remembering to change the direction until you have reached your desired height.
Always finish off your last layer with the bricks facing the same direction as the bottom layer.
Related: 25 Wood Craft Projects You Should Have In Your Backyard
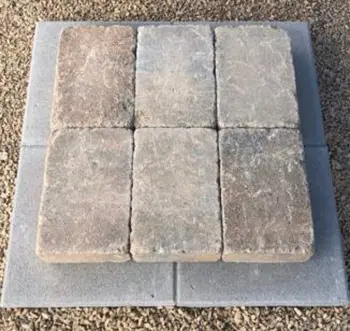
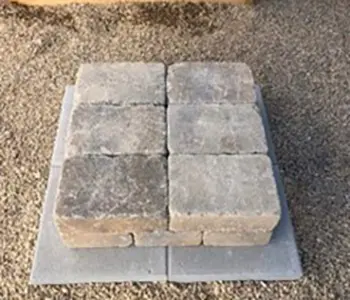
Create The Oven Base
Create the base for your oven by laying the four 12-inch x 12-inch square stone concrete pavers on top of the bricks.
Do not wedge them tightly together. Try to leave at least ¾ of an inch between them so that air can flow freely.
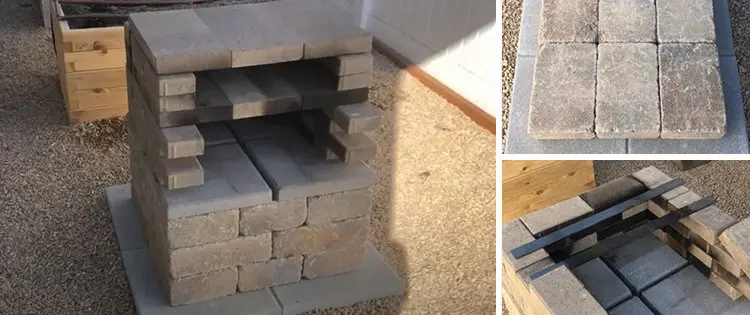
Build The Oven
Next you are going to work on building the oven itself. For this step you are going to be building 4 layers of bricks, followed by metal braces and the 8” by 16” paver stones.
For the first of the four layers you will need seven bricks. Three will be placed along the back and two will be placed down each side, basically like a square horseshoe. For the second level you are going to be using eight bricks. Two of them will go along the back and three will be placed down each side. Repeat the first two steps for the next two layers.
Related: Easy DIY Winter Doghouse
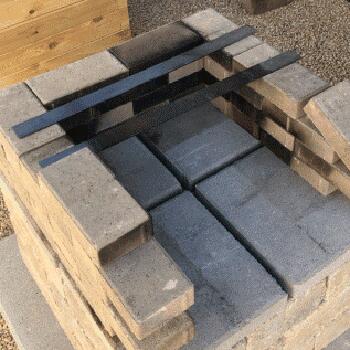
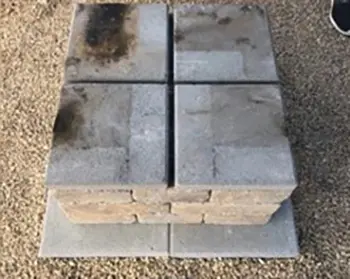
Now you are going to be adding the top part of the oven. You will need two pieces of the metal bar, three of the 8” by 16” pavers, and three bricks. Lay down your pieces of metal bar first, with approximately 8” in between them near the back of the oven. Place three bricks along the back of the oven and push the middle one back at least an inch to allow for good airflow.
Then place your three pavers on top from back to front. Next you are going to place another layer of bricks on the top, three of them along the back and two of them along each side. Repeat the brick laying procedure one more time. Layer eight is where you will use the remaining two pieces of metal. Again, you will want to space them about 8” apart. The last thing that you will need to do is use the remaining pavers to create a top.
Using Your Oven Safely
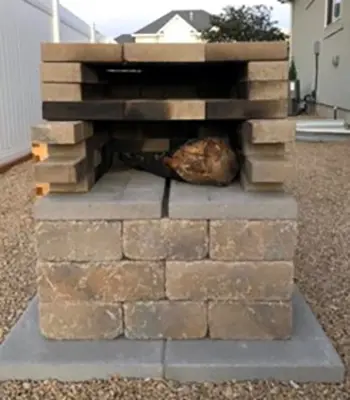 Once you are ready to test out your new oven, expect that it will take about twenty minutes for the heat to transfer to the bricks uniformly. Build your fire to a size that is appropriate for your use.
For example, once the oven is hot enough, it should take less than 15 minutes to cook something like a pizza or barbecue. If you are planning on cooking other items like bread, your cook time will be longer so you will need a slightly larger fire.
Never reach into your oven without using the proper tools. You can purchase specialty cooking tools for wood fired ovens at places like restaurant supply stores or you can order them online. There are also many resources online where you can find free recipes for cooking in your outdoor brick oven. This way, you can expand your culinary prowess and your next outdoor cookout will be the talk of the town.
Keep in mind that the bricks are going to be very hot, even on the outside. This is important, especially if you have curious pets or kiddos who may want to take a closer look. It is also a good idea to have a water source nearby in case of any mishaps. Your garden hose should do the job perfectly.
This is a very simple design that can work in almost any backyard. It does not require a ton of space – unless you choose to make it really large – and it is also easy on the budget.
This article first appeared on citygirlmeetsfarmboy.com .
You may also like:

World’s Smallest Battery Powers House For 2 Days (Video)
The Ultimate Guide To Composting
18 Plants That Should Never Be Planted Together
26 Necessary Tools For Off-Grid Living


This is a great idea but I’m concuss to where the heat source is located. Coals? I have extra pavers available from our property.
The bricks absorb the heat from the fire and then transfer the heat to your foods. Search cob ovens for further examples.
Here is a cob oven I built:
https://www.instructables.com/MINI-WOOD-FIRED-EARTH-OVEN/