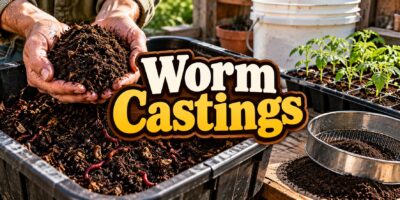
The first time I harvested a worm bin, I had a bucket of dark, crumbly castings and no real plan for them. I dumped most of it around one tomato plant, sprinkled the rest wherever, and wondered why the results were so uneven.
Since then I have learned that worm castings are one of the best soil amendments a homesteader can make or buy, but only when you use them the right way. This guide is all about the castings themselves: what they are, what they can and cannot do, how much to use for every job on the homestead, how to make a safe worm casting tea, and how to buy and store castings.
If you want to raise your own worms first, start with our guide to vermicomposting and setting up a worm bin. Then come back here to put the harvest to work.
What Worm Castings Actually Are
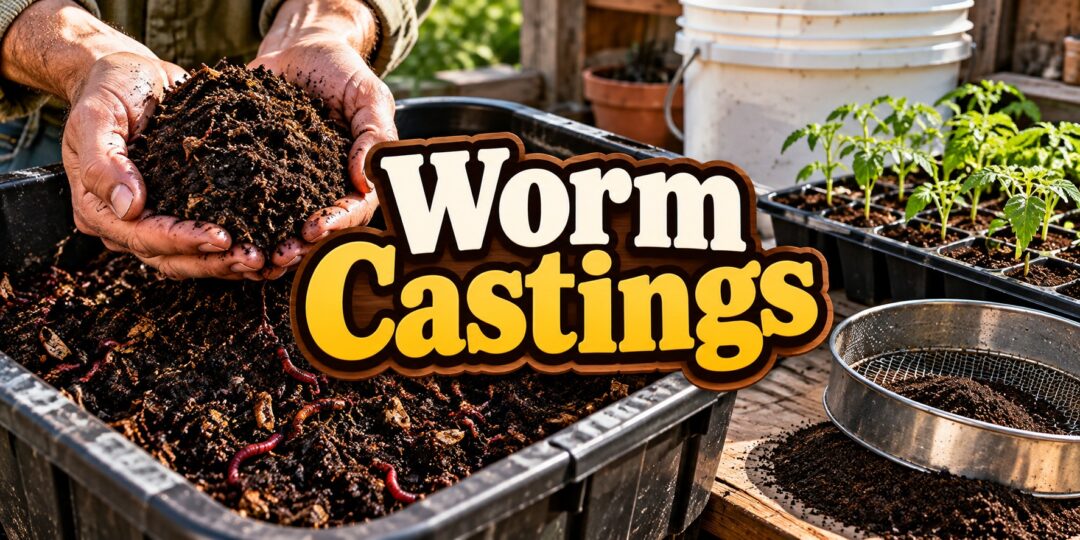
Strictly speaking, worm castings are worm manure. What most of us harvest from a bin, and what most bags at the garden center contain, is vermicompost. NC State Extension describes vermicompost as a soil-like mix of earthworm castings plus partially decomposed bedding and food scraps.
The same publication explains why it is so valuable. Vermicompost holds nitrogen, phosphorus, potassium, calcium, and magnesium in forms plants can readily take up, along with plant growth hormones and humic acids that act as plant growth regulators. It is also much more microbially active than the scraps the worms started with, and it has a fine texture that holds moisture well.
In everyday use, “worm castings” and “vermicompost” get used interchangeably, and I will do the same in this article. Just know that a bag of pure, screened castings and a bucket straight out of your bin are a little different, and the bin material may still carry bits of bedding and the occasional worm.
What Castings Can and Cannot Do
The research on castings is genuinely encouraging. NC State’s vermicomposting program notes that adding vermicompost to soil boosts the nutrients available to plants, improves soil structure and drainage, and has been shown to increase plant growth and suppress plant disease and insect pest attacks.
A University of Arizona Extension presentation shows NC State turnips grown with no vermicompost, 10 percent, and 20 percent by volume, with the turnips getting noticeably larger as the castings went up. The same presentation credits castings with stimulating beneficial soil microbes and helping regulate the availability of plant nutrients.
Here is the honest part: castings are a soil builder, not a magic fertilizer. The University of Hawai’i at Mānoa points out that compost improves drainage and soil life and adds some nutrients but is not very effective as a sole source of plant nutrients, and castings work much the same way. Their nutrient content also depends on what the worms were fed, so heavy feeders like corn and squash may still need extra feeding from your usual fertilizer program.
Worm Castings vs. Compost vs. Fertilizer
I think of these as three different tools. Regular compost from the pile is my bulk soil builder, the stuff I spread by the wheelbarrow load, and our ultimate guide to composting covers making it. Worm castings are the concentrated version I save for seed starting, containers, and transplants where a small amount goes a long way.
Fertilizer, whether it is aged manure or a bagged organic blend, is what I reach for when a crop needs a real nutrient boost. Castings help plants make better use of what is already in the soil, but they do not replace a balanced feeding plan for hungry crops.
How Much Worm Castings to Use
This is where most people go wrong, and I was one of them. More is not always better, and the research backs that up.
Seed Starting Mix
For seedlings, NC State’s home composting with earthworms guide recommends one part vermicompost to four parts potting media. The Arizona presentation suggests a seed-raising mix of 2 parts coir to 1 part castings, and a coco coir brick rehydrates into plenty of mix for a season of seed trays.
I keep my seed mixes at the lower end of that range, and here is why. In a 2025 cucumber seedling study, replacing 10 percent of the growing medium with vermicompost gave the best germination, vigor, and biomass, while higher proportions hurt germination and seedling quality. A 2017 tomato seedling trial found growth improved up to 20 percent vermicompost, but anything above 20 percent hurt emergence and growth, which the researchers blamed on high salt levels from cattle manure in the castings.
My rule of thumb is 10 to 20 percent castings for seed starting, closer to 10 percent for delicate seeds or castings I did not make myself. For more on getting seeds up and growing, see our guide on how to germinate seeds.
Containers and Houseplants
Potted plants can handle a richer mix. The Arizona presentation recommends 25 percent castings to 75 percent potting soil for container-grown plants, and a soilless mix of 40 percent castings with 30 percent perlite and 30 percent vermiculite. A bag of perlite and vermiculite makes that blend easy to put together.
For plants already growing in pots, NC State suggests placing 2 tablespoons of vermicompost per quart of potting mix around the base of the plant every two to four weeks. NC State also warns to make sure no worms or egg capsules end up in your pots, because red wigglers do not survive typical potted-plant conditions.
Transplants, Shrubs, and Trees
At transplant time, NC State recommends adding about ½ cup of vermicompost to the planting hole when moving seedlings from flats or small pots into beds or larger containers. For larger plants, shrubs, and trees, they suggest 1 to 2 cups per hole.
I always mix the castings into the soil at the bottom of the hole rather than leaving a solid layer. That way the roots meet a gradual transition instead of a pocket of very different material.
Garden Beds
In beds, castings work best mixed into the top few inches of soil. The Arizona presentation suggests digging them in as a general soil conditioner, or spreading them thinly before laying mulch over the top.
Covering them matters more than you might think. NC State advises protecting vermicompost from direct sunlight by working it into the soil or covering it with mulch, since sun-baked castings dry out and lose much of their biological life.
Lawns
If you have castings to spare, your lawn will take them too. NC State recommends about 8 quarts (10 pounds) per 100 square feet worked into the top 1 to 2 inches of soil for new lawns, and a top dressing of about 6 quarts (7 pounds) per 100 square feet for established lawns.
How to Make Worm Casting Tea Safely
Worm casting tea is simply castings steeped in water, used to water plants. NC State’s recipe is about as easy as it gets: add 2 tablespoons of vermicompost to 1 quart of water, let it steep for a day while stirring occasionally, and use it within 24 hours.
You will see plenty of fancier recipes online that bubble the tea with an aquarium pump and feed it molasses or sugar. The Arizona presentation includes one of these, but the University of Hawai’i’s food safety guidance recommends avoiding additives, especially simple sugars like molasses, because they can promote the growth of harmful organisms unless batches are lab-tested.
The same Hawai’i publication lists a few rules I follow every time:
- Use potable water. Untreated water, including rain barrel water, can introduce pathogens into the tea.
- Sanitize your equipment. Clean the bucket and any stirring tools between batches.
- Keep tea off the edible parts. Apply it to the soil around food crops rather than spraying leaves, especially close to harvest, since tea can collect in places like the base of lettuce heads.
NC State gives the same warning, advising against using vermicompost tea on the edible portion of a plant unless you are certain the solution contains no pathogens. A clean 5-gallon bucket with a lid that you use only for garden teas keeps things simple.
Tea Is Not the Same as Bin Leachate
The dark liquid that drips out of the bottom of a worm bin is often called “worm tea,” but it is really leachate. The Arizona presentation warns that leachate may carry a bad mixture of microorganisms, should be diluted 10 parts water to 1 part leachate, and should only be used fresh.
If your bin produces a lot of leachate, that is also a sign it is too wet. I use it diluted on ornamentals, and I put my real effort into keeping the bin moist rather than soggy.
Buying Worm Castings: What I Look For
Not everyone has a worm bin, and even those of us who do run short in spring. Bagged organic worm castings are easy to find, but quality varies a lot from bag to bag.
- Smell: Good castings smell like a forest floor. A sour, ammonia, or rotten smell means the material was not finished.
- Texture: Look for dark, fine, crumbly material that is slightly damp, not dusty-dry or soggy.
- Feedstock: Check what the worms were fed. The tomato study showed manure-based castings can carry enough salt to hurt seedlings at higher rates, so I use those more sparingly in seed mixes.
- Processing: The University of Hawai’i recommends buying compost products that have been fully composted to EPA standards, and I hold manure-based castings to the same expectation for my vegetable beds.
Making Your Own Supply
Our vermicomposting guide covers setting up a bin step by step, so I will keep this short. You need red wiggler composting worms rather than garden worms; the USDA notes that only seven of more than 9,000 earthworm species are suitable for vermicomposting, and it suggests harvesting after about four months.
If you want a hands-off harvest, NC State describes a vertical separation method using a stacking system. You feed only in the top bin, the worms move up to eat, and the bottom bin eventually holds mostly vermicompost, which is exactly how a stackable worm composting bin works.
Whichever way you harvest, watch for worm egg capsules. NC State describes them as lemon-shaped, about the size of a match head, shiny, and light brown, and they belong back in the bin so the next generation can hatch. Running finished castings through a ¼-inch garden soil sifter catches capsules, stray worms, and unfinished scraps in one step.
Storing Worm Castings
NC State notes that vermicompost can be used right away or stored for later. Their home vermicomposting flyer suggests keeping harvested castings in a container or a plastic bag pricked with a few tiny holes.
I store mine in lidded buckets with a few small air holes, kept in a cool, shady spot in the shed. The goal is to keep castings slightly damp and breathing, never sealed airtight, sitting in the sun, or allowed to dry to dust.
My Worm Castings Cheat Sheet
- Seed starting: 10 to 20 percent castings, closer to 10 percent for delicate seeds or unfamiliar castings.
- Potting mix: Up to 25 percent castings for container plants.
- Feeding potted plants: 2 tablespoons per quart of potting mix around the base every 2 to 4 weeks.
- Transplants: ½ cup per hole for seedlings, 1 to 2 cups for shrubs and trees.
- Beds: Mix into the top few inches or spread thinly under mulch.
- Lawns: About 6 quarts per 100 square feet as a top dressing.
- Tea: 2 tablespoons per quart of clean water, steeped a day, used within 24 hours, applied to soil.
🌱 Lost Skills of Independence: Grow More, Waste Less, and Rediscover the Skills That Made Our Ancestors Self-Reliant
Turning kitchen scraps into nutrient-rich worm castings is a perfect example of something our grandparents understood: the more you can produce, repair, preserve, and reuse yourself, the less you have to depend on expensive modern systems.
But what if composting was just the beginning?
Imagine knowing how to grow more of your own food, preserve your harvest without relying entirely on a freezer, make better use of the resources around your home, and handle everyday challenges without constantly reaching for your wallet.
That’s the kind of practical independence that Lost Skills of Independence is designed to help you rediscover.
🏡 What If You Could Become More Self-Sufficient, One Forgotten Skill at a Time?
For generations, families survived and thrived by mastering practical skills that many people today have never been taught.
They knew how to stretch their resources, waste almost nothing, and turn ordinary materials into something useful.
Lost Skills of Independence brings that resourceful mindset back into focus, helping you explore traditional knowledge that can make your home and homestead more resilient.
Here’s why these skills matter:
- 🌱 Grow More of Your Own Food: Discover the value of traditional gardening knowledge, soil improvement, and making the most of the space and resources you already have.
- 🥕 Make Your Harvest Go Further: Explore the importance of food preservation and the old-fashioned techniques that helped families make seasonal abundance last.
- ♻️ Turn Waste Into Something Valuable: Just like transforming food scraps into worm castings, learn to recognize opportunities to reuse materials and reduce unnecessary waste.
- 🛠️ Rely Less on Expensive Modern Conveniences: Reconnect with practical household skills that can help you solve problems, maintain what you own, and become more resourceful.
- 🔥 Prepare for Unexpected Challenges: Build a foundation of useful knowledge that becomes especially valuable when supplies are limited, services are interrupted, or everyday conveniences disappear.
- 🌾 Keep Traditional Knowledge Alive: Rediscover the mindset of generations who knew how to work with what they had and pass those valuable skills on to their families.
- 💚 Real Independence Begins With What You Know
A bag of fertilizer can run out. Grocery prices can rise. Equipment can break. And the conveniences we depend on every day aren’t always guaranteed to be available.
But practical knowledge is something you can carry with you wherever you go.
Knowing how to improve your soil naturally, make better use of your harvest, and become less dependent on store-bought solutions can make a meaningful difference over time.
You don’t need a hundred-acre farm, an enormous budget, or decades of experience to begin.
You just need the willingness to learn skills that are worth keeping.
📖 Don’t Let These Forgotten Skills Disappear!
Every small step toward self-sufficiency matters. Whether you’re making your first batch of worm castings, starting a vegetable garden, or looking for ways to become more independent, there’s always another useful skill waiting to be learned.
Stop depending on buying everything you need. Start discovering what you can grow, make, preserve, repair, and accomplish yourself.
Final Thoughts
Worm castings earn their black gold nickname, but they work best as a precise tool rather than something you pile on. A little in the seed tray, a scoop in the planting hole, and a light top dressing in pots will do more for your garden than a whole bucket dumped around one plant.
Whether you buy a bag this spring or start a bin under the sink, use castings in the amounts that research and extension experts recommend. Your seedlings, your soil, and your wallet will all be better for it.
You may also like:
Cabbage Worms – How I Finally Got Mine Under Control
Cheap and Easy to Build Root Cellar in Your Own Back Yard (Video)
Tomato Worms: How to Identify, Manage, and Protect Your Garden
I Put Cayenne Pepper in My Chicken Feed (Here’s What Happened)
7 Trees You Don’t Want Growing on Your Property
Too Much Zucchini? 10 Smart Ways to Use and Preserve It
How to Grow Bell Peppers – The Complete Guide From Seed to Harvest