For years I fed my garden the way most people do, a bag of all-purpose fertilizer every spring and a hope that it was the right call. Some crops thrived, some sulked, and I never really knew why.
A proper soil exam changed that. It took the guessing out of what I was adding, and it saved me money on amendments my ground never needed in the first place.
This guide walks through the whole process, from quick backyard checks to collecting a lab sample, testing for lead, and reading every line of the report that comes back. By the end you’ll know exactly what your soil has, what it’s missing, and what to do about it.
What a Soil Exam Actually Tells You
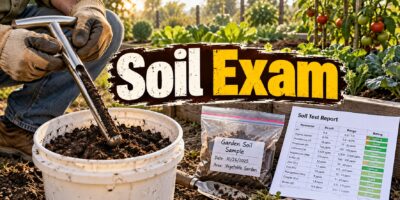
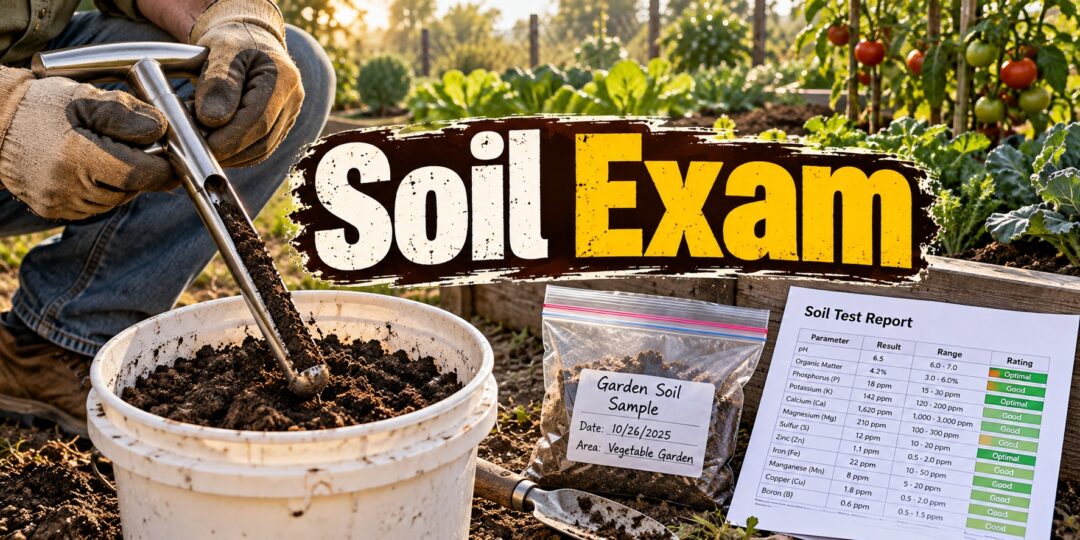
A soil exam is a snapshot of your soil’s chemistry and a few of its physical traits. University of Minnesota Extension explains that a regular lab test reports estimated texture, pH, percent organic matter, and levels of phosphorus and potassium, along with fertilizer recommendations.
For an extra fee, most labs will also test soluble salts, lead, calcium and magnesium, micronutrients like zinc, iron, copper and manganese, and boron or nitrate. Those add-ons are worth it in specific situations, which I’ll cover below.
One thing a standard exam usually won’t give you is a reliable nitrogen number. Nitrogen moves and changes form quickly in soil, so most garden recommendations are based on the crop you’re growing rather than a single measurement.
Start Before You Dig: Check the Soil Survey
Before I ever push a trowel into new ground, I look it up. The USDA’s free Web Soil Survey has mapped soils for more than 95 percent of U.S. counties, and you can draw a box around your property to see what soil types sit under it.
The survey won’t tell you how much phosphorus is in your vegetable bed. It will tell you whether you’re on heavy clay, sandy outwash, or a shallow soil over bedrock, and how well each one drains.
That background helps you split your land into sensible sampling areas and makes the lab report easier to interpret later.
Quick DIY Checks Versus a Lab Exam
What DIY Tests Are Good For
Simple at-home checks still have a place on the homestead. We’ve covered the jar test, ribbon test, vinegar fizz test, and earthworm count in detail in our guide to soil testing methods used by pioneers that still work today.
Those tests are great for understanding texture, drainage, and biological life. They cost almost nothing, and repeating them each year shows whether your soil structure is improving.
How Accurate Are Home Test Kits?
Color-change kits from the garden center are a different matter. When South Dakota State University Extension tested several popular kits against lab results on soils ranging from sand to clay, the kits generally got pH within about one unit.
Their nutrient readings were another story, especially for phosphorus and potassium. One kit called for phosphorus fertilizer on three soils that the lab measured as already high, and none of the kits clearly outperformed the others.
The reason is the chemistry. Labs use extracting solutions calibrated against real crop responses, while many kits use plain water, which pulls out only a small fraction of the nutrients plants can actually reach.
When a Lab Exam Is Worth It
I get a lab exam when I’m breaking new ground, converting lawn to garden, dealing with crops that keep struggling for no obvious reason, or growing food anywhere near an old house, road, or orchard. I also retest every few years to make sure I’m not building up nutrients I don’t need.
When to Test Your Soil
UMN Extension recommends testing every three to five years and any time you change how an area is used. Spring before planting or fall after harvest both work.
I prefer fall. Labs are less busy, and if the report calls for lime, it has the whole winter to start working before planting time.
Whatever season you pick, stick with it. Nutrient levels shift through the year, so testing at the same time each round gives you numbers you can honestly compare.
How to Collect a Soil Sample the Right Way
The lab can only analyze what you send it. The UMN Soil Testing Laboratory puts it plainly: a soil test can be no better than the sample.
What You Need
You need a clean plastic bucket, a trowel, spade, or soil probe, a sheet of newspaper or paper for drying, and a clean zip-top bag or the lab’s sample bag. Skip galvanized or rusty buckets, since they can add zinc or iron to the sample.
Step by Step
- Divide your land: Sample each area separately if it differs in soil, use, or history. Never mix lawn soil and garden soil in the same sample.
- Walk a zigzag: Collect from scattered spots across the area, and skip odd spots like old burn piles, low wet patches, and the edges right next to buildings.
- Take enough cores: UMN asks for at least five spots in a home garden, and Michigan State University Extension asks for ten. I aim for ten to fifteen in a typical vegetable plot.
- Dig to the right depth: Garden beds are sampled to about 6 to 7 inches, lawns to about 3 inches, and trees and shrubs to about 12 inches. Scrape off mulch, grass, and roots first.
- Take an even slice: Cut a vertical slice from the surface to full depth, so each core has the same amount of topsoil and subsoil.
- Mix thoroughly: Crumble and stir everything in the bucket into one composite sample.
- Air dry if wet: MSU says to spread wet soil on paper and let it dry overnight, without using an oven, microwave, radiator, or hair dryer.
- Bag and label: Send roughly one to two cups, labeled with your name and a sample ID, and keep a note of which area each ID represents.
Raised Beds and Orchards
For raised beds, sample inside the beds rather than the paths between them. In an orchard, UMN recommends sampling within the rows between trees, where the roots are actually feeding.
Sampling Mistakes That Ruin Results
The most common errors are taking too few cores, sampling right after fertilizing or liming, and mixing two very different areas together. Each one can send you a report that looks precise but describes soil you don’t actually have.
Choosing a Lab
Your state’s land-grant university lab is the best starting point for most homesteaders. Its recommendations are built on local field trials, and your county extension office can usually supply bags and forms.
If you use a private lab, ask which extraction method it runs. Alabama Cooperative Extension points out that labs use different extractants, such as Mehlich-1, Mehlich-3, Bray, and Olsen, and each one suits different soils and returns different numbers.
That means a phosphorus reading from one lab can’t be compared directly with a reading from another. Pick one lab and stay with it so your results over the years mean something.
When you fill out the form, tell the lab what you’re growing, such as vegetables, fruit trees, or pasture. The recommendations are tailored to that crop.
Testing for Lead and Other Contaminants
If you grow food near a house built before the late 1970s, a busy or older road, an old orchard, or any former industrial site, add a lead test. Lead-based paint, leaded gasoline, and old lead-arsenate orchard sprays all left residues that can last for centuries.
Order the Right Lead Test
Some routine tests include a quick lead screen. The UMass Soil Testing Lab explains that its routine screen only flags areas of concern, and a higher result should be followed by a total lead test.
Oregon State University Extension recommends asking for a total metals digest using strong acid, equivalent to EPA method 3050B. Only total lead results can be compared with EPA screening levels.
For lead, OSU suggests sampling the top 6 inches in gardens and the top 2 inches in children’s play areas. Lead tends to stay in the upper layer unless the soil has been dug or tilled.
Reading a Lead Result
Natural background lead usually runs about 10 to 50 parts per million. OSU’s guidance is that soil under 50 ppm needs no special precautions, and soil from 50 to 200 ppm can grow any vegetables if you limit dust and keep children from eating soil.
Between 200 and 1,200 ppm, OSU advises against growing leafy greens and root crops directly in the ground. Above 1,200 ppm, it recommends switching that ground to perennials, groundcover, or mulch and growing vegetables only in raised beds or containers with clean soil.
For context, the EPA’s October 2025 residential lead directive uses 200 ppm as its screening level for lead in residential soil at cleanup sites. It’s a cleanup guideline rather than a garden rule, but it’s a useful benchmark.
Gardening Safely on Lead-Affected Soil
OSU notes that the main risk is lead-contaminated dust on produce, not lead absorbed into the plant. Mulching bare soil, adding compost, keeping pH near 7 when lead is above 200 ppm, and washing and peeling produce all reduce exposure.
Wear gloves, leave muddy boots at the door, and wash up before eating. We go deeper into crop choices in the most contaminated vegetables you should look out for.
How to Read Your Soil Exam Report
Reports vary between labs, but the core sections are the same. Here’s how I read each one.
Soil pH and Buffer pH
Soil pH measures active acidity. University of Maryland Extension notes that most vegetables grow best between about 5.5 and 7.0, while blueberries and other acid lovers prefer 4.5 to 5.5.
Buffer pH measures the stored acidity held on clay and organic matter. It’s the number the lab uses to decide how much lime you need, and the closer the buffer pH sits to your actual pH, the more lime it will take.
That’s why two gardens at the same pH can need very different amounts of lime. Alabama Extension gives the example of a sandy soil needing about 1 ton of limestone per acre to reach pH 6.5, where a clay soil at the same starting pH needed 4 tons. For hands-on methods, see our guide on how to adjust the pH in soil and water.
Phosphorus and Potassium
These usually come with a rating such as low, medium, optimum, or high. If a nutrient is rated optimum or higher, adding more won’t improve growth.
Over-application is very common in home gardens. UMN found a median phosphorus reading of 68 ppm in lawn and garden samples from 1988 to 2021, compared with 26 ppm in farm fields, while about 20 ppm is considered sufficient for vegetables.
Excess phosphorus washes into streams and lakes and feeds algae blooms. If your report shows high phosphorus, choose fertilizers with a zero or very low middle number for a few years.
Some labs report nutrients in pounds per acre and others in parts per million. Alabama Extension’s rule of thumb is that ppm multiplied by two gives approximate pounds per acre for a standard sampling depth.
Organic Matter
Organic matter is reported as a percentage by weight, which is why it often looks lower than gardeners expect. UMD considers 2 percent or more a healthy level, and UMN suggests adding compost when it’s below 3 percent.
Track this number over time. It moves slowly, but a steady climb is one of the best signs your soil-building is working.
Cation Exchange Capacity
CEC is your soil’s capacity to hold onto nutrients like calcium, magnesium, and potassium. Clay and organic matter raise it, while sandy soils sit low.
UMD recommends adding organic matter if your CEC is below 10. Alabama Extension notes that most labs report an estimated CEC calculated from the nutrients they measured, not a direct measurement.
Base Saturation
Some private labs report base saturation, the share of CEC occupied by calcium, magnesium, and potassium, and then recommend fertilizer to hit an ideal ratio. Alabama Extension’s research found that approach is not effective and can lead to significant, costly over-application.
I read base saturation as background information. Lime and nutrient recommendations based on actual soil test levels are a more reliable guide.
Micronutrients and Soluble Salts
Alabama Extension also cautions that soil tests for micronutrients often don’t correlate well with how plants respond, and plant tissue testing is better at catching real deficiencies. Most mineral soils supply enough micronutrients as long as pH is kept in range.
A soluble salts test is worth adding if you use a lot of manure, irrigate with hard or salty water, or garden in a high tunnel. High salt levels can stunt plants and reduce yields.
Turning Your Results Into Action
Recommendations usually come as pounds of nutrient or lime per 1,000 square feet or per acre. UMD’s conversion is simple: divide pounds per acre by 43.56 to get pounds per 1,000 square feet.
When choosing a fertilizer, UMN advises matching the nitrogen recommendation first and compromising on phosphate and potash. You’ll rarely find a bag that matches perfectly, so it’s often better to combine single-nutrient products.
Our guide to 10-10-10 fertilizer walks through the math of converting a recommendation into pounds of product. It also covers when a balanced blend makes sense and when it doesn’t.
For lime, UMD recommends spreading no more than 50 pounds per 1,000 square feet in one application on lawns, or up to 70 pounds if it’s worked into the soil. Split larger amounts and apply the rest about six months later.
If your report calls for compost, remember it carries nutrients too, especially when it’s manure-based. Heavy yearly compost use is one reason so many gardens end up high in phosphorus.
Keep a Soil Record
I keep every report in a binder with a sketch map showing where each sample ID came from. Next to it I jot down what I added each year and how the crops did.
After two or three rounds of testing, that record becomes more valuable than any single report. You’ll see trends in pH, organic matter, and nutrients that tell you whether your management is working.
Your Soil Is Only the Beginning. How Many Other Skills Have We Forgotten?
Knowing what your soil needs can mean the difference between wasting fertilizer and producing a garden that actually feeds your family.
But understanding your land is only one piece of real self-reliance.
There was a time when ordinary people knew how to grow and preserve food, repair what broke, make useful things from basic materials, care for their property, and solve everyday problems without immediately reaching for a store, contractor, or delivery app.
Much of that knowledge has quietly disappeared.
The Lost Skills of Independence brings those practical, old-fashioned skills back together, showing you how previous generations did more with what they already had and depended less on systems outside their control.
Because if supplies become expensive, stores run empty, or professional help simply isn’t available, the most valuable thing on your homestead may not be something you stockpiled.
It may be something you know how to do.
If testing your soil is part of becoming more capable and self-sufficient on your own land, take the next step.
Final Thoughts
A soil exam is one of the cheapest, most useful things you can do for a homestead garden. It shows you what to add, and just as importantly, what to stop adding.
Start with the soil survey and simple DIY checks, then collect a careful sample for a lab. If you’re growing food near older buildings or roads, include a total lead test.
Read the report section by section, follow the recommendations, and retest in a few years. Your soil will tell you what it needs if you take the time to ask it properly.
You may also like:
 Compost for Raised Bed Garden: Everything I’ve Learned Building Healthy Soil
Cheap and Easy to Build Root Cellar in Your Own Back Yard (Video)
Succulent Soil: How to Mix Your Own and Actually Get It Right
7 Natural Amish Soil Boosters You Can Make for Free
The Black Soil That Doubles Your Harvest
Bone Meal Fertilizer: The Secret Soil Booster Hiding in Your Kitchen