Starting a vegetable garden in containers is easy. Container vegetable gardens are ideal for beginners who simply want to keep a couple of plants or try their hand at gardening. They’re also easier to work with in terms of soil quality: you’re the one controlling everything that goes into that pot and everything that comes out of it.
Roll up your sleeves, pick up a tote, and get ready to start gardening!
A Tote?
When container gardening, I’ve exclusively used totes with the 5 labels inside the recycling label.  In the United States, this means that the plastic used is food-safe quality and it is totally fine to go ahead and use it for your gardening. I stock up around the holidays when the red and green bins go on sale or during back-to-school sales.
The first thing you’ll want to do is to get a drill bit and drill, then drill some holes in your new container. If you decide to use a typical pot instead of joining my little tote party, that’s fine. Just skip this section.
Drill drainage holes gently into the bottom of your plastic. The more the better, but don’t weaken the bottom of your tote so you lose your soil. How many? That really depends on what you’re planting.
Related: DIY Elevated Raised Bed
What you’re planting will also decide the size of the container. Since we can’t possibly cover every single plant you may want to put in a pot, please use the chart below as a guideline:
- Melons (Watermelon, cantaloupes, etc)- the largest pot you can get, and have plans to trellis the vines and have sacks for the fruits.
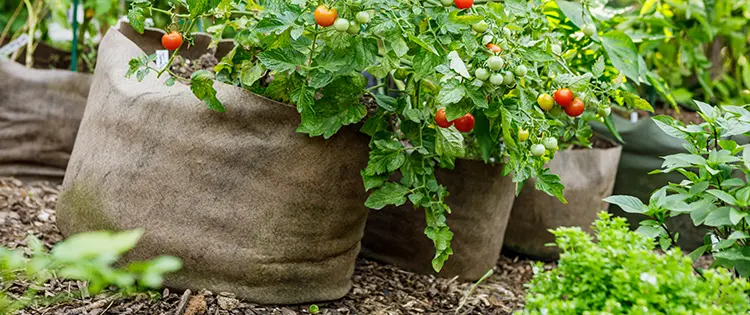
- Peppers, tomatoes, eggplants- at least a 3-gallon pot. Larger is always better.
- Zucchini, summer squash, cucumbers, runner beans, and peas- trellises are great here, too but you’ll need at least a 10-quart pot for each plant
- Flowers- there is simply too much variety in flowers; from bulbs to seeds, follow your planting instructions.
- Almost all herbs (especially culinary ones)- 6-quart pot minimum and trim heavily.
- Greens- 6-quart pot minimum and be ready to harvest regularly.
If you notice, totes have a very large quart size. A great deal of this is non-horizontal. You can only use so much of it. But that also means your plants aren’t getting root bound as they may in smaller pots. The choice is yours and yours alone. Good luck.
Let’s Talk About Dirt
The dirt on dirt is that you want the best stuff that you can afford. If all you can get is composted manure and stuff you dig out of your own backyard, hey; it’ll work. It may not control moisture and deal with the nutrients plants need quite as well as specialized $45-a-bag stuff, but it will grow a plant for you.
Where do I get my soil? I probably started off with Miracle-Gro stuff years and years ago. That, or I got my own vermiculite and mixed it with borrowed (and well-rotted) compost, a lot of bone meal, and hoped for the best. I honestly assume it’s the second one, given how much vermiculite is still viable in most of my pots and totes.
If you’re only starting a tiny garden (less than 10 pots or less than 60 quarts total), just go ahead and buy a bag mix of something that has a good review in your area. Feel free to talk to the local gardening masters in your local area to see what works best and what you’ll need to really make your plans work on your property.
Related: DIY Worm Compost Tower
For instance, I live in the Deep South where the humidity never stops in the summer. That means I really need to mix in something that controls moisture in the topsoil of my pots or else I’ll have mildew and mold and all sorts of nasty things growing in it. Without that moisture control, I’m also probably overwatering. Doesn’t matter how careful I am; the plants never get the chance to dry.
Someone in a very arid climate may also want moisture control soil but for obviously different reasons.
If you don’t want to get too deep into gardening and just want a little pot of basil on your windowsill, go for whatever works for your budget. It’s all very similar stuff and dirt, at this level, is frequently just plain dirt. Get what you can and try not to overthink it too much.
Splash Down
I know I just mentioned overwatering, but I did want to mention it again. Bugs and overwatering are the number 1 causes (tied) of container garden death. Disease sprouts from moisture in rotten things and often takes your plants with it.
When watering, stick your finger in the top 1″ of soil to make sure that the plant needs it. If this area of soil is still moist within the bounds of normal for the plant, don’t push your luck. Pots (and totes) drain much easier than soil in the ground, but there is still an issue of long-term drainage, comfort of the plant, root rot, and so much else.
Ultimately, the hardest thing to start in a container garden is often yourself. You may make a lot of plants, but many people just pause too long and, before they know it, the growing season is over. It’s time to pack up their pots (or totes!) and they’re looking at fall and winter planting, hoping that they’ll still be able to do something with the soil that they bought.
Final Thoughts
Gardening friends, lift your trowels. Get to work. It doesn’t matter if you only get one plum tomato out of your plants or if you get a thousand from one scrawny stem. What you’re doing is gardening, whether it’s in pots, totes, or the plastic gallon jugs that you picked up from the recycle bin at work (I don’t really recommend this one; you never know if it’s safe). Get started. Have fun. Grow stuff.
Happy Gardening!
You may also like:
The Relieving Plants That Should Grow in Every U.S Backyard (Video)
50 Tips From the Great Depression
How To Make A Self-Watering Planter From A Water Bottle
Veggies You Only Plant Once And Harvest Forever


