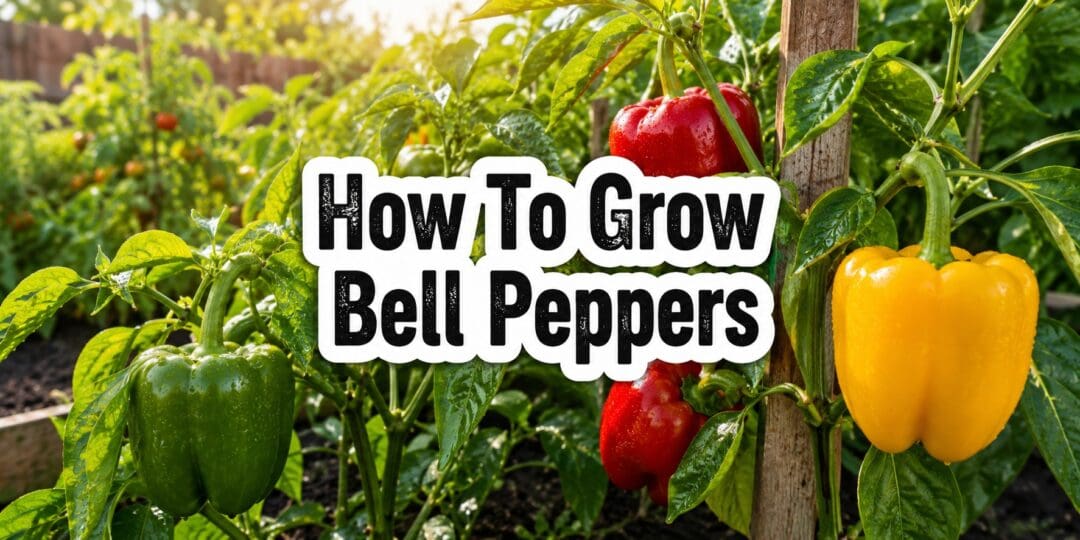
Bell peppers earn their spot in my garden every single year, and if you have ever paid grocery store prices for a bag of three peppers, you already know why. They are slower to get going than tomatoes or squash, they ask for a little more patience with heat and timing, but once a plant settles in, it will keep handing you peppers for months, and the flavor of a homegrown bell pepper left to actually ripen to red, orange, or yellow is nothing like the pale green ones sold in the store. This guide walks through the whole process, from starting seed indoors to troubleshooting the problems that trip up most home gardeners, so you can get a real harvest out of your own backyard this season.
Why Bell Peppers Are Worth the Effort
Peppers take longer to reach harvest than a lot of other garden vegetables, and that scares some gardeners off. But a single healthy bell pepper plant can produce for months once it gets rolling, and because the plant is a perennial in warm climates, a pepper you baby through one season can sometimes be carried over into the next, which I will cover later in this guide. For a self-sufficient garden, that combination of a long harvest window and a plant that can potentially outlive a single season makes bell peppers worth the extra attention they need early on.
Choosing a Bell Pepper Variety
Bell peppers all start out green and ripen to their final color if you leave them on the plant long enough, so the color you see on a seed packet or transplant tag is really telling you the mature color, not a different type of plant. Classic green bell types like California Wonder and Yolo Wonder are reliable and widely available. If you want to grow peppers that finish red, orange, yellow, or even purple, look for varieties bred and selected for that specific mature color, since not every green pepper variety colors up attractively or evenly.
- California Wonder and Yolo Wonder: classic, reliable green bell types, good for beginners
- Big Bertha and Aristotle: large-fruited types that hold up well and are popular for stuffing
- Gypsy and Golden Summer: early producers that ripen to yellow, good for shorter growing seasons
- Purple Beauty and Chocolate Beauty: fun color variations for gardeners who want something different
- Blushing Beauty: a variety that shifts through multiple colors as it ripens, which is a nice visual bonus in the garden
Smaller-fruited sweet peppers, including many snack-sized and lunchbox types, tend to tolerate both cool and hot weather swings better than the biggest bell varieties. If your climate runs unpredictable, it is worth planting a few smaller-fruited types alongside your main bell peppers as a kind of insurance policy on your harvest.
Starting Bell Peppers From Seed
Peppers are one of the slowest vegetable seeds to get going, which is exactly why timing your indoor start matters so much. West Virginia University Extension recommends starting pepper seeds indoors about eight weeks before your outdoor planting date, which is earlier than most gardeners start tomatoes, and notes that direct-seeding peppers outdoors is generally not recommended outside of the warmest climates.
- Sow seeds about 1/4 inch deep in a sterile, soilless seed starting mix
- Use a heat mat to hold the soil temperature between 80 and 90 degrees Fahrenheit until seedlings emerge, since pepper seeds germinate slowly and unevenly in cooler soil
- Check moisture often, since heat mats dry out seed trays faster than you might expect
- Once seedlings emerge, move them under strong light immediately and let the soil temperature settle into a slightly cooler range for steady, sturdy growth
- Some specialty and hot pepper types benefit from as much as ten to twelve weeks of indoor growing time before transplanting, so check the specific variety if you are growing something unusual
Do not rush pepper seedlings outdoors. Cold-stressed young peppers tend to sulk for weeks even after conditions improve, so it is almost always better to hold seedlings a little longer indoors under good light than to set them out too early into cool soil.
Site, Soil, and Timing for Transplanting
Bell peppers want full sun, ideally six to ten hours of direct light a day, and well-drained soil with a pH in the range of about 6.0 to 6.8. According to University of Maryland Extension, transplants should go into the garden only after the soil has thoroughly warmed in spring, since planting into soil below 65 degrees Fahrenheit will cause the plants to essentially stall out and just sit there instead of growing.
Texas A&M’s guidance narrows this further, noting that peppers can be direct seeded once soil temperature exceeds 60 to 65 degrees, but that transplanting after the last average frost date is the standard approach for most home gardeners using hybrid varieties. If your soil is naturally slow to warm in spring, laying black plastic mulch over the bed for a couple of weeks before planting is a simple trick that noticeably speeds up soil warming and lets you get transplants in earlier.
- Space plants roughly 12 to 24 inches apart within a row, with 30 to 36 inches between rows, though closer spacing works fine in raised beds or square-foot style gardens
- Water transplants in thoroughly right after planting to settle the soil around the roots and reduce transplant shock
- Transplant on a calm, cloudy day or in the late afternoon when possible, which reduces wilting stress on the young plants
- Keep the stem from touching black plastic mulch directly, since it can get hot enough to injure young tissue
Watering Bell Peppers
Peppers want deep, consistent watering rather than frequent shallow sprinkles. Deep watering encourages the root system to grow down rather than staying shallow and vulnerable to drying out. Consistency matters just as much as depth here, since letting the soil swing between very dry and very wet is one of the leading causes of blossom end rot, which is covered in detail further down in this guide. Container-grown peppers dry out much faster than peppers in the ground and may need daily watering during hot stretches, so check container soil moisture more often than you would an in-ground bed.
Fertilizing Bell Peppers
Peppers have a moderate nutrient requirement, and the timing of fertilizer matters more than most gardeners expect. Penn State Extension recommends a balanced fertilizer applied at the labeled rate, with a side dressing added once fruit begins to set to boost productivity, while Texas A&M’s guidance is more specific, suggesting a small amount of a balanced fertilizer such as 15-5-10 placed about six inches from the stem once the first fruit begins to enlarge, followed by watering it into the soil.
The mistake I see most often, and one I made myself in my early gardening years, is loading up on nitrogen too early and too heavily. A pepper plant given excess nitrogen before it sets fruit will often grow tall and leafy with disappointingly few peppers, since all that energy goes into foliage instead of flowers and fruit. Feed modestly at planting, then side-dress once the first fruits are actually forming, not before.
Staking and Supporting Your Plants
Bell pepper plants grow bushy and semi-woody, reaching three to four feet in height, and the branches loaded with fruit are more prone to snapping than you would think. West Virginia University Extension specifically recommends staking bell peppers to prevent stem breakage and to reduce sunscald, since a properly staked plant holds its canopy upright and keeps more leaf cover shading the developing fruit.
A simple single stake with a soft tie, a tomato cage, or even a short length of garden twine tied between a few stakes around a cluster of plants all work fine. The goal is just to keep top-heavy, fruit-loaded branches from splitting away from the main stem during a summer storm or a particularly good fruiting week.
Pruning and Pinching
Bell peppers do not need heavy pruning the way indeterminate tomatoes do, but a little shaping early on pays off. The Old Farmer’s Almanac recommends pinching out the growing tip once plants reach about eight inches tall, which encourages a bushier, more branched plant that ultimately produces more fruit than one left to grow as a single tall stem.
Mulching
Mulch matters for peppers, but timing depends on the type. Plastic mulch, particularly black plastic, is commonly used to warm soil early in the season and suppress weeds, and works well laid down before transplanting. Organic mulches like straw or grass clippings are excellent for moisture retention and weed suppression later in the season, but Utah State University Extension advises against applying organic mulch until soil temperatures are above 75 degrees Fahrenheit, since organic mulch insulates the soil and can keep it too cool for good pepper root growth if applied too early in spring.
Understanding Temperature and Blossom Drop
Peppers are genuinely fussy about temperature in a way that catches a lot of gardeners off guard. Fruit set happens most reliably at nighttime temperatures between 60 and 75 degrees Fahrenheit. Penn State Extension notes that daytime temperatures above 95 degrees will cause plants to abort their blossoms entirely, though fruit set resumes once temperatures cool back down. The Old Farmer’s Almanac gives a slightly tighter range for home gardeners, pointing out that blossom drop can occur when daytime temperatures climb above 85 to 90 degrees or when nighttime temperatures fall below 60 degrees, and that inadequate water makes the problem worse in either direction.
This means a heat wave in the middle of summer can knock a healthy, flowering pepper plant right back to producing nothing new for a stretch, even though the plant itself looks perfectly fine. If you see blossoms dropping off during a hot spell, do not panic and do not assume something is wrong with the plant. Keep watering consistently and the plant will resume setting fruit once temperatures moderate. Shade cloth over plants during the worst of a heat wave can meaningfully reduce blossom drop if your region regularly sees extended stretches above 90 degrees.
Pollination
Bell pepper flowers are self-pollinating and do not strictly need bees or other pollinators to set fruit, though visits from bees and other insects do improve pollination rates and fruit set in many gardens. Wind and the simple movement of the plant can be enough to move pollen within a flower. If you are growing peppers in an enclosed greenhouse or hoop house with little insect activity, gently shaking or tapping flowering branches by hand every few days can help ensure good pollination, particularly during the earliest flush of blooms.
Common Pests and How to Manage Them
Peppers attract a predictable cast of garden pests, and most home gardens will deal with at least one of the following over a season. NC State Extension’s pest guide for peppers identifies aphids, flea beetles, hornworms, and pepper weevils among the most common and economically significant pepper pests in home and commercial gardens alike.
- Aphids: small, soft-bodied insects that cluster on the undersides of leaves and new growth. Check leaf undersides regularly, and encourage natural predators like ladybugs and lacewings, which keep aphid populations in check in most home gardens without any spraying at all.
- Flea beetles: tiny beetles that chew small, round shotgun-style holes in leaves, most damaging on young seedlings under six inches tall. Floating row covers over young transplants are the simplest prevention, and established plants generally shrug off moderate flea beetle damage without any yield loss.
- Hornworms: large green caterpillars that can defoliate a young plant remarkably fast. Hand-picking is genuinely effective since these caterpillars are large and easy to spot once you know to look, and they are simple to remove by hand.
- Pepper weevils: a more serious pest in warmer growing regions, since larvae develop inside the fruit itself where they are hard to detect and treat. Field sanitation is the most effective home garden defense: remove and destroy dropped or infested fruit promptly rather than composting it, since University of California IPM Program notes that pepper weevils overwinter in fallen fruit and plant debris left in the garden.
Common Diseases
Bacterial leaf spot is one of the most frequently seen pepper diseases in home gardens, showing up as small, dark, water-soaked spots on leaves that can eventually cause defoliation in bad cases. Choosing bacterial-leaf-spot resistant varieties where available is the most effective long-term prevention, and West Virginia University Extension also recommends watering at the base of plants rather than overhead, since wet foliage encourages bacterial and fungal problems to spread.
Anthracnose and various viral diseases spread by aphids and other sap-feeding insects round out the most common pepper disease problems. Good spacing for airflow, watering the soil rather than the leaves, cleaning up plant debris at the end of the season, and rotating pepper plantings to a new bed every couple of years all meaningfully reduce disease pressure without needing to reach for a spray bottle.
Blossom End Rot: Why It Happens and How to Prevent It
If you have grown peppers before, you have probably seen a sunken, leathery, tan-to-black patch develop on the blossom end of an otherwise healthy-looking fruit. This is blossom end rot, and despite the name, it is not actually a rot or an infection at all. University of Florida IFAS Extension explains that blossom end rot is a physiological disorder caused by a localized calcium deficiency in the rapidly expanding tissue at the fruit’s tip, and it is not spread from plant to plant the way an actual disease would be.
The tricky part is that blossom end rot usually is not caused by a genuine lack of calcium in the soil. Purdue University’s Vegetable Crops Hotline points out that calcium moves through the plant along with water, so anything that disrupts steady water uptake, including drought stress, fluctuating soil moisture, or root damage, can prevent calcium from reaching the fruit even when there is plenty of it in the soil. This is why the condition shows up most often during hot, sunny weather and after uneven watering, rather than as a straightforward nutrient shortage.
- Water consistently rather than letting soil swing between soaked and bone dry, since fluctuating moisture is the most common underlying trigger
- Mulch to buffer soil moisture swings during hot weather
- Avoid heavy nitrogen applications early in fruit development, since excess nitrogen increases the plant’s calcium demand at the worst possible time
- Skip foliar calcium sprays; most extension research finds they do little good since calcium moves poorly through leaf tissue, and a soil test is a better first step if you suspect an actual calcium shortfall
- Simply remove affected fruit. The rest of the pepper is usually still edible if you cut away the damaged tip, and the plant will move on to set healthy fruit once conditions even out
Preventing Sunscald
Sunscald shows up as a pale, bleached, papery patch on the side of a fruit that gets too much direct, intense sun exposure, particularly on fruit that has lost some of its leaf cover. This is another reason staking and light pruning matter: a well-supported plant with a full, intact canopy shades its own fruit naturally. If you are gardening somewhere with intense summer sun, especially at higher elevation or in the desert Southwest, a simple length of shade cloth over the hottest part of the afternoon can prevent a surprising amount of sunscald damage on exposed fruit.
Growing Bell Peppers in Containers
Bell peppers do perfectly well in containers, which is good news if you are gardening on a patio, balcony, or small urban lot. University of Maryland Extension recommends a five-gallon container as the practical minimum size for a healthy, productive pepper plant. Container plants dry out faster than in-ground plants, need more frequent watering and feeding since nutrients wash out with each watering, and benefit from a stake or small cage even more than in-ground plants, since a top-heavy container is prone to tipping in wind.
Harvesting Bell Peppers
Here is where a lot of home gardeners leave flavor on the table without realizing it. University of Maryland Extension notes that bell peppers typically reach a mature green stage 70 to 80 days after transplanting, but need an additional two to three weeks on the plant beyond that to fully ripen into their final color, whether that is red, orange, yellow, or purple. Every pepper you pick green is a pepper that never got the chance to develop the fuller, sweeter flavor that comes with full ripening.
- Green bell peppers can be harvested anytime once they reach full size and feel firm, which is the standard approach for most home gardens and gives you the earliest harvest
- For colored peppers, leave fruit on the plant until it has fully changed color and feels firm rather than soft; a pepper that is only partially colored will not continue ripening once picked
- Cut peppers from the plant with pruning shears or a sharp knife rather than pulling them, which can tear the branch and damage the plant
- Picking mature fruit regularly encourages the plant to keep setting new flowers and fruit rather than slowing down
- At the end of the season, before a hard frost, gather all remaining mature green and partially colored fruit. Fruit that is fully green but not yet colored can sometimes be stored around 55 degrees Fahrenheit to continue slowly ripening indoors
Extending the Season
Row covers, cold frames, and simple plastic tunnels can push your pepper season earlier in spring and later into fall by buffering the plants from cool nighttime temperatures. If a surprise late frost threatens young transplants, a simple cloche, an overturned bucket, or a frost blanket thrown over plants overnight is often enough to get them through unscathed. Since peppers stall out so dramatically in cool soil and cool air, even modest season extension tools tend to pay off disproportionately well with this particular crop.
Overwintering Pepper Plants
Bell peppers are technically tender perennials in their native tropical range, even though most gardeners in temperate climates grow them as annuals. If you have a healthy, productive plant you would like to keep, it is possible to dig it up before the first frost, pot it, and bring it indoors to a bright window or under grow lights for the winter. Cut the plant back by roughly half to reduce stress, expect some leaf drop as it adjusts to indoor conditions, and keep watering light until you see new growth resume. Come spring, after hardening it off gradually to outdoor conditions again, an overwintered pepper plant will often fruit earlier and more vigorously than a brand new seedling, since it already has an established root system and woody structure to build on.
Saving Seeds
Bell peppers are simple to save seed from since the seeds are large, easy to see, and ready to harvest as soon as you cut open a fully ripe fruit. Choose a fully colored, healthy fruit from an open-pollinated variety rather than a hybrid, since hybrid seed will not reliably grow into a plant matching the parent. Scrape the seeds out, spread them on a paper towel or screen out of direct sun, and let them dry completely for a week or two before storing them in a labeled paper envelope somewhere cool and dry. Properly dried pepper seed stays viable for several years.
Troubleshooting Common Problems
- Plant is tall and leafy with few flowers or fruit: usually excess nitrogen fertilizer applied too early; hold off on further feeding and be patient, since the plant will eventually redirect energy to fruiting
- Flowers are dropping off without setting fruit: check daytime and nighttime temperatures first, since blossom drop above 85 to 90 degrees or below 60 degrees at night is extremely common and resolves on its own once temperatures moderate
- Sunken dark patches on the bottom of fruit: blossom end rot, addressed with consistent watering and mulching rather than added calcium in most cases
- Pale, papery patches on the side of fruit facing the sun: sunscald, addressed with staking, light pruning to preserve leaf cover, or shade cloth during the hottest part of the day
- Small round holes throughout the leaves: likely flea beetles; use row covers on young transplants and expect established plants to tolerate the damage without yield loss
- Rapid defoliation on a young plant: check for hornworms and hand-pick them off; they are large and easy to spot once you know what you are looking for
- Plant simply stalled and not growing after transplanting: soil or air temperature is likely still too cool; be patient, since peppers famously sit and sulk in cold conditions before resuming growth once it warms up
Companion Planting for Bell Peppers
Peppers get along well with a handful of common garden companions, and a little thoughtful planning around your pepper bed can cut down on pest pressure without any extra work once things are in the ground. Basil is a classic pairing, and some gardeners swear it improves pepper flavor, though the more reliable benefit is that basil’s strong scent can help confuse pest insects looking for peppers by smell. Marigolds are another dependable companion, since their scent deters a range of common garden pests, including some of the flea beetles and aphids that bother young pepper plants.
- Basil, onions, and garlic: aromatic companions that may help mask peppers from pest insects hunting by scent
- Marigolds: a classic pest-deterrent border plant around a pepper bed, and they also draw in pollinators
- Carrots and beets: low-growing root crops that share similar water needs and do not compete for the same light or nutrients as tall pepper plants
- Avoid planting peppers near fennel, which can inhibit the growth of many garden vegetables nearby, and be cautious about crowding peppers too close to other nightshades like tomatoes and eggplant, since they share several of the same pests and diseases
Crop Rotation and Soil Health
Because peppers share so many pests and diseases with tomatoes, eggplant, and potatoes, all members of the nightshade family, planting peppers in the same exact spot year after year gradually builds up a local population of the pests and pathogens that specifically target that plant family. University of California’s IPM guidance on pepper weevil specifically recommends rotating away from other nightshade crops when a pest problem like pepper weevil becomes established, since the pest can simply persist in the soil and plant debris and reinfest a new planting in the same spot the following year.
A simple two to three year rotation, where peppers and their nightshade relatives only return to a given bed every second or third season, meaningfully reduces the buildup of soil-borne disease and overwintering pest populations. If your garden space is small and true rotation is difficult, refreshing the soil with fresh compost between seasons and being extra diligent about removing all plant debris at the end of the year both help offset the lack of rotation room.
Grow More Than a Garden – Grow a Self-Sufficient Lifestyle
Learning to grow healthy bell peppers is a great step toward producing more of your own food. But the Amish have long understood that true self-reliance isn’t built on a single crop – it’s built on practical skills passed down through generations.
Imagine knowing how to:
- 🌱 Grow a productive garden that feeds your family year after year
- 🥕 Preserve your harvest through canning, drying, fermenting, and root cellaring
- 🍞 Bake wholesome bread and prepare meals from simple pantry staples
- 🐔 Raise chickens and other livestock with confidence
- 🧈 Make everyday essentials at home instead of relying on the store
- 🏡 Reduce your dependence on modern systems with time-tested homesteading methods
- 💰 Save money while creating a more resilient, sustainable household
That’s exactly what you’ll find inside Amish Ways.
Filled with traditional wisdom, practical how-to guides, and proven techniques, this book shows how generations of Amish families have created abundant, productive homes using simple tools, hard work, and common sense. Whether you have a large homestead, a backyard garden, or just a few raised beds, you’ll discover practical ideas you can start using right away.
If you’re serious about growing your own food, preserving your harvest, and becoming more self-sufficient, don’t stop with peppers. Learn the timeless skills that have helped families thrive for generations.
Final Thoughts
Bell peppers reward patience more than almost anything else in the vegetable garden. The slow start, the fussiness about temperature, and the wait for fruit to actually ripen into color can test a gardener’s patience, but a well-tended pepper plant pays that patience back with months of harvest and a flavor that a grocery store pepper simply cannot match. Get the timing right at the start, keep watering consistent, watch the thermometer during heat waves, and stake your plants before they need it rather than after a storm snaps a branch. Do that, and bell peppers become one of the most dependable, satisfying crops in a self-sufficient garden.
You may also like:
 Join Our Self-Sufficiency Facebook Group For Unseen Tips And Tricks!
What Every Survivalist Should Grow in His Backyard (Video)
What to Grow in a Greenhouse – A Complete Homesteader’s Guide to Year-Round Production
15 Vegetables You Can Actually Pickle Overnight
10 Vegetables That Are Too Easy To Grow Inside
5 Healthy Harvest Soup Recipes