The first time I planted thyme, I spent $4.99 on a tiny plant from the hardware store. That was eight years ago. The same plant is still out there in my garden, and I haven’t bought thyme since.
If you’ve ever gone to the supermarket and thought the prices for herbs are insane, then you might be in the right place. The grocery store wants you to come back every few weeks. Meanwhile, the herb you are spending money on is something you could plant once and harvest from for the rest of your life.
One thing I find interesting is that some of the herbs on this list might outlive us. So, it’s easy to say they’re a long term investment.
Having herbs on my homestead is a priority, as they always come in handy. Besides the obvious, such as using them when you’re cooking, they are very good bartering items, and I also use them to make various remedies.
Here’s what to plant, where to plant it, and how to keep each one going forever. I also included some DIY projects since I know you like them so much.
Chives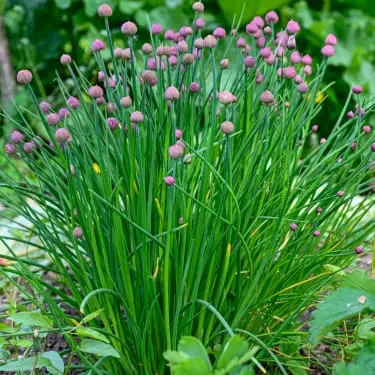
If you’ve never grown anything before, start with chives. They’re foolproof, they’re cheerful, and you’ll have them regrowing by the end of the first summer.
Chives grow in neat clumps with hollow green stems, purple pom-pom flowers in late spring, and leaves that taste like a soft, mild onion. The flowers are edible too.
Plant them in full sun. Chives shrug off cold winters and don’t mind drought once they settle in. You can harvest lightly the same year you plant them, but the real bounty comes the following spring, once the clump fills out.
How to keep them forever
Every two or three years, dig up the clump in early spring. Use a sharp spade to split it into smaller chunks. Each chunk should have at least five small bulbs at the bottom so it has enough to grow on its own.
Replant the divisions and give the rest you can give them to a neighbor. This keeps the plant young and protects it from getting woody and tired in the middle.
After they flower, cut the whole plant down to about two inches. Within a week, fresh tender leaves push up. If you don’t want chives popping up everywhere, snip the flower heads before they go to seed.
I keep a clump right by the kitchen door so I can grab a handful for scrambled eggs without having to go in the garden.
Thyme
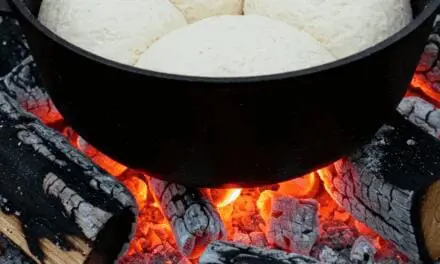
Thyme is a small woody herb with an earthy, slightly peppery smell. The flavor is intense and savory, perfect for roasted meat, soup, beans, and anything you’d cook in a Dutch oven.
Plant it in full sun, in soil that drains well. Sandy or rocky ground is perfect. Keep it away from soggy soil! This type of soil will give you great tomatoes, but it will rot the roots of your thyme. You can harvest a little in the first summer, but go easy. The plant really takes off in its second growing season.
How to keep it forever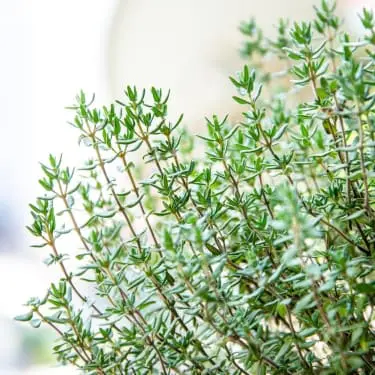
The trick with thyme is fighting the woodiness. Older plants get tough, sticklike stems with not many leaves.
During the spring, I give mine a pretty rough treatment, but this is the only way, believe me. Take off up to half the plant before new growth shows up. It looks brutal, but the fresh growth that comes back is tender and full of flavor.
Every three or four years, take cuttings from your healthiest stems. Strip the bottom leaves and stick the cut end in damp soil. Within a few weeks, you’ll have new plants. Pot one up in the fall and bring it inside for a winter supply on your kitchen windowsill.
Quick remedy
Thyme tea is one of the oldest cough remedies in the book. Steep a tablespoon of fresh leaves in a cup of hot water for ten minutes. Strain and add honey to taste. It’s warm and soothing, and it helps you with the cold.
But thyme is so much more powerful if you know how to use it. Sure, a hot drink will always make things better when you are congested and can barely breathe, but using thyme the right way will unlock its natural properties and make it even stronger.
That’s why thyme is one of the main ingredients in this “Mighty Lungs” Tincture. And the name is not an exaggeration. The first time I made this tincture, I couldn’t believe how good it was at opening up my airways. I was finally able to breathe properly after three sleepless nights.
If you often struggle with congestion, you should give this tincture a try. It’s easy to make at home and if you store it correctly ( all you have to do is keep it in a dark cupboard), it lasts at least 2 years. Add a couple of drops in your favorite tea or juice and you’ll notice how you start to breathe better.
See the full 5-step recipe, click here.
Oregano
If you’ve only ever tasted oregano from a jar, you haven’t really tasted oregano. Real Greek oregano is sharp, peppery, and so much stronger than the store-bought version. I need to add just half of what I was using in my recipes. When I throw a few sprigs into pasta sauce, the whole kitchen smells like an Italian pizza place.
Don’t grow it from seed, because seed-grown oregano often comes out bland. Buy a started plant from a nursery, sniff the leaves first, and pick the one that smells the strongest. You’ll get a small harvest the first summer and a generous one starting the following year.
How to keep it forever
Oregano barely survives cold winters. If you live somewhere with hard freezes, mulch heavily with straw or evergreen branches after the ground freezes. This insulates the roots and improves your odds.
Take stem cuttings or divide the roots every few years to make new plants.
If you want to harvest leaves all summer, snip off any flower buds the moment you see them. Once oregano blooms, the leaf production slows down and the flavor is not that potent anymore.
Lemon Balm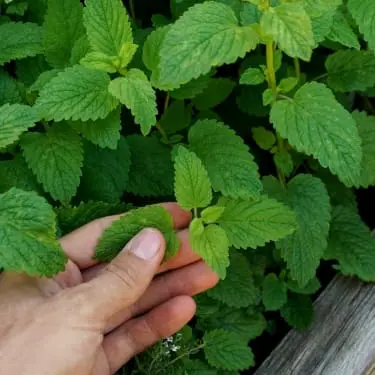
Lemon balm is a plant I planted once and now can’t get rid of. But I’m not complaining. The leaves smell like fresh lemon when you crush them, and the tea is one of the most calming things you can drink in the evening.
It grows in upright bushy clumps about a foot or two tall. Happy in sun or partial shade. Not fussy about soil. Lemon balm is fast, and you’ll be harvesting leaves in the same season you plant it.
How to keep it forever (and under control!)
The challenge isn’t keeping it alive. It’s keeping it from taking over your whole garden. I learned this the hard way. By the third year, I had lemon balm in three flower beds and the cracks of the patio.
Cut off the flower stalks before they go to seed. In mid-summer, give the whole plant a haircut down to about half its height. This stops the seeding, refreshes the foliage, and gives you a big harvest of leaves to dry for tea.
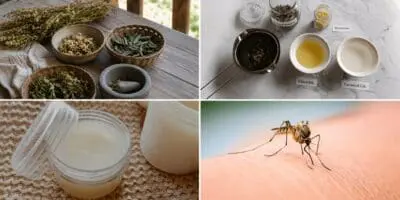
Quick remedy
Honestly, lemon balm might be the best thing when you deal with lots of stress. Why? Because it has a compound that helps your brain access its natural “off switch” for stress and anxiety.
Lemon balm is amazing at making your body relax after a hard day and when your body is calmer, your mind tends to follow. People have been using this herb for thousands of years when they needed to relax and sleep well. You can do the same and today the process is so much easier than it was for our grandparents.
They made the lemon balm tincture themselves, which isn’t complicated, but it needs 4 to 6 weeks to extract properly.
If you don’t want to wait, you can get your own lemon balm tincture now from here.
Mint
This herb spreads by underground runners that send up new shoots wherever they please. You’ll be harvesting from a brand-new mint plant within weeks of putting it in the ground.
Don’t plant mint directly in the ground if you can help it. Use a pot, or sink a bottomless container into the soil so the roots can’t escape sideways. I made this mistake in my first year, and we still find sprigs of mint in places it has no business being in, the same fashion as with lemon balm.
If you’ve already planted it in the ground and you can already see it taking over, dig it up while the patch is still small and move it to a container.
Related: DIY Amish Toothpaste From Mint Oil
How to keep it forever
If you keep it contained, mint will live for decades. Harvest stems regularly to keep it bushy. If you don’t do this, it gets leggy and falls over.
Every couple of years, dump out the pot and split the root mass with a knife. Replant a healthy chunk and compost the rest, or share it with a neighbor.
In the fall, leave mint in containers outside in most of the country. If your winters are brutal, haul the pots into a cold garage.
I dry mint every summer for tea and to add to my homemade ice cream.
Rosemary
Rosemary is the one perennial here that really struggles with cold winters. If you live somewhere warm, it grows into a small evergreen shrub four to six feet tall. Anywhere else, you’ll need to keep it in a pot and bring it inside for the cold months. A nursery-bought plant is ready to harvest from the day you bring it home; just don’t take more than a third of the plant the first season.
How to keep it forever
If you live somewhere cold, here’s how it works. Grow rosemary in a big pot. Outside in full sun all summer. Bring it in before the first hard frost.
Indoors, give it a cool, sunny spot. Most rosemary plants die indoors because of watering mistakes. Overwatering rots the roots, but rosemary also dies suddenly from drying out completely because it doesn’t wilt to warn you. Let the top inch of soil dry between waterings, but don’t let the pot go bone dry. Mist the leaves to keep humidity up.
Look for the variety called ‘Arp.’ It’s the most cold-tolerant rosemary on the market and can survive moderately cold winters with heavy mulching.
Take cuttings in late summer. Snip a four-inch piece and strip the lower leaves. Stick the cut end in damp soil. You’ll have a new plant by winter.
I cut a whole branch off our rosemary every time I make roast chicken. It’s the kind of thing that sounds small until you’ve been doing it for years and you realize you’ve never once paid for fresh rosemary at the store. This is what I love about homesteading.
Comfrey
Comfrey isn’t something you cook with. It’s the plant that homesteaders grow to stop buying fertilizer. The leaves are huge and fuzzy, and they hold serious amounts of nitrogen, phosphorus, and potassium, which makes them one of the best free fertilizers you’ll ever use. And the fact that you can grow it yourself gives it a huge head start compared to expensive fertilizers.
It also has a long history in folk medicine. Traditionally, people make a poultice or salve from the leaves to help with bruises, sprains, and minor wounds. Don’t take it internally. The plant contains compounds that can damage your liver. External use only, and check with a doctor first.
A new comfrey plant from a root cutting will give you usable leaves within a few months. By the second growing season, you’ll be cutting leaves three or four times a year.
Quick remedy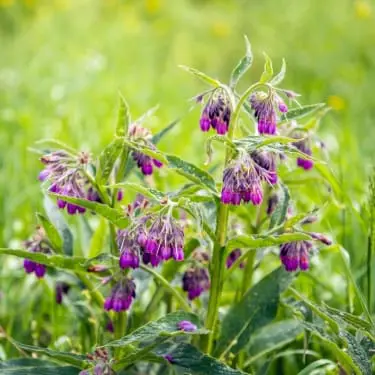
For a simple bruise salve, chop a handful of fresh leaves and warm them gently in olive oil over low heat for about an hour. Strain through cheesecloth, then store the infused oil in a clean jar in the fridge. Rub a little on bruises, sore muscles, or minor sprains. Just remember, never apply to broken skin and never take internally.
I keep a small jar of this in our medicine cabinet for whenever Mark or I need it. And there’s something so satisfying about reaching for a remedy you grew in your own backyard.
Another thing you can make using comfrey is Comfrey and Lavender “Herbal Oil for Joint Support”. This oil reduces inflamation quicky and helps you keep your joints functional.
If you ever feel like your joints let you down when trying to climb a flight of stairs, this oil might help. It is soothing and if you use it regularly, you can feel it acting and actively making your joints less swollen. You can see how to prepare yourself here.
In case you don’t want to make this oil at home, you can get this Joint & Movement Salve. Considered a miracle worker by many, this salve is made to support your joints and muscles. Your knees will thank you!
How to keep it forever
Pick the spot carefully. Comfrey has a deep root, and once it settles in, it’s nearly impossible to move. Plant it where you want it for the next twenty years.
Propagate from root cuttings two to four inches long. Plant them two to three inches deep and within a few weeks, you’ll have new plants.
Cut the leaves three or four times a season for compost or fertilizer tea, leaving a few leaves each time. A well-tended comfrey patch lasts decades.
DIY Project: Herb-Infused Honey
This might be one of my favorite homestead cooking projects. Raw honey takes on the aroma and flavor of whatever herb you steep in it, and the result is something you can drizzle into tea, spread on toast, glaze on chicken, or take by the spoonful when you feel a sore throat coming on.
Thyme honey is my favorite for cold season. Rosemary honey is incredible on roasted meat. Lemon balm honey makes the calmest cup of bedtime tea you’ve ever had.
There are two ways to do this: with fresh herbs or with dried. Each has a different shelf life, which I’ll get to at the end.
What you need:
- 1 cup raw honey (local if you can get it)
- A small handful of fresh herb sprigs or 2 tablespoons dried herbs
- A clean glass half-pint jar with a tight-fitting lid
- A chopstick or a clean spoon
How to do it:
- Pick and prep your herb. If using fresh, wash the sprigs and pat them completely dry with a clean towel. Any water clinging to the leaves can introduce moisture and spoil the honey. If using dried, you can skip this step entirely.
- Pack the jar. Place the herbs at the bottom of the clean jar. Don’t crush them, just lay them in.
- Pour in the honey. Fill the jar slowly to leave room at the top. Use a chopstick to stir gently and release any trapped air bubbles. Push every leaf down so the honey covers it completely. Any herb sticking up above the honey can mold.
- Cap and label. Put the lid on tight. Write the date and herb on the label so you don’t forget.
- Let it infuse. Set the jar somewhere cool and dark. Turn it upside down every couple of days for the first week to keep the herbs coated. Most herbs taste good in one to two weeks. Stronger flavor comes after three to four.
- Strain (optional). Once the flavor is where you want it, you can warm the jar gently in a bowl of hot tap water to loosen the honey, then strain through a fine mesh sieve into a clean jar. Or you can leave the herbs in for a more rustic look.
Storage and shelf life:
- Fresh herb honey needs the fridge (Did you know you can build a fridge that uses no electricity?). Use it within 3 to 4 weeks. The moisture from fresh leaves can cause the honey to ferment if you leave it at room temperature.
- Dried herb honey keeps for up to a year in a cool, dark cabinet at room temperature.
If you ever notice bubbling, an off smell, or the honey looks like it’s separating, throw it out. That’s fermentation, and the batch is no longer safe to eat. It’s rare with dried herbs and almost unheard of if you keep things clean, so don’t let it scare you off the project.
DIY Project: Herb Finishing Salt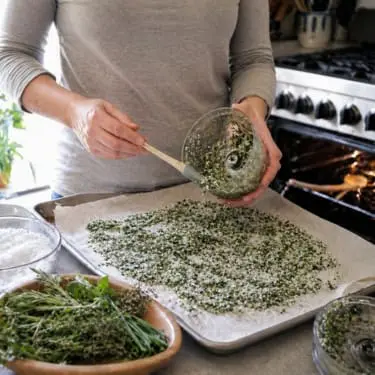
Specialty stores charge $14 for finishing salts. You can make them in your kitchen for almost nothing. I make a big batch every fall when the herb beds need cutting back, and we use it all winter long.
What you need:
- 1 cup loosely packed fresh herbs (rosemary, thyme, oregano, chives)
- 1 cup coarse salt (kosher or sea salt, not table salt)
- A blender or food processor
- A baking sheet lined with parchment paper
How to do it:
- Wash and dry the herbs. Pat them completely dry with a clean towel. Any moisture left on the leaves will cause clumping later.
- Strip the leaves. Pull them off any tough stems. Tender stems on chives are fine. Woody rosemary stems should go in the compost.
- Pulse with the salt. Add the herbs and salt to your blender. Pulse until the mixture turns evenly green with finely chopped herbs throughout. You’re not making powder, just a coarse, sandy texture.
- Spread on the baking sheet. Lay the mixture in a thin, even layer on the parchment-lined sheet.
- Dry it in the oven. Set your oven to its lowest setting, around 175°F. If your oven won’t go that low, prop the door open with a wooden spoon.
- Bake for 40 to 50 minutes. Stir once halfway through. The salt is done when the herbs look crisp, the green color has lightened, and the mixture feels completely dry to the touch with no damp clumps.
- Cool and store. Let it cool completely on the counter. Transfer to a clean, dry glass jar with a tight lid. Store in a cool, dark cabinet.
Sprinkle it over roasted vegetables, eggs, fresh bread with butter, grilled meat, popcorn, or anywhere you’d use plain salt. Once you have a jar by the stove, you’ll reach for it all the time.
Final Thoughts
Look, I know seven herbs feels like a lot to think about when you’re staring at an empty patch of dirt. You don’t have to plant them all this weekend.
If you only plant three, make them chives, thyme, and oregano. They’re forgiving, productive, and will live for years with almost no attention. Add the rest as you go.
A handful of these plants in the ground today is a pantry that fills itself for the next thirty years. That’s the whole point of perennials. You do the work once, you harvest forever.
You may also like: 
Rosemary Plant Care: The Complete Guide to Growing, Pruning, and Harvesting
The Long-Lasting Bread of the 1800s (Video)
7 High-Yield Crops for Small Spaces
These Invasive Herbs Will Devastate Your Backyard
2026 Spring Medicinal Planting Guide


