That white rind of the watermelon you’ve been ignoring your whole life can actually be turned into all kinds of good stuff in a jar. Sweet pickles, sour pickles, and probiotic-rich snacks that are good for your gut, the watermelon rind does it all, and self-sufficient families have known this for generations.
You can preserve it so it lasts a whole year on the shelf, ferment it, or throw together a quick batch of fridge pickles that’s ready in just one day.
The methods are simple, the ingredients are cheap, and the results are way better than you’d expect from something most people toss in the trash can.
Even if you already know the drill and your pantry is already lined with mason jars, I am sure there’s something in this guide for you.
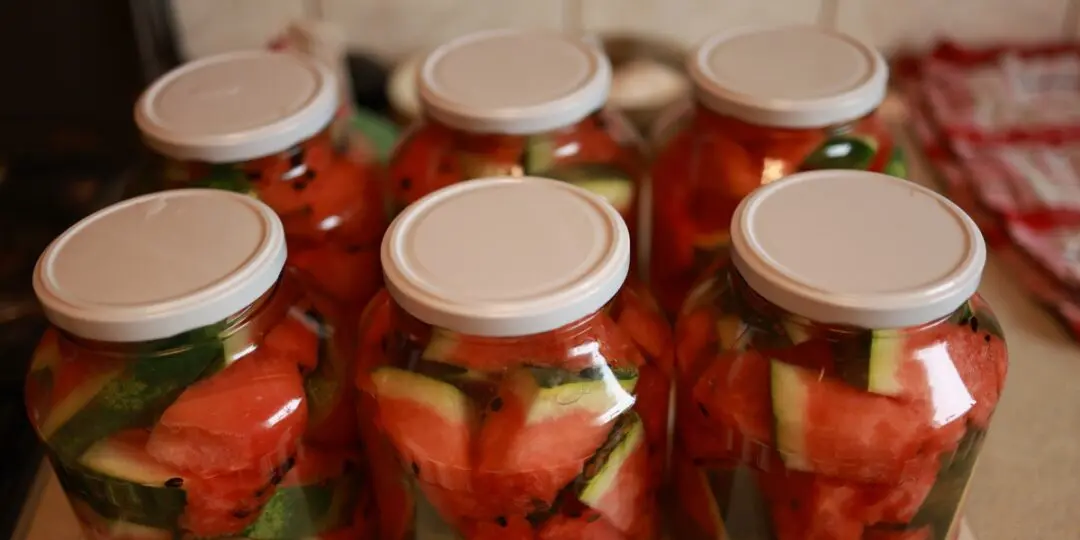
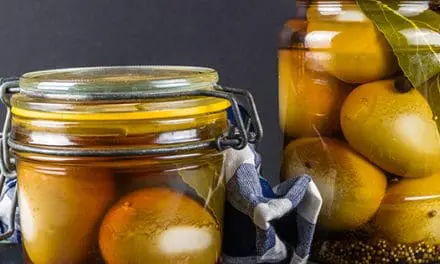
Sweet Watermelon Rind Pickles (Canning Method)
This is the classic recipe that’s been handed down through Southern kitchens for over a hundred years, and it was the first one I tried. The pickles come out sweet and spiced, almost like candy, but with a little tang from the vinegar.
Ingredients:
- About 6 pounds of watermelon rind (white part only),
- ¾ cup non-iodized salt,
- 9 cups sugar,
- 3 cups white vinegar,
- 3 cups water,
- Whole cloves and cinnamon sticks,
- 1 lemon, sliced thin,
- Ice cubes for the brine soak.
Here’s the process:
- Peel and cut the rind. Take off the green skin and scrape away most of the pink. Cut the white part into one-inch cubes.
- Soak in salt water. Mix the salt into cold water, toss in some ice cubes, and let the rind sit in there for 3–4 hours. This helps it hold its shape during cooking.
- Cook until tender. Drain and rinse the rind, then simmer it in fresh water for about 10 minutes. You want it soft enough that a fork slides in easily.
- Make the syrup. Wrap the cloves and cinnamon sticks in a piece of cheesecloth. Boil the sugar, vinegar, and water together for 5 minutes. Pour this hot syrup over the cooked rind, drop in the lemon slices, and let the whole thing sit in the fridge overnight.
- Cook and jar it up. The next day, bring the rind and syrup back to a boil and let it simmer gently for about an hour. Pack the hot pickles into clean pint jars, tuck a cinnamon stick into each one, and pour the boiling syrup over the top. Leave about half an inch of space at the top. Get rid of any air bubbles, wipe the rims clean, and seal.
- Process the jars. Put the sealed jars in your boiling water bath for 10 minutes if you live below 1,000 feet. Higher up, add more time, 15 minutes up to 6,000 feet, 20 minutes above that.
Let the jars cool on the counter for 12–24 hours and check that the lids are sealed. These will keep for up to a year in a cool, dark spot.
But here’s one thing nobody really talks about: you can spend a whole afternoon making the perfect batch of pickles and still lose them to a badly set-up pantry. It happens more than you’d think. Too much heat, a little moisture, and some sunlight hitting the jars every day. That’s all it takes for your hard work to go to waste.
And the worst part is you won’t even know something’s wrong until you open a jar and it smells off. Big grocery stores figured this out a long time ago. They use simple storage methods to keep thousands of products fresh, and most of those methods don’t cost a thing to copy at home.
If you want to make sure every jar you put on that shelf is still good when you reach for it months later, this is worth a look.
👉 Click Here to See How to Set Up Your Pantry the Right Way

Quick Fridge Pickles (No Canning Needed)
If you want pickled watermelon rind without all the canning gear, this is the easiest way to do it. No special equipment, no boiling water bath. Just make them, put them in the fridge, and they’re ready to eat the next day. Yes, it is this simple.
What you’ll need:
- 2 cups peeled watermelon rind (leave a thin strip of pink for color if you like),
- 4 cups water,
- 1 tablespoon coarse salt,
- ¾ cup sugar,
- ½ cup cider vinegar,
- Spices: allspice berries, peppercorns, whole cloves, a bit of fresh ginger, or celery seeds.
Recipe: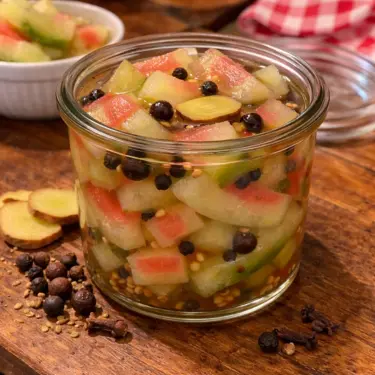
- Boil the rind. Bring the water and salt to a boil, drop in the rind pieces, and cook for about 5 minutes until they soften up. Strain them out, but keep the cooking water because you are going to use it in the next step.
- Make the brine. Take that saved water and mix in the sugar, cider vinegar, and spices. Let it simmer for about 15 minutes.
- Put it all together. Pour the hot brine over the cooked rind in a glass or in a ceramic bowl. Set a small plate on top to keep the pieces under the liquid, cover it up, and stick it in the fridge for at least a day.
Once a day or two has passed, move them into jars and they’ll remain fresh if kept in the fridge for about two weeks. These are great on cheese boards, next to grilled meat, or chopped up into potato salad. I made a batch last summer from leftover cookout rind and was honestly surprised by how good they turned out. Tangy, a little sweet, and way more interesting than regular cucumber pickles.
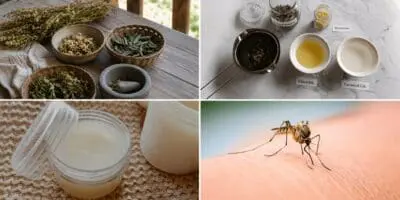
Watermelon rind is just the beginning when it comes to stuff you can pickle from your own backyard. This no-effort method works on all kinds of wild foods that are already growing near your house, and most probably, you walk right past them without knowing it.
Wild mushrooms like chanterelles, morels, and ringless honey mushrooms. Purslane. Ramps and wild garlic buds. Even dandelion buds, which most people spray with weedkiller without realizing what they’re throwing away.
The best part is that all of this is FREE. No store, no shopping list. Just what’s already growing around your property or down the road.
But before you start pickling any of it, there’s one thing you need to get right first, and that’s knowing exactly what you’re putting in your basket. This matters especially with mushrooms, where mixing up the wrong ones can make you seriously sick or even kill you. Telling apart the safe ones from the dangerous ones is an essential skill you need to master, and that’s exactly what The Forager’s Guide to Wild Foods covers.
It’s the only foraging guide a homesteader really needs and inside it, you’ll find out:
- Edible plant maps for every U.S. state
- The plants you should eat for each organ in your body
- What dandelions do to women’s bodies
- How the Amish always know which mushrooms are safe to eat
- The two forbidden berries you should eat every day
👉 Yes, I Want the Guide and My 3 Bonuses
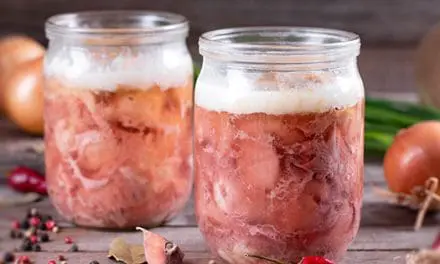
Fermented Watermelon Rind (The Probiotic Way)
This method is a bit different from the others because it doesn’t use any vinegar. Instead, you’re letting good bacteria like the ones that are already living on the rind do all the work. They feed on the natural sugars and turn them into lactic acid, which is what preserves the food and creates probiotics. That’s the same type of healthy bacteria you find in yogurt or sauerkraut.
Ingredients: 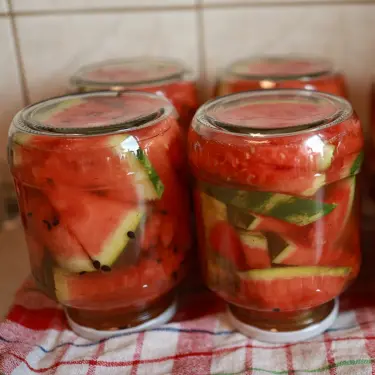
- Watermelon rind, peeled and cut into pieces,
- Non-iodized sea salt or kosher salt (about 1 tablespoon per cup of water),
- Filtered or non-chlorinated water,
- A clean quart jar,
- A fermentation weight. That’s just a small heavy disc that sits inside the jar to keep food pushed under the liquid. If you don’t have one, a small zip-lock bag filled with water works the same way.
- Spices of your choice: cinnamon and star anise for sweet, or mustard seeds, bay leaves, and garlic for savory.
Recipe:
- Pack the rind into the jar and add your spices.
- Make the brine. Dissolve the salt in water and pour it over the rind. Leave about an inch of space at the top.
- Keep everything under the liquid. This part is important. Anything poking above the brine can grow mold. Use your weight or bag to hold things down.
- Let it sit at room temperature out of direct sunlight for 2–4 days. If you don’t have a special fermentation lid, just open the jar once a day to let the gas out. This is called burping the jar.
- Taste it after two days. The longer it sits, the more sour it gets. Once you like the flavor, put the lid on tight and move it to the fridge. It’ll keep for up to three months.
Two things to watch out for: always use non-iodized salt, and don’t use tap water straight from the faucet if it’s chlorinated. Chlorine kills the bacteria you need for this to work. Use filtered water, or just fill a jug and let it sit open on the counter for 24 hours. In this way the chlorine will go away on its own.
Equipment and Food Safety
Getting set up right from the start makes everything easier, so let’s cover the basics before we begin anything.
For water-bath canning, you’ll need canning jars with two-piece lids, a pot deep enough so boiling water covers the jars by at least an inch, and a rack that sits on the bottom of the pot so the water can flow freely under the jars. Jar lifters are a must because you really don’t want to grab a boiling hot jar with regular tongs.
A few rules that matter:
- Use non-iodized salt, like sea salt or kosher salt, for any pickling or fermenting. Regular table salt has iodine in it, which can mess with the process and make your pickles soft.
- Don’t swap sugar for sweeteners in recipes meant for the shelf. Sugar is doing more than just adding sweetness. Utah State University says sugar actually helps preserve the fruit.
- Pick good watermelons. Look for strong green stripes, a yellow or orange spot on the bottom where it sat on the ground, and a dry stem. Rinds from well-ripened melons carry more of the natural bacteria that make fermentation work, so you’ll get better pickles.
- Pickling and fermenting are two different things. Pickling uses vinegar to preserve food. Fermenting uses salt and lets good bacteria turn natural sugars into acid, which is what preserves it. Both work great, but they give you different results. The main difference is that fermented watermelons will have the good bacteria that make your gut stronger and healthier.
Final Thoughts
If you already know your way around canning, this is just one more thing to add to your pantry and a wonderful way to make use of something you would have otherwise thrown in the trash anyway.
The sweet pickles are a Southern classic that deserve a spot on your shelf. The fermented kind gives you gut-healthy probiotics from something that costs you nothing. And the fridge pickles are perfect for when you’ve got leftover rind and half an hour to spare. There’s really no reason to waste any part of a watermelon when every piece can be turned into something good. Next time watermelon season comes around, grab a few extra watermelons and set aside an afternoon. You’ll end up with jars you’ll be happy to open up in the middle of winter.
You may also like: 
Canning Myths Debunked By The Amish
The Wild Plant That People Fought Over During The Great Depression (Video)
20 Plants That Attract Birds to Your Garden
10 Amish Canning Recipes You Should Know About
Canning Potatoes: A Self-Reliant Staple for Your Pantry
Canning Secrets Nobody Tells You About


