Canning is a safe way to preserve food if it is done properly. It involves transferring food into containers and heating them so that any microorganisms and enzymes that could cause the food to spoil and become a health hazard are destroyed. The heating process gets rid of the air, and a vacuum seal is formed as it cools down. The seal keeps air from getting back into the jar. Nevertheless, despite the benefits associated with canning foods, it is essential that the right protocol is followed to prevent food poisoning. Here are some canning secrets nobody tells you about.
The Benefits of Canning Food
There are several benefits associated with canning food, these include the following:
Canning is Good For The Environment: The less food you buy, the better it is for the environment. Food is often transported around the world to factories, shipped to farms and distributors before it makes its way to local stores. All of which leaves a carbon footprint because of the amount of fuel used. Additionally, you can reuse canning jars which reduces packaging waste.
You Will Save Money: Food is not cheap, you can save yourself some money by buying pickling foods when they’re in season, and then canning them to eat when they’re out of season.
Harvest Preservation: Gardeners are sometimes left with too much harvest. They spend months waiting in anticipation for the garden to start producing, and when it does, you end up with excess. Once you’ve given what you can away to friends and family, can the rest of it.
How to Can Food
As mentioned, canning food in the right way is essential. Heating the jars to the wrong temperature, or not letting them cool down enough will introduce bacteria and contaminate the food. According to The National Center For Home Food Preservation, the safest ways to can foods are as follows:
Pressure Canning: You can safely can low acidic foods (pH of 4.6 or higher) with the pressure canning method. Foods such as poultry, seafood, meats, and vegetables must be pressure canned to prevent a botulism outbreak. Place the jars of food in 2 to 3 inches of water in a pressure canner and heat to at least 240 degrees F. You can not achieve this temperature any other way other than in a pressure canner.
Atmospheric Steam Canning: When using the steam canning method, do so with naturally acidic foods, or foods that have been properly acidified and have a pH value of less than 4.6. You can use this method for pickled vegetables, preserves, and most fruits. Do not use the steam canning method for low acidic foods such as meats and vegetables.
Related: Canning Mistakes Even The Most Advanced Homesteaders Make
Boiling Water Bath: This canning method is safe for preserves such as jellies and jams, pickles, tomatoes, and fruits. Place the jars in a large saucepan of water that has been heated to 212 degrees F, and make sure they are fully submerged. It is important to mention that when canning high acidic foods that have a pH value of 4.6 or less, you will need to add citric acid or lemon to the jar.
Additionally, I would advise getting yourself a canning book that will walk you through the canning process step by step. It will also provide you with a variety of canning recipes to choose from.
Before putting your jars away, label them with the date they were made and the contents. You can either purchase custom-made printed food labels or use an adhesive mailing label or masking tape.
Canning Methods to Avoid
A few years back, the following canning methods were considered safe. However, safety standards have changed, and you can no longer use the following methods for home canning:
Hot Fill/Open Kettle: This method involves heating the food first, and then transferring it into jars so that the heat can seal the jars. 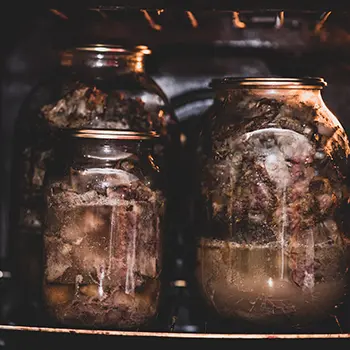
The Oven Method: Putting jars in the oven is dangerous, not only does it increase the risk of explosion, the heat does not distribute evenly throughout the jars.
The Microwave Method: You will read about canning foods in the dishwasher, slow cookers, and microwaves. None of these methods are recommended, again, they can cause the jars to explode.
What is the Best Equipment For Canning
You may already have some of the required equipment for canning in your kitchen; if not, you’ll need to go out and do a bit of shopping. But in general, the following tools will be suffice:
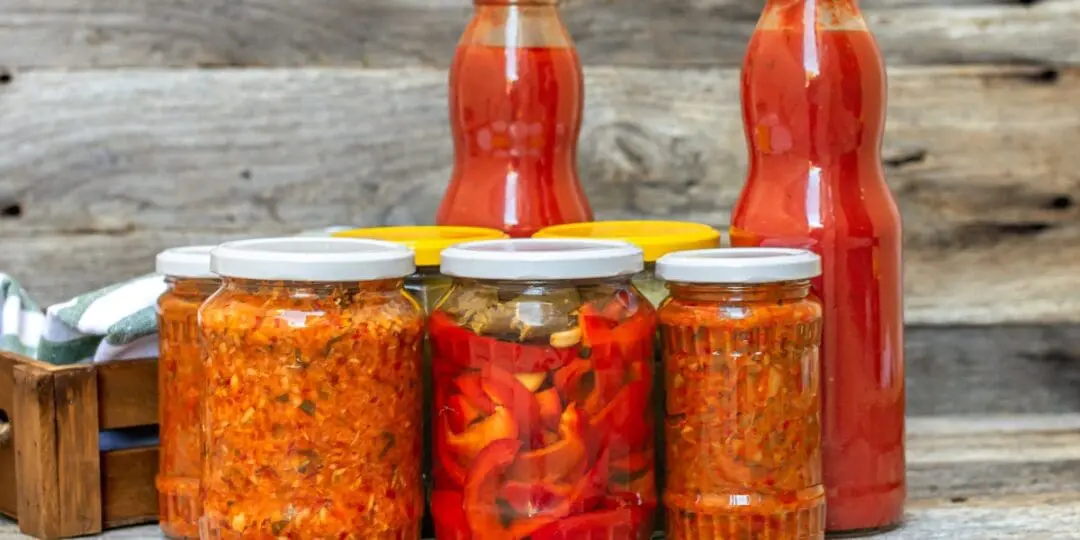
Glass Jars: Make sure the jars are glass, and that they can withstand temperatures of up to 240 degrees F. This is important because high temperatures can cause glasses to shatter. Additionally, metal two-piece screw lids are best for safety and quality. Jars are available in different sizes from ½ pint to ½ gallon sizes and everything in between. You will need to check which size is best for your specific recipes before going ahead. We’ve found that wide-mouth and regular threaded mason-type jars are the better choice. They have strong seals, and breakage is rare.
Unfortunately, traditional mason jars are hard to find, and some homesteaders have used alternatives such as salad dressing, mayonnaise, or quart size, and commercial pint jars. The problem with these jars is that the glass isn’t sturdy enough which leads to jar breakage and seal failures. Make sure your jars are purchased from a national retailer and not third-party vendors. Experience has taught us and many other homesteaders that third-party vendors sometimes sell inferior products. Here are some tips to apply when using canning jars:
- Check that the jars are free from cracks or nicks, even the smallest nicks and cracks can cause breakage.
- Use warm, soapy water to wash the jars before using them. There is no need to sterilize jars.
- Warm the jars before filling them.
- Before placing the lids on the jars, wipe the rims.
Related: Recipes I Made From The Lost Super Foods Book: Canned Hamburger Meat
Utensils: I don’t advise improvising when it comes to canning utensils. These items are a must-have and will make the process a lot smoother:
- A sturdy pair of kitchen tongs to pick the jars up out of the water
- A ladle, preferably stainless steel to spoon the food out and tip into the funnel
- A stock pot that’s a minimum of three inches taller than the jars
- A canning funnel, preferably stainless steel to transfer the food into the jars
- A bubble remover and magnetic lid lifter to release trapped air
- A rubber gripped or magnetic canning jar lifter to lift lids out of the hot water
Canner or Cooker: You can submerge your jars in a regular large saucepan with a canning rack, but there are canners specifically designed for canning. Water bath canners are the least expensive, they are ideal for beginners. Pressure canners are pricier, and for homesteaders with a bit more experience with canning.
Kitchen Towels: Regular kitchen towels won’t do, you’ll need the sturdier type to place the canning jars on to cool down.
A Food Strainer/Food Mill: To speed up the pureeing and grinding process, you’ll need a food strainer or a food mill. They work wonders for making things like applesauce and preserves. If you use electricity, food processors and blenders will work just as well.
Final Thought
It is advised that you do some research before canning to ensure you are following the proper guidelines. As mentioned, mistakes can lead to food poisoning. If you are looking for some great information on canning, I would advise checking The National Center for Home Food Preservation. It is a well-known authority and you’ll also find information about freezing, fermenting, drying, and curing.
You may also like:
Makin’ Bacon: How to Dry Cure Pork Belly
The Canning Mistake That Could Make or Break Your Winter Supplies (Video)
What I’ve Learned Homesteading With My Family of 8
40 Uses For Sawdust Around Your Homestead
Cheap Recipes To Keep You Well Fed In The Next Crisis


Has anyone tried an Instanapot of any knock off’s to can stuff? They are pressure cookers like what my mom used for cooking beans.
The pressure doesn’t get high enough and the pressure fluctuates. You need consistent 15 lbs of pressure for safely canning.
15lbs of pressure is based on altitude, is it not?
Yes, check the manual that came with your canner.