How many times have you been on the road, without anywhere to do laundry? Whether it’s homesteading, camping, a road trip or some other adventure, nobody wants to be caught wearing dirty clothes.
Laundromats can be expensive and difficult to find, especially if you are driving through the country. Many hotels don’t offer laundry services unless you are willing to pay an arm and a leg. If you live off-grid or are worried about your energy consumption, maybe a traditional laundry machine won’t work for you.
Luckily, I’ve got a DIY project to solve this problem. It’s cheap and easy to make a portable washing machine to use off grid or bring on the go. In fact, I was able to purchase the supplies (not including the drill and drill bits) for less than $20!
With a few basic items, that you may even have lying around, you won’t have to worry about being caught without clean clothes again.
Supplies
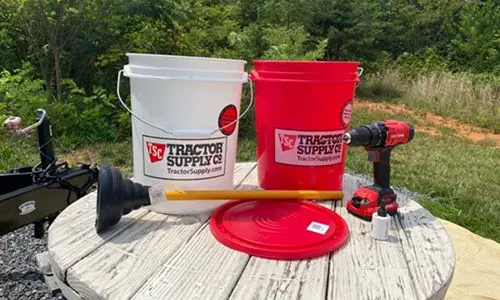
- 2 x 5-gallon buckets
- 1 x lid that fits the 5-gallon bucket
- 1 x plunger, 1 x drill, 1 x drill bit (I used 1/8” but you can use larger)
- 1 x hole saw bit (1 1/2”)
Step 1
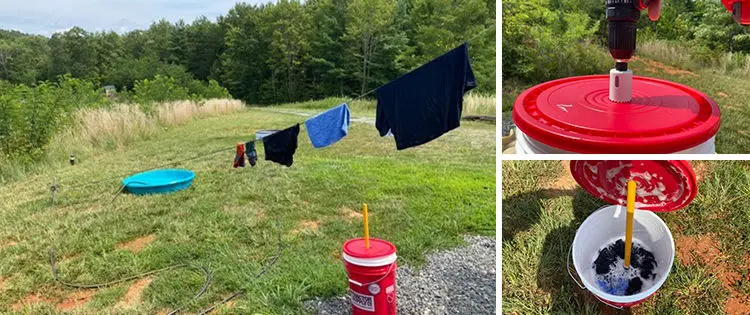
First, you’ll need to choose one bucket to the be the inner “basket” for your clothes. Use the drill bit to carefully drill holes into the side of the bucket. Stabilize the bucket to prevent it from slipping while you are drilling.
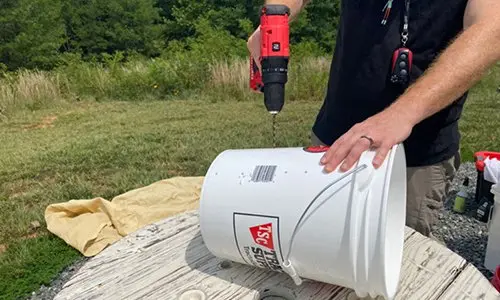
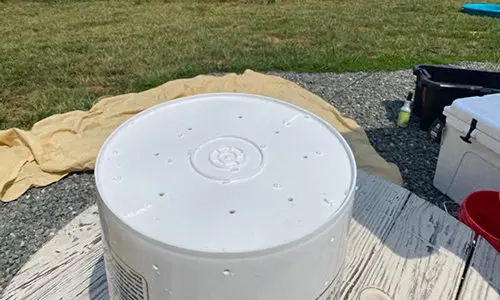
Make sure that the holes are not too close together so that you can maintain the structural integrity of the bucket. You also don’t want the holes too far apart. The holes are where the water will drain after you have washed the clothes. If you don’t have enough holes for the water to drain out, it might take a while.
Don’t forget to drill holes into the bottom of the bucket, too!
Step 2
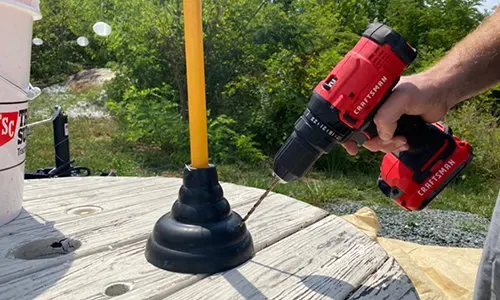
While you still have the drill bit attached, drill several holes in the head of the plunger. Like the bucket, you want enough holes so that water can move through the plunger but not too many holes so that it loses its strength.
The holes allow a route for the soap and water to escape from the plunger’s suction, so that the water becomes soapy. It basically replaces the agitator in a normal washing machine.
Step 3
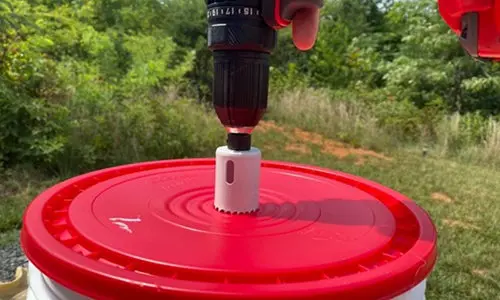
Use the hole saw bit to make a hole in the center of the top of the bucket lid. The arm of the plunger will stick out through this hole so that you can easily access it. Make sure it is centered and not off to the side, or this might affect the efficacy of the washing machine.
Be very careful to stabilize the lid before you drill. The hole saw works quickly but won’t grip the plastic lid unless you use enough pressure. You don’t want it to slip and get injured.
Step 4
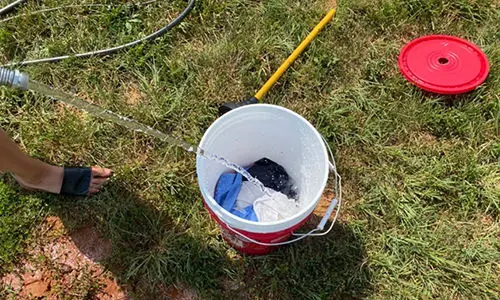
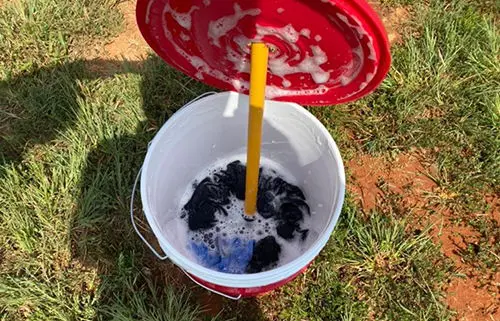
Place your dirty clothes into the “basket” bucket with the holes, and then put the “basket” bucket into the second bucket that is intact. In my case that is the red bucket. Fill a little less than halfway with water and add in powdered laundry detergent. You should use biodegradable soap since the water will be running off into the environment.
For this example, I comfortably washed 1x t-shirt, 1x pair of men’s boxers, 1x pair of socks, and 2x dish rags. I could have fit more items in the washing machine, but the clothes were dirty, so I wanted them to get some extra attention.
Step 5
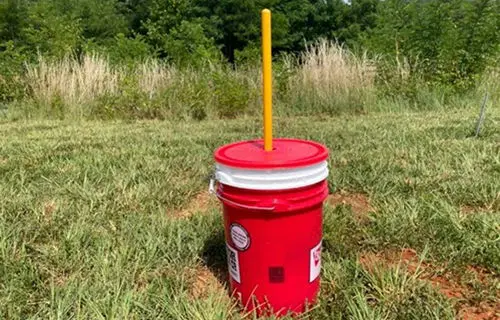
Put the plunger in the “basket” bucket on top of the clothes and then the arm of the plunger through the lid. Close the lid securely so that water and suds do not escape.
Step 6
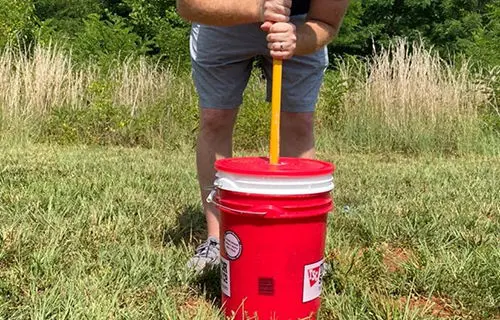
Plunge, plunge, plunge! Use the plunger exactly how you would on a toilet. The plunger will work as an agitator and the water will soon begin to get soapy. I recommend plunging for at least 5 minutes, but 10 minutes may be necessary if your clothes have stains or are particularly dirty.
Step 7
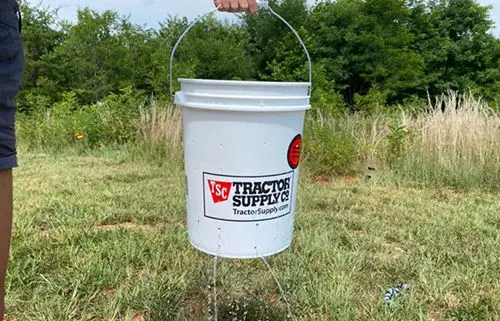
Open the laundry machine and take the “basket” bucket out of the second bucket. Let the water drain. Rinse thoroughly until water runs clear and garments are no longer soapy.
You can have a helper hold the bucket while you rinse the clothes, or you can set it on the ground. You can also hang the bucket to make it easier.
Step 8
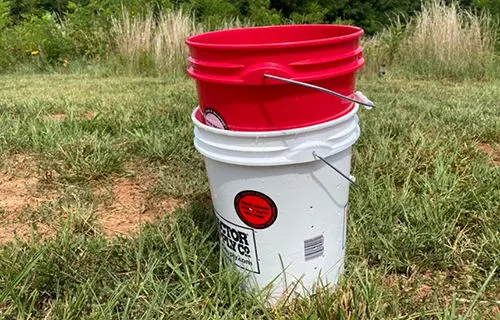
Reverse the buckets so that the second bucket is inside of the “basket” bucket. Sit on top of the bucket and use the pressure to squeeze out extra water from your clothes. This pressure is in lieu of a spin cycle but works just as well!
Step 9
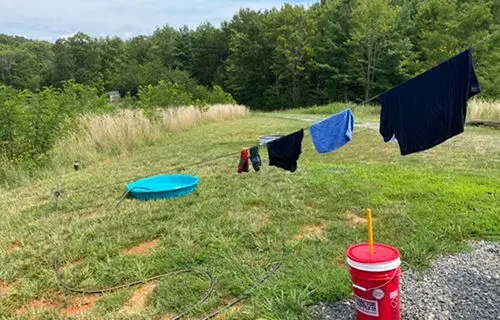
Remove freshly cleaned clothes and let them air dry!
Helpful Tips & Suggestions
This contraption really works, and my clothes came out looking and smelling great. I don’t mind sitting on the bucket, but you can always add a “spin cycle” to drain extra water if you prefer. To do this, tie up your “basket” bucket to a tree and spin it quickly so that the water runs out.
Depending on the plunger that you purchase for this project, you may need a different size hole saw bit. I’ve found that 1 ½ inch is large enough to fit most plungers without any issues, but there may be an exception out there. If you are worried about it, you can always size up. Alternatively, if you don’t have a hole saw bit, you can poke a hole through the plastic lid by some other means. All you need is for the plunger handle to fit out the top, it doesn’t have to look pretty.
Don’t overfill your bucket! This project is a great solution for a cheap and easy laundry machine that you can bring on the go, but it isn’t indestructible. If you over fill the “basket” bucket your clothes may not get as clean, and it might over-flow with suds.
You may also like:
 Easy DIY 165 Gallon Rain Harvester



Good post! That was the method we used in our early homesteading days. We needed to do a lot of wash so a bucket wouldn’t do. We had dual wash tubs just for the purpose. It was an antique when we bought it. Then a plunger was used to agitate. We did not drill holes in the plunger. We wanted maximum suction to draw the dirt and grime out.
Thank you so much for sharing this with us and also for your feedback, Ron! We really appreciate your support.
I’ve used this method many times, works very good (for small loads).
One suggestion… use 3-4 small wedges or clothespins, separated (and spring discarded) to wedge between the two buckets. This will prevent the ‘basket bucket’ from getting pushed to deep or wedged into the ‘water bucket’ during plunging. (you could even drill small holes into your wedges and tie them to handle so as not to loose them.) This way, the two buckets come apart very easily.
I drilled holes into my plunger but the suction theory as mentioned earlier by Ron might work better. Next time I’ll try that first before drilling any holes.
sorry… too deep, not ‘to’ deep
I had a similar idea to this YEARS ago and have it in my preps…along with a mop bucket wringer to get the water from the clothes. I love the modifications you have made with the dual bucket (the one on the inside for the washer tub with holes) AND drilling the holes in the plunger which would eliminate the suction it creates. Reversing the buckets inside each other & sitting on it to push out the water from the clothes is another good modification, eliminating MY NEED for the mop bucket ringer. Going to make the changes to my system to make it more compact without the need for the mop bucket ringer! EXCELLENT work, by the way!
Way too much work I did not lke balencing laundry on a bicycle to get to the laundy during a Nebraska winter! I coped by filling the bathtub with hot water adding detergent stirring it with the clean plunger, then adding clothes, and using the plunger all over the jeans sheets towels etc. I rinsed them in the kitchen sink and hung them in the basement, or on a stand that fit in the tub. For some reason this is in pale grey tiny type so I apologise for the many typos. LG
This is great for small loads. I, too have the mop bucket wringer,and decided that would be my rinse bucket. The mop bucket wringer doesn’t work so well for small, thin items, but it does a good job with larger things like towels, jeans, and sheets.
Very clever idea for camping. . . When I needed a washing machine for the house, I found one that was being thrown out, replaced a 12 dollar part
and it ran for 20 years. Instead of having a drier, I have two washing machines. You can wash clothes faster with two machines than with one,
and when one breaks, you’re not without a machine. With two machines, you can reduce your demand for water and detergent by washing whites
and lights in the first machine, dump it’s soapy water into the second machine which contains the dark and heavily soiled clothes.
(Add 1 tbs of borax if your laundry is heavily soiled with grease.)
Rinse the second load with with rinse water from the first machine. I’ve done this for many years. My clothes come out clean in less time, and
I use half as much water and half as much detergent.