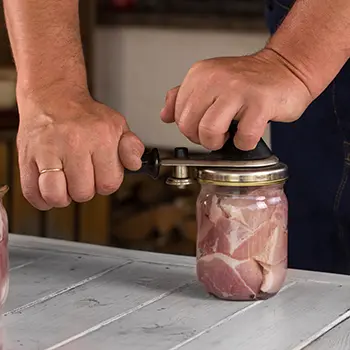
For most homesteaders, canning is just one of the essential skills to fully utilize your resources for the long term. When done correctly, this method of food preservation can extend the shelf life of food and other perishables by up to one to five years. In fact, it can even be longer depending on the surrounding variables.
The important phrase to remember here is “when done correctly.” Canning isn’t exactly a complicated process, but to be done successfully, each step must be executed perfectly. The thing is nothing is perfect and mistakes do happen.
But there are mistakes that beginners are and there are those that even the best in this trade still tends to do. In this article, we will discuss some canning mistakes that even experts can make.
Coming Up With A New Recipe On The Fly
One common mistake that both novice and experienced canners can make is to deviate from a proven and tested recipe and add or reduce a little more of something. Acting as if you’re smarter than the recipe is already a bad idea. How much more if you try to come up with something on the fly by yourself.
Recipes need an arduous amount of testing in order to get it right. The ones you see in Ball Blue Book Guide to Preserving and in the National Center for Home Food Preservation website have been fervently tested for safety.
Reusing Lids
Single-use lids are named exactly as how they are meant to be used. After using them once, it should never cross your mind to use them again for your next batch of preserves.
The reason behind this is not because we do not care about sustainability and saving the planet. While it is highly recommended and highly tempting to reuse your things, you should avoid doing it with canning lids. This is because they won’t be able to give a strong enough seal as the first time around.
Neglecting To Remove Air Bubbles
Ignoring air bubbles in your food isn’t exactly wrong. But when you’re processing them for preservation, not taking care of air bubbles will cause a huge headache.
Why? Because air bubbles mean excess air and excess air means that you won’t be able to get a good seal on your jar. In canning, the seal is everything and if you can’t get it right, you might as well just put your food in the freezer.
One important to remember here is to AVOID using a metal spoon to get rid of air bubbles AT ALL COST. Instead, you may use a wooden spoon or chopstick to stir your pot. The logic behind this is that metal utensils can etch into the glass, which will reduce the latter’s integrity leading to jar breakage over time.
Cooling To Slowly
Sometimes, experts can forget about not cooling their jars quickly enough after taking them out from the canner. While heat is essentially a key element in canning, keeping your jars hot for longer periods once they get out of the canner will do more harm than good.
Specifically, this is caused by a group of microorganisms called thermophiles. While harmless, these buggers can survive canning and can produce acids at the right temperature. What results is a defect called “flat sour” and will give your food nigh uneatable because of its undesirable flavor.
Shortchanging Your Heat
By now, it should’ve been etched in your mind that heat is the key to destroying unwanted bacteria like the C. botulinum. It is a microorganism that produces an enzyme that attacks the body’s nerves. Its potent toxicity causes difficulty breathing, muscle paralysis, and even death.
Acidic foods, like fruit and tomatoes, have low a chance of nurturing the said bacteria and can be safely preserved with just boiling water.
However, the same won’t apply to foods with less acidity, like meat and low-acid vegetables. To ensure utmost safety in canning them, you have to bring the temperature up to at least 240°F if you’re using a pressure canner.
But if you don’t have the latter, a USDA-approved pressure cooker can be used, but the heat should be brought to at least 250°F.
Not Minding Your Headspace
In canning, “Headspace” is used to refer to the gap between the top of the food as it settles in your jar and the bottom of the lid.
While it is tempting to utilize all the vacant inside your jar, setting aside this so-called headspace is a wrong move. Otherwise known as overfilling, this will prevent your lids from keeping a good enough seal and will cause your food to spoil quicker.
Lousy Storage
Aside from a good recipe, proper canning technique, and perfect execution of the procedures, some factors still affect the outcome of the canned food. One of these is a good storage area.
Canned food should be kept in a cool, dry place, away from any direct heat and sunlight. Anything less stellar than that will only give you disappointment when the time comes.
Light can cause discoloration among many canned foods. Heat can turn its contents into an unsatisfying mush and will encourage what little microorganisms are left to grow and multiply. Dampness will reduce the integrity of metallic lids and screw bands and will allow trace amounts of air which can inhibit various bacteria and molds to spawn in your food.
Not Accounting For Altitude
It may seem like altitude doesn’t matter, but it is one of the biggest players in the process of canning. Canning recipes are tested at sea level where the boiling point of water is at 212 ºF.
But for every 500 ft of increase in altitude, water’s boiling point is lowered by at least 32.9 ºF.
So what does this mean? It simply signifies that you have to vary your processing time to compensate for the height difference.
The higher you get, the longer you have to boil the water to reach the necessary temperature to sterilize the jar and its contents. This applies whenever you are canning food that’s high in acidity.
Not only that, but you also have to adjust the pressure if you are dealing with low-acidity food.
Messing Up The Timing
As we have said earlier in this article, canning is all about perfect execution and having precise timing is part of it. But being too confident in your skills in canning, especially your ability to keep track of time, is a recipe for disaster.
Always use a timer and never take a shortcut when it comes to processing time.
Conclusion
It was said that canning is best learned before you have to do it, not when you have to do it. If you’ll start now, you’ll become an expert in no time. Still, mistakes happen no matter how good you become in doing it.
Hopefully, this list will help you become aware of those mistakes and make you steer away from them in the future. If you feel that other things deserve to be in this article, feel free to share them with us below.
You may also like:
Cheap and Easy to Build Root Cellar in Your Own Backyard (Video)
Foods You Should Never Buy And Always Make At Home
How To Get Rid Of Tomato Hornworms Before They Destroy Your Tomato Plants


” … for every 500 ft of increase in altitude, water’s boiling point is lowered by at least 32.9 ºF”
Not even close to real physics. 500 feet drops the boiling point 0.5°C, or 0.9°F.
This reply is correct. .9 degree for 500 feet altitude gain. Without splitting hairs down to fractions. On your pressure canner control, 5lb will be about 230 degrees F temperature when it giggles. 10 lb will be about 240 degrees F, and 15 lb will be about 250 degrees F. These are practical numbers for use in canning. Once you establish what the elevation is where you are, that will never change. Adjust your times and pressures to the recommendation in your canner book accordingly.
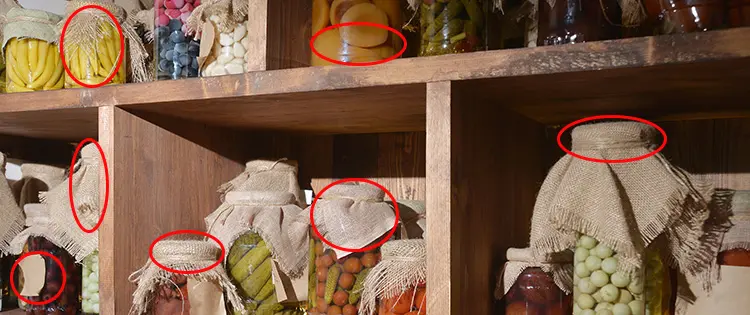
If the picture at the top of the article is meant to get attention, one might think there would be an explanation of the errors indicated by the red circled objects. But no.
You really call your credibility into question with this sort of clickbait antics.
Great article, thanks so much 💚
This article is useless. If, for example, I am not cooling my jars quickly enough, what is the correct way to do it? What’s the good of pointing out a problem if you aren’t going to give an answer to it?
This is one of the most poorly written articles I have ever read! And some of the info is just wrong!