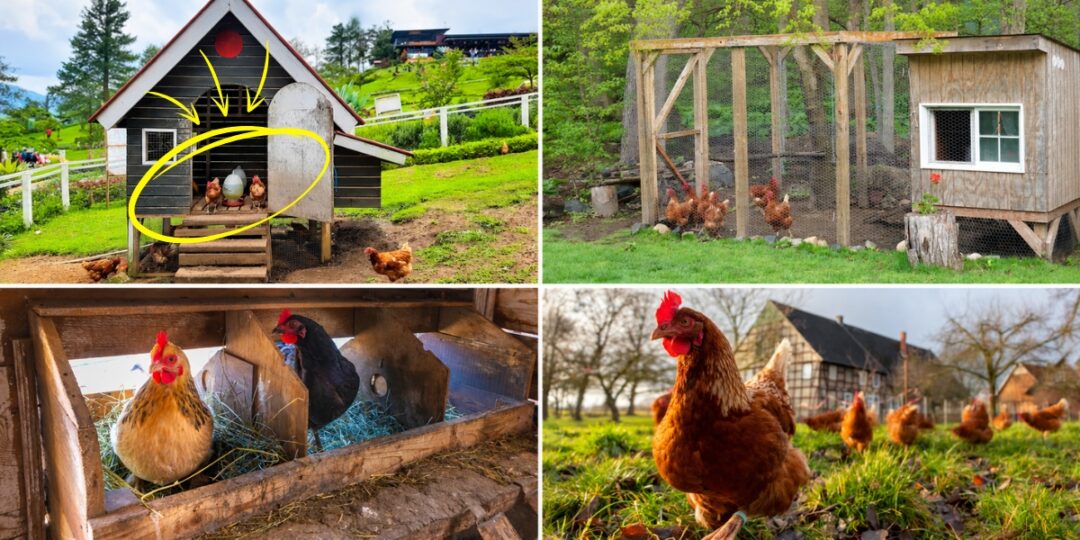
Taking care of a homestead is not an easy job for sure. But something no one prepared me for is how demanding my chickens are.
When you think about hens and chickens, you kind of know what the things you need to do. They need feed and water; you need to collect the eggs and clean the coop. Looking at these, all you see are some basic tasks. But once you start doing them every single day, you realize that they take a lot of time and effort.
And the other thing is that if you want to take two days off or you feel unwell, your chickens don’t care about it. You still need to take care of them, but with this type of coop, things get easier.
Building it was life-changing for me! It was a project spread out over an entire year, and now I want to share everything with you.
Bucket Waterers With Cups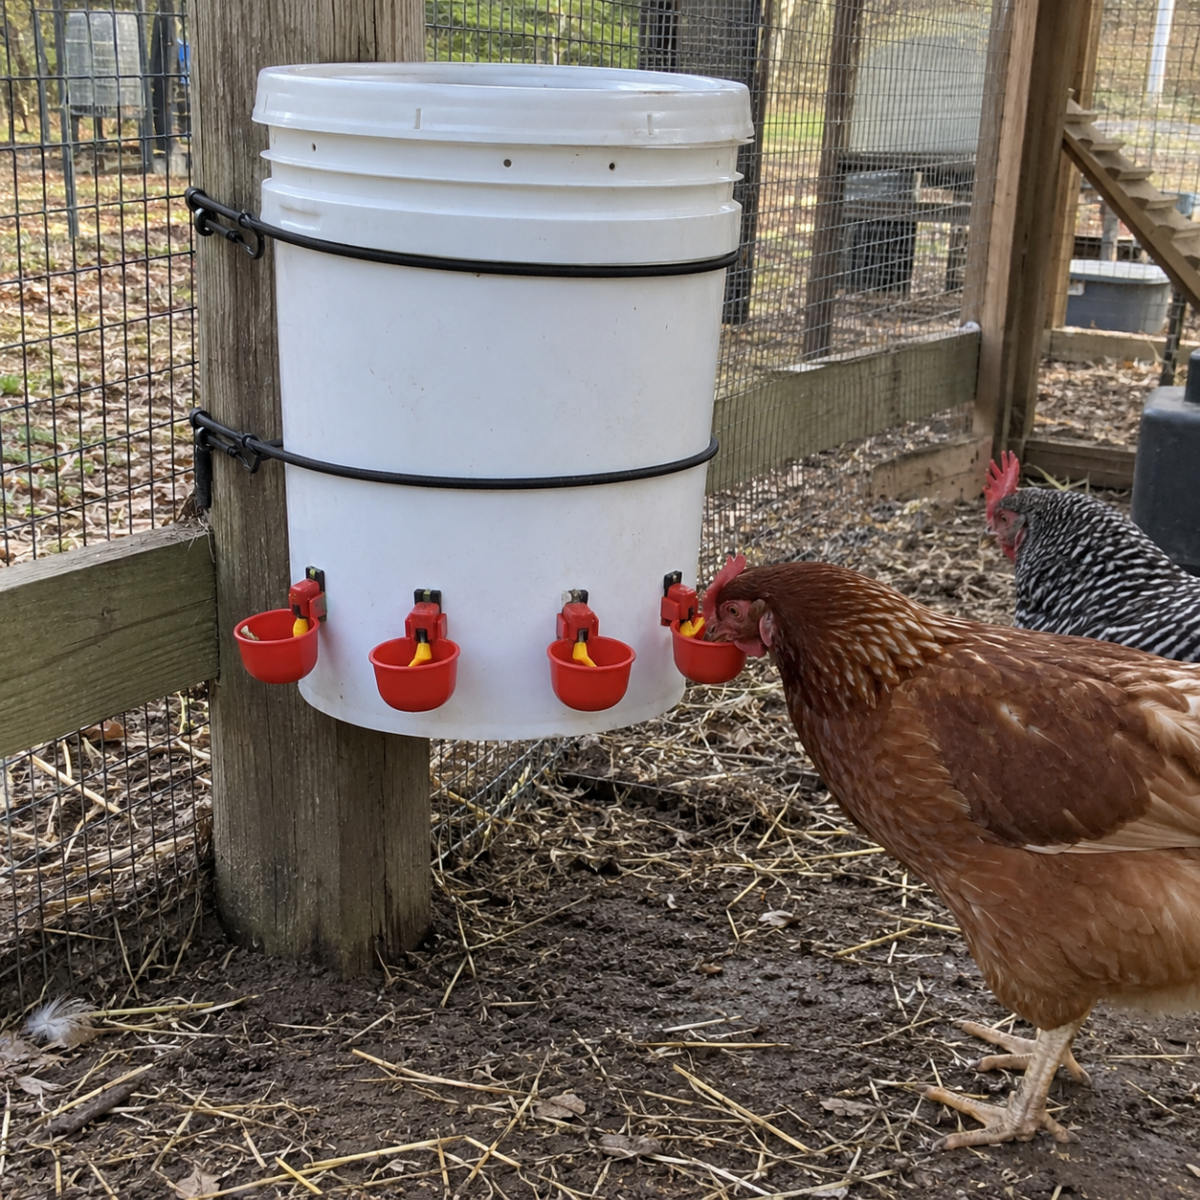
I think the first thing you need to do if you want a chicken coop that works for itself is to take care of the water. Feed is easier to deal with.
This is the cheapest upgrade on the list. All you need is a food-grade 5-gallon bucket with a lid and three or four poultry drinker cups.
The thing with these cups is that each one of them has a little paddle inside, and when a hen taps it, the cup refills. Why is this important? Because it keeps the water fresh. It’s also very useful in the summer because just leaving water out in the coop is not a reliable solution. When it’s very hot outside, that water will evaporate in just a couple of hours!
So, here’s how I built it. Below you find the step-by-step instructions.
- Draw three or four dots in a row on the outside of the bucket, about three inches up from the bottom and four or five inches apart. That’s where your cups go. Keeping them up off the bottom lets grit settle underneath instead of plugging them.
- Drill a hole at each dot, using the bit size printed on the cup package, usually around three-eighths of an inch. Go slow so the plastic doesn’t crack.
- Push a cup stem through a hole from the outside. Reach inside the bucket, slide the rubber washer onto the stem so it presses flat against the wall, and hand-tighten the nut behind it. That washer is the only thing stopping a leak. Turn the cup until the paddle hangs straight down, then do the rest.
- Drill two nail-sized holes near the top of the bucket. These let air in as the water goes down. Without them, the bucket seals itself, the way a straw holds water when you cap the end with your thumb, and the cups quit filling.
- Strap the bucket to a post in the run with a couple of bungee cords, high enough that the cups end up level with your hens’ backs. You want them reaching up a little, not bending down.
- Fill it to an inch below those air holes, or the water runs back out of them. Lid on, then press each paddle with your finger until water comes through. Watch a minute for drips.
Then build a second one for the other end of the run. Two buckets give you ten gallons, which carries ten hens through three days even in the heat, and if a cup sticks or a bossy hen guards one station, nobody goes thirsty.
Gutter Feeder That Holds Three Days of Feed
This one is my favorite. It’s easy to make and incredibly useful. Also, it helps you not spend a penny on those expensive feeders you find online or at the store. No need to waste money when you already have everything in your backyard.
You take some basic house rain gutters; how many depends on how large your flock is. You put them against the wall, fill them with feed, and that’s about it.
Here are some simple instructions.
- Cut each downspout to about three feet. Longer holds more, but keep it short enough that you can pour a scoop in the top without hauling out a ladder.
- Push an elbow onto the bottom of each pipe and run a screw through the joint so it can’t work loose. Turn it so the mouth faces out into the run.
- Fasten each pipe flat to the wall with two straps, one near the top and one just above the elbow. Make it solid, because your hens will lean on it and one of them will stand on the elbow.
- Set the height so the mouth of the elbow sits about level with your hens’ backs, ten to twelve inches off the ground. Lower than that and they’ll scratch the feed out onto the floor. Higher and your smaller birds can’t reach in.
- Cap the top of every pipe. A downspout cap works, so does a scrap of wood with a rock on it. You’re keeping rain and mice out by doing this.
- Fill one up and watch what happens at the mouth. The feed should slide down, build into a little pile, and stop by itself. That’s the whole thing working.
That’s what I like about little setups like this feeder. You get them working, and they take some of the chores off your hands.
And there’s another clever idea the Amish use that takes this even further.
They have a way of feeding their free-range chickens that also helps keep their gardens healthy.
They basically build a movable chicken run and move it around the yard. The chickens eat bugs and other pests, scratch around for food, and leave their droppings behind to fertilize the soil. So while the chickens are getting some of their food for free, they’re also helping prepare the ground for the next garden.
And when you think about it, this is how things are supposed to work. Nature is already a system that knows how to take care of itself. I think one of the best things you can learn as a homesteader is how to work with that system instead of against it, like so many modern practices have us doing.
That’s what I’ve always liked about the old Amish way of doing things.
They know how to make one thing take care of another, without spending more money or creating more work for themselves.
Here are some more old Amish ways of letting nature do the work for you.

Automatic Coop Door
Now, I have a great automatic door I got from a professional store. It runs on a small solar panel and a light sensor. In the morning, the door is open and at night, after the chickens get inside and it is dark, the door closes and protects the flock.
But there was a time I didn’t have this automatic door. And I improvised. I was looking on some forums and found some instructions from a guy for a coop door that closes itself in the evening. All you need to build it is a milk jug.
The catch is that this door is only able to close in the dark. For this one, you need to be there to open it in the morning. But it still saves you some time and some worries.
Setting it up:
- Cut the door from thin plywood, a bit bigger than the pop hole, and keep it light. Three or four pounds. A heavy door won’t lift.
- Build a track on each side of the hole. Screw one strip of wood up each side, then a second strip over the face of it, so the door sits in a channel and still slides. Rub a bar of soap inside both channels.
- Screw the screw eye into the top of the door, then mount the pulley on the wall above it. Mount it high, because the jug drops as far as the door rises and needs that much room underneath.
- Tie the cord to the screw eye, run it up over the pulley and down the wall, and tie the jug on.
- Prick the drip hole with a sewing needle. A hole you can see is too big and will empty the jug by lunchtime.
- Fill it in the morning and write down when the door comes down. Give it a couple of days to dial in, since the drip slows as the jug empties. Closing too early means a smaller hole, so tape that one over and start again. Closing too late means more weight, so drop a handful of gravel in the jug.
I eventually went to the solar door because I wanted something more reliable, but that jug hung on my coop wall for two summers and it never once failed me.
An Easy-Cleaning Floor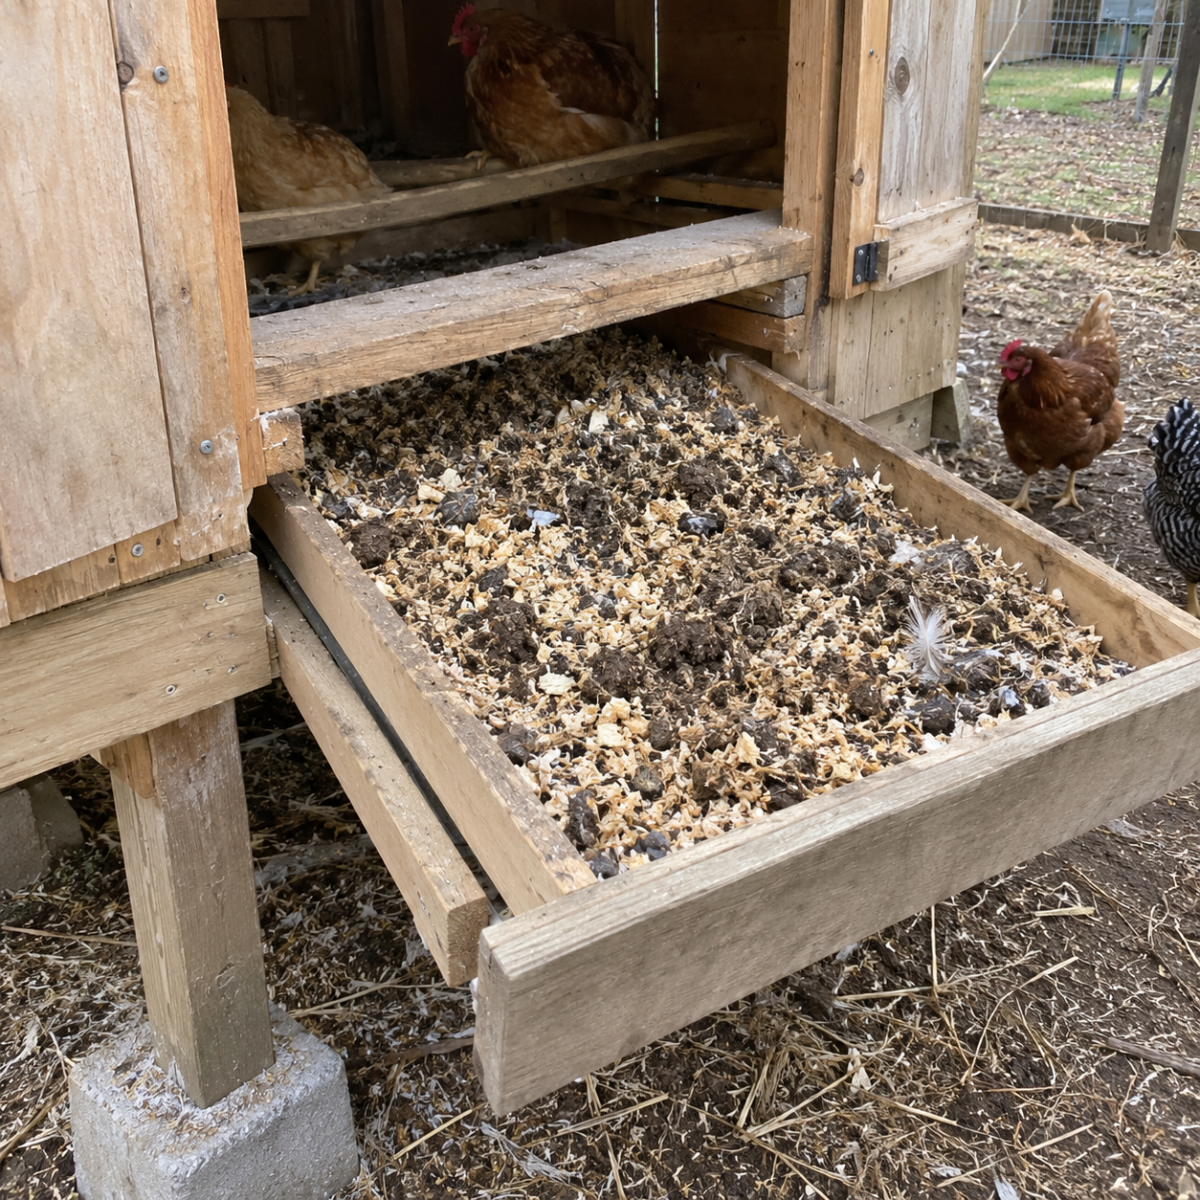
If you have a small coop, you know how droppings accumulate and how bad they smell. And this happens even more if there are more rainy days in a row and everybody stays inside.
Now, I don’t have a problem doing some cleaning, but to be honest, I got old and my back really hurts almost every time I clean the coop. I cried about this at the farmers market and one lady told me that she put a thick layer of pine shavings inside the coop and since then, cleaning it has gotten much easier.
The advantage of this is that you can clean all of the mess so much easier and besides what you take out of the coops is not just droppings anyone, it s basically compost you can use in the garden.
Start with four to six inches of pine shavings and keep adding on top as you go. Over six to twelve months, it builds up to a foot deep.
I kept my coop like this for years.
I kept my coop like this for years, and it worked just fine. But if you don’t care too much about getting compost out of it, there’s actually an easier way to clean the floor.
I came across this idea a while back, and I think it’s one of the smartest little coop tricks I’ve seen. Basically, you build the floor so it slides right out, just like a drawer.
When it’s time to clean, you pull the whole thing out instead of bending over and scrubbing inside the coop. You can scrape it, wash it with your garden hose, or even carefully pressure-wash it and let it dry. And if the wooden floor gets too worn out, you can just replace that part.
The build is pretty simple, too.
Here’s how to make this pull-out chicken coop floor yourself. →
Roll-Away Nest Box Keeps Eggs Clean for Days
So, what happens to your eggs while you’re gone? You come home after three days to cracked eggs, dirty eggs, and one hen who has discovered she likes eating eggs. This is a disaster…
A roll-away box solves all of that. The floor sits at a slight downhill tilt, and a partition walls off the back few inches into a little room she can’t reach.
She lays, the egg rolls down the tilt, slips under the partition, and waits back there for you. It keeps her from going broody too, since she can’t settle onto a clutch she doesn’t have.
You can buy one for about $35 to $55. But this version that I use and once again found on a forum, skips the woodworking almost entirely and starts with a plastic storage tote. Here’s how it goes together.
- Start with an 18-gallon plastic storage tote and its lid. They come in three-packs, and they’re cheap.
- Cut a doorway in one short end with a knife or a saw. Leave several inches of the tote wall standing below the opening, because that lip is what holds the liner and the eggs inside.
- Screw a short piece of 2×4 across the bottom edge of that opening. It stiffens up the cut plastic, gives your hens a step to hop onto, and you’ll want it there for the next part.
- Line the floor with artificial turf cut to fit. Cut a second piece while you have the material out, so you can swap liners and hose the dirty one off instead of scrubbing in place.
- Now the partition. Cut a piece of scrap plywood to fit across the tote about 5 inches from the back end, matching the taper of the tote so it’s a little wider at the top than the bottom. Screw a 2×2 along each side edge of it, then screw through those strips into the tote walls. Hang it so the bottom edge sits about two and a half inches above the turf. That gap is the egg’s doorway, and it’s too low for her to get her head through after it.
- Tack a flap of weed barrier fabric or old cloth across the partition so it hangs down over the gap. The egg rolls under it easily, and with the eggs out of sight she stops thinking about them.
- Set the tote on a shelf in the coop and prop the front end up with a scrap 2×4 laid flat underneath. That inch and a half of lift is usually all the tilt you need.
- Test it before your hens see it. Set an egg on the turf up front and watch it. It should roll down and disappear under the flap. If it stalls, shim the front up another inch and try again.
- Screw an eye bolt into that 2×4 at the front and another into the shelf below it, then run a short wire between them. Your hens will fly up and stand on the rim at night, and without that wire they’ll tip the whole box over.
- Collect your eggs by lifting the lid off, same as any storage tote.
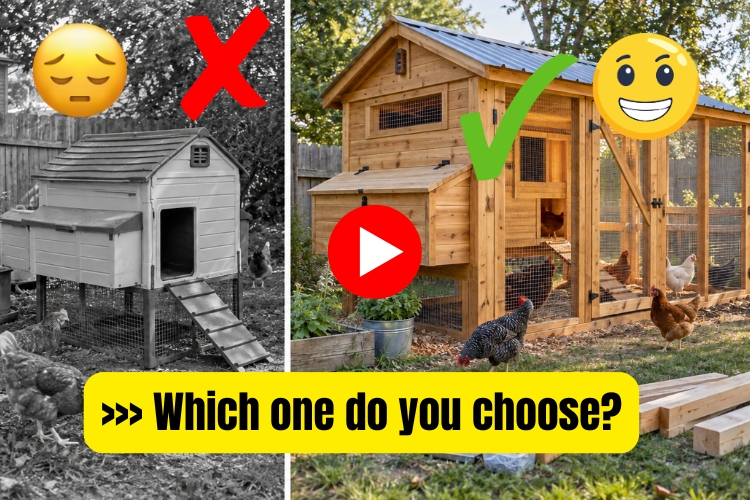
Why Spend $2,000 on a Chicken Coop When You Can Build Your Own?
Have you looked at how much ready-made chicken coops cost these days? Some go for $2,000 or more! And believe it or not, some of those expensive models are mostly plastic.
Now, I know plastic coops have their advantages, but for that kind of money, I’d rather have something made out of solid wood that I can repair or improve whenever I need to. After all, this is supposed to be your chickens’ home, even when a nasty storm hits your backyard.
Would you want to live in a plastic house?
And the funny thing is, building your own chicken coop isn’t nearly as complicated as you might think. Especially if you have the right plans to follow.
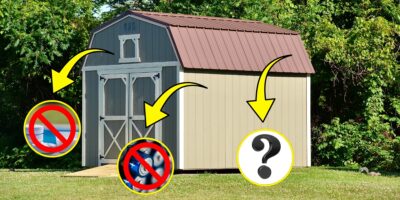
One of the easiest ways to do it is to start with a basic wooden shed and turn it into a coop. You just add the nesting boxes, roosting bars, feeders, proper ventilation, and a secure chicken door. You could even work in some of the upgrades we’ve talked about here.
And there’s quite a bit of money you could save doing it this way. Instead of paying for a finished coop, you’re buying the lumber, roofing, screws, and hinges yourself. Say you manage to build your coop and run it for $250-$500 in materials.
Compared with a $2,000 ready-made setup, that’s a lot of cash still in your pocket!
And if you’ve got some good lumber, old windows, or leftover roofing sitting around, you might spend even less. Of course, it depends on how big you build and what materials cost in your area.
I recently came across a collection of over 12,000 shed and woodworking plans, and what caught my attention wasn’t even the number. It was the fact that you could choose a design that actually makes sense for your property.
Don’t have much room? Start with a small shed. Have a bigger flock? Pick something with more space. You get the measurements, materials lists, and instructions, so you can figure out what you need and price everything before heading to the lumberyard. That’s also a good way to avoid buying more wood than you’ll actually use.
And here’s something else I really like about building this way. You can treat your coop almost like a modular project. Start with what you need now, and if you decide to keep more hens later, you can plan an addition instead of tearing everything down and starting over.
There’s even a guide that shows you how to change the dimensions of the shed plans, which is pretty useful when your yard doesn’t quite fit a standard design.
I think that’s a much better way to build a coop. You end up with something that fits your chickens, your property, and your budget, and you can keep improving it as you go.
Here are the plans I was talking about, if you want to see what you could build →
Final Thoughts
So, you don’t need to spend a fortune to automate a coop. Look back at that list. A bucket, some gutter, a board, a milk jug, a slab of plywood on a slant. The only thing I paid real money for was the door, and I got along fine without it for two years.
People were automating their chores long before anybody put a circuit board in a henhouse. The old ways were simpler, sure, but out here simple and efficient usually turn out to be the same thing. And efficient is what you’re after.
You may also like:
This DIY ‘Ghost Fence’ Works Better Than Electric Fencing
Why You Should Never Throw Away Eggshells! (Video)
How $20 Can Feed Your Chickens All Spring
7 DIY Projects Using Cinder Blocks
How to Build a Predator-Proof Automatic Chicken Coop Door